
Using the SharePoint REST API in a SharePoint Add In
4.33/5 (2 votes)
A simple example of a SharePoint Add-In using the REST API and the Cross Domain library
Introduction
Recently I started exploring using the SharePoint REST API framework within a SharePoint Add-In (formerly called SharePoint Apps.) Microsoft has a couple of good pages of documentation, but finding a simple practical example proved challenging. What I wanted was a complete project with step by step instructions on how to access data in a SharePoint website from your add-in by using the cross domain library in SharePoint 2013.
Background
As mentioned, this article and example uses the information found at MSDN:
Access SharePoint 2013 data from add-ins using the cross-domain library
Complete basic operations using SharePoint 2013 REST endpoints
Note: For my example, I used Visual Studio 2015 and a SharePoint 365 site with a List called Movies.

Important: The site has sideloading enabled.
Project Setup
You can download my project, but when it comes time to build your own, you will need these steps for initial setup:
Step 1: From the Visual Studio New Project window, choose App for SharePoint

For my example, I named the project spRestExample
Step 2: Enter the address of your SharePoint Site. Choose SharePoint-Hosted as how you wish to host the app.

Step 3: Specify the target SharePoint Version

You will end up with a set of solution files like this (in VS 2015)

At this point, hitting run brings up our site with my user name (as a result of javascript in the App.js file)

Step 4: Double click the AppManifest.xml file and give set the SharePoint Permissions like this:

Adding the Code
Double Click the App.js file and remove everything there.
Replace it with this code:
<formatted>
'use strict';

$(document).ready(function () {

    var hostweburl;
    var appweburl;

    //The SharePoint site where the App is installed
    hostweburl = decodeURIComponent(getQueryStringParameter('SPHostUrl'));
    //The location within the site where the App will be deployed
    appweburl = decodeURIComponent(getQueryStringParameter('SPAppWebUrl'));

    // resources are in URLs in the form: web_url/_layouts/15/resource
    var scriptbase = hostweburl + "/_layouts/15/";
    $.getScript(scriptbase + "SP.RequestExecutor.js", execCrossDomainRequest);

    // Use cross-domain library to interact with more than one domain
    //in your remote add-in page through a proxy
    function execCrossDomainRequest() {
        var executor = new SP.RequestExecutor(appweburl);
    }

    $("#showButton").click(function () {

        var executor = new SP.RequestExecutor(appweburl);
        executor.executeAsync(
            {
                url: appweburl + "/_api/SP.AppContextSite(@target)/web/lists/getbytitle('Movies')/Items?@target='"
                    + hostweburl + "'",
                method: "GET",
                headers: { "Accept": "application/json; odata=verbose" },
                success: successHandler,
                error: errorHandler
            }
        );

    });

});

function successHandler(data) {

    var jsonObject = JSON.parse(data.body);
    var moviesHTML = "";
    var results = jsonObject.d.results;
    for (var i = 0; i < results.length; i++) {
        moviesHTML = moviesHTML + "<p><h3>" + results[i].Title + "</p><hr>";
    }

    document.getElementById("resultsDiv").innerHTML = moviesHTML;
}

function errorHandler(error) {
    $("#resultsDiv").append(error.statusText)
}

//function to get a parameter value by a specific key
function getQueryStringParameter(urlParameterKey) {
    var params = document.URL.split('?')[1].split('&');
    var strParams = '';
    for (var i = 0; i < params.length; i = i + 1) {
        var singleParam = params[i].split('=');
        if (singleParam[0] == urlParameterKey)
            return decodeURIComponent(singleParam[1]);
    }
}
</formatted>
In the Default.aspx file, add this code between the <asp:Content> tags
<div>
         <input id="showButton" type="button" value="Show Movies2" />
    </div>

    <div id="resultsDiv">
    </div>
Now you are ready to run the project. The first time you do this, you will be prompted to Trust the new application. Choose the name of your list (Movies in this case) and click Trust It

You will see your page with your new Show Movies button.
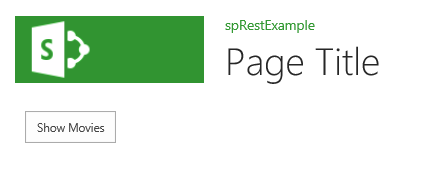
Clicking the button will now show all the Movie titles

Using the project with your site
If you want to run my project against your own SharePoint site, you will need to change the Site Url. You find this property by selecting the project with the Properties window open:
