
NetPipe Binding in WCF using window service
4.83/5 (4 votes)
In this article, I’ll describe how to use NetNamePipe binding in a WCF application.
Introduction
In this article, I’ll describe how to use NetPipe binding in a WCF application. We develop application with the help window service and WCF.
NetPipe Binding
A named pipe has a name, and can be used for one-way or duplex communication between processes on a single machine. Named Pipes in Windows can be used to communicate between processes on the same machine or between different machines across a network.
When communication is required between different WCF applications on a single computer, and we want to prevent any communication from another machine, then use the named pipes transport. An additional restriction is that processes running from Windows Remote Desktop may be restricted to the same Windows Remote Desktop session unless they have elevated privileges.
Scenario
For understand the NetPipe binding we will create a simple MVC application for achieve the below functionality.
- Get products list with details. This facility can be unutilized by subscribed and unsubscribed retailers.
- Get availability of products at any moment of time (inventory state). This facility can be utilized by only subscribed retailers.
Prerequisites
Visual Studio 2012 or Visual Studio Express 2012 for Web.
Create the Database
In Sql server we will creta two tables Products and SalesTrx, We use T-SQL command with the following code to create the Products table
CREATE TABLE [dbo].[tt.WCF.Lab1.Products](
	[ProdSysId] [bigint] IDENTITY(1,1) NOT NULL,
	[Name] [char](100) NOT NULL,
	[Img] [char](100) NOT NULL,
	[Price] [float] NOT NULL,
	[Currency] [char](4) NOT NULL,
	[IsActive] [bit] NOT NULL,
 CONSTRAINT [PK_tt.WCF.Lab1.Products] PRIMARY KEY CLUSTERED
(
	[ProdSysId] ASC
)WITH (PAD_INDEX = OFF, STATISTICS_NORECOMPUTE = OFF, IGNORE_DUP_KEY = OFF, ALLOW_ROW_LOCKS = ON, ALLOW_PAGE_LOCKS = ON) ON [PRIMARY]
) ON [PRIMARY]
We use T-SQL command with the following code to create the SalesTrx table.
CREATE TABLE [dbo].[tt.WCF.Lab1.SalesTrx](
	[TrsSysId] [bigint] NOT NULL,
	[TrxDateTime] [datetime] NOT NULL,
	[CustId] [bigint] NOT NULL,
	[ProdSysId] [bigint] NOT NULL,
	[Qnt] [smallint] NOT NULL,
 CONSTRAINT [PK_tt.WCF.Lab1.SalesTrx] PRIMARY KEY CLUSTERED
(
	[TrsSysId] ASC
)WITH (PAD_INDEX = OFF, STATISTICS_NORECOMPUTE = OFF, IGNORE_DUP_KEY = OFF, ALLOW_ROW_LOCKS = ON, ALLOW_PAGE_LOCKS = ON) ON [PRIMARY]
) ON [PRIMARY]
We will use the entity framework to connect the application with the database.
Create a window service application
In Visual Studio, on the File menu, click New > Project.

In the New Project dialog box, in the Project Types section, select Windows under Visual C#. In the Templates section, select Windows Service, specify the project location, and name it “TalTun.WCF.WCFNetPipeServiceHost".

Click OK to add a sample Windows service to the solution.
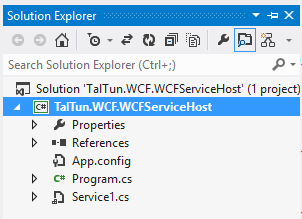
Rename the Service1 to SalesTrxPipeService Now Right-click SalesTrxPipeService.cs and then click View Designer. Right-click the designer view and then click Add Installer to add the ProjectInstaller.cs file with two objects, serviceProcessInstaller1 and serviceInstaller1.

In the designer view of ProjectInstaller.cs, right-click serviceProcessInstaller1 and then click Properties. In the properties section, set the Account attribute to NetworkService.

Create a Sample WCF Service
I will add the folder name service in our application. After added the folder right-click the folder, click Add, and then click New Item.

In the Add New Item dialog box, select WCF Service and set the Name as SalesDataSrv.cs and then click Add.

In ISalesDataSrv.cs, modify the ISalesDataSrv interface using below code:
[ServiceContract]
    public interface ISalesDataSrv
    {
        [OperationContract]
        List GetSalesTrx();
    }
In SalesDataSrv.cs, modify the SalesDataSrv class to return a List of entity salestrx data type as follows:
public class SalesDataSrv : ISalesDataSrv
    {
        public List GetSalesTrx()
        {
            try
            {
                BizEng biz = BizEng.GetInstance();
                return biz.GetSalesTrx();
            }
            catch (Exception)
            {
                return null;
            }
        }
    }
Here entSalesTrx is data contract
[DataContract]
    public class entSalesTrx
    {
        [DataMember]
        public long TrsSysId { get; set; }
        [DataMember]
        public DateTime TrxDateTime { get; set; }
        [DataMember]
        public long CustId { get; set; }
        [DataMember]
        public long ProdSysId { get; set; }
        [DataMember]
        public int Qnt { get; set; }
        [DataMember]
        public string ProdName { get; set; }
        [DataMember]
        public string ProdImg { get; set; }
        [DataMember]
        public double ProdPrice { get; set; }
        [DataMember]
        public double ProdCurrency { get; set; }
    }
Modify the Windows Service to Host the WCF Service
In the Solution Explorer, right-click SalesTrxPipeService.cs and then click View Code and add a using statement as follows:
using System.ServiceModel;
Declare an internal static member of ServiceHost type as follows:
internal static ServiceHost myServiceHost = null;
To open the service host, add code to the OnStart method of a Windows service as follows:
protected override void OnStart(string[] args)
        {
            if (myServiceHost != null)
            {
                myServiceHost.Close();
            }

            myServiceHost = new ServiceHost(typeof(SalesDataSrv));
            myServiceHost.Open();
        }
To close the service host, add code to the OnStop method of a Windows service as follows:
protected override void OnStop()
        {
            if (myServiceHost != null)
            {
                myServiceHost.Close();
                myServiceHost = null;
            }
        }
Build the solution and verify that your project produces “TalTun.WCF.WCFNetPipeServiceHost.exe” in your project \bin\debug directory.
Configure the WCF Service to Use netPipeBinding
First Remove all the component of system.serviceModel in app.config file and Make sure your solution builds.
Now Right-click the App.config file and then click Edit WCF Configuration.
If you do not see the Edit WCF Configuration option, on the Tools menu, click WCF Service Configuration Editor. Close the WCF Service Configuration Editor tool that appears. The option should now appear on the web.config context menu.


Click “Create a New Service” in the right panel of the Configuration editor. Browse to the bin directory and select the TalTun.WCF.WCFNetPipeServiceHost.dll and Double click this file and select your service implementation.


The service type should be displayed on the previous screen. Press Next Select the contract. This should automatically be selected to TalTun.WCF.WCFNetPipeServiceHost.Services.SalesDataSrv. Press Next.Since we are using Named Pipes binding to host our service select the Named Pipes option for the communication mode. And click next

Delete the “net.pipe://” from the address field. Since we are developing we don’t know which port this will get assigned as of yet.

Press Next. A dialog will appear. Select Yes.

Press Finish on the next screen.
Open the end point node in configuration screen and add the “WCFServiceHostNetPipeEndPoint” in name field.

Now right click on end point and click on new service end point for add new end point for mex. Set the name= “WCFServiceHostMexPipeEndPoint”,address=”mex”, binding= “mexNamedPipeBinding” and contract=”IMetadataExchange”.

Go to the host section and click on new address .add the base address “net.pipe://localhost/SalesDataSvc” in base address editor and click ok to save the address.

Open the advance node and click on service behavior for add new service behavior configuration.
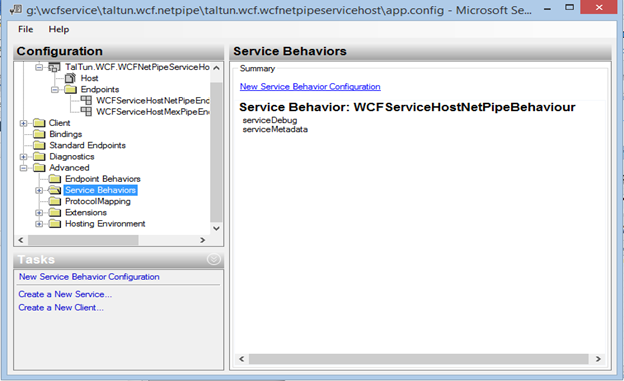
Add the name WCFServiceHostNetPipeBehaviour and click on add button for add behavior element extension

Avaliable extension window has been opened now select service.Debug and service. Metadata for add in the extension.

Select the service .debug and set IncludeEceptionDetailsinFault = “true”.

Click on TalTun.WCF.WCFNetPipeServiceHost.Services.SalesDataSrv service and set the behavior configuration “WCFServiceHostNetPipeBehaviour

Click on the file and save the configuration details.

In Visual Studio, verify your configuration in App.config. The configuration should look as follows:
          <baseAddresses>

          </baseAddresses>
Install the Windows Service
In this step, we install the Windows service and run it from the Services console.Rebuild the solution and open a Visual Studio 2010 command prompt.
Navigate to the \bin directory of the project where TalTun.WCF. WCFNetPipeServiceHost.exe was created.
Execute the following command to install the service:
> Installutil TalTun.WCF.WCFNetPipeServiceHost.exe
If the service installs successfully, open the service console by typing services.msc in the Windows Run prompt.
Search for the name of the service, SalesTrxPipeService, and then start it.

Note:
If you modified the service that is already installed, you can uninstall it by using following command:
> Installutil /u TalTun.WCF. WCFNetPipeServiceHost.exe
Conclusion
In this tutorial, we learnt to setup NetPipe binding in a WCF application.