
[tut5] form communication,multi tab program, custom cursor for each tool
4.94/5 (3 votes)
Learn how to implement a tecnique of a parent form that createes and controls other forms , through the tecnique of using the tab control, also learn how to implement a menu for the tools, and how to add cutom cursor for each tool
Introduction
This is the fifth tutorial of a series of tutorials of how to build a graphics program using C# in Windows form that exports the artwork in a vector format.
- tut1---http://www.codeproject.com/Tips/1082353/tut-GDIplus-Artwork-from-svg
- tut2---http://www.codeproject.com/Tips/1082633/interactivaly-add-multiple-shapes-using-linked-lis
- tut3---http://www.codeproject.com/Tips/1084073/tut-graphics-program-using-Csharp-Drag-Drop-Delete
- tut4---http://www.codeproject.com/Tips/1105143/tut-Draw-Lines-with-Circle-and-Rectangle-End
.... also, you would understand how to move, delete, ctrl z your vector art and save it in a special format to be read by your program again.
Also, we will learn how to save XML files... how to export in verilog format... how to use a star algorithm... how to use hand tool... how to manually create the ctrl z technique.
What you will be capable of building:
- https://drive.google.com/folderview?id=0B739QmcCMLMHVU1DbHhIQlZ3MTA&usp=sharing
- https://www.youtube.com/watch?v=6hXJ1EoAYc0
Today we are going to take our solution to next level , of having multiple instances of our form in a parent form , as if it is a command and control form , controlling all other children forms.
Also we are going to alk about how to create a simple menu containing all the used tools in the program ( that would be taking what we have designed in the previous tuts <of just having shortcuts keywords to select the required tool> to the next level)
We will also have special customized cursors for each tool the user would select.
Updates
here i replaced the use of action string as a flag to differ between different tools with using enum.
the source code is also updated for this.
Background
- tut1---http://www.codeproject.com/Tips/1082353/tut-GDIplus-Artwork-from-svg
- tut2---http://www.codeproject.com/Tips/1082633/interactivaly-add-multiple-shapes-using-linked-lis
- tut3---http://www.codeproject.com/Tips/1084073/tut-graphics-program-using-Csharp-Drag-Drop-Delete
- tut4---http://www.codeproject.com/Tips/1105143/tut-Draw-Lines-with-Circle-and-Rectangle-End
Map for the tut
to begin having form communication we must first :
- create a parent form i would call it
(super_form)that would create other forms and control them, and build the technique of creating the child forms in the tab control - convert action string (which was used before to differ between different tools)to be enumerator ,, and change its location which was in each child form to the
(super_form)and make itstaticso that it would be seen by all children. - edit the functions in
Form1that works with the action string to now work on the new static action string - changing the location of the key capturing event from each child form to the
(super_form)
to create the tool menu and use customized cursors
- add the needed controls to the
(super_form)like tool strip container and tool strip itself - add buttons for each tool and create its clicking events
- Custom Cursor for each tool
form communication
1-Create the (super_form) and build the technique of creating and controlling children forms
first lets simply create a new windows forms and call it (super_form)

don't forget that it will contain other children forms so we need it to be big enough so change its size from 300*300 to 1203*780

now we need to add the container that would contain all the children forms , we will use the TabControl

just add a TabControl to the middle of your (super_form) and make its size 1163, 717

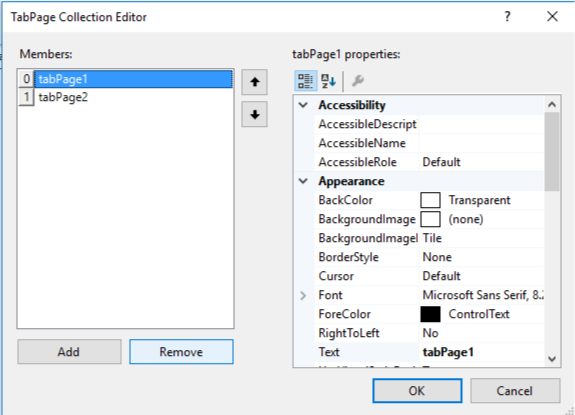
from the tab pages remove all previously added pages

now lets modify the constructor of the (super_form) to create an instance of the child form named Form1 and add it to the TabControl
also we would need to have a kind of data structure that would contain all the created children forms , we would use a list for this case
List<Form1> form_list=new List<Form1>();
and to add a new form to the tabcontrol we would use this function
        private void AddNewTab(Form frm)
        {
            TabPage tab = new TabPage(frm.Text);
            frm.TopLevel = false;
            frm.Parent = tab;
            frm.Visible = true;

            tabControl1.TabPages.Add(tab);

            frm.Location = new Point((tab.Width - frm.Width) / 2, (tab.Height - frm.Height) / 2);

            tabControl1.SelectedTab = tab;

            tabControl1.Select();// to select thsi tab
        }
so the constructor would create a new instance of the new form (for the first time) , add this form to the list and use AddNewTab to add this form to the tabcontrol
  List<Form1> form_list=new List<Form1>();
        public super_form()
        {
            InitializeComponent();

            Form1 frmChild = new Form1();
            frmChild.Dock = DockStyle.Right;
            form_list.Add(frmChild);

            AddNewTab(frmChild);
        }
now we need a button to let the user create new instances of the form

simply create a new button and create a click event , the goal of this event would be simply the same concept of that of the constructor, but with some modifications like a count to increment the name of the created forms
 int count=1;
        private void button1_Click(object sender, EventArgs e)
        {
            Form1 frmChild = new Form1();
            frmChild.Text = "file" + count;
            frmChild.Dock = DockStyle.Right;
            AddNewTab(frmChild);
            count++;
            form_list.Add(frmChild);
        }
we would also need to create a technique for the program to know which tab is selected
we would use selecting event
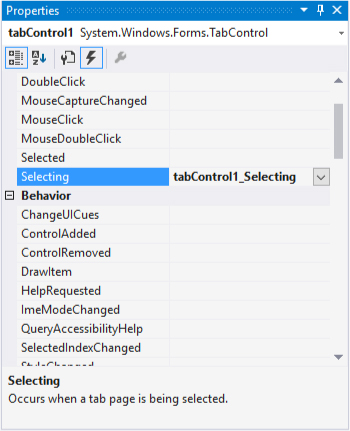
 int selected_tab = 0;
        private void tabControl1_Selecting(object sender, TabControlCancelEventArgs e)
        {
            selected_tab = e.TabPageIndex;
        }
2-use enumerator named action and make its location in super_form and make it static
first create a Global enumerator named action
then define a static variable to be seen by all children
namespace drag_and_drop_and_delete   //inside the same namespace
{

           public enum action  //write it in global section
           {
           star, heart, line, move, none
           }

           public partial class super_form : Form
           {

               public static action super_action   //define the static variable inside the
                                                   //class of superForm

             //to make the action string that defines which tool
             //is selected universal and seen by all child forms

           }

}
3-edit Form1 to now work with the new static action
edit some functions in the Form1 to now work with the new static variable, edit Form1_MouseClick
 private void Form1_MouseClick(object sender, MouseEventArgs e)
        {
            if (super_form.super_action.Equals(action.star))
            {
            //old code
            }

            else if (super_form.super_action.Equals(action.heart))
            {
            //old code
            }

            else if (super_form.super_action.Equals(action.line))
            {
            //old code
            }
         }
and edit Form1_MouseMove
 private void Form1_MouseMove(object sender, MouseEventArgs e)
        {
            if (first == true && e.Button == m && super_form.super_action.Equals(action.move))
            {
             //old code
            }

            if (is_selected == true && e.Button == m && super_form.super_action.Equals(action.move))
            {
             //old code
            }

            //old code
       }
4-changing the location of the key capturing event from each child form to the (super_form)
we will change the location of the key capturing event from the child forms to the tab control ,so add a keydown event to the tab control
from the last tutorial, there were some variables inside the key capturing event that were specific for the form , so to solve this we would use
Form1 selected_form = form_list.ElementAt<Form1>(selected_tab);
to edit those variables for only the selected form
so the tab control key event would be
  private void tabControl1_KeyDown(object sender, KeyEventArgs e)
        {
            Form1 selected_form = form_list.ElementAt<Form1>(selected_tab);
            if (e.KeyData == Keys.S)
            {
                super_action = action.star;
            }
            else if (e.KeyData == Keys.H)
            {
                super_action = action.heart;
            }

            else if (e.KeyData == Keys.M)
            {
                super_action = action.move;
            }

            else if (e.KeyData == Keys.L)
            {
                super_action = action.line;
            }

            //new code
            else if (e.KeyData == Keys.Enter)
            {
                super_action = action.none;

                Invalidate();
                selected_form.first_point_in_line = true;
            }

            else if (e.KeyData == Keys.NumPad1)
            {
                lines current_line = new lines();
                current_line = selected_form.lines_list.ElementAt<lines>(selected_form.line_counter - 1);

                current_line.end_arrow = "circle";

                current_line.draw_arrow();
                super_action =action.none;
                selected_form.Invalidate();
                selected_form.first_point_in_line = true;
            }

            else if (e.KeyData == Keys.NumPad2)
            {
                lines current_line = new lines();
                current_line = selected_form.lines_list.ElementAt<lines>(selected_form.line_counter - 1);

                current_line.end_arrow = "box";

                current_line.draw_arrow();
                super_action =action.none;
                selected_form.Invalidate();
                selected_form.first_point_in_line = true;
            }
            //new code

            else if (e.KeyData == Keys.Delete && selected_form.is_selected == true)
            {
                selected_form.shape_list.RemoveAt(selected_form.selected);
                RectangleF null_rectangle = new RectangleF();
                selected_form.selected_recatngle = null_rectangle;
                selected_form.is_selected = false;
                selected_form.Invalidate();
            }
        }
tool menu
now we would need to add a menu containing all the tools the user would use , so we would use a menu and put the circle , star , line and move tools, but't forget that we would need some properities for the end tip of the line , so for this matter we would use 2 menus , one for the primary tools and another tool menu only for the line properities (would be hidden until the user would use the line tool)
1-add the needed controls to the (super_form)
so we would begin with having a container that would contain all our menus , so we would use the ToolStripContainer

adjust it to have the same size as the (super_form) 1203, 755

and bring it to back
you will notice 4 arrows on all 4 sides of the container, so expand the left and the top container, (by simply clicking on the arrow), you would notice that the top arrow has been already expanded (no need for you to expand it yourself

now we would need to add to the expanded area the menues themseleves , so we would use the ToolStrip control

simply drag and drop to the needed expanded area ,( use 2 ToolStrips one primary in the left expanded area of the ToolStripContainer and another for the line properities in the top expanded area of the ToolStripContainer

as we would need the tool menu of the line properities(top ToolStrip ) ,to be hidden and only be visible in case the user clicks the line button , from the ToolStrip properities let visibility be hidden.

2-add buttons for each tool and create its clicking events
now we need to add the buttons themselves to the tool strip , we would use colored buttons which is the default control for adding in the tool strip , so simply click on the tool strip you would notice a box with a rounded arrow click on the rounded arrow to add images
![]()
(or click on the drop down menu to select the button),

add 3 buttons then add a separator(also can be found in the drop down menu)and then add another button.

now we need to add 2 buttons on the top tool strip , but how , we have just made it hidden , simply click on the tool strip name in the menu under your form

and then add 2 buttons
now we would like to focus more on the primary tool, so just increase size of the left tool strip, by editing the image scaling size property to be 32*32

now we would need to add these images to each button in the menu , simply right click the required button , and set image , then from select resource , local resource , click import and select the required image , use these images
![]()
![]()
![]()
![]()


and the same concept for the secondary top toll strip so that the result would be


then simply add a clicking event to each button , in each button click we would make sure that the secoundary top toll menu is off, except of course when clicking on the line tool itself, the concept of clicking the menu is just the same as when the user was clicking on the keyboard , you just edit the static public action string
        private void star_button_Click(object sender, EventArgs e)
        {
            action = "star";
            toolStrip2.Visible = false;
        }

        private void heart_button_Click(object sender, EventArgs e)
        {
            action = "heart";
            toolStrip2.Visible = false;
        }

        private void line_button_Click(object sender, EventArgs e)
        {
            action = "line";
            toolStrip2.Visible = true;
        }

        private void move_button_Click(object sender, EventArgs e)
        {
            action = "move";
            toolStrip2.Visible = false;
        }
and the same for the top , it would be the same concept as when the user clicked 1,2, but just adding that the top ine proprieties would disappear when the user clicks on those buttons
    private void end_tip_square_Click(object sender, EventArgs e)
        {
            Form1 selected_form = form_list.ElementAt<Form1>(selected_tab);

            lines current_line = new lines();
            current_line = selected_form.lines_list.ElementAt<lines>(selected_form.line_counter - 1);

            current_line.end_arrow = "box";

            current_line.draw_arrow();
            action = "none";
            selected_form.Invalidate();
            selected_form.first_point_in_line = true;
            toolStrip2.Visible = false;
        }

        private void end_tip_circle_Click(object sender, EventArgs e)
        {
            Form1 selected_form = form_list.ElementAt<Form1>(selected_tab);

            lines current_line = new lines();
            current_line = selected_form.lines_list.ElementAt<lines>(selected_form.line_counter - 1);

            current_line.end_arrow = "circle";

            current_line.draw_arrow();
            action = "none";
            selected_form.Invalidate();
            selected_form.first_point_in_line = true;
            toolStrip2.Visible = false;
        }
3-Custom Cursor for each tool
Now we would need to add customized cursor for each of our tools, to do this we would need first to add the icon of each cursor as a resource to our project
To add a resource to your project , First select your project name

then select the wrench icon (to go to your project proprieties )
![]()
then from Resources , add resource drop down list , select add exciting file

and select these icons
now lets return back to super_form.cs
First we would define a Cursor type that we would change according to the selected tool , we would call it cursor_super
Cursor cursor_super;
now we would modify each button click event of each tool to change the cursor of the super_form , so lets start with star button
 private void star_button_Click(object sender, EventArgs e)
        {
            action = "star";

            //new code
            cursor_super = new Cursor(drag_and_drop_and_delete.Properties.Resources.star_cursor.Handle);
            //just load our variable with the required cursor
            this.Cursor= cursor_super;
            //and make our variable (cursor_super ) to be the cursor of this form (super_form)
            //new code

            toolStrip2.Visible = false;
        }
and same would be made for all other tools
   private void heart_button_Click(object sender, EventArgs e)
        {
            action = "heart";

            //new code
            cursor_super = new Cursor(drag_and_drop_and_delete.Properties.Resources.heart_cursor.Handle);
            this.Cursor = cursor_super;
            //new code

            toolStrip2.Visible = false;

        }

        private void line_button_Click(object sender, EventArgs e)
        {
            action = "line";

            //new code
            cursor_super = new Cursor(drag_and_drop_and_delete.Properties.Resources.Line_cursor.Handle);
            this.Cursor = cursor_super;
            //new code

            toolStrip2.Visible = true;
        }

        private void move_button_Click(object sender, EventArgs e)
        {
            action = "move";

            //new code
            cursor_super = new Cursor(drag_and_drop_and_delete.Properties.Resources.move__cursor.Handle);
            this.Cursor = cursor_super;
            //new code

            toolStrip2.Visible = false;
        }