
Hosting a WCF Web Service inside a Windows Service using Spring.Net
5.00/5 (4 votes)
Step-by-step guide to building a WCF Web Service hosted in a Windows Service
Introduction
There were a few projects I was facing that needed a reasonably simple web service, but I didn’t want to host the service in IIS, because of the performance issues and I needed extensive logging. I read the articles posted on MSDN, which describe several methods of self-hosting the web service, but none of them seemed that easy to implement.
I am planning on using this as a component of several projects, so my objective is to keep it as simple (and reusable) as possible. The more simple the code, the less it breaks. Someone recommended I look at the Spring framework as a starting point. Granted, building a Windows Service can be a hair-pulling task sometimes, but if you follow a few guidelines, it is an easy thing to do.
Background
My colleagues are all big Spring proponents. We have been using it extensively for several months as a Dependency Injection framework. So I began to wade through the documentation on the Spring.Net site.
There are several samples to work with, but I was not able to get it to build completely. And I found that many samples were dependent on other samples. After many hours of frustrating trial and error, I decided to do my own sample project. My hope is that it would be helpful to someone facing a similar requirement.
I’m going to walk through the process of building the solution, step by step. It may seem like a lot of needless detail, but getting the details correct here is the difference between having a working solution and not.
Create the Solution
Creating a Windows Service application has become a very trivial task. The project template provided by Visual Studio will give you a complete code set to build one right out of the box.
First, start a new Windows Service project. Visual Studio will name the service “Service1” by default. Rename the file to something more appropriate for your purposes.

|
I chose “ |
|

In the code, Visual Studio places three default methods, a constructor, OnStart and OnStop.
OnStart – When this method is implemented in class derived from ServiceBase, it is executed when a Start command is sent to the service from the Service Control Manager (or when the OS starts the service automatically). It is designed as the place where you put service initialization code.
OnStop – When this method is implemented in a class derived from ServiceBase, it is executed when a Stop command is sent to the service from the SCM. This is the ideal location for cleanup code to close down gracefully.
If you’re interested in learning more about controlling services, check out the MSDN page.
Add an Installer
Installing a Windows Service on a target computer has traditionally been a complicated task. Fortunately, there are a couple of handy tools the .NET Framework provides to make the job a little easier. It does require using the command line, but I’ve included a CMD file that you can modify for your own project.
An installer class gives the Service Control Manager enough information to add your service to the list of services on that machine. Adding an installer for the project is very simple. Right click on the design surface of the service and select "Add Installer".

The IDE will add a “ProjectInstaller” class to your project and automatically put two components on the design surface – a service process installer and a service installer. This MSDN article is a good primer.

Right click on the serviceInstaller1 component and select Properties. You will see several properties that you can modify to meet your needs. There are three that you will likely want to change.
|
|
Service Name – This is the identifier that Windows uses to identify this service. It is mandatory that this property be set. Display Name – In the Services Management Console, this is a friendly name that will be displayed to the user. This property is optional. Description – This is an optional entry that will display in the Description field in the Services Management Console. It’s usually a good idea to describe what the service does. |

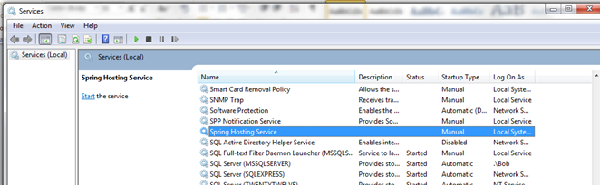
With the changes that I've made, the service will appear in the Services Management Console like this:
|
There is also one property of the service process installer that you need to pay attention to. Right click on the The important property here is |
|

Under most circumstances, the Local System is the option that I go with, however it really depends on the application requirements. See this article for a good explanation of the different options you have available here.
Installing the Windows Service
The InstallService.cmd file contains the commands that are needed to install the service on your target system. To execute those commands, you must use a command window that has been opened with Administrative privileges. From the Start Menu, go to your Programs folder, and navigate to the Visual Studio Tools folder. Right click on “Developer Command Prompt” and select the “Run as administrator” option.

Now it’s time to use the CD command. Inside the command window, navigate to the bin folder where the executable is. This will likely be in the debug folder under the folder where you’ve extracted the solution. Execute the command file and it will take care of installing the service.

InstallUtil.exe – This utility will ‘install’ your service into the Service Control Manager. In reality, it simply makes the necessary registry entries for the SCM to recognize the executable.
Once the SCM is aware of the service, you can make changes to the service without having to uninstall and re-install. You just simply stop the service when you build. If you do not stop the service, you will likely encounter an error as the executable may not be able to be overwritten.
Add WCF Service
Now, it’s time to add the WCF service to the project. Add a new item to the project – a WCF service and name it “MaintenanceService” or something that is meaningful to your project.

Visual Studio will add the interface and a concrete class for you. The class will contain a sample ‘DoWork’ operation. I’ve modified mine to return a string. This string should return when the service is invoked, thus proving that the service actually works.

Add Spring.Net to the Solution
We will now add the dependency injection framework to the project. NuGet makes it very a simple task to these add components to your solution. Right click on the project and select Manage NuGet Packages.

For this project, we only need the Core and Services. There are a number of other modules Spring offers that you may want to take a look at.
Search for “spring services” in the Manage Packages window.

Note that the package manager will also add the Spring.Core and Common.Logging packages. This is all you will need for the simple service we’re building here. I recommend also installing log4net as well as a logging mechanism.
Modify App.Config
Spring looks to the application’s configuration file for what classes it should instantiate and how it should behave. In the configSections node, you need to add a sectionGroup node like the one below:
  <configSections>
    <sectionGroup name="spring">
      <section name="context" type="Spring.Context.Support.ContextHandler, Spring.Core"/>
      <section name="objects" type="Spring.Context.Support.DefaultSectionHandler, Spring.Core"/>
    </sectionGroup>
  </configSections>
The context is the container in which the spring objects live. In this case, I’m specifying that the object definitions are located in the config file, in the “spring/objects” node. You have the option of specifying another location. Very often, it makes sense to put the object definitions in XML files elsewhere in the project – or even in another project of the solution.
  <spring>
    <context>
      <resource uri="config://spring/objects"/>
    </context>

    <objects xmlns="http://www.springframework.net">
      <!-- Service definition -->
      <object id="MaintenanceService" singleton="false"
              type="SpringWcfHost.MaintenanceService, SpringWcfHost">
        <!--<property name="SleepInSeconds" value="1"/>-->
      </object>
      <!-- host the service object -->
      <object id="maintenanceServiceHost" type="Spring.ServiceModel.Activation.ServiceHostFactoryObject, Spring.Services">
        <property name="TargetName" value="MaintenanceService" />
      </object>
    </objects>
  </spring>
Each object definition is contained in the objects node. Here, I have only two, the service definition (MaintenanceService) and the host for the service (maintenanceServiceHost). The framework will attempt to instantiate each class based on the parameters you specify in the object node.
The ‘type’ attribute identifies the class to instantiate and in what assembly that class is defined. In the example above, the ‘MaintenanceService’ object is instantiated from the ‘SpringWcfHost.MaintenanceService’ class, located in the ‘SpringWcfHost’ assembly. Similarly, the ‘maintenanceServiceHost’ object will be instantiated from the ‘Spring.ServiceModel.Activation.ServiceHostFactoryObject’ class located in the ‘Spring.Service’ assembly.
The Service Model
There are entire books written about the .NET Service Model, so I won’t be going into enormous detailed explanation here. When you added the WCF service to your project, the Visual Studio template automatically made the appropriate entries in your app.config to support the service implementation.
The ‘services’ node contains an entry for each service in your project. This ‘service’ node will need to be modified slightly in order to work with the Spring Services components. First, look at the ‘name’ attribute of the ‘service’ node. This name must match the ‘id’ attribute of the ‘object
  <system.serviceModel>
    <behaviors>
      <serviceBehaviors>
        <behavior name="">
          <serviceMetadata httpGetEnabled="true" />
          <serviceDebug includeExceptionDetailInFaults="false" />
        </behavior>
      </serviceBehaviors>
    </behaviors>
    <services>
      <service name="MaintenanceService">
        <endpoint address=""
                  binding="basicHttpBinding"
                  contract="SpringWcfHost.IMaintenanceService">
          <identity>
            <dns value="localhost" />
          </identity>
        </endpoint>
        <endpoint address="mex" binding="mexHttpBinding" contract="IMetadataExchange" />
        <host>
          <baseAddresses>
            <add baseAddress="http://localhost:8733/" />
          </baseAddresses>
        </host>
      </service>
    </services>
  </system.serviceModel>
Second, you will want to modify the ‘baseAddresses’ node that the framework has chosen to something that is more appropriate for your project. In my case, the address that Visual Studio added for me looked like this:
<add baseAddress="http://localhost:8733/Design_Time_Addresses/SpringWcfHost/MaintenanceService/" />
The template simply looks at the namespace of the class generated to build the URL and chooses an available port on your development system. You can change this to any valid URL.
Modify the Service Implementation
To make all of these components start working, you need to tell Spring to actually load all of them. This is accomplished with a call to ‘ContextRegistry.GetContext()’. This call will force Spring to instantiate all of the classes that you’ve defined in the app.config.
Open the service file and add the two using statements at the top.
using Spring.Context;
using Spring.Context.Support;
In the OnStart method, add the following line that will force Spring to load the context as you’ve defined in the Spring configuration section of your app.config.
protected override void OnStart(string[] args)
{
    IApplicationContext context = ContextRegistry.GetContext();
}
Start the Service
Now for the moment of truth. You can start the service from the Services Management Console or from a command window use the “NET START” command. Note: If you do use the command window, make sure you start it with admin privileges.
If the service encounters an error starting, carefully check your Event Log.
<Message>Service ' SpringWcfHost '
has zero application (non-infrastructure) endpoints.
    This might be because no configuration file was found for your application,
    or because no service element matching
    the service name could be found in the configuration file,
    or because no endpoints were defined in the service element.</Message>
Remember that the name parameter in the service node of the service model configuration must match the object id parameter. I had neglected to change this from the entry that VS had implemented.
    <!-- Service definition -->
    <object id="SpringWcfHost.MaintenanceService" singleton="false"
            type="SpringWcfHost.MaintenanceService, SpringWcfHost">
      <!--<property name="SleepInSeconds" value="1"/>-->
    </object>
Uh Oh – An Error
The next step is to make sure that the service is actually alive and responding.

For those of you with a Java background, you might recognize the Soap UI interface. This is a free tool I have used for many years to test my web services. You can get more information and download it from the SoapUI page. You can also use Fiddler to compose a call to your service.
The root cause of the problem is improper configuration. I had copied and pasted the spring configuration node from their WCF Quick Start sample.
  <spring>
    <context>
      <resource uri="config://spring/objects"/>
    </context>

    <objects xmlns="http://www.springframework.net">
      <!-- Service definition -->
      <object id="MaintenanceService" singleton="false"
              type="SpringWcfHost.MaintenanceService, SpringWcfHost">
        <property name="SleepInSeconds" value="1"/>
      </object>
      <!-- host the service object -->
      <object id="maintenanceServiceHost"
          type="Spring.ServiceModel.Activation.ServiceHostFactoryObject, Spring.Services">
        <property name="TargetName" value="MaintenanceService" />
      </object>
    </objects>
  </spring>
Note the ‘property’ node within the ‘MaintenanceService’ object definition. I had changed the id of the service definition to the name of my service. However, I neglected to remove the property “SleepInSeconds” that existed in the configuration file of the WCF Starter Sample.
Debugging
The biggest favor you can do yourself when developing WCF services is understand the Trace Logging. WCF will generate a large amount of information when you simply add a few entries to the config file. This can give you a lot of clues as to what is going on in your service.
  <system.diagnostics>
    <sources>
      <source name="System.ServiceModel"
              switchValue="Information, ActivityTracing"
              propagateActivity="true">
        <listeners>
          <add name="traceListener"
              type="System.Diagnostics.XmlWriterTraceListener"
              initializeData= "Traces.svclog" />
        </listeners>
      </source>
    </sources>
  </system.diagnostics>
This entry will create a “Traces.svclog” file in the folder where your service executable exists. It is a text file that can be read by your favorite text editor – or by the Windows Trace Log Viewer. The file will be quite large, as all events connected to your service will be logged by the framework.
The file consists of many “E2ETraceEvent” elements. The one containing your error will likely be near the bottom of the file. Stop your service, as the framework does do some caching. The event containing your error may not appear until the cache has been flushed. Read through the XML carefully.
Handling an exception.
Exception details: Spring.Objects.Factory.ObjectCreationException:
Error creating object with name 'MaintenanceService' defined in
'config [C:\Prototypes\SpringWcfHost\SpringWcfHost\bin\Release\SpringWcfHost.exe.Config#spring/objects] line 1' :
Initialization of object failed : 'SleepInSeconds' node
cannot be resolved for the specified context [SpringWcfHost.MaintenanceService].
---> Spring.Core.InvalidPropertyException: 'SleepInSeconds'
node cannot be resolved for the specified context [SpringWcfHost.MaintenanceService]
There’s the bug. I just needed to remove the property entry from the Maintenance Service declaration, then restart my service.

TRIUMPH!!!
I hope this helps when you're faced with a project that involves a self-hosted service.
History
- 2014-12-21 Initial draft