
A DIY Bluetooth Low Energy Temperature and Humidity Server
An ESP32 with a temperature/humidity sensor are configured as a bluetooth low energy server to provide remote monitoring
Introduction
The ESP32 platform provides an inexpensive and small form factor platform for hosting Bluetooth Low Energy (BLE) applications. This article describes combining a low cost temperature and humidity sensor with the ESP32 platform to implement a BLE server device that can provide temperature, humidity, and date/time readings.
The ESP32 platform provides a small, available, convenient, and low cost platform for hosting BLE applications. It's available in many form factors for costs below $10 USD - just search on Amazon for ESP32 and you will see many many listings.
This particular application uses only one GPIO pin from the ESP32 so almost any of the available platforms will work.
Background
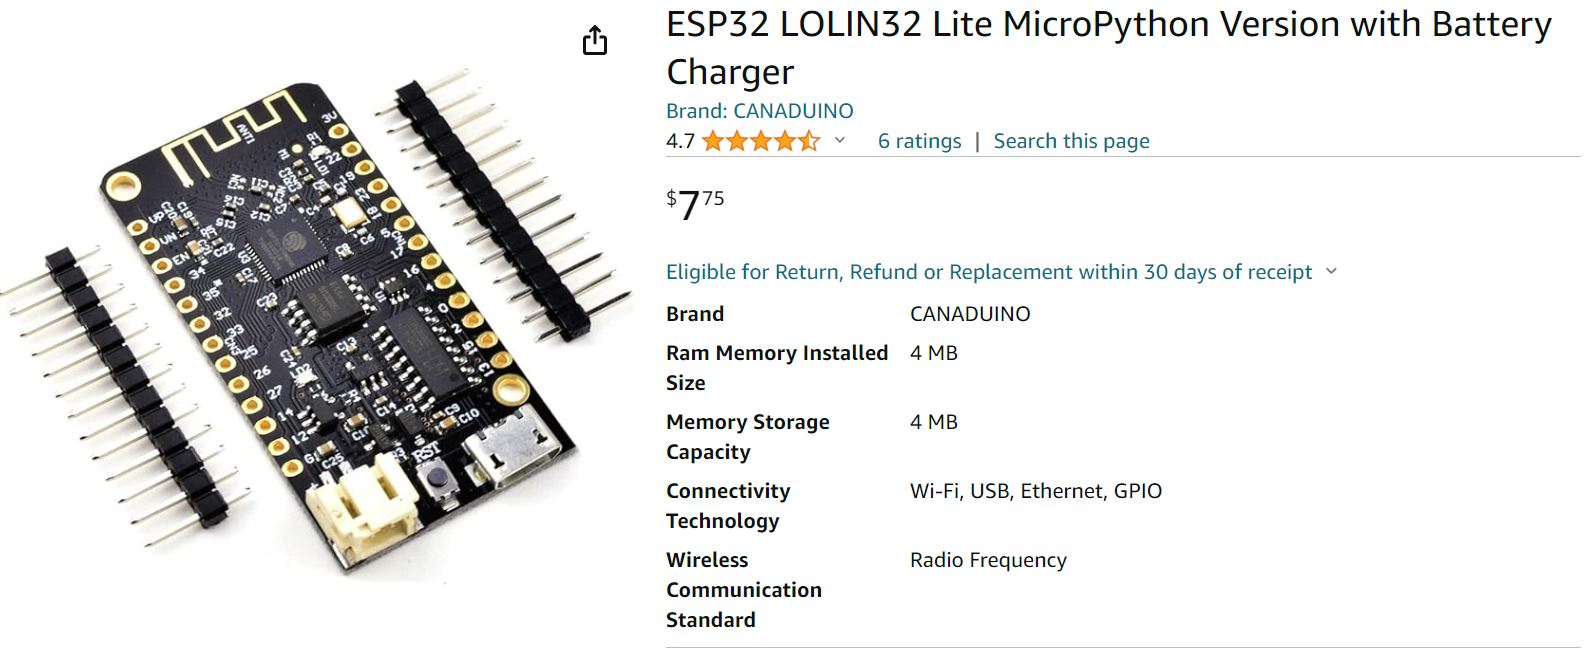
The ESP32 platform used for this example is the LOLIN32 - available on Amazon for less than $10 USD. This platform has the advantage of a built-in battery interface to allow battery operation and battery charging.
The application will implement a Bluetooth Low Energy (BLE) server - a BLE endpoint device that serves data for reading and/or writing. In this case, the BLE server will allow reading of temperature, humidity, and date-time.
A remote BLE client can connect to this device and read the values. The client can also write the date-time field to set the calendar and clock in the BLE server.
With a bit of effort, this application could be changed - to replace the temperature and humidity sensor with another sensor or controller to provide measurement and/or control of another quantity or device.
Hardware Architecture
A DHT-11 sensor is connected to the ESP32 with three wires.

In the photograph above, you'll see the red wire connected to "+" (vcc), the brown wire connected to "-" (gnd), and the yellow wire connected to "out" (data).
These three wires are connected to the ESP32 as follows:
- "+" or "vcc" - red - ESP32 3.3V power
- "-" or "gnd" - brown - ESP32 GND (ground)
- "out" - yellow - ESP32 GPIO4

The sensor itself uses a single wire for communications. It seems this is the protocol dubbed "1-Wire" or also "MicroLAN". This link describes how it works. Here is a tutorial specific to the DHT-11 sensor. Basically, this is a low speed communications protocol with the major advantage of requiring just one wire.
The DHT11 sensor is normally in a low-power sleep mode. When the ESP32 sends a "start" signal to it, the DHT11 will wake up, take a measurement, and send back the data. The DHT11 then automatically enters sleep mode again.
The DHT11 sensor is a low cost sensor that provides measurement of temperature and humidity over a limited range and with limited accuracy (0-50⁰C with a 2% accuracy and relative humidity from 20-80% with an accuracy of 5%.)
A newer model, the DHT22 sensor, is available with improved ranges and accuracy. (0-100% humidity with 2-5% accuracy and -40 to 80°C temperature with ±0.5°C accuracy)
This ESP32 application supports both sensors. The sensor type is selected by an entry in a configuration file.
Software Architecture
The software architecture consists of two major sub-components.
- Bluetooth Low Energy (BLE) driver - built in software from the ESP32 sdk
- DHT sensor driver - we're using a slightly modified driver from Adafruit (added one function to allow the sensor type to be updated after object creation)
Bluetooth Low Energy (BLE)
The ESP32 SDK provides software to implement BLE devices. BLE consists of a local-area-network communicating over 2.4 GHz radio frequencies using the BLE protocol (link) From a software viewpoint, the main features of BLE we need to deal with are:
- Endpoint type (client / server)
- Services with Characteristics
Essentially, a BLE server allows other devices to connect to it, and may allow other devices to read or write characteristics. When another device reads a characteristic, it may be something like a measured value such as temperature that is "served" to a connected client.
When another device writes a characteristic, it may be something like opening or closing a relay to turn a light on or off that is "served" to a connected client.
The complete specifications are about 100 cm thick of printed paper, so we won't try to go too deep in this discussion!
Characteristics may have a descriptor attached - a string that describes the characteristic. For example, a characteristics that represents a measured temperature might have a descriptor of "temperature, F".
In BLE, one or more characteristics are grouped under a "service". And a single BLE server may have one or more "services". So a list of services provided by a BLE server is sort of like a top level directory of the server. Characteristics are sort of a second level directory under each service.
For this application, there are three characteristics implemented.
- Temperature (degrees F)
- Humidity (percent)
- Date and time "2023/02/20 12:34:56" - the internal clock reading of the server
These three characteristics are grouped under a single service in this application.
So a typical operation for a client wishing to read these characteristics would be:
- Connect to the device and query its services - it finds a single service
- Query a list of characteristics under that service - it finds three characteristics
- Read the value of the desired characteristic(s)
There's another topic to discuss with BLE services and characteristics. They are uniquely named using a long hex string of 36 digits called a UUID (Universally Unique Identifier). These UUIDs are used all over the place whenever something needs to be tagged with a unique name in the universe. These can be generated several ways, but one easy way is to use a special web site.
Each service and each characteristic must have its own UUID for BLE.
It turns out that there are some services and characteristics that are so common they are assigned special UUIDs that are the same - these are part of a universe of BLE jargon called GATT (Generic Attribute Profile). You can look on this website for further information. For this BLE server, we have not used a GATT - although one probably exists for temperature and humidity. Feel free to experiment with this!
BLE Advertising
In order to connect to the device, a client must know what device to connect to. To solve this issue, BLE defines something called "advertising" where an active BLE Server will periodically "advertise" itself by sending a special BLE radio packet. A client can listen for these packets to discover what BLE servers might be in its range. It can then pick one of these servers to connect to.
There is a very handy application (iPhone and Android I think) called BT Inspector which can be used to illustrate this. This allows the phone to listen for BLE servers that are advertising within its range. You can then use the application to try to connect to a server and interrogate its services and characteristics. The application will allow reading and writing of characteristics as well. It's an amazing testing device!
Here are some examples of using BT Inspector. First item is to scan for advertising BLE servers. Press the Scan button.

Among the list of advertisers - you should see the BLE device you've created in this application. I've set the BLE name in the configuration file to "DIY TempHumidity Sensor". You'll see it highlighted in yellow in the above screen shot.
Next, we click on the "DIY TempHumiditySensor" and this takes us to a screen where we can connect. This screen shows all the data that is contained in the advertising packet received from our BLE device.

Next we hit the "interrogate" button which will cause BT Inspector to connect to the device, scan for its list of services, and scan each service for a list of its characteristics. You'll see one service with three characteristics are discovered.

Finally, we can click on an individual service which takes us to a screen where we can read and/or write the characteristic.

As you can see, this BT Inspector app is a useful tool for checking out BLE devices. Some devices are not so easy to connect to - they may require authentication and/or pairing of some kind. But for this application, the server is quite promiscuous - a client can connect and read the characteristics.
DHT Sensor
The application uses a DHT-11 sensor which provides temperature and humidity measurement. This sensor is also readily available and a simple search on Amazon will yield multiple results. This sensor requires only three wires connected to the ESP32 - there is a power (3.3V), ground (0V) and a signal line.
In this application, the signal wire from the sensor is connected to the ESP32 GPIO4 connection - allowing the software to configure the sensor and read its measured values.
The three sensor connections are labeled "-", "out", and "+" or (GND, DATA, and VCC) as shown in the photographs above. The ESP32 uses its GPIO4 line to communicate with the DHT11 sensor during operation.
The Adafruit driver for the DHT can interface to the DHT-11 or newer, more accurate DHT-22 sensor. The type of sensor connected can be defined in the configuration file.
The driver will allow the application to initialize a connection to the DHT sensor, and read the temperature and humidity. You just have to tell the driver which type of sensor is connected, and what GPIO pin is used to communicate with it.
Configuration File
The application will attempt to read a configuration file on startup from a SPIFFS partition of the ESP32 device. If you put a file config.ini in the top level folder of the SPIFFS on the device, it will be read on startup to configure the application. If this file cannot be read, default values will be used for these parameters. This is a simple text file with four lines. Here is an example:
SERVERNAME=DIY TempHumidity Sensor
SENSOR=DHT11
UPDATERATE=5
UNITS=F
Here's what each line controls:
SERVERNAME- This line determines the name that the BLE server will advertise. You can change this name on each BLE server if you have multiple devices so you can easily identify a particular device.SENSOR- This line determines the type of temperature/humidity sensor is connected. It's value should be either DHT11 or DHT22UPDATERATE- This line determines how often the BLE server will update the temperature and humidity characteristics. It is the number of seconds between each update. It should be between 2 and 60.UNITS- This line determines the units for the temperature measurement - it should be C or F
Setup Tasks
Setup tasks are things that the application does once when it boots up on the ESP32. These tasks initialize the various hardware and software components. This code is placed in the setup() function on the Arduino IDE. Below, you'll see the code for the setup function.
Notice that there is a "comfort" LED that will blink at specific times. During setup tasks, the comfort LED is turned on. During operational tasks, the comfort LED is turned on when the sensor is read and characteristics are updated.
These are the steps of the setup tasks:
- Setup the serial port to allow output of diagnostic messages. Normally, nothing is connected to this so these are simply ignored. But if you are connected to the device in the Arduino IDE, you can go to Tools | Serial Monitor to see what's coming out on this port. First, it will output a sign-on message to show that the app is starting up.
- Turn on the comfort LED.
- Initialize the real-time-clock to a fixed date of January 1, 2024 at 00:00:00
- Read the config file from the SPIFFS - set the parameters based on this file, or set them to default values.
- Initialize the driver for the temperature / humidity sensor.
- Initialize the BLE device with its name and service and characteristics, initialize call-backs for when a client connects, disconnects, or writes a characteristic.
- Start the BLE device and begin advertising. Print the BLE MAC address to the diagnostics port.
- Initialize a few variables for the operational tasks.
- Turn off the comfort LED.
Note that quite a bit of code is required to get the BLE device configured, initialized, and operational. It requires initializing with the device name, creating a server, creating a service, creating all the characteristics, adding the characteristics to the service, and finally initiating the advertising process.
//--------------------------------------------------------------------
// Setup tasks - called one time on power up
void setup()
{
  char tmpbuf[32];

  //-- start up serial port for diagnostics
  Serial.begin(115200);
  Serial.println(SIGNON);

  //-- initialize signal LED to blink when in operation
  pinMode(LED,OUTPUT);
  digitalWrite(LED,LEDON);

  //-- initialize the RTC
  rtc.setTime(0,0,0,1,1,2024);

  //-- mount SPIFFS and read config file
  bleServerName[0] = '\0'; // "my diy temp sensor name"
  sensorIsDHT11 = true; // SENSOR=DHT11 or DHT12
  updateRateSec = 10; // read every 10 seconds

  if(!SPIFFS.begin(true))
  {
    print("An Error has occurred while mounting SPIFFS");
  }
  else
  {
    // read config file
    readKey(CONFIGFN,"SERVERNAME=",bleServerName,63);
    readKey(CONFIGFN,"SENSOR=",tmpbuf,15);
    sensorIsDHT11 = (strcmp(tmpbuf, "DHT11") == 0);
    readKey(CONFIGFN,"UPDATERATE=",tmpbuf,15); // update rate in seconds
    int x = atoi(tmpbuf);
    if (x < 2) x = 2;
    if (x > 60) x = 60;
    updateRateSec = x;
    tempIsF = true;
    readKey(CONFIGFN,"UNITS=",tmpbuf,15); // UNITS=C or UNITS=F,
                                          // F is default temperature unit
    char c = tmpbuf[0];
    if ((c=='C') || (c == 'c')) tempIsF = false;

    readKey(BACKUPFN,"TIME=",tmpbuf,31);
    setRtcTime(tmpbuf);
  }

  // default server name if we can't read it from the configuration file
  if (bleServerName[0] == '\0')   strcpy(bleServerName,"DIY Temp Humidity Sensor");

  Serial.print("BTLE Name: "); Serial.println(bleServerName);

  //-- initialize the DHT - 11 sensor (or DHT-22)
  dht.setType(sensorIsDHT11 ? DHT11 : DHT22);
  dht.begin();

  //-- Create the BLE Device
  // We need to initialize the device with a name
  BLEDevice::init(bleServerName);

  // Then we need to create the BLE Server
  pServer = BLEDevice::createServer();
  pServer->setCallbacks(new MyServerCallbacks());

  // Then we need to create the BLE Service that will hold characteristics
  dhtService = pServer->createService(SERVICE_UUID);

  // Then we need to create the Characteristics and Create a BLE Descriptor of each one
  // Temperature
  dhtService->addCharacteristic(&dhtTemperatureFahrenheitCharacteristics);
  dhtTemperatureFahrenheitDescriptor.setValue("DHT temperature Fahrenheit");
  dhtTemperatureFahrenheitCharacteristics.addDescriptor
                 (&dhtTemperatureFahrenheitDescriptor);

  // Humidity
  dhtService->addCharacteristic(&dhtHumidityCharacteristics);
  dhtHumidityDescriptor.setValue("DHT humidity");
  dhtHumidityCharacteristics.addDescriptor(new BLE2902());

  // Time
  // time is writable, so there's a call back for when a client writes the time
  dhtTimeCharacteristics.setCallbacks(new CharacteristicCallBack());
  dhtService->addCharacteristic(&dhtTimeCharacteristics);
  dhtTimeDescriptor.setValue("Date and Time yyyy/mo/da hr:mn:ss");
  dhtTimeCharacteristics.addDescriptor(new BLE2902());

  // Now we can start the service running
  dhtService->start();

  // Finally, let's start advertising that this server is alive
  BLEAdvertising *pAdvertising = BLEDevice::getAdvertising();
  pAdvertising->addServiceUUID(SERVICE_UUID);
  pServer->getAdvertising()->start();
  std::string myaddr = BLEDevice::getAddress().toString();
  Serial.print("BLE: Advertising and awaiting a client connection on ");
  Serial.println((char*)myaddr.c_str());


  //-- initialization for the app
  lastSecond = rtc.getSecond();
  lastHr = rtc.getHour();
  secondCtr = 0;

  // LED has been on during initialization
  digitalWrite(LED,LEDOFF);
}
Call-Back Tasks
The ESP32 BLE driver utilizes a call-back mechanism to notify user code of certain happenings. For this application, we want to know about connects and disconnects (when a client connects or disconnects from the server). We also want to know about writes to the time/date characteristic - as this is an attempt by some client to let us know the correct date and time.
To make this happen, we need to define some call-back routines according to a template provided by the BLE driver as shown below.
First, a class instance is declared that handles the onConnect and onDisconnect events. This simply sets or clears a flag letting the rest of the code know if a client is connected or not.
For disconnect, we also want to re-start advertising - because advertising is automatically disabled when a client connects. So if we didn't restart advertising on disconnect, no other client would ever see our BLE device again.
//--------------------------------------------------------------------
// BLE: Callbacks for onConnect and onDisconnect
class MyServerCallbacks: public BLEServerCallbacks {
  void onConnect(BLEServer* pServer) {
    deviceConnected = true;
  };
  void onDisconnect(BLEServer* pServer) {
    deviceConnected = false;
    pServer->startAdvertising();
  }
};
For writing a characteristic, we declare a class instance to handle the onWrite event on the time date characteristic. It looks like this:
char setTimeData[32] = "";
//--------------------------------------------------------------------
// callback for when time characteristic is written by some client
//
class CharacteristicCallBack : public BLECharacteristicCallbacks
{
public:
  void onWrite(BLECharacteristic *characteristic_) override
  {
    // client writes a date-time string to set the BLE device clock
    // Expect it to be exactly this format "2024/02/23 12:34:56"
    std::string ttag = characteristic_->getValue();
    strncpy(setTimeData, (char*)ttag.c_str(),31);
    // copy it to a special setting variable setTimeData
    // next 1 second task interval it will be picked up
    // and used to set the RTC
    //Serial.print("Time was written: ");
    //Serial.println((char*)ttag.c_str());
  }
};
You can see here that all this handler does is to copy the new value to a variable setTimeData. We will see that new data has been deposited here in the operational task and run some code to try to use the value written to set the RTC to the desired date/time.
Operational Tasks
Operational tasks are implemented in the loop() function in the Arduino IDE. This function is called repeatedly forever after the setup() function is called while the ESP32 is powered up and running.
Here, we handle the operational tasks. In this case, we have some tasks that have to be done on a one-second basis, and some that have to be done on a one-hour basis. We trigger these by watching the RTC to see when there is a change in the second or hour values of the clock.
As you'll see in the code below, we continually read the rtc seconds value, and when it changes, we run two tasks:
- Check to see if some data has been written to the time-date by a client writing to the time-date characteristic. If so, we try to set the rtc based on what the client wrote. We expect this data to be in the format of yyyy/mm/dd hh:mm:ss exactly. For example, if a client wrote the string "
2024/02/18 12:34:56", we would set the RTC. If they wrote something else, like "HELLO WORLD", we would simply ignore it. - Check to see if it's time to read the sensor. Every so many seconds (
UPDATERATEfrom the configuration file) the ESP32 will read the temperature and humidity values from the DHT sensor and update the characteristics accordingly. The comfort LED is turned on during this operation, so if you are looking at the board when this happens, you'll see a short flash of light from this LED.
There is also one hourly task - once per hour we read the RTC and save its value in another file on the SPIFFS top level folder - /backup.dat.
This is done so that we can know the "approximate" time (to the nearest hour) that the BLE server was last operational. When we boot up and run the setup() code, the RTC is initialized to 2024/01/01 00:00:00. If a backup file exists, it will be read and the RTC time will be updated to that time. So if the ESP32 ever looses power, or is reset for some reason, when it boots up, it will reset the RTC to the last hour that it was active.
At the bottom of the loop() function below, you'll see code that - once per hour - writes the time to this backup file whenever the hour of the RTC changes (xx:00:00).
char tmpbuf[32];
//--------------------------------------------------------------------
// Called forever after setup() completes
void loop()
{
  //-- detect when each second ticks by on the rtc
  int sec = rtc.getSecond();
  if (sec != lastSecond)
  {
    lastSecond = sec;
    secondCtr++;

    // inside this if() we do things every 1 second
    // -- time characteristic handling
    if (strlen(setTimeData) > 0)
    {
      // if a client wrote a time, we set our internal clock to that time/date
      setRtcTime(setTimeData);
      setTimeData[0] = '\0';
      backupTimeValue();
    }
    else
    {
      // otherwise we update the characteristic value with current time/date
      String ttag = rtc.getTime("%Y/%m/%d %H:%M:%S");
      dhtTimeCharacteristics.setValue((char*)ttag.c_str());
    }

    // -- temperature and humidity characteristic handling
    if ((secondCtr % updateRateSec) == 0) // every 5 seconds or so
    {
      digitalWrite(LED,LEDON);
      // Read temperature as Fahrenheit
      dht.setType(sensorIsDHT11 ? DHT11 : DHT22);
      float tempF = dht.readTemperature(tempIsF);
      // Read humidity
      float hum = dht.readHumidity();

      // Update temperature
      tmpbuf[0] = '\0';
      sprintf(tmpbuf,"%.1f", tempF);
      //dtostrf(tempF, 6, 2, tmpbuf);
      //Set temperature Characteristic value and notify connected client
      dhtTemperatureFahrenheitCharacteristics.setValue(tmpbuf);
      dhtTemperatureFahrenheitCharacteristics.notify();
      Serial.print("Temperature Fahrenheit: ");
      Serial.print(tmpbuf);
      Serial.print(" ºF");

      // update humidity characteristic
      tmpbuf[0] = '\0';
      sprintf(tmpbuf,"%.0f",hum);
      //dtostrf(hum, 6, 2, tmpbuf);
      //Set humidity Characteristic value and notify connected client
      dhtHumidityCharacteristics.setValue(tmpbuf);
      dhtHumidityCharacteristics.notify();
      Serial.print(" - Humidity: ");
      Serial.print(tmpbuf);
      Serial.println(" %");

      // LED is on during 1 second processing
      // 1 second processing has completed, so turn it off
      digitalWrite(LED,LEDOFF);
    }
  }
  // Hourly tasks
  int hr = rtc.getHour();
  if (hr != lastHr)
  {
    lastHr = hr;
    backupTimeValue(); // once per hour, save current time
    // on reset, if there's a saved time value, use that as
    // the startup time
  }
}
That's about it for the BLE server application. You can find the full code on GitHub.
Follow-on Thoughts
This was an interesting application to develop for the ESP32. I learned what seems like a lot about Bluetooth Low Energy. However - considering the full specifications are about 100cm of printed material, there's a lot more to learn!
I think it would be fairly straight forward to use this code to implement a BLE server with a different function - like dimming lights, controlling a relay, reading illumination, a GPS server, etc.
Have fun!
History
- Version 1.0, 25th February, 2024, Deangi