
Rapid Roll C#
5.00/5 (5 votes)
Rapid Roll game in C#
Introduction
I'm presenting you an old Nokia game called Rapid Roll in C# language.
How the Game Works
- Player moves the red ball using A and Left arrow keys for left,and D and Right arrow keys for right.
- The ball must hit the bar in order to move on, otherwise if it collides with wire on top, falls out of bounds or falls on the spike, player loses life.
- The goal of the game is to score a certain amount of points in order to win.
Preparing the Background
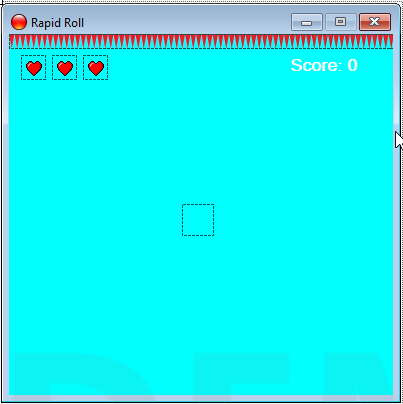
Before I started writing the code, I modified the Form by changing its BackColor to Aqua, resizing it to 400x400, setting MaximizeBox to false, Locked to true and switching FormBorderStyle to FixedSingle. After that, I added a pictureBox with the wire background image at position 0;0, 3 small pictureBoxes named "Life1","Life2" and "Life3", a label that presents the current score, and an empty pictureBox of size 32;32 for ball, named "Ball":
Using the Code
For starters, I added some global variables. Constant integers width and height presents the width and height of the fields in game (bars and spikes), integer value lives stores the number of lives of the player, while save and count will be explained later in article. Short type value score will store the amount of points player achieved, and bools moveLeft and moveRight will determine if the player moves left or right. The r instance of Random class will be used in multiple procedures in the program:
const int width = 90;
const int height = 15;

int save = 0;
int count = 0;
int lives = 3;

short score = 0;

bool moveLeft = false;
bool moveRight = false;

Random r = new Random();
The first thing I needed was the ball. Instead of adding a picture, I used GDI in Paint event of the ball pictureBox to draw the ball in the control. The control is slightly larger than the image within:
private void DrawBall(object sender, PaintEventArgs e)
{
    Rectangle ball = new Rectangle(0, 0, 30, 30);
    Pen pn = new Pen(Color.Black);
    SolidBrush brush = new SolidBrush(Color.Red);
    e.Graphics.DrawEllipse(pn, ball);
    e.Graphics.FillEllipse(brush, ball);
}
Then, when the ball is created, I used Form events KeyUp and KeyDown called Pressed and Released to make controls for the ball, alongside timer named Controller with event called Controlling that will direct the ball based on the keys that player pressed:
private void Pressed(object sender, KeyEventArgs e)
{
    if (e.KeyCode == Keys.A || e.KeyCode == Keys.Left)
    {
        moveLeft = true;
    }
    else if (e.KeyCode == Keys.D || e.KeyCode == Keys.Right)
    {
        moveRight = true;
    }
}
private void Released(object sender, KeyEventArgs e)
{
    if (e.KeyCode == Keys.A || e.KeyCode == Keys.Left)
    {
        moveLeft = false;
    }
    else if (e.KeyCode == Keys.D || e.KeyCode == Keys.Right)
    {
        moveRight = false;
    }
}
private void Controlling(object sender, EventArgs e)
{
    if (moveLeft && Ball.Location.X >= 0)
    {
        Ball.Left -= 6;
    }
    else if (moveRight && Ball.Location.X <= ClientSize.Width - Ball.Width)
    {
        Ball.Left += 6;
    }
}
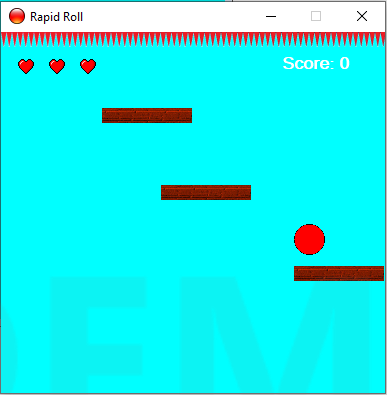
The game contains three type of fields: Bars, Spikes and Layers.
Barsare regular fields where the ball shall fall in order to move on. But due to the fact that theIntersectsWith()method will connect the ball with the bar at any point, we have the next field - layer.Layersare thinpictureBoxesadded 5px above the bars and their use is to diminish (for the most part) the impact of the ball on the bar.Spikesare fields that shall be avoided by the player because colliding with them will cause player to lose life.
Bar procedure will create its Layer after the field is added on the form. It has arguments w and h reserved for the random position of the bar on the screen, and adds the brick looking texture as a background image:
private void Bar(int w, int h)
{
    PictureBox bar = new PictureBox();
    bar.Location = new Point(w, h);
    bar.Size = new Size(width, height);
    bar.BackgroundImage = Properties.Resources.brick;
    bar.BackgroundImageLayout = ImageLayout.Stretch;
    bar.AccessibleName = "Field";
    bar.Name = "Bar";
    this.Controls.Add(bar);
    Layer(bar);
}
Layer procedure holds argument b to get placed at the same X position as its bar, and 5px above it:
private void Layer(PictureBox b)
{
    PictureBox layer = new PictureBox();
    layer.Location = new Point(b.Location.X, b.Location.Y - 5);
    layer.Size = new Size(width, 1);
    layer.AccessibleName = "Field";
    layer.Name = "Layer";
    this.Controls.Add(layer);
}
Just like Bar, Spikes procedure holds w and h arguments for random width and height position on the screen:
private void Spike(int w, int h)
{
    PictureBox spike = new PictureBox();
    spike.Location = new Point(w, h);
    spike.Size = new Size(width, height);
    spike.BackgroundImage = Properties.Resources.spikes;
    spike.BackgroundImageLayout = ImageLayout.Stretch;
    spike.AccessibleName = "Field";
    spike.Name = "Spike";
    this.Controls.Add(spike);
}
Now we have the ball with its controls, procedures for creating bars, layers and spikes, but no interface. Instead of adding pictureBoxes manually, I wrote two separated procedures - Interface which will create pictureBoxes (bars and layers) repeatedly to the certain point of the screen, and SetBall that will relocate the ball to the lowest bar created, 5px above the bar.
SetBall:
private void SetBall()
{
 foreach (Control c in this.Controls)
 {
     if (c is PictureBox && c.Name == "Layer")
     {
         PictureBox layer = (PictureBox)c;
         Ball.Location = new Point(layer.Location.X, layer.Location.Y - Ball.Height - 5);
     }
 }
}
Interface will keep creating the bars until the position of the bar is lesser than the (about) screen height minus ball height. Still, I had to use conditional break for logical reasons:
private void Interface()
{
    int x, c, y = 0;

    while (y < ClientSize.Height - Ball.Height)
    {
        x = r.Next(0, ClientSize.Width - width);
        c = r.Next(60, 120);
        y += c;
        if (y > ClientSize.Height - Ball.Height) break;
        Bar(x, y);
    }

    SetBall();
}
The screen should now look like this:
The ball seems to be slightly above the bar, but the space between ball and bar diminishes during the game.
Now we came to the part of how the bars (with layers) and spikes are created. I used two timers - Generate and Detect. Detect timer holds event called Detected:
private void Generator(object sender, EventArgs e)
{
    if (save == 0)
    {
        int pick = r.Next(1, 5) + 1;
        save = pick;
    }

    count++;

    if (count == save)
    {
        Spike(r.Next(ClientSize.Width - width), ClientSize.Height);
        count = 0; save = 0;
    }
    else
    {
        Bar(r.Next(ClientSize.Width - width), ClientSize.Height);
    }
}
This timer uses the above mentioned integer values save and count. Save holds a random value, while count increments every time timer fires. So let's say that the random number of save was 4. When the timer is fired, count will increase, and check if its value is equal to the value of save. If it's not, the bar is created. Otherwise,the spike will be created, and both values count and save will be set to 0 and the cycle runs over and over. So at that point, timer will create 3 bars and 1 spike. The timer interval is set to 350ms.
Detect timers holds event called Detector and loops through the controls searching for pictureBoxes with AccessibleName property set to "Field". I forgot to mention that I added that property to all fields - bars, layers and spikes in order to simplify the code. Once they're found, they've been launched above, and if they collided with the wire at the top, they will be removed. That decreases memory usage of the program and enhances performance:
private void Detector(object sender, EventArgs e)
{
    foreach (Control c in this.Controls)
    {
        if (c is PictureBox && c.AccessibleName == "Field")
        {
            PictureBox field = (PictureBox)c;
            field.Top -= 3;

            if (field.Bounds.IntersectsWith(Wire.Bounds))
            {
                this.Controls.Remove(field);
            }
        }
    }
}
As the ball falls, when it intersects with bar, it shall stay on it and move above, but that part might not be that easy. As I mentioned somewhere above, the bare IntersectsWith() will return true whenever (and wherever) one control collides with another control. That's another reason why I created layers above the bars. But now, we need to find a safe range of where the ball can collide with layer and stay on it, without falling through. After testing, I came to the idea to calculate the difference between Y position of the layer and Y position of the ball minus "safe number" which will make sure that the ball stays on the layer and intersects at the same time:
private bool Settled(PictureBox surface)
{
    return surface.Location.Y - Ball.Location.Y >= Ball.Height - 6;
}
Let's move to the Observer now:
private void Observer(object sender, EventArgs e)
{
    int top = 3;

    if (Ball.Bounds.IntersectsWith(Wire.Bounds) || Ball.Location.Y >= ClientSize.Height)
    {
        checkStatus();
        return;
    }
    foreach (Control c in this.Controls)
    {
        if (c is PictureBox && c.Name == "Layer")
        {
            PictureBox layer = (PictureBox)c;

            if (Ball.Bounds.IntersectsWith(layer.Bounds) && Settled(layer))
            {
                top = -3;
            }
        }
        else if (c is PictureBox && c.Name == "Spike")
        {
            PictureBox spike = (PictureBox)c;

            if (Ball.Bounds.IntersectsWith(spike.Bounds))
            {
                checkStatus();
                return;
            }
        }
    }
    MoveBall(top);
    WriteScore(top);
    CheckForWinner();
}
First, we have local variable top that is set to 3. Before we approach looping through the controls, we will check if the ball collided with wire on the top in which case, player loses life. After it, we're looking for pictureBox controls with names "Layer" and "Spike". If layer is found, the program will check if the ball collided with it at specific range, and if it did, top gets multiplied by -1 meaning that it will change direction and will start moving up. If the spike is found, program checks if the ball collided with it, and if it did, player loses life, or ends the game if he has no more lives. Once the loop is done, it uses value of top variable to determine where the ball should go, adds a score to the user if he moves down (if the ball is standing on the bar\layer, the score won't increase) and checking if player has won by reaching a certain amount of points.
MoveBall:
private void MoveBall(int num)
{
    Ball.Location = new Point(Ball.Location.X, Ball.Location.Y + num);
}
WriteScore:
private void WriteScore(int value)
{
    if (value > 0)
    {
        score++;
        label1.Text = "Score: " + score.ToString();
    }
}
CheckForWinner:
private void CheckForWinner()
{
    if (score == short.MaxValue)
    {
        DisposeTimers();
        MessageBox.Show("Congratulations, you won!");
    }
}
Player wins the game if he reaches maximal value of short data type which is 32767, but feel free to add a number by your will.
There are two final procedures, checkStatus and StopTimers. checkStatus is called when the ball collided with the wire on top, fell out of the bounds on fell on the spike. It will decrement value lives, exit from the loop and check if the lives value is 0 meaning that the game is over. If the player has no more lives, StopTimers will be called, and the message of game over will appear, along with the score that player achieved. Otherwise, the SetBall procedure is called so the ball will be relocated to the another active bar and the game keeps on:
private void checkStatus()
{
    foreach (Control c in this.Controls)
    {
        if (c is PictureBox && c.Name.Contains("Life"))
        {
            this.Controls.Remove(c);
            lives--;
            break;
        }
    }

    if (lives == 0)
    {
        DisposeTimers();
        MessageBox.Show("Game Over!" + "\n"
                        + "Score: " + score.ToString()
                       );
    }
    else
    {
        SetBall();
    }
}
And at the end, whether the player won or lost, all timers will be disposed:
private void DisposeTimers()
{
    Controller.Dispose();
    Generate.Dispose();
    Detect.Dispose();
    Observe.Dispose();
}
Note
The Settled function is quite sensitive, so I would suggest you that if you're changing the top value in Observer and Detected events for example to 2, then change the value 6 from Settled to 5. You might also want to change the movement speed of the ball from 6 to 4 or 5 for the sake of better adjustment.
History
- 24th December, 2019: Initial version