
WPF Controls Tester
WPF Controls Tester is a small application written to test several WPF controls and panels in order to study their behavior. Beginning WPF programmers may benefit by studying techniques used within this application.
- Download the WPF Controls Tester application - 170.26 KB
- Download the source for WPF Controls Tester - 155.72 KB
Introduction
This article will introduce you to a sample application I wrote called "WPF Control Tester." The purpose of the application is to study and demonstrate the behavior of the control panels that come as a part of WPF and several other important controls.
Background
I began studying WPF on a hit or miss basis since the technology was introduced several years ago; unfortunately the time spent was more miss than hit. After working with .NET Forms control for so long, and similar technologies before that, I found it difficult to get my head around the xaml way of doing things. The old familiar properties are either missing altogether or behave in entirely new ways.
Having some available time recently I to the opportunity to immerse myself in a study of WPF, and I am thankful to say that not only am I starting to get a handle on things now, but I am enjoying WPF and I can see how it is superior to the old ways in many different ways.
As a part of my recent study of WPF I wrote the application that accompanies this article. Most of the application was purposely written in Xaml. Except for a few old fashioned event handlers written in C# for convenience, I wanted to see how things could be done in Xaml without writing code. Once the logic begins to make sense, there is a good bit you can do by writing Xaml. I am sure that some of the code that I wrote could have been done in better ways, but I decided sometimes it is better to finish a project, than to do everything just write.
In the following article I will briefly describe the application, and then point out a number of interesting discoveries I made while programming the application.
Using WPF Control Tester
You can download WPF Control Tester from this page in either of two packages. The compiled version will run "out of the box" by simply extracting it and its support files and folders into any folder on your computer. Otherwise you can download the source code in order to peruse and make your own modifications, and then compile and run the application from the source.
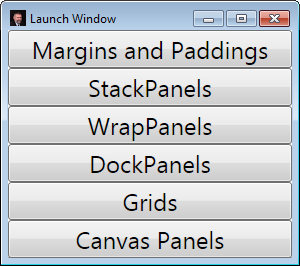
Six test windows are created by the application to illustrate various features of several WPF controls. All of those windows are available from the main Launch Window. Thumbnail images of each window are presented here (plus two others), and a description of each follows.
 |
 |
 |
 |
| Margins & Paddings | StackPanels | WrapPanels | DockPanels |
 |
 |
 |
|
| Grids | Canvas Panels | Help Window | Context Menu |
Margins and Paddings
The Margins and Paddings window demonstrates the use of the
Margin and Padding properties on all WPF controls. It
demonstrates how these properties behave when one number, two numbers, and four
numbers are used to set the properties. By comparing the output shown in the top, middle and bottom
rows, it is easy to see the difference between a Margin setting,
and a Padding setting.
For the demonstration I used Labels wrapped in Borders
to make it easy to distinguish between the areas defined by
Margin (outside of
the red Border in green) and the area defined by Padding (inside the red Border surrounding the text of a Label.
StackPanels
The next window is StackPanels. In this window two StackPanel
objects are presented to demonstrate the difference between
Orientation="Vertical" and Orientation="Horizontal." This is perhaps the
simplest test window of the six. As a point of interest I decided to use a
Grid in this window to organize and separate the to
StackPanels. This could have been done with other panels, including
StackPanel, so sometimes choosing between one and another kind of panel
is just a matter of preference.
WrapPanels
The WrapPanels window is very much like the StackPanels
window. Comparing the xaml of the two windows shows very little difference in
the visual elements other than the WrapPanel and StackPanel
tags. In the Style I created in the Resources
section I added two Setter tags for the WrapPanel that were not part of the
StackPanel Style, one for ItemWidth, and another for
ItemHeight.
Like the StackPanels window WrapPanels has two
WrapPanel objects demonstrating both Horizontal and
Vertical settings for Orientation.
DockPanels
The DockPanels window demonstrates perhaps the most useful WPF
panel. When adding a control to a DockPanel you specify the side to
which the control should dock with an attached property, DockPanel.Dock.
This window shows how the order in which controls are added affects the
amount of room given to it. The window also illustrates the effect of setting
LastChildFill either True or False.
Grids
The last two windows are the most interesting of the six. The Grids
window illustrates how that rows and columns are setup within a Grid,
and the sizing effects of setting the Height of a
RowDefinition or the Width of a ColumnDefinition
either to "Auto" or to "*".
Canvas Panels
The last test window is called Canvas Panels, and it illustrates how
the attached properties Canvas.Left and Canvas.Top and
normal Margin property combine to effect the placement of controls
on a Canvas.
I Need Help! No problem.
Additional information about the controls illustrated is available in a help window by clicking on those windows with the right mouse button. This will open a context menu. Clicking on the top menu option will open a new window with information about that window and the controls demonstrated there.
Points of Interest
Besides the demonstrations presented in the test windows there are other
interesting aspects in the code for the application. In order to make it easy to
open the test windows I added an instance of each window as a resource within
Window.Resources of the Launch Window, and then used Binding to
bind each window to its Button, and a Button Style to set each Button's Content
property to its window's Title property, and the window itself to the Button's
Tag property.
(See LaunchWindow.xaml for the markup for this.)
Launching a window then was as simple as casting Sender to Window and using its methods to make it appear.
In order to keep a window from being disposed while the program was still
running, LaunchWindow's button_Click event handler attached an event handler to
any window it launched. Then when LaunchWindow detected that a window was trying
to close, it intercepted that and simply made the window invisible. Subsequent
requests to open the same window were honored by making the window visible and
then making it the active window.
I discovered while debugging that when I exited the program (by closing all of the windows), the program would not actually stop running. This confused me at first because during my tests I had always closed the test windows before closing the Launch Window. I had assumed that closing that window would cause its resources to be disposed which would have closed all of the test windows automatically. My thinking erred.
Perhaps making LaunchWindow the Owner of each of the test windows would have
made the program work as I expected, but I did not test that. Instead I used an
override of OnClosing to close each of the test windows when LaunchWindow
closed. The other technique however probably would not have worked
without doing something to remove the event handler created to prevent the test
windows from closing, and might have caused additional problems when the test windows called the
even handler of a object that had been disposed. (See LaunchWindow.xaml.cs for
the code discussed here.)
There are several other items that may be of interest to programmers. One is
the use of a Frame element within HelpWindow to show
the html help files created for the project. Look in
HelpWindow.xaml and HelpWindow.xaml.cs for the markup and code behind to make
that work.
Another is the simplicity of adding a splash screen to appear while the
application is opening. (Just add an image to the project, and set its
Build Action property to SplashScreen.) At first this
application started so quickly that there was not enough time for the splash
screen, so I added a short delay in the App() constructor before
showing the first window in App.xaml.cs.
Finally you may like to take a look at the event handler for the context menu
that is also found in App.xaml.cs. Because the same ContextMenu is
used in all of the windows where it is available, I had to find a way to
determine which window was involved in the request. I know there are better ways
in WPF to handle this problem, but for this quick application I wrote code to
find the ContextMenu object from the MenuItem generating the event, and then from
the ContextMenu the PlacementTarget property gave me a control within the window
from which the event was invoked. Once I had that I only needed to follow a path
of Parent items until the appropriate Window was found, and with that I could
determine which help file to load within the help window.
I have enjoyed putting this application together, and writing about it here. My purpose has been mostly selfish, hoping that following this path I might better understand this technology. However, I hope also that this might help others come to understand WPF a little faster than they might without it.
Enjoy!
History
January 29, 2012 - Original submission.