
Getting User Input From Dialogs - Part 2
4.69/5 (9 votes)
An article on obtaining user input by the use of dialogs
Introduction
The previous article in this series of two articles Getting User Input From Dialogs - Part 1 demonstrated methods of obtaining a single piece of data from a user. This article will attempt to do the same thing for multiple pieces of data.
The sample solution contains four projects:
All four of them deal with "complex" user input, i.e. getting more than one piece of information.
Account Class
All of the examples in this article use a fairly simple class called Account, here's the code:
[Serializable]
public class Account
{
	private string accountNumber;
	private string accountHolder;
	private decimal balance;

	protected Account()
	{
		// deliberately empty
	}

	public Account(string number, string holder, decimal balance)
	{
		this.accountNumber = number;
		this.accountHolder = holder;
		this.balance = balance;
	}

	public Account Clone()
	{
		System.Runtime.Serialization.Formatters.Binary.BinaryFormatter
			binFormatter = new System.Runtime.Serialization.Formatters.
			Binary.BinaryFormatter(null,
			new StreamingContext(StreamingContextStates.Clone));
		using (System.IO.MemoryStream accountStream =
					new System.IO.MemoryStream())
		{
			binFormatter.Serialize(accountStream, this);
			accountStream.Seek(0, System.IO.SeekOrigin.Begin);
			Account result =
				(Account)binFormatter.Deserialize(accountStream);
			return result;
		}
	}

	public Account ShallowClone()
	{
		return (Account)this.MemberwiseClone();
	}

	public static Account Clone(Account account)
	{
		return account.Clone();
	}

	public override string ToString()
	{
		return this.accountNumber + ", " + this.AccountHolder;
	}

	#region Account PROPERTIES ...............................
	public static Account Empty
	{
		get
		{
			return new Account(string.Empty, string.Empty, 0.00M);
		}
	}

	public string AccountNumber
	{
		get
		{
			return this.accountNumber;
		}

		set
		{
			if (this.accountNumber != value)
			{
				this.accountNumber = value;
			}
		}
	}

	public string AccountHolder
	{
		get
		{
			return this.accountHolder;
		}

		set
		{
			if (this.accountHolder != value)
			{
				this.accountHolder = value;
			}
		}
	}

	public decimal Balance
	{
		get
		{
			return this.balance;
		}

		set
		{
			if (this.balance != value)
			{
				this.balance = value;
			}
		}
	}

	#endregion Account PROPERTIES
}
Account has three private members, two of which are of type string...
accountNumberaccountHolder
... and a decimal type:
balance
Each of these has a public property associated with it. All of the properties happen to be both accessors and setters, but that has no relevance for this example.
The only interesting thing about Account is the Clone() method. This uses a technique of copying the data into memory and then returning a new instance by reading the data back out again. By using this technique, you end up with what is called a Deep Copy of the object. There have been some concerns raised about using this methodology to clone large, or complex, objects but for a small class like Account it is fine and has the added advantage that, using memory, as it does, it is very fast.
You might also notice that there is a static Clone() method. If you think about it, it is very difficult to envisage a circumstance where this method could be used. In order to use it, you have to have an Account instance to pass as the parameter and if you have an instance, you can call the Clone() method on the instance...
newAccount = exampleAccount.Clone();
... rather than:
newAccount = Account.Clone(exampleAccount);
I have left it in because it serves as a warning. It was about 03:00am when I 'designed' the Account class, and I might, just might mind you, have had one or two glasses of an amber coloured liquid. So, NEVER EVER EVER do any coding when you are tired and/or emotional!
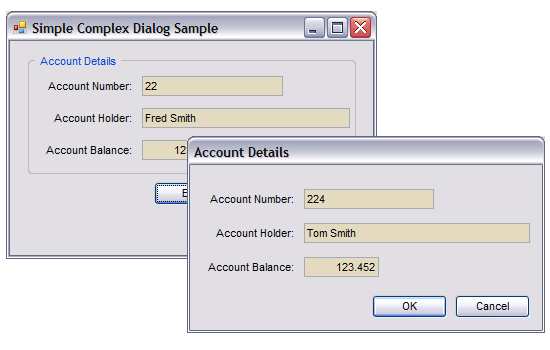
VerySimpleComplexDialog Example
The Main Form
Here it is:
Here is the code:
public partial class VerySimpleComplexDialogMainForm : Form
{
	// Declare an Account to use for the example
	private Account exampleAccount = null;

	// Constructor
	public VerySimpleComplexDialogMainForm()
	{
		InitializeComponent();

		// set up an example Account instance
		exampleAccount = new Account("22", "Fred Smith", 123.452M);
		// Update the display
		this.RefreshExampleAccount();
	}

	private void btnEdit_Click(object sender, EventArgs e)
	{
			// Create an instance of the dialog with the Account
			// created in the constructor.
			using (AccountDialog dlg = new AccountDialog(exampleAccount))
			{
				// and display it modally.
				dlg.ShowDialog();

				// No need to check for OK or Cancel because the
                                     // dialog takes care of returning the appropriate
                                     // account.
				this.exampleAccount = dlg.ResultAccount;
			}

			// Refresh account details
			this.RefreshExampleAccount();
	}

	private void RefreshExampleAccount()
	{
		// Simply copy exampleAccount data into the TextBoxes.
		this.txtAccountNumber.Text = this.exampleAccount.AccountNumber;
		this.txtAccountHolder.Text = this.exampleAccount.AccountHolder;
		this.txtAccountBalance.Text =
			this.exampleAccount.Balance.ToString("F2");
	}

	private void btnExit_Click(object sender, EventArgs e)
	{
		// Er.........., go on, take a guess.
		this.Close();
	}
}
The TextBoxes on the form have been set to read-only merely for the purposes of this example. Since they are not connected to the exampleAccount, there would be no point in allowing input. There is an instance of Account declared at the start of the class definition, which for this example is initialized in the constructor. It could have been obtained from a database, an XML file, Excel or anywhere else, if this were a real world situation. When the user clicks on the Edit button, the Click event handler uses the same methodology as the second example from Part 1 of the series to display the dialog but implements it in a different way.
Take note of:
// Create an instance of the dialog with the Account
// created in the constructor.
using (AccountDialog dlg = new AccountDialog(exampleAccount))
{
	// and display it modally.
	dlg.ShowDialog();

	// No need to check for OK or Cancel because the dialog
	// takes care of returning the appropriate account.
	this.exampleAccount = dlg.ResultAccount;
}
This makes use of the 'using' statement. All that is required for this statement to work is that the object being instantiated implements the IDisposable interface, which Form does. Well, strictly speaking the two times removed ancestor of Form, ScrollableControl, implements the interface and Form inherits that implementation. If the object you are using does not implement IDisposable, you will get a compile-time error telling you so.
Why use 'using'? Simple really, I cannot explain it better than to quote from the definition in MSDN Help:
As a rule, when you use an IDisposable object, you should declare and instantiate it in a using statement. The using statement calls the Dispose method on the object in the correct way, and (when you use it as shown earlier) it also causes the object itself to go out of scope as soon as Dispose is called. Within the using block, the object is read-only and cannot be modified or reassigned.
This dispenses with the need to check if the dialog is still there and, if so, disposing it. What more could you ask for? Absolutely the safest way to ensure an object is disposed.
I am drawing particular attention to this for two reasons:
It is the correct way to do it. When I originally wrote the code from Part 1, back in the VS2003 days, I had not yet discovered the 'using' Statement, had I done so it would have saved me a lot of problems in other projects. This, however, is all part of the learning process.
After Part 1 was published on CodeProject, an eagle eyed CPian, Michal Blazejczyk noticed the bad code and was kind enough to post me about it. Thanks for that Michal!
That's all there is to the main form really.
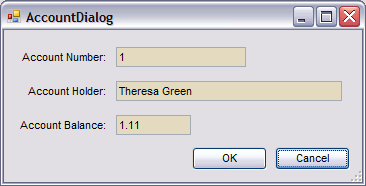
The Dialog Form
Here it is:
It is a fairly typical dialog, designed identically to those in Part 1 of the series.
The obvious difference being that it has an input control for each of the fields in Account, rather than the single TextBox used in the dialogs in Part 1.
Here is the code:
/// <summary>
/// Summary description for AccountDialog.
/// </summary>
public partial class AccountDialog : System.Windows.Forms.Form
{
	private Account resultAccount;

	protected AccountDialog()
	{

		//
		// Required for Windows Form Designer support
		//
		InitializeComponent();

		//
		// TODO: Add any constructor code after InitializeComponent call
		//
	}

	public AccountDialog(Account account)
		: this()
	{
		Initialize(account);
	}

	private void Initialize(Account account)
	{
		// Save a reference to the account in case of Cancel
		this.resultAccount = account;
		// Update display
		this.DisplayAccount(account);
	}

	private void DisplayAccount(Account account)
	{
		this.txtAccountNumber.Text = account.AccountNumber;
		this.txtAccountHolder.Text = account.AccountHolder;
		this.txtBalance.Text = account.Balance.ToString();
	}

	#region AccountDialog PROPERTIES ...........................
	/// <summary>
	/// Public getter for access from calling Form
	/// </summary>
	public Account ResultAccount
	{
		get
		{
			return resultAccount;
		}
	}
	#endregion

	private void btnOK_Click(object sender, EventArgs e)
	{
		// User is satisfied with edits, so change resultAccount
		// to reflect changes.
		decimal newBalance = 0.00M;
		decimal.TryParse(this.txtBalance.Text, out newBalance);
		this.resultAccount = new Account(this.txtAccountNumber.Text,
			this.txtAccountHolder.Text,
			newBalance);
	}
}
The default constructors access modifier has been changed to protected, so that the other constructor has to be used. This constructor requires an Account instance as a parameter. For this example, an initialized instance was used but if the need was to start a new Account it could be used like this...
dlg = new AccountDialog(Account.Empty);
... or even...
dlg = new AccountDialog(null);
... and amend the AccountDialog constructor like this:
public AccountDialog(Account account)
	: this()
{
	if (account == null)
	{
		Initialize(Account.Empty);
	}
	else
	{
		Initialize(account);
	}
}
Remember, this example is only to demonstrate the overall technique of getting user input, not how to design classes, coding style or anything else. Use your imagination, use Google, use MSDN, have fun.
The constructor passes off the work to an Initialize() method. This method stores a reference to the passed instance in resultAccount, so resultAccount and the passed Account instance are pointing at the same data. It then updates the display controls with the data from the passed instance. From here on, it is all down to the user. He/she can alter the data to suit his/her needs before either clicking OK or Cancel. As this article is just to demonstrate a technique, there is very little by way of data verification in the code. It would be very easy to cause an exception in this app by, for example, entering non numerical data in the Balance TextBox. Because the input controls are not linked to the instance of Account passed to the dialog, nor to resultAccount, the original data is still there. So if the user 'cancels' there is nothing to do. If they click OK or press the Return key, a new instance of Account is created using the values of the input controls and a reference to this is stored in resultAccount. When control passes back to the main form, the value of resultAccount is accessed through the public ResultAccount property, thus implementing 'the secret' (see Part 1) and the new values are displayed. If the user has not changed any data, the value passed back is the same as that passed in, regardless of whether she/he pressed OK or Cancel. If the user altered the data and pressed Cancel, the original data is passed back but if she/he presses OK, the new data is returned.
Things to Research Yourself
- Deep Copy
- Shallow Copy
Object.Clone()method
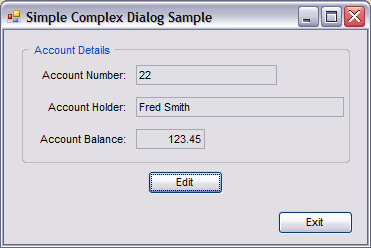
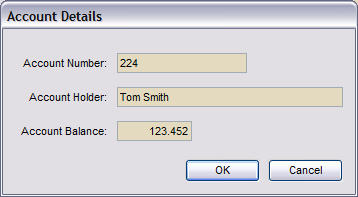
SimpleComplexDialog Example
The two forms in this example are visually identical to those from the previous one. The code however differs because this example uses a different methodology to access the data, namely Data Binding.
The Main Form
The code:
public partial class SimpleComplexDialogMainForm : Form
{
	// Account instance for use in example.
	private Account exampleAccount = null;

	public SimpleComplexDialogMainForm()
	{
		InitializeComponent();

		// set up the example Account instance
		exampleAccount = new Account("22", "Fred Smith", 123.452M);

		// Update the display
		this.RefreshExampleAccount();
	}

	private void RefreshExampleAccount()
	{
		if (this.exampleAccount != null)
		{
			// Simply copy exampleAccount data into the TextBoxes.
			this.txtAccountNumber.Text =
				this.exampleAccount.AccountNumber;
			this.txtAccountHolder.Text =
				this.exampleAccount.AccountHolder;
			this.txtAccountBalance.Text =
				this.exampleAccount.Balance.ToString("F2");
		}
	}

	private void btnEdit_Click(object sender, EventArgs e)
	{
			// If exampleAccount is null, for some reason,
			// make it an empty account.
			if (this.exampleAccount == null)
			{
				this.exampleAccount = Account.Empty;
			}

			// Create a clone of the account, in case of cancel.
			Account oldAccount = exampleAccount.Clone();

			// Create an instance of the dialog with the Account
			// created in the constructor.
			using (AccountDialog dlg = new AccountDialog(exampleAccount))
			{
				// No need to check for OK, just Cancel because the
                                     // dialog updates exampleAccount automatically.
				// Display it modally.
				if (dlg.ShowDialog() != DialogResult.OK)
				{
					this.exampleAccount = oldAccount;
				}
			}
			// Refresh account details, on return
			// from dialog.
			this.RefreshExampleAccount();
	}

	private void btnExit_Click(object sender, EventArgs e)
	{
		this.Close();
	}
}
The main difference from the previous example appears in the event handler for the Edit button. Firstly a check is made to ensure that exampleAccount is not null, see the Dialog Form description for the reason, a Clone() of the example data is made and stored in an Account instance, oldAccount. Secondly an instance of AccountDialog is created using exampleAccount as the parameter. Thirdly the new dialog instance is displayed modally, at the same time checking for a non-OK result. There is no need to do anything if the DialogResult is OK because the Account used in the dialog is exampleAccount, therefore any changes made while in the dialog magically appear in the main form. On the other hand, if the user cancels, precisely because any changes are automatically registered in the main form, we have to replace exampleAccount with the copy of the original data that was taken at the start of the method...
this.exampleAccount = oldAccount;
... and refresh the display with:
this.RefreshExampleAccount();
That's it for the main form.
The Dialog Form
The code:
public partial class AccountDialog : Form
{
	// Declare a BindingSource instance.
	private System.Windows.Forms.BindingSource accountBindingSource = null;

	/// <summary>
	/// Default Constructor
	/// access modifier changed to protected.
	/// </summary>
	protected AccountDialog()
	{
		InitializeComponent();

		this.accountBindingSource =
			new System.Windows.Forms.BindingSource();
	}

	/// <summary>
	/// Only accessible constructor.
	/// </summary>
	/// <param name="account"></param>
	public AccountDialog(Account account)
		: this()
	{
		if (account == null)
		{
			throw new ArgumentNullException("account");
		}
		Initialize(account);
	}

	private void Initialize(Account account)
	{
		// Set the bindingSource up
		this.accountBindingSource.DataSource = account;
	}

	private void AccountDialog_Load(object sender, EventArgs e)
	{
		this.txtBalance.DataBindings.Add(new System.Windows.Forms.Binding
			("Text", this.accountBindingSource, "Balance", true));
		this.txtAccountHolder.DataBindings.Add
		    (new System.Windows.Forms.Binding
		    ("Text", this.accountBindingSource, "AccountHolder", true));
		this.txtAccountNumber.DataBindings.Add
		    (new System.Windows.Forms.Binding
		    ("Text", this.accountBindingSource, "AccountNumber", true));
		this.txtAccountNumber.Select();
	}
}
One of the first things to notice about this code is that it is a little shorter than the previous example. This is mainly because using Data Binding dispenses with the need for a public accessor for the Account.
The first thing to notice in the code is the declaration of a BindingSource instance, accountBindingSource.
The default constructor is amended to have a protected access modifier and, in addition to the standard InitializeComponent(), accountBindingSource is instantiated.
A new public constructor with an Account parameter is the only accessible constructor for the dialog. It is important to note that you cannot pass a null as the parameter, because accountBindingSource will give an ArgumentException at run-time, so I have put a conditional test to throw an exception if null is found. It is far better that you are in control of raising Exceptions, in circumstances where you are aware of that possibility, rather than leaving it to the system.
As before, the constructor passes the account to an Initialize(Account account) method. In this example, this method simply sets the DataSource property of accountBindingSource to be the passed account.
Then, when the dialog gets loaded, the three input controls are hooked up to accountBindingSource in the AccountDialog_Load() event handler. What this means is that any changes the user makes in the dialog are automatically registered in the Account passed to the dialog. As already stated, this Account instance is the same instance as the one in the main form (exampleAccount), so exampleAccount also has the changes. All done automatically courtesy of Data Binding.
Things to Research Yourself
- Data Binding
BindingSourceComponent- Exceptions
ComplexDialog Example
This example is essentially the same as the previous one, in that it uses Data Binding. Where it differs is that it uses the methodology from the third example from Part 1, delegating responsibility for displaying the dialog to the dialog itself.
The Main Form
Here's the code:
public partial class ComplexDialogMainForm : Form
{
	private Account exampleAccount = null;

	public ComplexDialogMainForm()
	{
		InitializeComponent();

		this.exampleAccount = new Account("22", "Fred Smith", 123.425M);

		this.DisplayAccount();
	}

	private void DisplayAccount()
	{
		this.txtAccountNumber.Text = this.exampleAccount.AccountNumber;
		this.txtAccountHolder.Text = this.exampleAccount.AccountHolder;
		this.txtAccountBalance.Text =
			this.exampleAccount.Balance.ToString();
	}

	private void btnEdit_Click(object sender, EventArgs e)
	{
		Account accountStore = this.exampleAccount.Clone();
		if (AccountDialog.Show(this.exampleAccount) != DialogResult.OK)
		{
			this.exampleAccount = accountStore;
		}

		this.DisplayAccount();
	}

	private void btnExit_Click(object sender, EventArgs e)
	{
		this.Close();
	}
}
It's even shorter than last time. The only thing of note is the code to display the dialog:
if (AccountDialog.Show(this.exampleAccount) != DialogResult.OK)
{
	this.exampleAccount = accountStore;
}
As in Example 3 from Part 1, this uses the static Show() method from the AccountDialog.
As in the previous example from this article, it checks for not OK, and if so replaces exampleAccount with accountStore.
The Dialog Form
Here is the code:
public partial class AccountDialog : Form
{
	private System.Windows.Forms.BindingSource accountBindingSource;

	protected AccountDialog()
	{
		InitializeComponent();

		this.accountBindingSource =
			new System.Windows.Forms.BindingSource();
	}

	protected AccountDialog(Account account)
		: this()
	{
		if (account == null)
		{
			this.Initialize(Account.Empty);
		}
		else
		{
			this.Initialize(account);
		}
	}

	public static DialogResult Show(Account account)
	{
			DialogResult result = DialogResult.None;

			using (AccountDialog dlg = new AccountDialog(account))
			{
				result = dlg.ShowDialog();
			}

			return result;
	}

	private void Initialize(Account account)
	{
		this.accountBindingSource.DataSource = account;
	}

	private void AccountDialog_Load(object sender, EventArgs e)
	{
		this.txtBalance.DataBindings.Add(new System.Windows.Forms.Binding
			("Text", this.accountBindingSource, "Balance", true));
		this.txtAccountHolder.DataBindings.Add
		    (new System.Windows.Forms.Binding
		    ("Text", this.accountBindingSource, "AccountHolder", true));
		this.txtAccountNumber.DataBindings.Add
		    (new System.Windows.Forms.Binding
		    ("Text", this.accountBindingSource, "AccountNumber", true));
	}
}
This is also shorter than the previous example.
So one benefit to Data Binding is that it can cut down on the amount of typing you have to do.
Doing Data Binding programmatically, as in these examples, is perhaps overkill for a class as simple as Account, particularly for a single instance of that class. However, if the class were much more complex, i.e. it had many more public members, Data Binding as a technique would be useful but the amount of typing required in setting the data bindings, as in the Load event handler, for the input controls would be horrendous and error-prone. Fortunately there is a way to do Data Binding in the designer and the next example will attempt to demonstrate this. It still uses Account because its simplicity is useful for demonstrations, but this time it will maintain a collection of Accounts.
Things to Research Yourself
Staticmethods
ComplexCollectionDialog Example
This example uses Data Binding in a very similar way to the previous one, the only difference being that the Account to be edited is selected from a collection displayed in a DataGridView control. Additionally, I have included a dialog to allow scrolling through the collection one item at a time. In this second dialog, any changes made by the user are permanent, in that I have not implemented any recovery/rollback. The dialog is simply there to show how to do Data Binding to Objects in the designer.
The Main Form
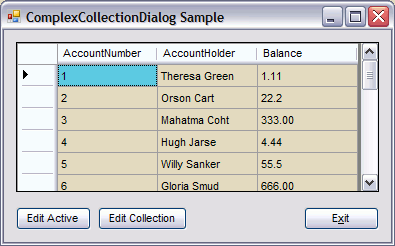
The code:
public partial class ComplexCollectionDialogMainForm : Form
{
	private Accounts exampleAccounts = null;
	private BindingSource accountBindingSource = null;
	private int activeRow = -1;

	public ComplexCollectionDialogMainForm()
	{
		InitializeComponent();

		this.accountBindingSource = new BindingSource();
		this.exampleAccounts = new Accounts();

		this.MakeList();

		if (this.exampleAccounts.Count > 0)
		{
			this.activeRow = 0;
		}
	}

	private void MakeList()
	{
		this.exampleAccounts.Clear();

		this.exampleAccounts.Add(new Account("1", "Theresa Green", 1.11M));
		this.exampleAccounts.Add(new Account("2", "Orson Cart", 22.2M));
		this.exampleAccounts.Add(new Account
				("3", "Mahatma Coht", 333.00M));
		this.exampleAccounts.Add(new Account("4", "Hugh Jarse", 4.44M));
		this.exampleAccounts.Add(new Account("5", "Willy Sanker", 55.5M));
		this.exampleAccounts.Add(new Account("6", "Gloria Smud", 666.00M));
		this.exampleAccounts.Add(new Account("7", "Anita Bush", 7.77M));
		this.exampleAccounts.Add(new Account("8", "Drew Peacock", 88.8M));
		this.exampleAccounts.Add(new Account("9", "Sean Neatly", 999.00M));
		this.exampleAccounts.Add(new Account("10", "Alek Kazam", 10.10M));
		this.exampleAccounts.Add(new Account
				("11", "Justin Case", 111.10M));
		this.exampleAccounts.Add(new Account
				("12", "Helen Highwater", 1212.00M));
		this.exampleAccounts.Add(new Account("13", "Clara Smud", 13.13M));
		this.exampleAccounts.Add(new Account
				("14", "Marion Haste", 141.4M));
		this.exampleAccounts.Add(new Account
				("15", "Ophelia Smallcock", 1515.00M));
		this.exampleAccounts.Add(new Account
				("16", "Gloria Stitz", 16.16M));
		this.exampleAccounts.Add(new Account
				("17", "Mustapha P Baddely", 171.7M));
		this.exampleAccounts.Add(new Account
				("18", "Ahmed Totheteeth", 1818.00M));
		this.exampleAccounts.Add(new Account("19", "Lord Elpus", 19.19M));
		this.exampleAccounts.Add(new Account
				("20", "Jiminy Trembler", 202.00M));
		this.exampleAccounts.Add(new Account
				("21", "Brendan ButtaPudding", 2121.00M));
		this.exampleAccounts.Add(new Account
				("22", "Martha Tidfyll", 22.22M));
	}

	#region ComplexCollectionDialogMainForm PROPERTIES ...........................
	private int ActiveRow
	{
		set
		{
			if (this.activeRow != value)
			{
				this.activeRow = value;
				this.btnEditActive.Enabled = value >= 0;
			}
		}
	}

	#endregion ComplexCollectionDialogMainForm PROPERTIES

	private void btnExit_Click(object sender, EventArgs e)
	{
		this.Close();
	}

	private void dgvAccount_CellEnter(object sender, DataGridViewCellEventArgs e)
	{
		if (e.RowIndex >= 0)
		{
			this.ActiveRow = e.RowIndex;
		}
		else
		{
			this.ActiveRow = -1;
		}
	}

	private void ComplexCollectionDialogMainForm_Load(object sender, EventArgs e)
	{
		this.accountBindingSource.DataSource = this.exampleAccounts;
		this.dgvAccount.DataSource = this.accountBindingSource;
	}

	private void btnEditActive_Click(object sender, EventArgs e)
	{
		if (this.exampleAccounts.Count > 0)
		{
			Account oldAccount = this.exampleAccounts
						[this.activeRow].Clone();
			if (AccountDialog.Show(((Account)((BindingSource)
				this.dgvAccount.DataSource)[this.activeRow]))
							!= DialogResult.OK)
			{
				((BindingSource)this.dgvAccount.DataSource)
						[this.activeRow] = oldAccount;
				((BindingSource)this.dgvAccount.DataSource).
							ResetCurrentItem();
			}
		}
	}

	private void btnEditCollection_Click(object sender, EventArgs e)
	{
		if (this.exampleAccounts.Count > 0)
		{
			AccountCollectionDialog acd = null;
			using (acd = new AccountCollectionDialog
						(this.exampleAccounts))
			{
				acd.ShowDialog();
			}
		}
	}
}
This example does Data Binding in a slightly different way. It uses a BindingSource instance as the datasource for the DataGridView. Not because the DataGridView requires it, but because a BindingSource has many more methods and properties which are useful in situations like this. I would recommend that you look for more examples of using a BindingSource and study them. Search the MSDN Help Documentation for more detail.
The BindingSource instance (accountBindingSource) is declared at the start of the class, together with an instance of Accounts (exampleAccounts), the collection of Account instances, and an integer member (activeRow) to track the currently selected row in the DataGridView. All of these are initialized in the constructor.
Here is the Accounts class:
public class Accounts : System.ComponentModel.BindingList<accountlibrary.account>
{
}
That is not an error, that's all there is.
Of course, the declaration of exampleAccounts...
private Accounts exampleAccounts = null;
... could have been written...
private BindingList<account> exampleAccounts = null;
... and the instantiation from the constructor...
this.exampleAccounts = new Accounts();
... could have been:
this.exampleAccounts = new BindingList<account>();
In this example that would work fine, however, in many projects where I did do it the second way, I later found that I needed to make some 'refinement' to the way the collection worked, which meant creating a descendent of BindingList<account>, anyway, in order to implement the refinement. So, when I remember, or, when I design, rather than code-on-the-hoof, I do it the way I have shown in this example.
Also in the constructor is a call to a method which puts some test data into the exampleAccounts collection. Of course in the real world, this data could come from anywhere.
There is also a private property to set the activeRow member so that the Edit Active button can be enabled/disabled depending on if an account is selected.
The data binding part is done in the forms Load event handler. I do it here because, at least in theory, I can be sure that the required elements have been initialized. Firstly the DataSource property of the accountBindingSource is set to the exampleAccounts collection, then the DataSource property of the DataGridView is set to accountBindingSource.
The CellEnter event of the DataGridView is handled to set the activeRow member via the private property using the RowIndex conveniently passed in the DataGridViewCellEventArgs parameter.
This only leaves the two Edit buttons.
The Edit Active button Click event handler first checks for the existence of some accounts, not really necessary as the button should not be enabled if there were none, then, as in previous examples, it takes a copy of the existing data. Secondly it delegates the display of the dialog to the dialog itself, checking for a non-OK result. If a non-OK result is returned, the original data is copied back into the DataSource of the DataGridView and a very useful method of the BindingSource (ResetCurrentItem()) is called. This method causes all its bound controls to synchronize their data with the data from its DataSource.
The Edit Collection button event handler simply displays an instance of the AccountCollectionDialog. That is all it does, no checking the result, no restoring on cancel. Its purpose in this example is simply to show that design-time Data Binding can be done with Objects as well as Data Stores. Creating the dialog will be covered in the relevant section.
The Edit Active Dialog Form
Here it is:
The code:
public partial class AccountDialog : Form
{
	private System.Windows.Forms.BindingSource accountBindingSource;

	protected AccountDialog()
	{
		InitializeComponent();

		this.accountBindingSource =
			new System.Windows.Forms.BindingSource();
	}

	protected AccountDialog(Account account)
		: this()
	{
		if (account == null)
		{
			this.Initialize(Account.Empty);
		}
		else
		{
			this.Initialize(account);
		}
	}

	public static DialogResult Show(Account account)
	{
			DialogResult result = DialogResult.None;

			// Using the 'using' construct takes care of
			// disposing of the dialog automatically.
			using (AccountDialog dlg = new AccountDialog(account))
			{
				result = dlg.ShowDialog();
			}

			return result;
	}

	private void Initialize(Account account)
	{
		this.accountBindingSource.DataSource = account;
	}

	private void AccountDialog_Load(object sender, EventArgs e)
	{
		this.txtBalance.DataBindings.Add(new System.Windows.Forms.Binding
			("Text", this.accountBindingSource, "Balance", true));
		this.txtAccountHolder.DataBindings.Add
		    (new System.Windows.Forms.Binding
		    ("Text", this.accountBindingSource, "AccountHolder", true));
		this.txtAccountNumber.DataBindings.Add
		    (new System.Windows.Forms.Binding
		    ("Text", this.accountBindingSource, "AccountNumber", true));
	}
}
This should be familiar from the previous example and is displayed in response to a click on the Edit Active button on the main form.
The Edit Collection Dialog Form
Here it is:
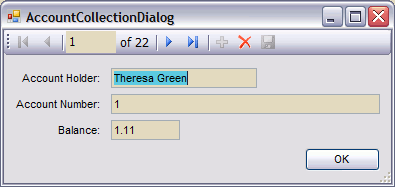
The code:
public partial class AccountCollectionDialog : Form
{
	protected AccountCollectionDialog()
	{
		InitializeComponent();
	}

	public AccountCollectionDialog(Accounts accounts)
		: this()
	{
		this.accountBindingSource.DataSource = accounts;
	}
}
The only thing to note is that the default constructor has had its access modifier changed to protected, forcing the use of the second constructor, which requires an Accounts collection as a parameter. This parameter is used to set the DataSource property of the accountBindingSource member.
Here are step-by-step details to create this form, if you are using Visual Studio.
- Create a new empty form, to act as the dialog, and ensure that your project builds, particularly the class for the object that you are going to bind to.
AccountLibraryin this case. - Open the Data Sources window found under Data | Show Data Sources.
- In the Data Sources Window, click on the Add New Data Source link.
- In the dialog which displays, select Object then the Next button.
- Expand the tree on the left of the wizard until you can select the object you want (
Account). In my project that is:AccountLibrary–AccountLibrary–Account. Then click Next. - Then click Finish.
- Ensure that the form you are going to use is visible in the designer and is selected.
- In the Data Sources window, expand the Account node. Note that there are three sub-nodes, one for each of the
publicproperties ofAccount. Each node has an icon representing the type of control that will be used for that node if it is dragged onto the form. Also as long as you have the form selected in the designer, theAccountnode has an icon for aDataGridViewand if you drag theAccountnode on to the form now, you will get aDataGridViewwith a column for each of thepublicproperties. However, to get the design I have used, click on the drop-down and select Details, then drag theAccountnode onto your form. Arrange the controls to suit, add buttons etc. and there you go. Incidentally the control used for the sub-nodes can also be changed by selecting the node and clicking the drop-down then selecting from the list. Selecting customize allows you to use a non-standard control, such as one of your own design, or one you have bought.
I would also recommend Marc Cliftons' article here on CodeProject which covers DataBinding to properties in the designer in some depth.
Things to Research Yourself
- Collections
- Generic collections
BindingListDataGridView
Using the Code
The source code accompanying this article simply updates some text boxes with the users input, not the most challenging or difficult operation. You can do whatever you want with the data. Update a database, e-mail it to someone or anything else. It is your data, use your imagination!
The code from the sample should work in all versions of C# and .NET. (For pre VS2008, you will need to cut and paste the code.) A lot of it comes directly from projects of mine written using VS2003 and .NET 1.1, although the solution and project files included were produced with VS2008 and .NET 3.5.
Points of Interest
There is nothing interesting here. Move along now!
History
- 11th December, 2008: Initial version This is the second part of a series of two articles.