
Render Text On A Bitmap (and other stuff)
Put text on a bitmap, make your winform app go full-screen, and say hello to some simple LINQ code.
Introduction
A few weeks ago, I decided I wanted to create a screen saver that fades quotes on/off the screen. I've subsequenty lost interest in the project, but I learned some handy things in the process of becoming bored. This certainly isn't rocket science, but I've seen a few people ask about it, so I thought I'd share my findings.
Putting Text on a Bitmap
This is so ridiculously simple, it almost hurts to describe. Essentially, you only need five lines of code (with three optional lines shown for completeness and making the text "pretty".
	Bitmap bitmap = new Bitmap(800, 600);
	Graphics g = Graphics.FromImage(bitmap);

	g.SmoothingMode = System.Drawing.Drawing2D.SmoothingMode.AntiAlias;
	g.TextRenderingHint = System.Drawing.Text.TextRenderingHint.ClearTypeGridFit;
	g.Clear(Color.Transparent);

	TextRenderer.DrawText(g, "This is my text", myFont, new Point(0, 0), Color.Red);

	// assign the bitmap to a globally defined one
	m_bitmap = bitmap;

	g.Dispose();
So there you have it. Simple eh? Yeah - I think so, too. However, if I stopped here, this article really wouldn't be very interesting, now would it? For that reason, I'm going to talk a little about the sample application provided with this article.
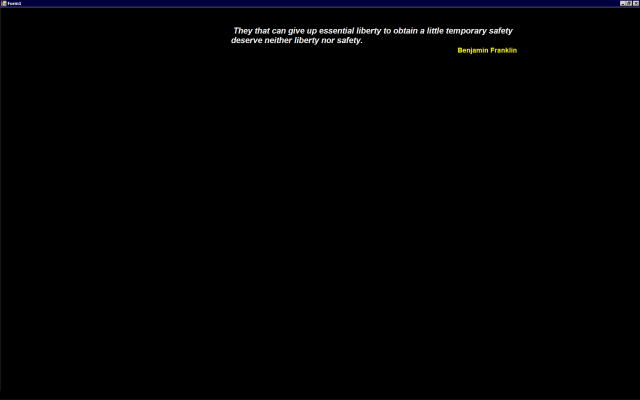
The sample app always runs maximized, and displays randomly selected quotes at random positions on the screen. This means we need to be cognizant of the width and height of the quote bitmap so that we can display it without any part of it being cut off by an edge of the screen. Some of the quotes are quite long, and some are quite short, so that means we have to dynamically calculate the size of the rectangle for each quote before it's displayed. On top of all that, the app suppports a width constraint as specified by the programmer (or user if a settings form is provided). For this app, it's hard-coded for the sake of example.
After a quote is selected, the app calls a method called GetConstrainedTextHeight. This function accepts a font, the original text string, and a ref parameter that will contain the modified version of the original text string. The method returns a rectangle object that is large enough to contain the rendered text. Just follow the coments to see what we're doing.
private Rectangle GetConstrainedTextHeight(Font font, string textToParse, ref string resultText)
{
	// to ease typing, we set a local variable to the value specified in the
	// settings object
	int quoteAreaWidth = m_saverSettings.QuoteAreaWidth;

	// create a new bitmap - I don't knowe if the size matters, but just to
	// be safe, I set it to be larger than the expected height, and the max
	// area width
	Bitmap bitmap = new Bitmap(100, quoteAreaWidth);

	// create a graphics object from the image. This gives us access to the
	// GDI drawing functions needed to do what we're here to do.
	Graphics g = Graphics.FromImage(bitmap);

	// Get the size of the area needed to display the original text as a
	// single line.
	SizeF sz = g.MeasureString(textToParse, font);

	// Make sure we actually have work to do. If the quote width is smaller
	// than the desired max width, we can exit right now. This should almost
	// always happen for author text.
	if (sz.Width <= quoteAreaWidth)
	{
		resultText = textToParse;
		// don't forget to clean up our resources
		g.Dispose();
		bitmap.Dispose();
		return new Rectangle(new Point(0, 0), new Size((int)sz.Width+5, (int)sz.Height));
	}

	// make sure our resultText is empty
	resultText = "";

	// split the orginal text into separate words
	string[] words = textToParse.Trim().Split(' ');
	string nextLine = "";
	string word = "";

	for (int i = 0; i < words.Length; i++)
	{
		word = words[i];

		// get the size of the current line
		SizeF lineSize = g.MeasureString(nextLine, font);

		// get the size ofthe new word
		SizeF wordSize = g.MeasureString(" " + word, font);

		// if the line including the new word is smaller than our constrained size
		if (lineSize.Width + wordSize.Width < quoteAreaWidth)
		{
			// add the word to the line
			nextLine = string.Format("{0} {1}", nextLine, word);

			// If it's the last word in the original text, add the line
			// to the resultText
			if (i == words.Length - 1)
			{
				resultText += nextLine;
			}
		}
		else
		{
			// Add the current line to the resultText *without* the new word,
			// but with a linefeed
			resultText += (nextLine + "\n");

			// Start a new current line
			nextLine = word;

			// If it's the last word in the original text, add the line
			// to the resultText
			if (i == words.Length - 1)
			{
				resultText += nextLine;
			}
		}
	}

	// It's time to get a new measurement for the string. The Graphics.MeasureString
	// method takes into account the linefeed characters we inserted.
	sz = g.MeasureString(resultText, font);

	// Cleanup our resources
	g.Dispose();
	bitmap.Dispose();

	// Return the rectangle to the calling method
	return new Rectangle(new Point(0, 0), new Size((int)sz.Width, (int)sz.Height));
}
We call the GetConstrainedTextHeight() method twice - once for the quote text itself, and once for the author text. After all, there's really no point in leaving anything to chance. Besides, we need the author's rectangle to complete the positioning calculation. After getting the two rectangles, we can take care of positioning the bitmap on the screen. Remember, in the sample app it's always running in a maximized window state. For this reason, we simply use the screen resolution as the constraining rectangle.
	// rectangle for quote
	string newQuoteText = "";
	Rectangle quoteRect = GetConstrainedTextHeight(m_saverSettings.QuoteFont,
							quoteItem.Text,
							ref newQuoteText);

	//rectangle for author text
	string newAuthorText = "";
	Rectangle authorRect = GetConstrainedTextHeight(m_saverSettings.AuthorFont,
							quoteItem.Author,
							ref newAuthorText);

	// set the author rectangle origin
	authorRect.X = quoteRect.Right - authorRect.Width;
	authorRect.Y = quoteRect.Bottom;
Finally, some quality properties are set, and the text is actually rendered to the bitmap.
	// Create a new bitmap that contains both the quote and the author text
	Bitmap bitmap	= new Bitmap(quoteRect.Width, quoteRect.Height + authorRect.Height + 2);
	Graphics g	= Graphics.FromImage(bitmap);

	// Set the text rendering characteristics - we want it to be attractive
	g.SmoothingMode		= System.Drawing.Drawing2D.SmoothingMode.AntiAlias;
	g.TextRenderingHint	= System.Drawing.Text.TextRenderingHint.ClearTypeGridFit;
	g.Clear(Color.Transparent);

	// Draw the text
	TextRenderer.DrawText(g,
			      newQuoteText,
			      m_saverSettings.QuoteFont,
			      new Point(quoteRect.X, quoteRect.Y),
			      m_saverSettings.QuoteColor);

	TextRenderer.DrawText(g,
			      newAuthorText,
			      m_saverSettings.AuthorFont,
			      new Point(authorRect.X, authorRect.Y+2),
			      m_saverSettings.AuthorColor);

	// Set our global bitmap
	m_bitmap = bitmap;

	// Cleanup the graphics object
	g.Dispose();
Other Points of Interest
This article features a simple windows form application that I used to test the core functionality. Besides demonstrating the dynamic creation and display of a bitmap, this article illustrates a method for making your Windows form application go full screen, the use of a BackgroundWorker object that's used to do the real work, as well as some rudimentary use of LINQ when loading and saving XML files.
Full-screen Mode
At work, I needed to make an application consume the entire screen, including the task bar. This entailed changing the border style to "None", make the formthe top-most window, and finally, using up the entire screen. The only way I know of to *truly* go full-screen is to use the Interop features of .Net, so I found this class on the internet that does exactly what we need:
public class WinAPI
{
	[DllImport("user32.dll", EntryPoint = "GetSystemMetrics")]
	public static extern int GetSystemMetrics(int which);

	[DllImport("user32.dll")]
	public static extern void
		SetWindowPos(IntPtr hwnd, IntPtr hwndInsertAfter,
						 int X, int Y, int width, int height, uint flags);

	private const int SM_CXSCREEN = 0;
	private const int SM_CYSCREEN = 1;
	private static IntPtr HWND_TOP = IntPtr.Zero;
	private const int SWP_SHOWWINDOW = 64; // 0×0040

	public static int ScreenX
	{
		get { return GetSystemMetrics(SM_CXSCREEN);}
	}

	public static int ScreenY
	{
		get { return GetSystemMetrics(SM_CYSCREEN);}
	}

	public static void SetWinFullScreen(IntPtr hwnd)
	{
		SetWindowPos(hwnd, HWND_TOP, 0, 0, ScreenX, ScreenY, SWP_SHOWWINDOW);
	}
}
To make all this happen, we write the following code:
	// go full screen
	WinAPI.SetWinFullScreen(this.Handle);
	// make the window top-most (prevents the user from getting to the task bar
	this.TopMost = true;
	// delete the window border
	this.FormBorderStyle = FormBorderStyle.None;
Of course, this doesn't keep the user from alt-tabbing out of the app, but there's a highly-regarded article here on CodeProject that discusses hooking the keyboard using C#, and I sugggest that you start there if you want to address this issue.
The Basic Framework
We start out with a standard Windows Form application. Since we're only dealing with a single form with no controls, there's no point in setting the form properties in the using IDE. So, it's off to the form's constructor, on a manual-typing adventure (c'mon - I know you'd rather do it this way).
First up, we want to set some styles regarding painting within the form. For some reason, I could never get this to work completely when setting these properties in the IDE, so I moved them to the object constructor:
	SetStyle(ControlStyles.AllPaintingInWmPaint |
		 ControlStyles.UserPaint |
		 ControlStyles.DoubleBuffer, true);
We also need to override the Paint method, so we can display the bitmap.
private void Form1_Paint(object sender, PaintEventArgs e)
{
	// if we have a bitmap
	if (m_bitmap != null)
	{
		try
		{
			// present it
			e.Graphics.DrawImage(m_bitmap, m_rect, 0, 0, m_rect.Width, m_rect.Height, GraphicsUnit.Pixel, m_attributes);
		}
		catch (Exception ex)
		{
			// eat the exception
			if (ex != null) {}
		}
	}
}
Finally, we use a BackgroundWorker object to control the fading of the bitmaps.
private void fader_DoWork(object sender, DoWorkEventArgs e)
{
	BackgroundWorker worker = sender as BackgroundWorker;

	if (m_bitmap != null)
	{
		m_bitmap.Dispose();
	}

	m_bitmapType = BitmapType.Quote;

	switch (m_saverSettings.QuoteOrder)
	{
		case OrderSelector.Random:
			{
				m_nextQuoteIndex = RandomQuoteIndex();
			}
			break;

		default:
			{
				m_nextQuoteIndex = NextQuoteIndex();
			}
			break;
	}
	if (m_nextQuoteIndex < 0 || m_nextQuoteIndex > m_quotes.Count)
	{
		return;
	}
	PrepareQuoteImage(m_quotes[m_nextQuoteIndex]);

	// randomize the rectangle's origin (only the proimary monitor is considered
	int x = m_random.Next(0, Math.Max(0, WinAPI.ScreenX - m_bitmap.Width));
	int y = m_random.Next(0, Math.Max(0, WinAPI.ScreenY - m_bitmap.Height));
	m_rect = new Rectangle(x, y, m_bitmap.Width, m_bitmap.Height);

	// how much the alph is changed in each step
	float delta = 0.05f;
	// current alpha value
	m_alpha = 0.0f;

	while (m_alpha != 1.0f && !worker.CancellationPending)
	{
		// set the current alpha value
		m_colorMatrix.Matrix33 = m_alpha;
		try
		{
			m_attributes.SetColorMatrix(m_colorMatrix, ColorMatrixFlag.Default, ColorAdjustType.Bitmap);
		}
		catch (Exception ex)
		{
			if (ex != null) {}
		}
		// bump the alpha value up
		m_alpha += delta;
		// make sure the alpha doesn't exceed 1.0
		m_alpha = Math.Min(1.0f, m_alpha);
		// make it paint
		this.Invalidate(m_rect);
		// sleep a little so the fade doesn't hppen too quickly - this is
		// even more important when you're fading large images
		Thread.Sleep(35);
	}

	// sleep for the specified amount of time before fading the item off the screen
	int sleeper = 0;
	int sleepTime  = 100;
	while (sleeper <= m_saverSettings.OnDuration && !worker.CancellationPending)
	{
		Thread.Sleep(sleepTime);
		sleeper += sleepTime;
	}

	// fade the item off the screen (essentially counts the alpha down
	// from 1.0 to 0.0
	m_alpha = 1.0f;
	while (m_alpha != 0.0f && !worker.CancellationPending)
	{
		m_alpha -= delta;
		m_alpha = Math.Max(0.0f, m_alpha);
		m_colorMatrix.Matrix33 = m_alpha;
		m_attributes.SetColorMatrix(m_colorMatrix, ColorMatrixFlag.Default, ColorAdjustType.Bitmap);
		this.Invalidate(m_rect);
		Thread.Sleep(35);
	}
}
Loading The Data - LINQ to the Rescue!
I like patriotic quotes. Despite most of them being 200 years old, and some being of questionable origin, I like to read them. It makes me feel good to know I'm a part of what was an uncommon (and even unpopular) idea. I can understand that this kind of stuff isn't necessarily everyone's cup of tea, but since this is my article, I claim the right of creative license.
As far as quotes are concerned, Our needs are quite simple - we have the quote text itself, and the author of that quote. While in the process of writing this article, I had cause to start using LINQ at work, and decided it might be fun to add LINQ to this sample application. Initially, I was using a simple comma-delimited text file to store the quotes, and everything was right with the world. However, to really experience LINQ, I decided I would use an XML file instead because that's currently how most people load data that's not in a database. Here's the QuoteItem class:
public class QuoteItem
{
	private string m_text;
	private string m_author;

	public string Text		{ get { return m_text; } }
	public string Author	{ get { return m_author; } }

	public XElement XmlElement
	{
		get
		{
			return new XElement("QUOTE",
					new XElement("TEXT", Text),
					new XElement("AUTHOR", Author));
		}
	}

	public QuoteItem(string text, string author)
	{
		m_text		= text;
		m_author	= author;
	}

	public QuoteItem (XElement element)
	{
		m_text = element.Element("TEXT").Value;
		m_author = element.Element("AUTHOR").Value;
	}
}
Notice that there's a property that returns the data as an XElement. This helps to keep the code outside this class a little cleaner. Toward that same end, there's a constructor overload that accepts an XElement object.
Having started with a .txt file, I first wanted to automate it's conversion into XML, but first, I had to load the text file. Since the code was already written to do that, I decided to simply modify it enough to cause a conversion to take place.
private void LoadQuotes()
{
	m_quotes.Clear();
	if (File.Exists(m_quotesFileName))
	{
		LoadQuotesFromXML();
	}
	if (m_quotes.Count == 0)
	{

		// ... load the text file here

		// if we have quotes from the quotes.txt file
		if (m_quotes.Count > 0)
		{
			// save them to an xml file
			SaveQuotesToXML();
			// clear the list
			m_quotes.Clear();
			// reload from the xml file
			LoadQuotesFromXML();
		}
	}
First, I check for the exstance of the XML file, and load the data from it if it's there. If after loading the XML file, there are no quotes loaded, it tries to read the .txt version of the file. Finally, if we loaded some quotes, we save them to the XML file, clear the list, and repopulate it from the XML file. This allows us to verify that the XML file was indeed created.
Loading XML data is a piece of cake with LINQ. Our LoadQuotes() function required more than two-dozen lines of code to load the data from a comma-delimited text file, and this doesn't even count the code in the string parsing class. With LINQ, the line-count is reduced to just six lines of code:
private void LoadQuotesFromXML()
{
	XDocument quotes = XDocument.Load(m_quotesFileName);
	var dataSet = from data in quotes.Descendants("QUOTE") select data;
	foreach (var quote in dataSet)
	{
		m_quotes.Add(new QuoteItem(quote));
	}
}
Saving the data as XML is fairly straightforward using LINQ:
private void SaveQuotesToXML()
{
	// create our document
	XDocument quotes = new XDocument(new XDeclaration("1.0", "utf-8", "yes"), new XComment("Quotes file"));
	// create the root element - notice that we populate the child elements
	// at the same time
	var root = new XElement("QUOTES", from q in m_quotes select q.XmlElement);
	// add the root element
	quotes.Add(root);
	// save the file
	quotes.Save(m_quotesFileName);
}
I seem to remember it being a complete pain-in-the-ass to create XML and save it to a file before LINQ came along. Now, it's just four lines of code Remember when I said hiding details in black-box classes kept your code clean? This is a perfect example of what I mean.
Closing
The sample app serves no useful purpose beyond letting me test the code I was going to use in the screensaver I intended to write. On the way, I use a couple of techniques and classes that most of the rest of you can make use of. If you want to step through the code that creates the XML file, just delete the XML file from the program folder.
History
09/29/2008: Corrected some spelling errors, and modified some of the descriptive text.
09/28/2008: Posted original article.