
Install Gulp and Bower using Visual Studio 2015 in ASP.NET 5 project.
5.00/5 (2 votes)
How to use client side JavaScript toolkits such as Gulp and Bower with ASP.NET 5 project using Visual Studio 2015
Introduction
With release of Visual Studio 2015 and ASP.NET 5 developer has the ability to include some JavaScript toolkits like Gulp and Bower into their project which makes the development workflow so easy.
Contents of this article
- What is Gulp.
- What is Bower.
- Demo Slider project.
What is Gulp
In short Gulp is a task runner toolkit which is used to perform some recurring task like file clear, file concatenation, file minify, file uglify etc. It is built on NodeJS but is used by some other platforms like Java, .Net, PHP etc.
What is Bower
Bower is a package management tool. It manages the packages and it's dependencies used in the project. It automatically install the packages in the project which are configured in the bower.json file.
Demo Slider project
The demo project shows how to install Gulp and Bower in a Asp.Net 5 project. Here KheyaJQSlider package is used for sliding functionality which is published in GitHub. Here Visual Studio 2015 community version is used as a IDE.
The steps are as follows.
- Create a new project using Asp.Net 5 Empty template. The following image shows the template list.

- The newly created solution is shown below.

Here wwwroot folder contains the files and folders which need to be published. Dependencies folder contains the node packages configured in the package.json file. The packages are not configured and downloaded yet. project.json file contains the configurations for asp.net server side packages. Startup class contains the configurations for HTTP request pipeline and other server side configurations needed for asp.net.
-
To configure the NodeJS JavaScript packages required in the project add the configuration file package.json in the solution. The following image makes it clear.

- Now change the devDependencies part of the package.json file with the following json object.
    "devDependencies": {
        "gulp": "3.8.11",
        "gulp-concat": "2.5.2",
        "gulp-cssmin": "0.1.7",
        "gulp-uglify": "1.2.0",
        "rimraf": "2.2.8"
    }
After the file is saved Visual Studio automatically download the configured packages. Solution explorer with downloaded packages are shown below.

- To install the Gulp in the project add the gulp configuration file gulpfile.js in the project. The following image makes it clear.

The required nodejs packages for gulp are declared at top of the gulpfile.
var gulp = require("gulp");
var gulp_clean = require("rimraf");
var gulp_concat = require("gulp-concat");
var gulp_cssmin = require("gulp-cssmin");
var gulp_uglify = require("gulp-uglify");
"rimraf" package are used to remove the existing file. "gulp-concat" package is used to concatenate the declared files. "gulp-cssmin" package is used to minify the declared css file. "gulp-uglify" package is used to rectify the JavaScript files.
-
Some of the tasks are declared in the gulpfile which are executed recurrently are shown below.
gulp.task("CleanJs", function (cb) { gulp_clean(gulpPaths.concatJsDest, cb); }); gulp.task("CleanCss", function (cb) { gulp_clean(gulpPaths.concatCssDest, cb); }); gulp.task('CopyJs', function () { gulp.src(gulpPaths.copyJs) .pipe(gulp.dest('./wwwroot/js')); }); gulp.task('CopyCss', function () { gulp.src(gulpPaths.copyCss) .pipe(gulp.dest('./wwwroot/css')); }); - The gulp paths which are used as a source and destination are declared below.
var gulpPaths = {
    webroot: "./wwwroot/"
};

gulpPaths.copyCss = ['./lib/font-awesome/css/*.css', './lib/KheyaJQSlider/css/*.css'];
gulpPaths.copyJs = ['./lib/jquery/dist/*min.js', './lib/KheyaJQSlider/js/*.js'];
gulpPaths.jsSrc = gulpPaths.webroot + "js/**/*.js";
gulpPaths.minJsSrc = gulpPaths.webroot + "js/**/*.min.js";
gulpPaths.cssSrc = gulpPaths.webroot + "css/**/*.css";
gulpPaths.minCssSrc = gulpPaths.webroot + "css/**/*.min.css";
gulpPaths.concatJsDest = gulpPaths.webroot + "js/site.min.js";
gulpPaths.concatCssDest = gulpPaths.webroot + "css/site.min.css";
The tasks declared in the gulpfile uses these directories to copy, minify and concatenate both css and js files.
Here KheyaJQSlider is a JavaScript slider package uploaded in GitHub and is downloadable using Bower. It's dependencies are font-awesome and jquery. We shall come to know how to install this package using Bower later in this article.
-
Now right click on gulpfile.js and select the Task Runner Explorer. Task Runner Explore is the Visual Studio tool for task management. Click on refresh button it will display the gulps configured task.

By right click on a task and then click on Run one can run a task.
Here "RunAll" task is declared as follows
gulp.task("RunAll", ["RunClean", "RunMinJsCss"]);which runs another two tasks declared above it.
gulp.task("RunClean", ["CleanJs", "CleanJs"]);
gulp.task("RunMinJsCss", ["ConcatAndMinJs", "ConcatAndMinCss"]);
Here "CleanJs", "CleanJs", "ConcatAndMinJs", "ConcatAndMinCss" are individual tasks.
-
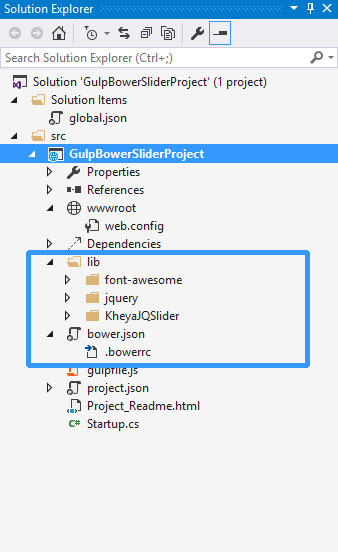
Now to install Bower in you project, add bower.json file in the solution. The following image shows that.

-
Replace the dependencies property of bower file with the following.
"dependencies": {
        "KheyaJQSlider": "*"
    }
After save the file Bower will automatically download the configured packages and will also download its dependencies.
One more changes for Bower is, expand the bower.json file and open the file with extension .bowerrc and change the directory to lib only. Now it will save the downloaded packages inside lib folder under solution folder. The following image shows that.
- Now run the task "RunCopy" from Task Runner Explorer. It will copy the css and js files from lib folder to wwwroot folder. The following image shows that.

- Now copy index.html and images folder from src folder of KheyaJQSlider package to wwwroot folder. The following image shows that.

- Open the index page and change the link of css and js files.
- Now right click on index page and view in browser. The browser will display "Hello World!". This is because of the project is not configured to render the html page. It is rendering the default text declared in Configure function of Startup class.
public void Configure(IApplicationBuilder app) { app.UseIISPlatformHandler(); app.Run(async (context) => { await context.Response.WriteAsync("Hello World!"); }); } - To make the static file working let add a new .net package in project.json file.
"dependencies": {
        "Microsoft.AspNet.IISPlatformHandler": "1.0.0-rc1-final",
        "Microsoft.AspNet.Server.Kestrel": "1.0.0-rc1-final",
        "Microsoft.AspNet.StaticFiles": "1.0.0-rc1-final"
    }
The last one need to download. After save the changes the newly added package will download automatically.
-
Now open the Startup file and replace the Configure function with the following statements.
public void Configure(IApplicationBuilder app) { app.UseIISPlatformHandler(); app.UseStaticFiles(); } - Finally run the index page again and now you can see the slider. The image is shown below.

Conclusion
In conclusion I can say Gulp is a useful tool to manage the recurring tasks which are needed to complete before every build. It saves lot deployment time and makes the development easy. On the other hand Bower is a package management tool which manage the packages and its dependencies so easily in the project.