
Authentication and Authorization using Asp.net Identity in MVC Project
4.84/5 (19 votes)
Authentication and Authorization using Asp.net Identity
Introduction
Asp.net Identity is a new way of Authentication for all kind of Asp.net templates such as Web forms, MVC, Web API etc. It also provide the functionality for user and role management. Asp.net Identity also allow user to login into the site using their social site credential like Facebook, Google and Microsoft. Asp.net Identity uses OWIN framework for authentication cookie generation and social credential login functionality.
Content list of this article.
- What is Asp.net Identity?
- Authentication and Authorization diagram.
- Asp.net Identity and OWIN.
- Sample MVC project and project description.
What is Asp.net Identity?
Asp.net Identity is the new way of authentication for Asp.net projects which is provided by Microsoft. It is a common authentication mechanism used by all the Microsoft framework such as Web forms, MVC, Web API etc. It also provide the functionality for user and role management in the system. It uses OWIN middleware for authentication cookie generation and social site's login credential capability. Asp.net Identity requires VS2015 and .Net 4.5 for functioning.
Authentication and Authorization diagram.
The following diagram shows the authentication and authorization.

In short authentication is the process of checking user credential, that is checking of user name and password provided by the user with the system database to allow user in the system to access the resources.
And authorization start after authentication. Resources that are open for all is acceded by all user. But resources that are restricted and user try to access those, then the system check for user name and password for authentication. If the user is authenticated and are the right person to access, then the system allow the user to access the resources otherwise system redirect the user to login page.
Asp.Net Identity and OWIN.
Asp.Net Identity uses OWIN framework for authentication cookie generation which is used between post back. OWIN also provide the functionality to allow third party credential for authentication. Third party social sites are such as Fabcebook, Gmail and Microsoft.
Sample MVC project and project description.
The sample MVC project shows the authentication using Asp.net Identity and also shows the way of applying authorization for MVC project. The demo project is all about Student Courses management system. Student can add courses in the system and can assign it to him. Here students are the user.
To run the project download the zip file and unzip it. Open the solution file using VS2015. Before run rebuild the project. It will download the necessary packages from online using NuGet. Then run the project.
The steps are follows.
- First create a MVC project by selecting the Authentication option to Individual User Accounts. This option will add all the necessary packages and necessary dll for Asp.Net Identity and OWIN.
- Since Asp.Net identity uses code first Entity Framework, so I have modified some default code and have added some new Entity Model. I have replace the ApplicationUser Model by following Model.
public class StudentUser : IdentityUser { public StudentUser() { Courses = new HashSet<Course>(); } public int RollNo { get; set; } public string Address { get; set; } public string Sex { get; set; } public virtual ICollection<Course> Courses { get; set; } } - Course is a new Entity Model with the following properties.
public class Course
    {
        public Course()
        {
            this.Students = new HashSet<StudentUser>();
        }
        public int Id { get; set; }
        [Required]
        public string Title { get; set; }
        public string Description { get; set; }
        public float Credit { get; set; }
        public virtual ICollection<StudentUser> Students { get; set; }
    }
The Models StudentUser and Course has many to many relation. Both Model contains a collection of each other. -
The Default ApplicationDbContext class is replaced by the following code.
	public class StudentCourseManagementDbContext : IdentityDbContext <studentuser>
    {
        public StudentCourseManagementDbContext() : base("StudentCourseManagementCS")
        {
            Configuration.ProxyCreationEnabled = false;
        }

        public System.Data.Entity.DbSet<course> Courses { get; set; }
    }
Here IdentityDbContext is the Asp.net Identity's built in class and provide the Entity Framework's data access operations. Here StudentCourseManagementCS is the connection string declared at web.config file. This Context class will create a new table Course with other tables used by Asp.net Identity for user and role management. - Now enable the code first migration running the command 'enable-migrations' from Package Manager Console.
It will enable the code first migration and will create a Migrations folder with Configuration.cs file in the project. - Now from Package Manager Console run the command 'add-migration InitialCreate'.
It will create a .cs file in Migrations folder and the file will contain the code to create initial database tables. - Now run the command 'Update-Database' from Package Manager Console, which will execute the above created file and will create the tables for Asp.Net Identity.
- The database tables diagram is shown below.

Here are the default tables used by Asp.net Identity except Courses and StudentUserCourses. StudentUserCourses is used to keep the many to many relationship between Courses and AspNetUsers. - CourseController and it's actions are used to Add, Edit and Delete courses and assign to a student. The default AccountController is used to create new user only. Here student are the user.
- After run the project it will display the following UI.

- The action executed to render the above view is
public ActionResult Index(string message)
        {
            ViewBag.Message = message;
            return View(db.Courses.ToList());
        }
This action is accessed without login. Here both authentication and authorization is not checked by the system. User can access this action because no restriction is given in this action. Next we shall come to know how to apply restriction in a action and check the authentication to access. - Now if user click the link 'Add New Courses' or 'Assign to User' the application will redirect you to the login page and this is because of applying access restriction to the requested action. The action for creating a new Course is shown below.
[Authorize(Users = "Basher")]
        public ActionResult Create()
        {
            return View();
        }
In this action authorization is applied by adding the attribute class Authorize. Here only user with name Basher can access the action. So to access this action user need to login with the appropriate credential. - The action executed after click on 'Assign to User' is shown below.
    [Authorize]
        public ActionResult Assign()
        {
            /* Code Here */
        }
Here access permission is given to all the Authorized user. To access this user must need to login in the system. - The registration page for a new user is shown below.

The action to create a user is shown below.public async Task<actionresult> Register(RegisterViewModel model) { if (ModelState.IsValid) { var user = new StudentUser() { UserName = model.UserName }; var result = await UserManager.CreateAsync(user, model.Password); if (result.Succeeded) { await SignInAsync(user, isPersistent: false); return RedirectToAction("Index", "Home"); } else { AddErrors(result); } } return View(model); }
Here UserManager class is used to create a new user, which is automatically generated by the Asp.Net Identity. So here Identity is used to create a user. You can even edit, delete a user and can create role using Identity. - The UI for new courses.
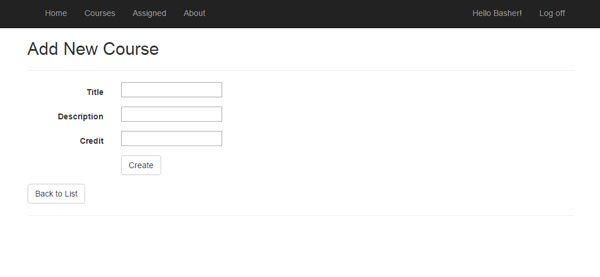
The action used here is[Authorize] public ActionResult Create([Bind(Include="Id,Title,Description,Credit")] Course course) { if (ModelState.IsValid) { db.Courses.Add(course); db.SaveChanges(); return RedirectToAction("Index"); } return View(course); }
Here Entity Framework DB Context class StudentCourseManagementDbContext is used to add new courses. - The UI to assign courses to student.

The action used here is[Authorize] public ActionResult Assign(IEnumerable<courseviewmodel> assignVeiwModel) { var currentUser = userManager.FindById(User.Identity.GetUserId()); if(currentUser !=null) { var user = db.Users.Include("Courses").Where(u => u.Id == currentUser.Id).FirstOrDefault(); foreach (CourseViewModel courseVM in assignVeiwModel) { if (courseVM.IsSelected) { Course course = user.Courses.Where(c => c.Id == courseVM.Id).FirstOrDefault(); if(course == null) { Course courseAdd = db.Courses.Where(c => c.Id == courseVM.Id).FirstOrDefault(); currentUser.Courses.Add(courseAdd); } } } db.SaveChanges(); } return RedirectToAction("AssignedCourses"); }
The operations performed here is, first get the current user object then get all the assigned courses of the current user then find the unassigned courses and display for user. Here a new CourseViewModel class is used to hold all the unassigned courses.
The properties of the CourseViewModel class ispublic class CourseViewModel { public int Id { get; set; } public string Title { get; set; } public string Description { get; set; } public float Credit { get; set; } public bool IsSelected { get; set; } } - Finally the UI to display the list of assigned courses for the current user.

The action used here is[Authorize] public ActionResult AssignedCourses() { var currentUser = userManager.FindById(User.Identity.GetUserId()); if (currentUser != null) { var user = db.Users.Include("Courses").Where(u => u.Id == currentUser.Id).FirstOrDefault(); return View(user.Courses); } return RedirectToAction("Assign"); }
The operations performed here is, first get the current user object then get the assigned courses of the current user and display those.
Conclusion
This is all about the Authentication and Authorization using Asp.Net Identity for MVC project. Hope the demo project make you clear how to apply authentication and authorization in MVC project. So in summary Authentication allow user in the system and Authorization allow and deny user to access of the system resources.