
Send an Email using Nintex Workflow in SharePoint 2013/ Office 365
4.00/5 (3 votes)
Send an Email using Nintex Workflow in SharePoint 2013/ Office 365
Introduction
Welcome to Nintex Workflows where we will see today the most important and mostly used functionality which is sending an email using Nintex Workflow in SharePoint 2013.
I know it is a part of all our developments throughout.
So let’s see how it is done.
Go to the List or Document Library you want this functionality to work on.
Go to the List or Library tab and you will find the icon as Nintex Workflow.

Click on the icon and you will see the below screen. Here, we have actions on the left side and on the center as you can see we can insert an action by clicking on it.

As we can see below, we can insert the action from:
- Integration
- Libraries and Lists
- Logic and Flow
- Operations
- User Interactions
- Utility

So as we can see, I have inserted an action from User Interaction named send an Email.
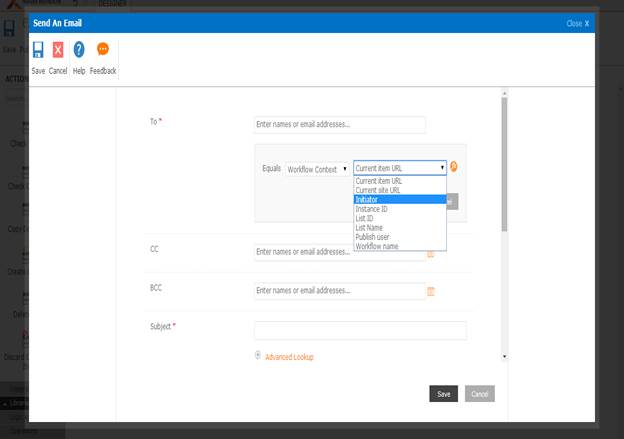
On clicking on it, we will see the below screen as send an email. You might be seeing an exclamatory mark as a warning because it is yet not configured. Once we configure it, the notification gets off.

Once you double click on it, it will open the configuration layout where you need to add the following details.
- To
- CC
- BCC
- Subject
- Body
Developers who have worked on previous versions of Nintex would know how deliberately we were waiting for CC & BCC Configuration in Nintex.

On to the right, you would be seeing icons next to each configuration. When you click on them, you will get several options to fill in the configuration through variables or through lists as per requirement. Here, we will add in the values to the configuration.
Once you configure the email, click on save and publish. You will see the below Publish Screen.

Here, you have the following labels to configure:
- Name
- Description
- Task List - Here, you can select a Task list to store all the tasks created by Nintex. If you don’t select one, it will choose a default one.
- History List - Next, we have History List which stores in the workflow history details similarly if you don’t select one, it will choose a default one.
- Start Options - Now, we have Start Options as to when or how you want our workflow to start. In our case, when an email will be triggered.
So here, we have options like:
- Start manually: Here, you can select the item > Click on the workflow icon and run the workflow manually by clicking on it.
- Start when items are created: Here, you can start a workflow when an item is just created automatically.
- Start when items are modified: Similarly, here you can start a workflow when an item is just modified automatically.

So in our case, it will Start manually as well as when an item is created. So click on Publish on the top left corner and the workflow will be published.

Now, go back to the library or List where you have associated this workflow. Create a new item and once you save the newly created item, click on save, immediately the workflow will trigger an email and I will receive an email according to my configuration.

Lot of new stuff in Nintex at SharePoint 2013 version, isn't it?
Keep learning.
Cheers!