
Getting Started Guide | Deno.js
5.00/5 (3 votes)
Quick Introduction to Deno.js with an example
Introduction
Deno.js is an open-source framework and secure JavaScript/TypeScript runtime built on V8 JavaScript engine. It was released on May 13, 2020 by the original author of Node.js - Ryan Dahl. Someone can call Deno.js like a “second Node.js”, but it's definitely not. Here is the list of some opposites to Node.js:
- Deno.js has no package manager. Means no NPM or Yarn
- Deno.js has no package.json for dependencies
- You can easily import modules from web, github or cdn
- Deno.js always asks for permission
- You can write clean top-level
async/awaitcode and use Typescript features
Why We Need to Try Deno.js?
- It's a new secure JavaScript and Typescript runtime with a wide range of different tools.
- Deno has a low entry threshold for developers who have already used Angular, Ionic, NestJs, because the latest built around Typescript.
- If we look on the technologies side, Deno.js is very promising because it spins around Microsoft and Google technologies.
- Growing and active community. If we look to Github, we can see that Deno.js platform is growing very fast which means the issues will be resolving quicker:

- Startup time 3X faster than Node.js
- You can use Browser API in Deno.js runtime
Why Do We Not Need to Try Deno.js?
- Probably you will not convince your technical manager to try Deno.js. There is nothing differently new for business side
- For developers, it means you need to focus on Typescript stack
- I/O is not fast yet
- It’s still raw
According to the described points, Deno.js can be an interesting runtime for developers, but it will not replace Node.js in the near feature. Both of these runtimes can work for JavaScript projects. Maybe Deno.js will take a decision and move to use only JavaScript. But an attempt to use Deno.js with Typescript can make your project more bulletproof and well documented.
Installing Deno.js to Get Started
To install Deno.js, you need just to run the following in the terminal:
curl -fsSL <a href="https://deno.land/x/install/install.sh"
rel="noreferrer noopener" target="_blank">https://deno.land/x/install/install.sh</a> | sh
Or for windows:
iwr <a href="https://deno.land/x/install/install.ps1"
rel="noreferrer noopener" target="_blank">https://deno.land/x/install/install.ps1</a>
-useb | ie

Then let’s add a directories to PATH. We can do this using this (for Mac):
nano ~/.zshrc
And add the following lines:

Where is “r.akhromieiev” your username.
To verify local Deno.js version, just run this:

If everything is OK, it will return the version number.
Hello World
Let’s print the simple “Hello world”. We will use the same as we use in browser - “console.log”. But, first we need to enter the Deno terminal. Simply type “deno”:
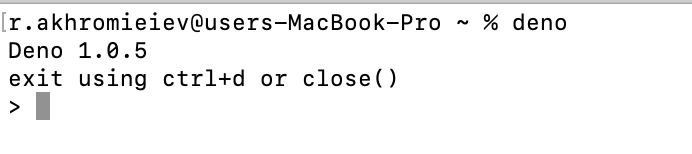
Okay, let's try printing “Hello world”:

Create a Simple Hello World HTTP Server
You can create a simple folder using the following:
mkdir deno-server
Then let’s create “index.ts” file with “console.log(“works”)” line:
touch index.ts
Ok. Now we are going to create a simple HTTP server. We need to import “serve” package for this. The “serve” module will help us with server creation. In Deno, we have no NPM or Yarn, but Deno can import modules from WEB:
import { serve } from '<a href="https://deno.land/std/http/server.ts"
rel="noreferrer noopener" target="_blank">https://deno.land/std/http/server.ts</a>'
Then we need to create an instance of serve and specify port to run:
const port = 8000;
const s = serve({ port })
console.log(`Server works on ${port}`);
We will use the loop to respond to every request coming to the server:
for await (const req of s) {
  req.respond({ body: 'Hello World\n' })
}
The final code will look like this:
import { serve } from '<a href="https://deno.land/std/http/server.ts"
rel="noreferrer noopener" target="_blank">https://deno.land/std/http/server.ts</a>'

const port = 8000;
const s = serve({ port })
console.log(`Server works on ${port}`);

for await (const req of s) {
    req.respond({ body: 'Hello World\n' })
}
We can open a terminal and run our server. Use the following inside project folder:
deno run index.ts

Deno will start downloading all necessary packages and you can notice that our first run is failed. We need to allow network access using the —allow-net flag.

And if you visit “localhost”8000”, you should see:

As we mentioned in the beginning, Deno is a secure environment. No wonder our issue was fixed by adding “—allow-net” flag. Deno has other flags:

Conclusion
In this simple tutorial, we saw what is Deno.js, how it different from Node.js and looked into a quick example.
History
- 3rd July, 2020: Initial version