
Debug a PHP Application using the IIS Express, PHP 7.1 and XDebug for Visual Studio Code
3.00/5 (4 votes)
Debug PHP applications under IIS Express
Introduction
As a .NET developer, I do not have much interest in configuring another web server like the Apache/ Tomcat. There is always the IIS that comes integrated with your Windows or Visual Studio. Why not use it?
Steps
So, assuming that you have Windows 10 x64 and Visual Studio Code, the following steps brought me to debug a PHP application using the IIS Express, PHP 7.1 and XDebug for Visual Studio Code:
- Check if you have the Microsoft Web Platform Installer 5.0 on your system: either in search bar, or in the Control Panel.
If you do not have it, you may download it from here.
Please install it.
- Check if you have IIS Express installed using the Control Panel.
If you do not have it, open Microsoft Web Platform Installer 5.0 and type in the search box: “IIS express” and click enter. The “IIS 10.0 Express” should be available and click the “Add” button and the “Install” button. Follow the steps and finish the IIS Express installation.
- Again in the search box of the Microsoft Web Platform, type “PHP Express” this time and “PHP 7.1.1 (x86) For IIS Express” should be available. Click the “Add” button and then “Install” button. Follow the steps and finish the PHP for IIS Express installation.
- Go to %systemdrive%\Program Files (x86)\IIS Express\PHP\v7.1. There should be the PHP express installed.
- Open a browser window and download the
XDebuglibrary for PHP: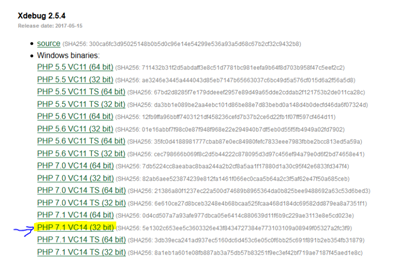
- Copy the downloaded file to extension folder of the PHP installation:
%systemdrive%\Program Files (x86)\IIS Express\PHP\v7.1\ext
- Go to %systemdrive%\Program Files (x86)\IIS Express\PHP\v7.1 and open the PHP.INI file in an elevated editor (Notepad run as administrator). Add this
XDebugsection at the end and save the file:[XDebug] zend_extension = "C:\Program Files (x86)\iis express\PHP\v7.1\ext\php_xdebug-2.5.4-7.1-vc14-nts.dll" xdebug.remote_enable = 1 xdebug.remote_autostart = 1
Note: I am assuming this is a fresh install of PHP, otherwise please check for a section or xdebug reference in the ini file and delete or update accordingly.
- Open Visual Studio Code and install the following extensions:
- PHP Debug
- PHP Intellisense

You may install others, if you wish.
- Close Visual Studio Code.
- Create a folder and open the folder in Visual Studio Code.
- Create a new file index.php and do a
phpinfo()call.<?php phpinfo(); ?>
- Insert a breakpoint to
phpinfo();line. - Go to Debug and start Listen for
XDebug. - In the Visual Studio Code menu, go to View->Integrated Terminal. The terminal appears.
- Enter and run the command:
> runphp.cmd
A website should be available for browsing at http://localhost:8080

Note: If an error occurs, that there are not sufficient rights, modify the file:
%systemdrive%\Program Files (x86)\IIS Express\PHP\v7.1\runphp.cmd
to add the localhost as in the following example:
%appcmd% add site /name:WebSite1 /physicalPath:"%currentdir%"
/bindings:http/*:8080:localhost /apphostconfig:"%currentdir%\apphost.config"

- After the Debug is running and the IIS is running, open a browser and go to http://localhost:8080.
The execution should stop to the breakpoint. Continue the execution and the PHP information will be displayed.
- Additionally, the Xdebug bookmarklets may be added from the phpstorm website to your favorites from https://www.jetbrains.com/phpstorm/marklets/.
Enjoy XDebug under IIS!
Points of Interest
Multiple articles on debugging with XDebug, but most of them under XAMPP or WAMP.
I just wanted something for IIS, good for other .NET enthusiasts like me.
History
- June 5, 2017 - Initial version
- June 6, 2017 - Added images again