
How to Publish ASP.NET MVC Web Application to Azure
4.71/5 (6 votes)
Deploy an ASP.NET MVC application to a Azure Web Site by using the Publish Web Wizard in Visual Studio 2015
Scope
This tip walks you through the steps to deploy an ASP.NET MVC application to a Azure Web Site by using the Publish Web Wizard in Visual Studio 2015.
Install Windows Azure SDK for .NET
This could be done through Microsoft Web Platform Installer.
Select the option Add on item Azure SDK for .NET (VS 2013) -2.2, and the component will be installed on your machine:

Create Azure Account
You need to get a Windows Azure account. Everyone can open a Windows Azure account for free.
Check the link below for more information:
Create an ASP.NET MVC Application
Check my wiki article about that:
You also can download the code from my sample in Microsoft Code Gallery at:
Deploy to Windows Azure
- In Visual Studio, select Solution Explorer and right-click the project.

- Then select Publish option from the context menu.
- The Publish Wizard window will open. Select the option Import.
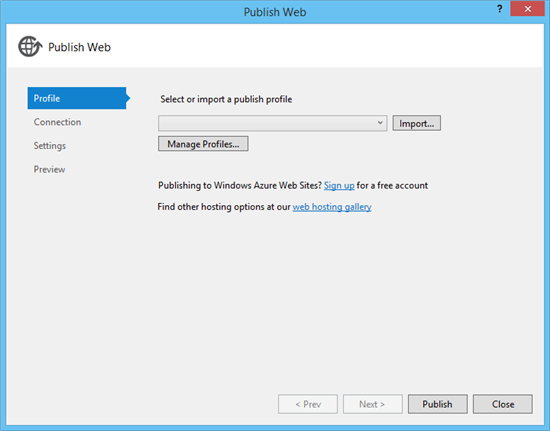
- A new Windows will open. In this window, we have two choices to import publish settings:

- Import from a Windows Azure Web Site.
- Import from a publish profile file (I will demonstrate this one).
- To use this option, we need to create the Web Site on Windows Azure.
- Access to the web page of Windows Azure Management Portal (https://manage.windowsazure.com/
 )
) - On this page, we have a lot of options on the left side of the page. In this case, we will focus on the Web Site one.
- Select Web Sites option.
- On the left bottom, select the option New.

- A new role of options will appear to select what kind of web site we need to create.
- We will select the Quick Create option.

To create a new site, we need to provide the url and region.
After that, it is necessary to check the option Create Web Site, that will be provision of the new website.
- As we can check the new site was created with success with name
mvc5publishdemo.
- The final step on Azure side, is to download the Publish Profile that we need on Visual Studio. For that, we have an option Download the Publish Profile on the Dashboard of our new site.
- Check that option and download the file to a location on local machine.

- Select the previous downloaded file and select OK button.

- A new window will be provided. To finalize the publish, select the Publish button.

- The publish will be made with success and the web site will be opened in our default browser.


Windows Azure Resources
Some good resources about Windows Azure could be found here:
- Windows Azure Portal
- My personal blog: http://joaoeduardosousa.wordpress.com/
- ASP.NET Portal