
How to Download and Set Up Oracle Express 11g
4.72/5 (11 votes)
This article explains how to download and install Oracle Express and SQL Developer on your own computer, to get started with running SQL queries.
Introduction
In this article, you'll learn how to download, install, and set up an Oracle database, so that you can start running SQL queries on your own computer.
Why do you need these instructions?
Isn't it just as simple as download, install, and run?
Well, it's not that straight forward when setting up an Oracle database. Even if you're using Oracle Express, which is Oracle's version of their database that you can use yourself and the one that I'm explaining in this guide.
There are a few things to watch out for - which I'll cover.
Also, Oracle's website can be very confusing. Especially if you've never downloaded anything from there before.
So, with these instructions, you should be able to get Oracle Express running on your own computer without too much trouble.
At the time of writing, you can run Oracle on Windows and Linux machines. There is no Mac version available. The only way that I know of to run Oracle on a Mac is to use a virtual machine such as Parallels, but as it's not something I've done, I won't include the steps here.
Overview
The steps we will cover in this guide are:
- Download and install Oracle client (or Oracle Express, which is the actual database)
- Download and install Java JDK (which is needed to run the development tool)
- Download and install SQL Developer (which is used to run SQL queries)
- Create a connection in SQL Developer (to allow you to run queries on your installed Oracle database)
I won't be covering how to learn SQL in this article, but that would be the next step to take, if you don't know SQL.
Let's get started!
Step 1 - Download Oracle Client (Oracle Express)
The first step is to download the Oracle client. This is the actual database software that runs and manages the database.
Oracle Express is a version created by Oracle that you can download for free for your own use. It does have some limitations, but it should be enough for your own education and smaller projects.
To start with, visit the Oracle website at www.oracle.com.
Hover over the Downloads menu item at the top of the page.
Select "Oracle Database 11g Express Edition".

The download page will appear. To be able to download the link, you'll need to accept the license agreement. Read that by clicking on the link, and then click Accept License Agreement.

Choose the relevant download for your operating system.
- If you're running a 64-bit version of Windows, choose the "Oracle Database Express Edition 11g Release 2 for Windows x64" file.
- If you're running a 32-bit version of Windows, choose the "Oracle Database Express Edition 11g Release 2 for Windows x32" file.
- If you're running Linux, then choose the "Oracle Database Express Edition 11g Release 2 for Linux x64" file.
If you're not sure which version of Windows you're running, go to the Start button, right click on My Computer, and select Properties. This will bring up the System screen in the Control panel.
You can also right click on My Computer within Windows Explorer and select Properties to get to the same screen.
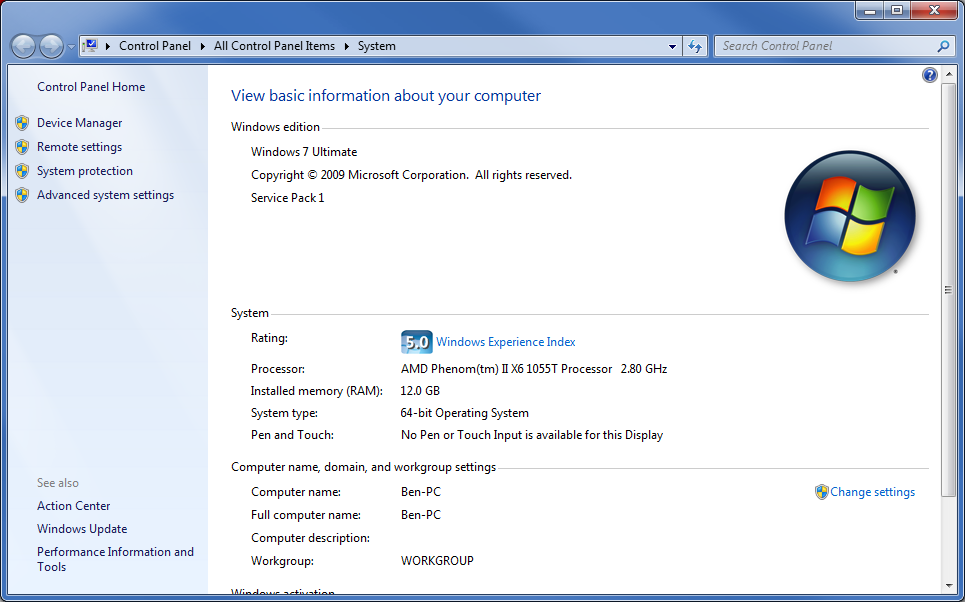
In the middle of the screen, you'll see a System Type label, and next to it will say either 32-bit or 64-bit Operating System.
Once you click on the right version of the Oracle download file, you'll be prompted with a Sign in screen.

If you have an account, then enter your details.
If you don't have an account (which, if you're setting up Oracle for the first time, you probably don't), click Create Account on the right.

Fill out your details and click Create Account at the bottom. You don't need to check the "Yes, send me emails on Oracle Products, Services and Events" if you don't want to.
Once you have your account created, you should be presented with the file download box.

If not, you can log in with your new account details and follow the steps above to go back to the download link.
Save the file (which is called "OracleXE112_Win64" or similar. This is the archive file that you extract and install from.
The file will then be downloaded.
Now, we need to extract and install the file.
Step 2 - Install Oracle Express
To install Oracle Express from the downloaded file, go to the location where you've downloaded it.
Extract the file to a location of your choice. The process for doing this will depend on what acrhive program you use (7zip, WinZip, WinRAR), but generally you start by openning the ZIP file.
Choose a location to extract it to on your hard drive, and click Extract.
Once the extract has finished, go to the location you extracted to.
Open the DISK1 folder and run setup.exe It should be the only file in the folder.

An installer wizard will pop up and begin preparing.

Once it has prepared, click Next.
Read and accept the Terms and Conditions.

On the Choose Destination Location page, ensure you have enough space to install it to the default location. You don't need to change the location, but if you want to, you can here. Otherwise, click Next.

Now, this is an important step. Here, you specify the database password, to be used for two system accounts - SYS and SYSTEM.
You should choose a secure password, and one that you'll remember. You'll need to enter this password later in this process when you log in to the Oracle database - so don't forget it.
Enter the password twice, and click Next.

Click Install on the final screen.
The installation will take a few minutes. Once it's finished, click the Finish button.

Step 3 - Download JDK
The next step is to download the JDK or Java JDK as it's also known.
JDK stands for Java Development Kit, and you'll need to run SQL Developer, which is the tool used to run SQL queries that we'll be installing next.
To install the JDK, go back to the Oracle website at www.oracle.com.
Hover over the Downloads menu item and click Java for Developers.

On the Java SE Downloads page, click on the Java Platform JDK button. It should be the one on the left.

Once again, you'll need to read and accept the license agreement to proceed.
If you don't accept, a message will pop up when you try to download the file and prvent you from downloading.

After you've done that, select the right version for your operating system. Focus on the "Java SE Development Kit" section, not on the second section (which has sample downloads that you don't need).
If you're running Windows, you should select either the 32 bit or 64 bit version.
If you're running Linux, you have several choices here as well.
Once you click on the link, you'll be asked to save the file. Save it to your computer.

Step 4 - Install the JDK
Now that you've downloaded the file, the next part is to install it. This is pretty straight forward, but I'll run through the steps anyway.
Open the JDK file you downloaded above. If a security warning appears, click Run.
On the welcome screen, click Next.

On the Features page, click Next as well. The default settings are OK.
The JDK will now be installed. This step can take a couple of minutes as well.
Once that has completed, another installation path may be requested for the JRE. This is the Java Runtime Environment, which is another part of Java you'll need. Click Next on this screen.

The next part will then be installed, which may take a couple of minutes.
Once the installation has completed, click Close.
Step 5 - Download Oracle SQL Developer
Alright, we're now up to the final piece of software to download.
SQL Developer is a tool created by Oracle that lets you write SQL queries against the Oracle database.
To download it, go back to the Oracle website at www.oracle.com.
Hover over the Downloads menu item and click SQL Developer.

Once again, you'll need to read and accept the license agreement to proceed.
Select the relevant file based on your operating system.

You might notice that there is a Mac version listed here, even though Oracle is not available for Mac.
This is because while you can't install the Oracle database on a Mac, you can still run SQL Developer to connect to databases on other computers or servers using other operating systems. It's not restricted to just connecting to your own computer.
Once you click on the file you want, choose a location for the file and click Save.
Step 6 - Set Up Oracle SQL Developer
After the SQL Developer file has finished downloading, open the file.
This step is different to the earlier steps as you don't need to install SQL Developer, you just need to unzip and run it.
So, now you've opened the file, extract it to the location you want. This is where the file will be run from, so you may want to extract it to Program Files or something to be consistent.
Once it has extracted, go to the folder that you extracted it to.
Run "sqldeveloper.exe".
The program will ask for the path to java.exe. This is something you installed earlier in the process.
To find the path, click on Browse, and go to the location it was installed to. The location will be something like this:
C:\Program Files\Java\jdk1.7.0_25\bin
When you're in the right folder, the java.exe file should be visible. Click on that to select it and click OK.
You might get a message saying that the Java version is not certified. This is usually due to the fact that the SQL Developer has not been updated to match the latest Java version. I've gotten this message before and had no problems with using SQL Developer, so if you get it, just click Yes to proceed.

SQL Developer will then start.
The File Type Associations dialog box will appear. You don't need to select any of these, but if you want to have these file types open in SQL Developer, then check the boxes. Click OK.
SQL Developer is now installed and ready to go. The final step is to set up a connection to your database.
Step 7 - Create a Connection in Oracle SQL Developer
You've got SQL Developer running, as well as your Oracle database. Now you just need to connect the two.
Click on the green plus icon on the top left of the screen, under the Connections tab in the sidebar.

The New Database Connection window will appear.
Enter the following details into the window:
Connection Name: Something that you can identify it by. I usually use "Local"
Username: system
Password: The password you entered during the install process (hopefully you remembered it!)
Save Password: Checked
Connection Type: Basic
Role: Default
Hostname: localhost
Port: 1521
SID: xe
Once you've entered that information, click Test. The Status in the bottom left should say Success.

If it doesn't, ensure you've entered the right information, and have Oracle running. If it still doesn't work, restart your computer and try again.
Once the test is successful, click Connect.
A connection called Local (or whatever you named it) will appear in the sidebar, and a new SQL window will appear in the main section.
This is where you enter your queries.
To test it, enter a sample query.
You can try this one:
SELECT 'X' FROM DUAL;
Press F9, or click on the green Play triangle in the window, to run the query.

The result will appear at the bottom of the window.
Congratulations! You have now installed Oracle Express and Oracle SQL Developer on your computer! Now it's ready to be used for your SQL queries.
History
11/4/15 - Initial version.