
Eye of the Drone
Turn your smartphone into the Eyes and Ears of your Quadcopter drone.
- Download eyeofdroneService-noexe.zip - 15.6 MB
- Download eyeofdroneService.zip - 15.6 MB
- Download eyeofdrone.WindowsPhone-noexe.zip - 4.7 MB
- Download eyeofdrone.WindowsPhone.zip - 4.7 MB
- Download eyeofdrone.Windows-noexe.zip - 7.4 MB
- Download eyeofdrone.Windows.zip - 7.4 MB
- Download eyeofdrone.Shared.zip - 11.2 KB
Introduction
Quadcopters are becoming a very popular option for flying your own drone. Most of them, but not all, offer a built in video camera for giving your drone some eyes. However, if you want a quality camera, or live video feed to your controller, you usually must pay a premium. Not everyone can afford to pay hundreds of dollars. "Eye of the Drone" is a project aimed at using your smartphone as the ultimate sensor package for your drone. A smartphone can be utilized to capture pictures, video, sound, acceleration, GPS coordinates, and other useful data. With a built in cellular connection, smartphones are the perfect mechanism to transform all of this data real time to Azure storage. From there, a user can see the data through a web site or application. Perhaps most importantly, by taking advantage of the smartphone you probably already own, you can save hundreds of dollars by focusing on buying a quadcopter that is built for one thing, flying.
Background
This all started when my father in law expressed some interest in getting a drone. But he was mostly joking because he felt they must be too expensive for regular people to get. I started showing him some models on Amazon for less than $100. He was amazed they could be had for so cheap. But I quickly noticed that you had to pony up several hundred dollars if you wanted a quadcopter with a good camera that could transmit live video feed. So I wondered if it would be practical to strap your phone to one of these and have to be the eyes and ears of your quadcopter. The more I thought about it, the more I thought it could actually be a good idea. Not only could you capture video with your phone, but you could capture GPS data and you could even upload all of this real time since the phone will probably have a cellular connection. I was actually already planning on making this project when I saw this contest. I thought this could be a perfect demo of an IoT based app utilizing Azure to connect users to a "thing" (in this case, a Quadcopter drone).
For my demo, I plan to build a Windows Phone 8.1 application that runs on the smartphone while it is being carried by the Quadcopter. The client app will periodically gather GPS coordinates and images. If an internet connection is detected, the app will upload that data real time to an Azure mobile service. Otherwise, utilizing the Offline Sync capability of Azure Mobile Services, the app will store the data on local storage and sync with the cloud when a future connection is established.
To view your data, I plan to create a website and a Windows 8.1 / WP8.1 universal app. They will show a Bing Map control that plots the path your quadcopter has taken. The site and app will also show pictures taken by the phone.
Storing a users data on the server and letting them view the data in client applications will require some type of account management and authentication. Rather than have users go through the trouble of creating their own accounts, we will utilize OAuth. Using OAuth, users can sign in with a 3rd party account, such as Facebook, Microsoft, or Google. For the purposes of this demo, I will also use CodeProject as an option for authentication.
Using the Code
Taking Pictures: For our demo, we will use the Universal apps API's for taking pictures and video.
First, open the Package.appxmanifest of the phone project. Under Capabilities, check Webcam, Pictures Library, and Videos Library. Webcam allows our app access to the camera or webcam of the device to capture pictures and record videos. The picture and video library capabilities will allow us to save files to the users phone library. Under Requirements, make sure that Rear Camera is selected.


In my XAML, I add a CaptureElement called capturePreview to show the view of the camera. I also add a Image called capturePost to show the pictures that are taken. For this demo, I'm inlcuding a button to fire pictures off manually, but the final app will fire off pictures on a timer or web call.
Add the following usings
using Windows.Media.MediaProperties;
using System.Threading.Tasks;
using Windows.Media.Capture;
using Windows.Storage;
using Windows.UI.Xaml.Media.Imaging;
InitPreview will set the capturePreview CaptureElement source to the camera.
        public Windows.Media.Capture.MediaCapture mediaElement;
        public ImageEncodingProperties imageProperties = ImageEncodingProperties.CreateJpeg();

        public MainPage()
        {
            this.InitializeComponent();

            //...

            InitPreview();
        }

        public async Task InitPreview()
        {
            mediaElement = new Windows.Media.Capture.MediaCapture();
            await mediaElement.InitializeAsync();

            this.capturePreview.Source = mediaElement;

            await this.mediaElement.StartPreviewAsync();
        }
Tie the button to an asyc takePicturesBtn_Click event. Create a file in local storage with a random Guid name to ensure its unique. Use CapturePhotoToStorageFileAsync to capture the picture to that file. Note that you can also capture an image to a stream, which might be useful latter. Now create a BitmapImage and set its stream to our local file. Load that BitmapImage to the Image control in the XAML to show the user.
        private async void takePictureBtn_Click(object sender, RoutedEventArgs e)
        {
            string picName = String.Format("{0}.jpg", Guid.NewGuid());

            StorageFile picFile = await ApplicationData.Current.LocalFolder.CreateFileAsync(picName, CreationCollisionOption.GenerateUniqueName);

            await mediaElement.CapturePhotoToStorageFileAsync(imageProperties, picFile);

            BitmapImage bi = new BitmapImage();
            var stream = await picFile.OpenStreamForReadAsync();
            bi.SetSource(stream.AsRandomAccessStream());

            capturePost.Source = bi;
        }
Tracking GPS: For our demo, we will use the Windows Phone APIs for tracking GPS and displaying a simple map control that centers on the phones position. At the moment, the phone APIs and Windows 8 APIs are slightly different. Hopefully when Windows 10 launches, these will be more unified.
First, open the Package.appxmanifest of the phone app project. Under Capabilities, check Location. This lets the phone OS know that your app is requesting access to the users location.

Here is the basic set of code I use to get the users Location and update a map control on the phone itself. The map control isn't necessary since this will just be the pilot app, but it's good for debugging.
using Windows.Devices.Geolocation;

public Geolocator locator = new Geolocator();

locator.ReportInterval = 1;
locator.MovementThreshold = 1;
locator.DesiredAccuracy = PositionAccuracy.High;
locator.PositionChanged += locator_PositionChanged;

mapControl.ZoomLevel = 15;

async void locator_PositionChanged(Geolocator sender, PositionChangedEventArgs args)
        {
            var position = args.Position.Coordinate.Point.Position;

            await Windows.ApplicationModel.Core.CoreApplication.MainView.CoreWindow.Dispatcher.RunAsync
            (Windows.UI.Core.CoreDispatcherPriority.Normal, () =>
            {
                gpsTxt.Text = String.Format("Altitude: {0}, Long: {1},
                Lat: {2}", position.Altitude, position.Longitude, position.Latitude);
                mapControl.Center = args.Position.Coordinate.Point;
            });
        }
To test out the code, let's use location features in the WP8.1 emulator. On the emulator, click the double arrows >> on the right side toolbar. That will expand out your advanced emulator features. Click on the Location tab. Zoom into some area you want to pretend your phone is at. Let's create a route. On the top bar, there is a dropdown for "Live, Pin, Route". Select route. Click on the map once you create your starting point. Click again for your ending point. You will see driving based directions created. Click the play arrow next to the speed drop down to start the route. This is a great way to test any location based app!

Authentication: For our demo, we will use CodeProject API and OAuth to let the user authenticate with their CodeProject account. The following code uses the sample from https://api.codeproject.com/Samples/ResourceOwnerCsDoc to handle authentication from the WP8.1 app that gathers data, and the client WP8.1/W8.1 universal app for viewing the data from the server. Basically, the user will enter their email and password into the application. We use that information to get an access token from Code Project through a HttpClient web call. Part of the information we can get back is the users MemberId. This will be used as the unique ID to tie the users data to their account. So when the phone app is uploading media and GPS data to the server, that data will be tied to the MemberId of their CodeProject account. When the user logs onto a client app with their CodeProject credentials, the server will give them data that's associated with their MemberId.
/// The client information used to get the OAuth Access Token from the server.
string clientId     = "JkOnJ9zIQ1vWvP3FvsJVx-3iOnSd-6a-";
string clientSecret = "U_ZHCQackGJHW4-Jn4qfGce6JLV9qAKhJEGahyRHVpeYVWf_r8iSaSt4z6AZn8kC";

// The server base address
string baseUrl      = "https://api.codeproject.com/";

//User email and password (will get these from text boxes on the form
string email = "test@live.com";
string password = "password";

// this will hold the Access Token returned from the server.
string accessToken  = null;
// this will hold the MemberId returned from the server.
string codeProjectMemberId  = null;

//Get our Access Token
using (var client = new HttpClient())
{
 client.BaseAddress = new Uri(baseUrl);

 // We want the response to be JSON.
 client.DefaultRequestHeaders.Accept.Clear();
 client.DefaultRequestHeaders.Accept.Add(new MediaTypeWithQualityHeaderValue("application/json"));

 // Build up the data to POST.
 List<keyvaluepair<string, string>> postData = new List<KeyValuePair<string, string>>();
 postData.Add(new KeyValuePair<string, string>("grant_type",    "password"));
 postData.Add(new KeyValuePair<string, string>("client_id",     clientId));
 postData.Add(new KeyValuePair<string, string>("client_secret", clientSecret));
 postData.Add(new KeyValuePair<string, string>("username",      email));
 postData.Add(new KeyValuePair<string, string>("password",      password));

 FormUrlEncodedContent content = new FormUrlEncodedContent(postData);

 // Post to the Server and parse the response.
 HttpResponseMessage response = await client.PostAsync("Token", content);
 string jsonString            = await response.Content.ReadAsStringAsync();
 object responseData          = JsonConvert.DeserializeObject(jsonString);

 // return the Access Token.
 accessToken = ((dynamic)responseData).access_token;
}

//Get the profile data
using (var client = new HttpClient())
{
 client.BaseAddress = new Uri(baseUrl);
 client.DefaultRequestHeaders.Accept.Clear();
 client.DefaultRequestHeaders.Accept.Add(new MediaTypeWithQualityHeaderValue("application/json"));

 // Add the Authorization header with the AccessToken.
 client.DefaultRequestHeaders.Add("Authorization", "Bearer " + accessToken);

 // create the URL string.
 string url = string.Format("v1/My/Profile");

 // make the request
 HttpResponseMessage response = await client.GetAsync(url);

 // parse the response and return the data.
 string jsonString   = await response.Content.ReadAsStringAsync();
 object responseData = JsonConvert.DeserializeObject(jsonString);
 codeProjectMemberId = ((dynamic)responseData).codeProjectMemberId;
}
Using Azure Mobile Services
This whole section will be devoted to explaining how I utilize Azure Mobile Services to tie everything together.
Real time: In my envisioned scenario, my app will run on a phone attached to the drone, called the pilot, and on one or more client devices. The pilot app will continously upload data to my Azure Mobile Service, while the connected client apps will display that data. For this scenario to run properly, we need a (close to) real time connection between the pilot and client applications. My first inclication is to utilize something like SignalR to provide a near real time connection between the web service and the client applications. Indeed I found a very good article that could be the key for this scenario, "Real-time with ASP.NET SignalR and Azure Mobile Service Backend." However, before going to deep into this, I decided to see how fast the out of the box "Refresh" feature worked. To do this I modified the refresh button code:
The old code runs Refresh once.
        private async void ButtonRefresh_Click(object sender, RoutedEventArgs e)
        {
            ButtonRefresh.IsEnabled = false;

            //await SyncAsync(); // offline sync
            await RefreshTodoItems();

            ButtonRefresh.IsEnabled = true;
        }
My new code simply runs the refresh operation on a loop and updates the button text to let you know how many times its running.
        private async void ButtonRefresh_Click(object sender, RoutedEventArgs e)
        {
            ButtonRefresh.IsEnabled = false;

            //await SyncAsync(); // offline sync
            int counter = 0;
            DateTime startWatch = DateTime.Now;
            while (counter < 1000)
            {
                await RefreshTodoItems();
                ButtonRefresh.Content = String.Format("Refresh ({0}), {1} seconds", counter, DateTime.Now.Subtract(startWatch).Seconds);
                counter++;
            }

            ButtonRefresh.IsEnabled = true;
        }
I ran the new code in two emulators. What I found with this experiment surprised me. It seems that simple polling of the Mobile Service will let us get updates roughly every 1/10th a second. This resulted in a near real time experience. At least for our application its near enough. So call me lazy, but I'll go with this. If latency becomes an issue I will investigate switching to SignalR.

Uploading the Location data is pretty straight forward. In our code, when we listen for position change, we simply insert a new Location Item:
    private IMobileServiceTable<LocationItem> _LocationItemTable = App.MobileService.GetTable<LocationItem>();
    async void locator_PositionChanged(Geolocator sender, PositionChangedEventArgs args)
        {
            var position = args.Position.Coordinate.Point.Position;

            //Record to Azure
            LocationItem newLocation = new LocationItem()
            {
                Altitude = position.Altitude,
                Longitude = position.Longitude,
                Latitude = position.Latitude,
                Time = DateTime.Now,
                SessionId = CurrentSession.Id
            };
            await _LocationItemTable.InsertAsync(newLocation);
        }
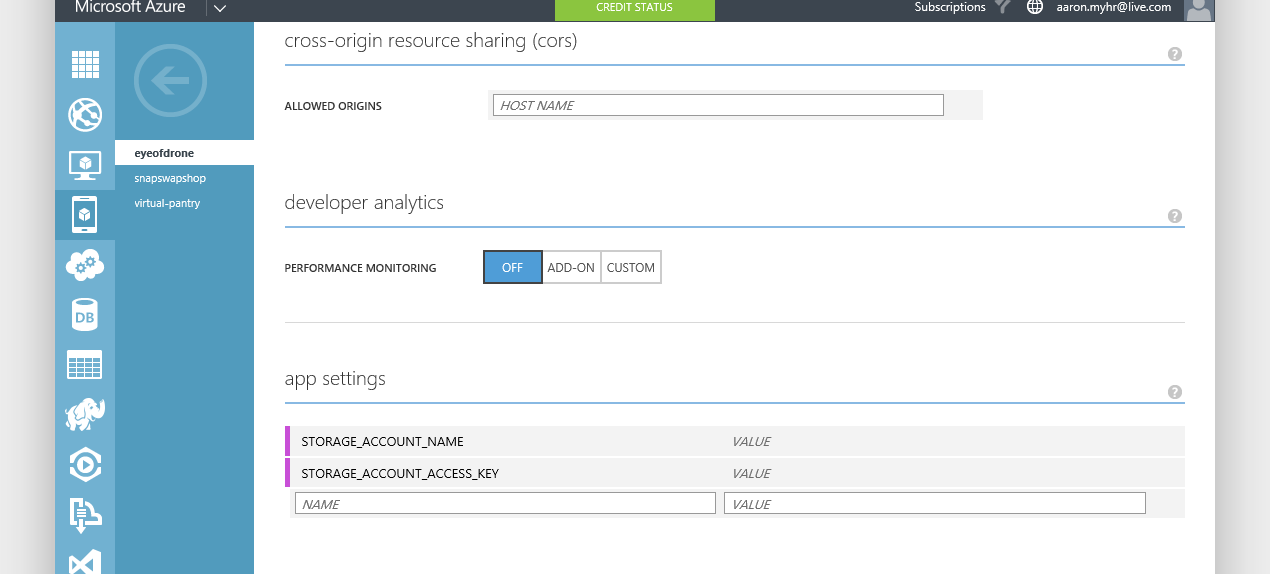
For Pictures, we have to utilize Azure Storage for storing the pictures. To set up azure storage, create a new Storage account in Azure. Click Manage Access Keys on the bottom:

Now go to your mobile service, select the Configure tab, and add the STORAGE_ACCOUNT_NAME and STORAGE_ACCOUNT_ACCESS_KEY values to the app settings section.
In your solution, add WindowsAzure.Storage NuGet package to all your projects. In the service, add the following lines to your webconfig.

In the PictureItemController.cs, edit the PostPictureItem call.
    // POST tables/PictureItem
        public async Task PostPictureItem(PictureItem item)
        {
            string storageAccountName;
            string storageAccountKey;

            // Try to get the Azure storage account token from app settings.
            if (!(Services.Settings.TryGetValue("STORAGE_ACCOUNT_NAME", out storageAccountName) |
            Services.Settings.TryGetValue("STORAGE_ACCOUNT_ACCESS_KEY", out storageAccountKey)))
            {
                Services.Log.Error("Could not retrieve storage account settings.");
            }

            // Set the URI for the Blob Storage service.
            Uri blobEndpoint = new Uri(string.Format("https://{0}.blob.core.windows.net", storageAccountName));

            // Create the BLOB service client.
            CloudBlobClient blobClient = new CloudBlobClient(blobEndpoint,
                new StorageCredentials(storageAccountName, storageAccountKey));

            if (item.containerName != null)
            {
                // Set the BLOB store container name on the item, which must be lowercase.
                item.containerName = item.containerName.ToLower();

                // Create a container, if it doesn't already exist.
                CloudBlobContainer container = blobClient.GetContainerReference(item.containerName);
                await container.CreateIfNotExistsAsync();

                // Create a shared access permission policy.
                BlobContainerPermissions containerPermissions = new BlobContainerPermissions();

                // Enable anonymous read access to BLOBs.
                containerPermissions.PublicAccess = BlobContainerPublicAccessType.Blob;
                container.SetPermissions(containerPermissions);

                // Define a policy that gives write access to the container for 5 minutes.
                SharedAccessBlobPolicy sasPolicy = new SharedAccessBlobPolicy()
                {
                    SharedAccessStartTime = DateTime.UtcNow,
                    SharedAccessExpiryTime = DateTime.UtcNow.AddMinutes(5),
                    Permissions = SharedAccessBlobPermissions.Write
                };

                // Get the SAS as a string.
                item.sasQueryString = container.GetSharedAccessSignature(sasPolicy);

                // Set the URL used to store the image.
                item.imageUri = string.Format("{0}{1}/{2}", blobEndpoint.ToString(),
                    item.containerName, item.resourceName);
            }


            PictureItem current = await InsertAsync(item);
            return CreatedAtRoute("Tables", new { id = current.Id }, current);
        }
In the Pilot.xaml.cs class, add this code to takePictureBtn_Click event.
    StorageFile picFile = await ApplicationData.Current.LocalFolder.CreateFileAsync(picName, CreationCollisionOption.GenerateUniqueName);

            await mediaElement.CapturePhotoToStorageFileAsync(imageProperties, picFile);

            var stream = await picFile.OpenStreamForReadAsync();

    PictureItem pictureItem = new PictureItem();
            pictureItem.ContainerName = "eyeofdrone";
            pictureItem.ResourceName = picName;

            await _PictureItemTable.InsertAsync(pictureItem);

            if (!string.IsNullOrEmpty(pictureItem.SasQueryString))
            {
                // Get the URI generated that contains the SAS
                // and extract the storage credentials.
                StorageCredentials cred = new StorageCredentials(pictureItem.SasQueryString);
                var imageUri = new Uri(pictureItem.ImageUri);

                // Instantiate a Blob store container based on the info in the returned item.
                CloudBlobContainer container = new CloudBlobContainer(
                    new Uri(string.Format("https://{0}/{1}",
                        imageUri.Host, pictureItem.ContainerName)), cred);

                // Upload the new image as a BLOB from the stream.
                CloudBlockBlob blobFromSASCredential =
                    container.GetBlockBlobReference(pictureItem.ResourceName);
                await blobFromSASCredential.UploadFromStreamAsync(stream.AsRandomAccessStream());

                // When you request an SAS at the container-level instead of the blob-level,
                // you are able to upload multiple streams using the same container credentials.

                stream = null;
            }
This will create your Picture Item and upload the picture to the Azure Storage container.
To View the data, we have a universal XAML page called DroneDashboard.xaml that shows the pictures and locations of the drone session. Here is the code for the refresh method.
    public DroneDashboard()
        {
            this.InitializeComponent();

            RefreshItems(TimeSpan.FromSeconds(1));
        }


        private async Task RefreshItems(TimeSpan refreshInterval)
        {
            while (_stop == false)
            {
                try
                {
                    var newItems = await todoTable
                        .Where(todoItem => todoItem.Complete == false)
                        .ToCollectionAsync();

                    if (TodoItems == null || TodoItems.Count() != newItems.Count())
                    {
                        TodoItems = newItems.ToList();
                    }

                    var newPictures = await _PictureItemTable.ToCollectionAsync();

                    if (PictureItems == null || PictureItems.Count() != newPictures.Count())
                    {
                        PictureItems = newPictures.OrderByDescending(p => p.Time).ToList();
                    }

                    var newLocations = await _LocationItemTable.ToCollectionAsync();

                    if (LocationItems == null || LocationItems.Count() != newLocations.Count())
                    {
                        LocationItems = newLocations.OrderByDescending(p => p.Time).ToList();
                    }

                    await Task.Delay(refreshInterval);
                }
                catch (MobileServiceInvalidOperationException e)
                {
                    _stop = true;
                }
            }
        }
Points of Interest
The original goal of my app was to provide live video feed. However, at the moment, I haven't been able to find example code for Windows Phone for uploading a live video stream to an online service. I'm sure it's technically possible since there are some webcam type applications. But for the sake of time, I'll focus on uploading GPS coordinates and periodic picture shots and displaying this data in a website and a client application. I hope to finish in time to take another shot at the live video feed.
A future goal of my project is to also figure out a way to send commands from the smartphone to a quadcopter. Figuring that out would open up the possibility of flying the quadcopter out of range of the controller.
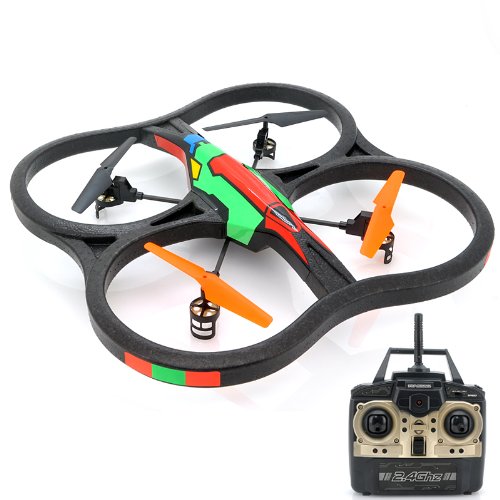
The Quadcopter I am purchasing is this model from Amazon. At $70, it looks plenty big enough and even comes with a bucket type accessory for carrying the smartphone.
History
- 2/17/2015: First write up
- 2/19/2015: Added instructions and code for authenticating with a users' CodeProject account. This is how we will tie their data to their account.
- 3/15/2015: Added GPS tracking stuff
- 3/22/2015: Added intro to capture images.
- 3/31/2015: Final write up and code submission for contest. Unfortunately my code is still a work in progress at the moment. But I plan on continuing to edit this article as I progress.