
Getting Started with Eclipse on Intel® IoT Platforms
5.00/5 (1 vote)
This guide explains how to connect to your Intel IoT Platform using the Eclipse IDE on Windows*, OS X*, or Linux*.
Get access to the new Intel® IoT Developer Kit, a complete hardware and software solution that allows developers to create exciting new solutions with the Intel® Galileo and Intel® Edison boards. Visit the Intel® Developer Zone for IoT.
Overview
The Intel® IoT Developer Kit (dev kit) lets you create and test applications on Intel® IoT platforms. It helps you write applications in C and C++ languages and provides two libraries, specially designed for Intel IoT dev kit:
- MRAA is a low-level library that offers a translation from the general purpose input/output (GPIO) interfaces to the pins available on Intel® Galileo and Intel® Edison boards.
- UPM is a repository of sensors written in C++ and uses the MRAA library.
This guide explains how to connect to your Intel IoT Platform using the Eclipse IDE on Windows*, OS X*, or Linux*. It walks you through the IDE setup and getting the onboard LED to blink.
Requirements
- You have obtained the IP address for your platform. To obtain your IP address, refer to the corresponding document for your platform:
- For Galileo only:
Program an SD with the Yocto Linux Image by going to the Programming a Blank SD Card document, or watching the Programming a Blank SD Card video. Due to the limited storage space onboard the Galileo, you need to run Yocto off of the SD card to use the libraries needed to work with the Intel® XDK IoT Edition. - Eclipse depends on a Java* Runtime Engine (JRE) to execute. If you don’t have JRE installed, you will see a message similar to this one:

If you see this message, install JRE or a Java Development Kit (JDK). You can download either from Oracle at http://www.oracle.com/technetwork/java/javase/downloads/index.html.
Install the 64-bit JRE or JDK (indicated by x64 in the download name) — not the 32-bit (x86) version.

Install Intel® IoT Dev Kit IDE
- Windows:
7-Zip supports extended path names, which some files in the compressed file have, so only use 7-Zip software to extract the installer file.- Install 7Zip (Windows only)
- Download the 7-Zip software from http://www.7-zip.org/download.html.
- Right-click on the downloaded executable and select Run as administrator.
- Click Next and follow the instructions in the installation wizard (Figure 1).
- Download the Eclipse IDE installer file for Windows.
- Using 7zip, extract the installer file. Right-click the installer file and select Extract here.
- Install 7Zip (Windows only)

- Linux:
- Download the Eclipse IDE installer file for Linux.
- Extract the installer file.
- OS X:
- Download the Eclipse IDE installer file for OS X. Extract the installer file, as follows:
- Open a new Terminal window.
- Navigate to the directory that contains
iotdk-ide-mac.tar.bz2. - Type
tar -jxvf iotdk-ide-mac.tar.bz2to extract the tar.bz2 file.
- Download the Eclipse IDE installer file for OS X. Extract the installer file, as follows:
Note: If you see a message that says "devkit-launcher can’t be opened because it is from an unidentified developer", right-click the file and select Open with. Select the Terminal app. In the dialog box that opens, click Open.
Launch Eclipse
- Once the file is extracted, navigate to the directory you created in the steps above: iotdk-ide-win, iotdk-ide-linux, or iotdk-ide-mac.
- Double-click
devkit-launcher.batto launch the Eclipse* integrated development environment (Figure 2).
Note: Using the batch file (instead of the Eclipse executable) will launch Eclipse with all the necessary environment settings. Use devkit-launcher.bat to launch Eclipse every time.

Note: Using the batch file (instead of the Eclipse executable) will launch Eclipse with all the necessary environment settings. Use devkit-launcher.bat to launch Eclipse every time.
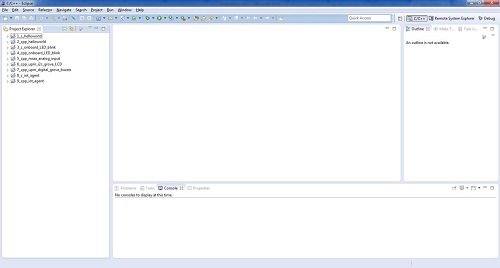
The end result should look like this:
Connect the Eclipse IDE to your board
- To connect to your Intel Edison or Intel Galileo board, configure Eclipse with your board’s IP address.

- Click the Remote System Explorer tab in the top right corner of the Eclipse screen.
- Select Edison or Galileo on the top-left side, depending on your Intel IoT device.
- A menu of settings opens in the lower-left side. Replace the entry for Host name with the IP address of your Intel board.
Run a sample application
The version of Eclipse distributed with the developer kit has some built-in example projects. Execute a simple one to test for proper connection.

- Click the C/C++ tab on the top right corner.
- In the Project Explorer panel, right-click 4_cpp_onboard_LED_blink. This particular example blinks an LED on the IoT board.
- Select Build Project. This compiles and builds the project.
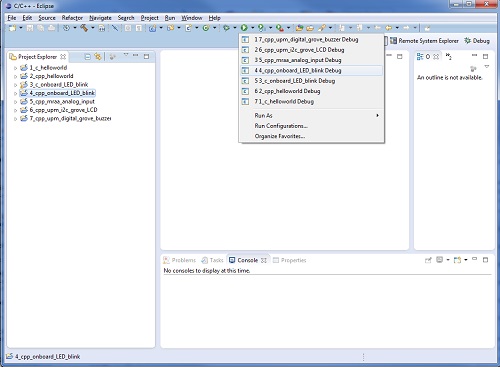
- Click the dropdown menu on the Run icon.
- Select 4_cpp_onboard_LED_blinkDebug. The Enter Password dialog box opens.
- Type
rootin the User ID field, then click OK.

- The following authentication warning will appear only once. Click Yes to proceed.

Note (Intel® Edison only): If you are having problems connecting, try running the following commands in a terminal on your Intel IoT platform (to set up the terminal, refer to Step 1 – Setup Hardware in the Getting Started Section of the Getting Started Home – Edison page.#ifconfig usb0 down
#ifconfig wlan0 down
#ifconfig wlan0 up - Look at your board for a blinking light
|
Intel Galileo Gen1 A green LED should be blinking in the bottom-left corner. |
|
|
Intel Galileo Gen2 A green LED located near the USB port should be blinking. |
|
|
Intel Edison The LED located near the center of the board should be blinking. |
|


Next Steps
You have now successfully gotten your Edison board to blink its on-board LED using the Eclipse IDE. Explore the capabilities of the Eclipse* IDE:
- Next Steps: Create Applications with DevKit
- Guide to Eclipse* IDE (Creating new projects)
- Remote (Shell) access through Eclipse* IDE
- Getting Started Home
Troubleshooting
- If you have any issues or questions, visit the Intel IoT Forum to post your questions and look for solutions.