
Sample Codes for Video 3D on Android
5.00/5 (4 votes)
In Android, it is very easy to create an app that can play video clips; it is also easy to create a game app with 3D graphic surface. But it is not straightforward to create an app that can play video on a 3D graphic object. This article describes an app I created with the goal of meeting this chall
Introduction
 In Android, it is very easy to create an app that can play video clips; it is also easy to create a game app with 3D graphic surface. But it is not straightforward to create an app that can play video on a 3D graphic object. This article describes an app I created with the goal of meeting this challenge. The app plays a video rendering on the 3D surface and lets the user play with the video surface interactively.
Three implementation challenges had to be overcome for this app:
- How to construct the code so that the user can change the 3D surface while the video is playing at the same time.
- Although the default MediaPlayer in Android is well-equipped with the playback actions, it is impossible to get the video image data and render it in a customized manner.
- How can the graphic component be designed to perform video data rendering?
This app also challenges the device capabilities since it forces the video and graphic objects to work at the same time. This paper will introduce the features and usage of this app, and then describe the design briefly.
The Features
This app has the following features:
- It lets the user select video clips from his/her local media library.
- The app works in both vertical layout and horizontal layout; the video can be played continuously when the layout is changed.
- It has three playback modes:
- Default mode: This is the normal playback mode; the video clip will be played like a normal media player.
- Random spin: The surface of the video is spun randomly along both horizontal and vertical axes; the color is also toggled between a reddish tone and a normal color.
- Touch spin: The user can use touch to sweep and spin the surface left and right, varying the speed.
- When the app is pushed to the background or closed, the current clips can be saved and replayed when the app is re-activated.
Note: There is no video session control; so the user can’t stop, fast forward, or rewind the video. If the app is pushed to the background or stopped, the video can only be played from the beginning.
The Usage Model
Start playing video clips
The app doesn’t include any video, so the user can choose any video clips supported by the Android platform. But it is recommended to use a video clip with the H.264AVC codec in a MPEG-4 container because this was the format tested during the development. When the app is launched for the first time, the file chooser screen will display (see the screen shot on the previous page).
Once the user selects the preferred file chooser, onscreen directions are given. After a video clip is selected, playback will start.
Note: Sometimes it takes a while before the video starts—about 5~10 seconds.

Select a different mode
The app starts with the normal mode. To change modes, the user clicks the options button on the UI to launch the options menu.
The options menu has four choices: the first three are options of play mode; the last option allows the user to select different video clips.

Random Spin
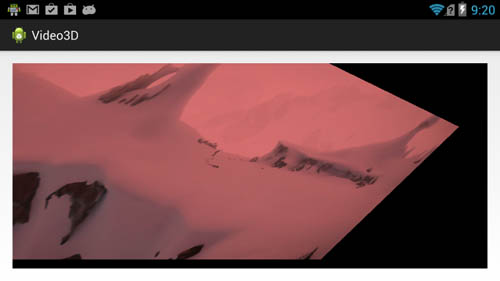
This selection causes the surface that renders the video to spin randomly with a 3D effect along the horizontal and the vertical axis. It also casts a reddish color on the screen periodically.

Touch spin
In the touch spin mode, the user can sweep left or right to let the surface spin along the vertical axis left or right. The spin accelerates with a faster sweep and decelerates naturally when the user stops sweeping.

The design
The three major components in this app are: the UI component to give the user an interactive presentation of the app; the video component to do the video playback; the OpenGL* surface to render the video frame buffer and create a 3D effect when in the special mode.

The video playback component has two threads. The video engine thread uses the MediaCodec class. This class was introduced in the Android JellyBean release (API 16). It exposes the low-level API of the Android media framework, so that the playback can be controlled at the frame level. On each video frame, the graphic component can hold the image data and change the way the image is being rendered.
The playback component also implemented an audio engine thread that plays the audio track of the video clips. To synchronize the video and audio threads so that the lips of the characters match the voice when they speak, the AV sync algorithm is implemented. The video playback always compares its time stamp with the audio time stamp. It will tweak the playback pace so that the video frame never exceeds the time limitation of 30 milliseconds.
The graphic component extends a GLSurfaceView so that a customized rendering class is embedded in the class. The rendering class implements the Renderer interface to do the OpenGL rendering algorithm. The algorithm implements the 3D spin effect on the texture surface and also changes the mode to different algorithms based on the user input.
In the render, spin and coloring of the video frame are handled via a simple vertex and pixel shader. Spin of the video plane is performed by application of a series of Euler-angle rotations. Colorization of the frame is achieved via a linear mixing of the video frame contents and a fixed color (red in this case) inside the pixel shader.
The graphic component also works as a video frame listener to the video engine and is passed to the MediaCodec object during the construction so that the rendering function will be called each time a frame is available. The graphic component has a function in the UI component so that the user can change the play mode .
The MediaCodec decoding process works at the pace of the video frame, and the render function in the graphic component works at the pace of the graphic frame. So the functions in both components must be synchronized when accessing the frame buffer.
Related links and resources:
- Porting OpenGL* Games to Android* on Intel Atom Processors
- Android* MediaPlayer Sample Code Walkthrough on Intel Architecture
- 3D Gaming on Intel Processor Graphics
- Intel Android* Developer Zone
To learn more about Intel tools for the Android developer, visit Intel® Developer Zone for Android.
About The Author
Mark Liu worked in the Intel Ultra-Mobile Group as a software engineer to develop the validation framework on Android based devices. He also joined several Android projects in the Intel Ultra-Mobile Group , including smartphone and tablet devices. Much of this work was related to media playback, video conference, and software stack performance tuning.
After joining the Intel Software and Services Group Intel® Atom™ processor-based device software enabling team, he worked on several horizontal efforts, including the development of Android sample media apps, system optimization of Windows* 8 media framework, and documentation for writing media apps.
Chris Kirkpatrick is a software applications engineer working in the Intel Software and Services Group supporting Intel graphics solutions in the Visual & Interactive Computing Engineering team. He holds a B.Sc. in Computer Science from Oregon State University.