
Thin Client for Microsoft Visual SourceSafe on Pocket PC / SmartPhones
4.21/5 (12 votes)
Thin client for Microsoft Visual SourceSafe on Pocket PC / SmartPhones targeting .NET Compact Framework.
- Download source (WebService and Client) - 33.4 KB
- Download binaries (WebService and Client) - 31.8 KB
Introduction
VSSThinClientSmart is a thin-client for Microsoft® Visual SourceSafe. The application targets the .NET Compact Framework and the .NET Framework to provide a user-friendly GUI to access a Visual SourceSafe database over a network from a Pocket PC / SmartPhone. The application exploits most of the major features of the .NET framework.
This product is a submission for the mobile contest.
Snaps


Motivation
Obviously, the prime motivation are CodeProject and HP! :) But, when I started to think about what I was going to develop for this contest, I was thinking like what I would expect on my Pocket PC if I am given a chance. I am working in a Software Development MNC and I have faced numerous situations wherein we need to view/verify a code when we were in a conference/chat. Though we have a computer in the conference room, we cannot provide network access to our code base directly to a common computer. Even if I had an option of a Pocket PC, I had no way to access our codebase. So, I thought it would be better if I can come up with an application to help many people around the world... and here it is!!!! A VSS ThinClient for Pocket PCs and SmartPhones.
Overall Design
Let me explain about the design of my application so that you can understand and appreciate the features better. VSSThinClientSmart is not a single application, but has a WebSerivce - VSSClientWebSerivce (on .NET) and a client application - VSSThinClientSmart (on .NET Compact). As you might guess, the WebService is the one that runs on the host workstation and is going to react on VSS, on behalf of the client application. The client application and the WebService communicate through SOAP and do the job. This is why I call the application as thin-client rather than just a client.
The picture would give you a clear view of the design.

Features
Although the webservice forms part of the whole application, let me talk about the client application first. More about the webservice in the Development section. VSSThinClientSmart provides almost all the commonly expected actions on SourceSafe, when in mobile. Here are the features..
- Secured Login
- Browse through the entire database
- Files
- Get Latest Version
- Delete
- Destroy Permanently
- View File Properties
- Projects
- Delete
- Destroy Permanently
- Label
- Customize View (based on File/Project status)
- Show only deleted files
- Show only checked-out files
Secured Login
You need to login to the VSSDatabase before proceeding with any operation on the VSSDatabase. VSSThinClientSmart provides you with a login screen as shown in the "Snaps" section. The user should enter the following information:
- Username - username as in the VSS database
- Password - password for the user
- Database - this is the most important, because the path of the srcsafe.ini file must be as per the visibility from the host computer (not from Pocket PC). If your VSS database is on a different server machine than the host computer, the Pocket PC need not have access to the server machine at all. It is enough if your host computer is connected to both the server and your Pocket PC. This ensures greater security, no?
The Webservice will provide a unique session ID on successful login, which would be internally maintained by the client application. This session ID will be used by the client application to authenticate itself for every operation after that.
Browse through the entire database
On successful login, the user will be provided with a UI to browse through the entire database and menus to perform all the provided operations on the database. VSSThinClientSmart provides you with a Main screen as shown in the "Snaps" section. The tree view at the top displays the list of Projects available as per the hierarchy. On selecting a particular project in the tree view, the list of files under the selected project will be displayed in the list box provided below the tree view.
Note: VSSThinClientSmart will not expand all the Projects by default. So, you can see the subprojects only on clicking on a particular project in the Projects view. This is done for optimizing the number of requests to the Webservice.
Files
VSSThinClientSmart provides you with a number of operations that can be performed on a file. Every operation has to be performed only after selecting a particular file from the Files list; failing which, would be reported with an appropriate error.
Operations on a file:
- Get Latest Version
- Delete
- Destroy Permanently
- View File Properties
All these operations are available in the File menu on the client application.

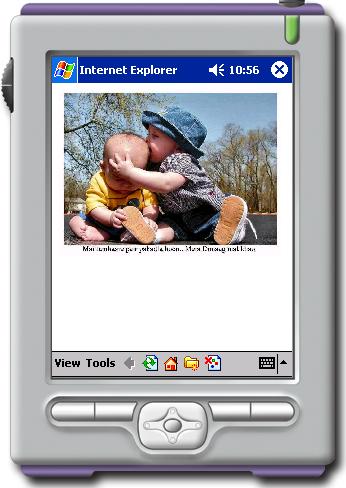
Get Latest Version
Get Latest Version aids to obtain the latest version of the selected file. On successful retrieval, a Save-File dialog will be opened to select a particular location to store the file. After that, the application also would ask if the user wants to open that file. The picture shown above, shows a .jpg file opened in Internet Explorer as per user selection.
Delete / Destroy Permanently
Delete a file, aids to delete the selected file. On clicking Delete, the user would be asked if he wants to delete the file permanently. If the user chooses No, the file will be deleted temporarily and shall be recovered later (though not from VSSThinClientSmart). If the user chooses Yes, the file will be destroyed permanently and can no longer be recovered (not only from VSSThinClientSmart).
View File Properties
Clicking on Properties aids the user to view the various properties of the selected file, like file name, size, checked out status etc.
Projects
VSSThinClientSmart provides you with a number of operations that can be performed on a project. Every operation has to be performed only after selecting a particular project from the Projects tree; failing which, would be reported with an appropriate error.
Operations on a Project:
- Delete
- Destroy Permanently
- Label
All these operations are available in the Project menu on the client application.


Delete / Destroy Permanently
The information about deleting a file and deleting a project are almost the same. Delete a Project, aids to delete the selected Project. On clicking Delete, the user would be asked if he wants to delete the Project permanently. If the user chooses No, the Project will be deleted temporarily and shall be recovered later. If the user chooses Yes, the Project will be destroyed permanently and can no longer be recovered.
Label
Clicking on Label aids to label the selected Project. The user would be asked for the Label Name and the Comment for the label. That's it. If the labeling action is successful, VSSThinClientSmart will report the success and switch back to the Main screen.
Customize View (based on File/Project status)
The user can customize the view by selecting one or more options from the View menu. The options are check options, so can be enabled or disabled using the same menu. Following are the modes of customization available to the user.
- Show only deleted files
- Show only checked-out files
All these operations are available in the View menu on the client application.
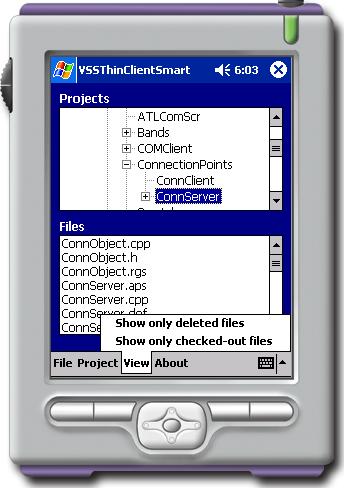
Show only deleted files
Clicking on Show only deleted files makes the File view to show only those files which have been deleted (i.e. temporarily).
Show only checked-out files
Clicking on Show only checked-out files makes the File view to show only those files which have been checked out (either by the current user or any other user). This is applicable only for files.
Note: a tick mark will be shown in front of the menu item if the item is enabled.
Development
I developed this application using Microsoft® Visual Studio .NET 2003 with Pocket PC 2002 Emulator. Though I can't walk you through the entire code-base, I shall say about the methods supported in my webservice.
VSSClientWebService supports the following methods:
OpenDatabaseUsed to login into a VSS database and create a session.
GetItemsInFolderUsed to obtain the list of subprojects and files under a given project.
CloseDatabaseCloses the database and destroys the session.
DeleteUsed to delete a file or project, temporarily or permanently.
GetFileInfoUsed to obtain the properties of the specified file.
LabelProjectUsed to label a project.
GetFileUsed to obtain the latest version of a given file.
Development Platforms
- WebService: .NET Framework 1.1
- Client application: .Net Compact Framework 1.0 SP2
- Emulator: Pocket PC 2002 Emulator
How things work
The webservice that I have developed acts as a proxy VSS Automation Component to the client. All requests from the Pocket PC/Smart Phone are sent to the WebService and the Webservice instantiates the VSS Automation Component through the .NET Interop Services, and does the job on behalf of the client and returns back the result. This has been clearly depicted in the Overall Design Architecture. Once the user logs into the database successfully, a unique session is created for that user and is held in the Server (WebService) until the user closes the database.
Most of the WebMethods return a structure to provide necessary information to the client application. For example, the following is the ResponseXML returned from the OpenDatabase WebMethod.
 <OpenDatabaseResult>
   <bSucceeded>boolean</bSucceeded>
   <SessionId>string</SessionId>
   <ErrorMsg>string</ErrorMsg>
 </OpenDatabaseResult>
If the OpenDatabase WebMethod fails, then the error information will be returned as string in <ErrorMsg> tag.
Similarly, the following is the response for GetFileInfo WebMethod:
 <GetFileInfoResult>
   <isValid>boolean</isValid>
   <FileName>string</FileName>
   <SizeInBytes>long</SizeInBytes>
   <isDeleted>boolean</isDeleted>
   <isCheckedOut>boolean</isCheckedOut>
 </GetFileInfoResult>
These XMLs can be directly serialized/de-serialized as objects, due to the advent of .NET, and it's that easy!!
.NET features used
- WebService
- Serialization/De-serialization
- Interop Services (RCW)
This is how .NET Webservice accesses the VSS Automation COM Component.
- Delegates
All the functionalities are executed by the MainForm in the client application. When the user clicks on Label, to label a Project, the Label string and the Comment string are obtained in a different Windows Form. The MainForm provides a handler to the Label-Input form, as delegate to callback when the user is done providing the input. So, when the user provides the input strings and clicks the "Label" button in the Label-Input form, the user-inputs are given to the Main Form using a delegate (
LabelProjectHandler) to proceed with the execution.
What's Next
Although this application implements most of the commonly expected operations on VSS when in mobile, there are a few more operations like check-out/check-in which would enrich the application still further. The next version on this, shall include all those capabilities.