Optimize WordPress Speed Hosted on IIS
0/5 (0 vote)
How to optimize WordPress speed hosted on IIS
If you’re interested in getting a high score in ySlow or PageSpeed for your blog and your blog happens to be hosted on IIS of Windows Server, here are some tips:
1. Enable gzip
- To enable gzip on IIS, first add Dynamic Content Compression Role Services for IIS.
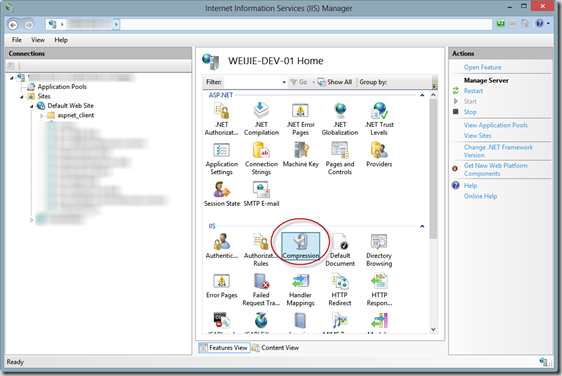
- If your site is running with Application Pool Identity account, you need to grant IIS apppool\[your application pool name] user full control access to the folder %SystemDrive%\inetpub\temp\IIS Temporary Compressed Files. This is the default temp folder which is used by IIS for content compression. Double click the following icon to see which is the default folder for compression in your situation.
- In your site’s Web.Config file, under
system.webServerelement, add the following configuration:<httpCompression directory=" %SystemDrive%\inetpub\temp\IIS Temporary Compressed Files"> <scheme name="gzip" dll="%Windir%\system32\inetsrv\gzip.dll" /> <dynamicTypes> <add mimeType="text/*" enabled="true" /> <add mimeType="message/*" enabled="true" /> <add mimeType="application/javascript" enabled="true" /> <add mimeType="*/*" enabled="false" /> </dynamicTypes> <staticTypes> <add mimeType="text/*" enabled="true" /> <add mimeType="message/*" enabled="true" /> <add mimeType="application/javascript" enabled="true" /> <add mimeType="*/*" enabled="false" /> </staticTypes> </httpCompression> <urlCompression doStaticCompression="true" doDynamicCompression="true" /> - Check with Firebug or Chrome developer tools if there’s Content-Encoding is gzip in the header of your site’s HTTP response:
2. Combine JavaScript File
For example, your site has a list of JavaScript files, you can:
- Combine them into one single file by the following command:
copy /b *.js source.js
- If you’re using SublimeText, install the Sublime-Minifier plugin, hit ctrl+alt+shift+m, compress the source.js to source.min.js.
- Replace the JavaScript files with the compressed file.
3. Add Expiration for Static Files
- In your site’s Web.Config file, again, under
system.webServerelement, add:<staticContent> <clientCache cacheControlMode="UseMaxAge" cacheControlMaxAge="3.00:00:00" cacheControlCustom="public" /> </staticContent>
- If you have a favicon, under configuration element, add:
<location path="favicon.ico">
  <system.webServer>
    <staticContent>
    <clientCache cacheControlMode="UseMaxAge" cacheControlMaxAge="7.00:00:00"
    cacheControlCustom="public" />
    </staticContent>
  </system.webServer>
</location>
You can adjust the time according to your situation.
4. Add *.css File in Header and *.js Files on the Bottom of the Page
I use Add to Header and Add to Footer plugin to insert CSS files and JS files. Place your CSS files to header and JavaScript files to footer.
After the steps above, your site probably will have a better score in ySlow and PageSpeed. Happy blogging! ![]()


