
Rippling Reflection Effect with Silverlight 3’s WriteableBitmap
5.00/5 (2 votes)
Rippling reflection effect with Silverlight 3's WriteableBitmap
This blog post demonstrates how Silverlight 3’s WriteableBitmap can be used to create a UserControl that renders the content of any other Framework Element as a reflection with an animated ripple effect.

[See the above animation in action on my blog.]
I was sad to hear the news earlier this year that Yahoo! was pulling the plug on GeoCities. Somewhere buried deep within GeoCities is the first web page I ever created, complete with “Under Construction” banner, animated GIFs, guestbooks, and nasty background music. Unfortunately, I have no idea what the URL for that page was, and this is long before Google ran my life!
This blog post is a tribute to one of the many dynamic effects that were popular in the 90’s, animated reflections. These Java applets were quite popular for a while, but have gone the same way as GeoCities. Perhaps it is time for a revival?
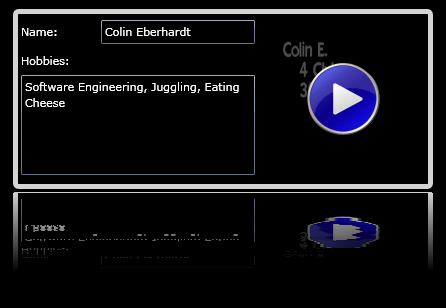
The Silverlight application shown above contains a UserControl which renders an animated reflection of a referenced FrameworkElement.
The code which produces the ripple is very simple, A DispatcherTimer increments _time and redraws the reflection. The reflection itself is achieved by constructing a WriteableBitmap from the referenced element, allowing us to grab its pixel values. Another WriteableBitmap is constructed for the reflection image, and rows of pixels are copied across with a suitable Y offset to produce the ripple effect:
private double _time = 0.0;

private void Timer_Tick(object sender, EventArgs e)
{
    // increment phi and update the reflection
    _time += 0.4;
    UpdateReflection();
}

/// <summary>
/// Copies an inverted image of the referenced FrameworkElement
/// with a 'ripple' effect
/// </summary>
private void UpdateReflection()
{
    FrameworkElement reflectedFE = ReflectedElement as FrameworkElement;

    if (reflectedFE == null)
        return;

    // synchronize the element width
    Width = reflectedFE.ActualWidth;

    // copy the source into a writeable bitmap
    WriteableBitmap sourceBitmap = new WriteableBitmap(reflectedFE, null);

    // create a target which is the same width / height as the reflection element
    WriteableBitmap targetBitmap =
	new WriteableBitmap((int)ActualWidth, (int)ActualHeight);

    // copy the reflection
    for (int y = 0; y < targetBitmap.PixelHeight; y++)
    {
        double amplitude = ComputeAmplitude(y, targetBitmap.PixelHeight);
        double sinusoid = ComputeRipple(y, targetBitmap.PixelHeight, _time);

        // the offset to the y value index caused by the ripple
        int yOffset = (int)(sinusoid * amplitude);

        // compute the Y position of the line to copy from the source image
        int sourceYLocation = sourceBitmap.PixelHeight - 1 -
            ((y + yOffset) * sourceBitmap.PixelHeight) / targetBitmap.PixelHeight;

        // check that this value is in range
        sourceYLocation = Math.Min
	(sourceBitmap.PixelHeight - 1, Math.Max(0, sourceYLocation));

        // copy the required row
        int sourceIndex = sourceYLocation * sourceBitmap.PixelWidth;
        int targetIndex = y * targetBitmap.PixelWidth;
        for (int i = 0; i < targetBitmap.PixelWidth; i++)
        {
            targetBitmap.Pixels[targetIndex++] = sourceBitmap.Pixels[sourceIndex++];
        }
    }

    targetBitmap.Invalidate();

    LayoutRoot.Source = targetBitmap;
}

/// <summary>
/// Compute the amplitude of the oscillations at a given Y position
/// </summary>
private double ComputeAmplitude(int y, int height)
{
    // our amplitude range is 1 to 3
    return ((double)y * 2) / (double)height + 1.0;
}

/// <summary>
/// Compute the sinusoid applied to the image at the given location
/// </summary>
private double ComputeRipple(int y, int height, double time)
{
    // provide a ripple that is the combination of two out of phase sine waves
    double phaseFactor = (double)y / (double)height;
    return Math.Sin(time + phaseFactor * 16) + Math.Sin(time + phaseFactor * 30)
        + Math.Sin(time + phaseFactor * 62);
}
The XAML for this user control is simply an image with an opacity gradient:
<UserControl x:Class="SilverlightShimmer.ReflectionControl"
    xmlns="http://schemas.microsoft.com/winfx/2006/xaml/presentation"
    xmlns:x="http://schemas.microsoft.com/winfx/2006/xaml"
    Width="300" Height="300">
    <Image x:Name="LayoutRoot">
        <Image.OpacityMask>
            <LinearGradientBrush EndPoint="0.5,1" StartPoint="0.5,0">
                <GradientStop Color="#FF000000" Offset="0"/>
                <GradientStop Color="#00000000" Offset="1"/>
            </LinearGradientBrush>
        </Image.OpacityMask>
    </Image>
</UserControl>
This control is associated with our Christmas-ey image as follows:
<UserControl x:Class="SilverlightShimmer.MainPage"
    xmlns="http://schemas.microsoft.com/winfx/2006/xaml/presentation"
    xmlns:x="http://schemas.microsoft.com/winfx/2006/xaml"
    xmlns:local="clr-namespace:SilverlightShimmer" Width="320" Height="260">

    <Grid Background="Black">

        <StackPanel Orientation="Vertical" Margin="10">
            <Border  x:Name="controlToReflect"
		BorderThickness="5" BorderBrush="LightGray"
                     CornerRadius="3" HorizontalAlignment="Center">
                <Image  Source="christmas.jpg" Margin="3"
                        Stretch="None"/>
            </Border>
            <local:ReflectionControl x:Name="shimmer" Height="80" Margin="3"
                       ReflectedElement="{Binding ElementName=controlToReflect}"/>
        </StackPanel>
    </Grid>
</UserControl>
One interesting point here is the way in which the Border and Image are associated with the ReflectionControl. The ReflectedElement property is bound to the Border via an ElementName binding, however this binding has no Path. Therefore, rather than binding to a property of the referenced element, the ReflectedElement is bound to the element itself. Hence, no need for any code behind to associate the ReflectionControl with the element(s) to render.
This control can be used to render a reflection of anything (even a reflection of a reflection if you so wish). Here is a more complex example:
[See the above animation in action on my blog.]
You can download the full source code here: SilverlightShimmer.zip.
Regards,
Colin E.