
Install Power View for multi-dimensional model
5.00/5 (2 votes)
This document evaluates the latest functionality provided by Microsoft SQL Server 2012 With Power View for Multidimensional Models and not just Tabular Models.
Introduction
This document evaluates the latest functionality provided by Microsoft SQL Server 2012 With Power View for Multidimensional Models, this SQL Server 2012 CTP release allows connections between Power View and Multidimensional Models (cubes) and not just Tabular Models. Contains step by step instructions with screenshots for installing and creating a Microsoft Business Intelligence infrastructure based on Power View an new tool for Data Visualization. Additionally this document gives a Service Level Agreement applicable to other companies.
System Requirements
Before installing this new SQL Server release, there are some requirements that we must be fulfilled.
Hardware
Hardware requirements for installing required software was very demanding for the VM running on a desktop environment used for this evaluation. You can see more detailed information on these matters at following references:
- Hardware and software requirements for SharePoint 2013
- Microsoft SQL Server 2012 With Power View For Multidimensional Models CTP
Internet Connection
Having network adapter with access to Internet is recommended. Also we must turn Windows Firewall off in the server. Finally, for testing purposes is a good idea to turn Internet Explorer Enhanced Security Configuration off.
Software
These are the required software component required to install Power View for Multidimensional Model:
- Microsoft SharePoint 2013 is a integral part of the Microsoft Business Stack. We need to complete the prerequisites through Microsoft SharePoint 2013 Preparation Tool. This download an install e.g. Microsoft WCF Data Services 5.0, Framework 4.5, etc.
- We need Microsoft SQL Server 2012 with Power View for Multidimensional Model CTP; unfortunately, this is not a SQL Server Production Version when I wrote this document.
- Microsoft Silverlight in order to work with Collection Site inside of SharePoint 2013 and PowerPivot Gallery.
Installation overview
- Assign a fixed IP on a LAN Segment for a Domain Controller.
- Add a Domain Controller Role to the Server
- Promote Windows 2012 Server to Domain Controller
- Create Domain Accounts for SQL and SharePoint Services.
- Install a new and complete instance of SQL Server 2012 CTP.
- Install prerequisites for SharePoint 2013, Restart and complete the Installation.
- Install SQL Server Power Pivot for SharePoint.
- Run the Tool PowerPivot Configuration Tool to integrate both SQL Server and SharePoint.
- Enable SharePoint Enterprise Features and services.
- Configure PerformancePoint Service Application.
- Configure SSRS Integration and PowerView.
- Add Report Server Content Types to a Library
Detailed Installation procedure
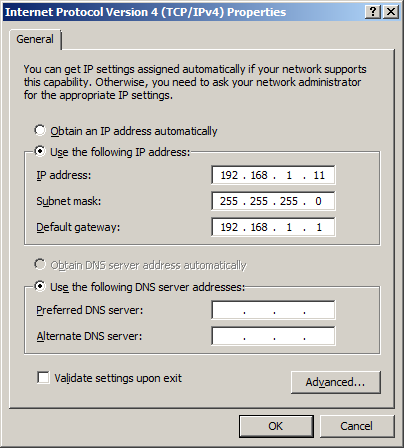
1 Assign a fixed IP on a LAN Segment for a Domain Controller
For example, assign a static IP to the server (e.g., 192.168.1.11) with subnet mask: 255.255.255.0 and default Gateway: 192.168.1.1 and other setting as shown below:
2 Add “Domain Controller” Role
Before installing anything, we need to add “Active Directory Domain Services” role by using Add Roles and Features Wizard as depicted in following screenshots (If we run from Windows Server 2008 we can run the command “dcpromo”):
Run “Server Manager” for Windows Server 2012 and setup this feature:

For Installation Type select Role-Based option:

In “Select destination server” screen, check “Select a server from the server pool” option:

To install Active Directory select Active Directory Domain Services. In “Add Roles and Features Wizard” dialog, select Add Features:

Then, select Active Directory Domain Services and click “Next >”.

By default the Group Policy Management is selected, click “Next >”:

The next screen only show basic information and click next.

We need just confirm to continue with the configuration Wizard:

The installation of the wizard begins:

3 Promoting Windows 2012 Server to Domain Controller
After going to Server Manager and selecting the left upper option in a warning signal, select promote the server to a domain controller:

When the Active Directory Domain Services Configuration Wizard appears, select option “Add a new forest” and specify the root domain name e.g. “bigdata.com “:

Promoting In “Domain Controller” screen, for “Forest Functional Level ” and “Domain Functional Level” options select “Windows Server 2012″. For “Specify the Domain Controller capabilities” check Domain Name System (DNS Server:

In the next DNS options warning dialog, just select OK:

Verify that the NetBios name is taken from Root Domain Name:

Leave paths in default values:

Review the options

Run the prerequisites Check:

4 Create Domain Accounts for SQL and SharePoint Services.
Run Server manager-> Tools-> Active Directory User and Computers

Add the following Accounts:
- SQLS (SQL Server database engine Account)
- SSAS (SQL Server Analysis Services Account)
- SSRS (SQL Server Reporting Services Account)

It's best practice to create an account for each SQL and SharePoint service. And this service accounts should be added to the Administrators group as local administrators on the server and as Domain Administrators.

5 Install a new and complete instance of SQL Server 2012 CTP.
Select the first installation option of SQL Server 2012 CTP installer. A new SQL Server stand-alone installation or add features to an existing installation:

Deslect Include SQL Server product update because at the moment of installation this is the last version created.

A rule check start to run, a Warning is show because is not recommended to run a instance of SQL Server on a Domain Controller:

Specify the product Key ( I left in a Evaluation version)

Select SQL Server Feature Installation :

Select Default Instance and the name of Instance ID to MSQSQLSERVER

Press “next >” in screen showing “Disk Space Requirement”:

Select the appropiate accounts created for this purpose a in previous step “Create Domain Accounts for SQL and Sharepoint Services”:

Set the Autentication Mode to Mixed and provide a srtong password . Also specify an SQL Server administrator (I select Add Current User):

This point is very important, we should select Multidimensional and Data Mining Mode:

Select the Reporting Services SharePoint integrated mode to Install only.

Click “Next >” in “Error Reporting” screen:

Click “Next >” in “Installation Configuration Rules” screen when It’s completed:

Click “Install” in Ready to Install screen:


6 Install prerequisites for SharePoint 2013, Restart and complete the Installation.
Before installing all prerequisites for SharePoint 2013, is important that you are connected to Internet to download them.

This is the summary of software prerequisite installer for SharePoint 2013

After we run the Setup of SharePoint 2013 we left the File Location to default:

We must check “Run SharePoint Configuration Wizard now”.

The SharePoint Products Configuration Wizard begin, with a Warning because IIS, SharePoint Timer Services, and SharePoint Administration Services will restart:

Then select Create a new server Farm:

Specify the Configuration Database settings, and Specify the Database Access Account. This account must be a Domain Account for install correctly.

Then specify the port number and configure security settings.

Just only a summary of the steps that have been taken:

When the installation is complete we get a screen with Configuration Successful. To to see if the installation was successful we can run the tool “SharePoint 2013 Central Administration”. This will open the administration Site of SharePoint (previous to provide the credentials).
7 Install SQL Server Power Pivot for SharePoint.
Run the Setup from SQL Server SQL 2012 CTP and in the step of Setup Role select “SQL Server PowerPivot for SharePoint” and not “Add SQL Server Database Relational engine Services to this installation”

In “feature selection” screen, we don’t select anything and by default all the required options are selected.

Click “Next >” when Installation Rules screen completes:

Select The instance Configuration and enter POWERPIVOT for the Instance ID

After this screen we get a Summary of Disk Usage screen the same screen in Install a new and complete instance of SQL Server 2012 CTP” for Disk Space Requirement .
Select the appropriate accounts created for this purpose a in previous step “Create Domain Accounts for SQL and SharePoint Services”:

Set the Authentication Mode to Mixed and provide a strong password . Also specify an SQL Server
administrator (I select Add Current User):

Add a user to have administrative permissions for SQL Server Analysis Services:

The rest of the steps are very similar to previous installation and are just almost intutitive.
8 Run the Tool PowerPivot Configuration Tool to integrate both SQL Server and Sharepoint.
Once we’ve installed SQL Server Power Pivot for SharePoint we have two Tools to integrate and configure: (1)Sharepoint and (2)SQL Server. The one in SharePoint 2010 is called “PowerPivot Configuration Tool”. As we are integrating with SharePoint 2013, we are going to use PowerPivot for SharePoint 2013 Configuration Tool .

In the PowerPivot Configuration Tool we select “Configure or Repair PoverPivot for SharePoint:

A validation Process begin with 24 steps to complete. Then we get the PowerPivot Configuration Tool with all the steps and parameters to configure.
Set the SQL Server to create the Database, and specify the PowerPivot Server for excel Services to its default setting.

In the Create Default Web Application we must provide a URL to run, http://SERVER2012DC, which is the name of the server, has been used. Don’t forget to include a contact e-mail in the “Create a Site Collection” step.
To check if the installation was successful, we should run the tool “SharePoint 2013 Central Administration”. This will open SharePoint's administration Web Site running in a different port than default TCP/80.
Besides the administration site, another SharePoint's web site known as a “collection site” should also be present. This collection site hosts a PowerPivot Gallery (a new template for BI sites) installed by default at http://SERVER2012DC

9 Enable SharePoint Enterprise Features and services.
Initially, we must enable features needed to correctly create Reports in PowerView. On the main page of SharePoint Administration Site, we have “System Settings” section under which we should select “Manage Services on server” option as showed next.

We need to enable: Business Data Connectivity Services and Performance Point Services

Next, in the page “Site Settings” and under “Site Collection Administration”, we select “Site collection features”

At this screen, we activate these features:
-
PerformancePoint Services Site Collection Features
-
Power View Integration Feature
-
PowerPivot Feature Integration for Site Collections
-
SharePoint Server Enterprise Site Collection features

Go back to “Site Settings” screen, select “enable some features”, then select “Manage Site Features” and activate:
- BICenter Data Connections Feature
- PerformancePont Services Site Features
- SharePoint Server Enterprise Site features


10 Configure PerformancePoint Service Application
On the main page of Administration Site and under Application Management -> Manage Service applications.

From there, we select the “New” menu in the ribbon menu and select “PerformancePoint Service Application”:

We must provide a Name for this application and also specify the Database Server a Name for the Database. Then we use Windows authentication as credentials.

We set create a new Application Pool in IIS and provide a name for it.

After we finish creating the integration we get:

11 Configure SSRS Integration and PowerView
To enable the integration with SQL Server Reporting Services and PowerView we need to run some commands from SharePoint 2013 Management Shell and Run as Administrator.

Run the following PowerShell command to install Sharepoint integrated to SSRS:
- Install-SPRSService
- Install-SPRSServiceProxy
- get-spserviceinstance -all |where {$_.TypeName -like “SQL Server Reporting*”} | Start-SPServiceInstance

We return to Admin Site and select under Application Management -> Manage Service applications

From there, we select the “New” in the ribbon menu and select “SQL Server Reporting Services Service Application”:

We must set some values as the Name of Service for this SSRS Service Application. Create a new application pool for IIS and enter a name for it.

Scroll the page and enter Database server and a Name for a Database. Use Windows Authentication for credentials.

Set the Web Application Association to SharePoint -80

After we finish to create the integration we get:

12 Add Report Server Content Types to a Library
The last step to enable and create Reports in PowerView is adding report Server Content Type to a Library.
We set this the default collection site running on http://SERVER2012DC and in the main page go to Settings -> Advanced Settings. In the Content Types section, select Yes to allow management of content types.

To Add Reporting Services content types we go to Library Settings and under Content Types, click Add from existing site content types:

In Select site content types from, select SQL Server Reporting Services Content Types. Also In the Available Site Content Types list, click Report Builder and Report Data Source , then click Add to move the selected content type to the Content types to add list

We must get this configuration:

After and before to create Reports in PowerView we must download and install Microsoft Silverlight 5.

In this phase we need to deploy the database an Cube on SSAS, to work in this example I the very classic Adventure WorksDW and related cubes which in this case are two we must use Adventure Works. You can download both from http://msftdbprodsamples.codeplex.com/releases/view/55330

We must create a Report Data Source similar that we do in Reporting Services.

We must provide a Name for this Report Data Source and select the Data Source Type to “Microsoft BI Semantic Model for Power View”. Also we left the windows authentication and Tets the connection.
Don’t forget to set “Enable this Data Source”

Once we create a new Data Source we select the three points and in the options OPEN SHARE FOLLOW we select three points again to show the menu and select “Create a Power View Report”

And you can follow the instructions here to populate and create an amazing PowerView Report:

SLA – Acceptance criteria
Power View show us an interactive data exploration and presentation experience in this configuration with SQL Server 2012. Beside of that we prepare a SLA Acceptance criteria for this new BI product:
| Criteria | Yes/No | Comments |
| Prove that we can connect to the SSAS cube | Yes | |
| Does it connect natively or does it grab all data and stick it in its own database | Yes | |
| Identify platform requirements | We need SharePoint 2013 and SQL Server 2012 SP1 CTP edition | |
| Identify cost structure | We require a SharePoint Enterprise License CAL or SharePoint Online with $3 or $7 user/month | |
| Automation | Yes | On SharePoint we have SharePoint Server Publishing Infrastructure. |
A downside of this platform is the use of Silverlight in front end and this because Microsoft eventually will not support anymore. For me is better follow a standard and clean way with HMTL5 without any plug-ins. Another downside is the dependency of SharePoint to work with Power View in any case is better to work with Reporting Services as I suggest in the Microsoft site: http://connect.microsoft.com/SQLServer/feedback/details/738938/power-view-without-silverlight.
At the end I want to show a demo about Natural Interaction with Power View and Kinect made for the Microsoft Team