Working with AWS Lambda C++ Runtime as Lambda layer
How to put the AWS Lambda C++ Runtime into a Lambda layer and how to use it
Introduction
At AWS Lambda C++ Runtime, there is a C++ Runtime for AWS Lambda implemented. You can locally create an AWS Lambda function in C++, compile it, create a zip-package containing the executable and the C++ Runtime and upload the whole package to AWS. This upload package is rather large in size. To avoid uploading the whole runtime every time you build a new Lambda C++ executable, Amazon has created the concept of layers.
Background
Click the link below if you want to learn some basics of Lambda layers.
There are multiple reasons why you might consider using layers:
- To reduce the size of your deployment packages. ...
- To separate core function logic from dependencies. ...
- To share dependencies across multiple functions. ...
Sample applications The GitHub repository for this guide provides blank sample applications that demonstrate the use of layers for dependency management.
Node.js – blank-nodejs
Python – blank-python
Java – blank-java
Ruby – blank-ruby
What I miss here is:
C++
Other compiled languages
In FAQ & Troubleshooting at AWS Lambda C++ Runtime, you can read:
1. Why is the zip file so large? what are all those files? Typically, the zip file is large because we have to package the entire C standard library. You can reduce the size by doing some or all of the following:
But a solution as layer is not offered.
I haven't found any article on the internet on how to achieve this. So, I will present my own solution on how to do this.
First of all:
Why Implement the Lambda Function in C/C++?
Here is a comparison of DurationInMS and BilledDurationInMS of a Custom Alexa Skill to turn lights on and off. Once as Python Lambda function and second as compiled C++ Lambda function. Both use there runtime in a layer. Once a Python Runtime layer and second, the C++ Runtime above.
The Lambda function is the endpoint of a Custom Alexa Skill named 'Mein Haus' (my home) which is also the invocation phrase.
The utterances are:
Licht an and Licht aus (light on, light off)
where an and aus are the values of an OnOff slot with the name state.
Here is an example of a Mein Haus dialog:

// the wake word

// invocation phrase

// response of LaunchRequest

// 1. LichtRequest

// response to 1. LichtRequest

// waiting for ask response of LichtRequest

// comes here

// 2. LichtRequest

// response to 2 LichtRequest

// StopRequest

// response of StopRequest
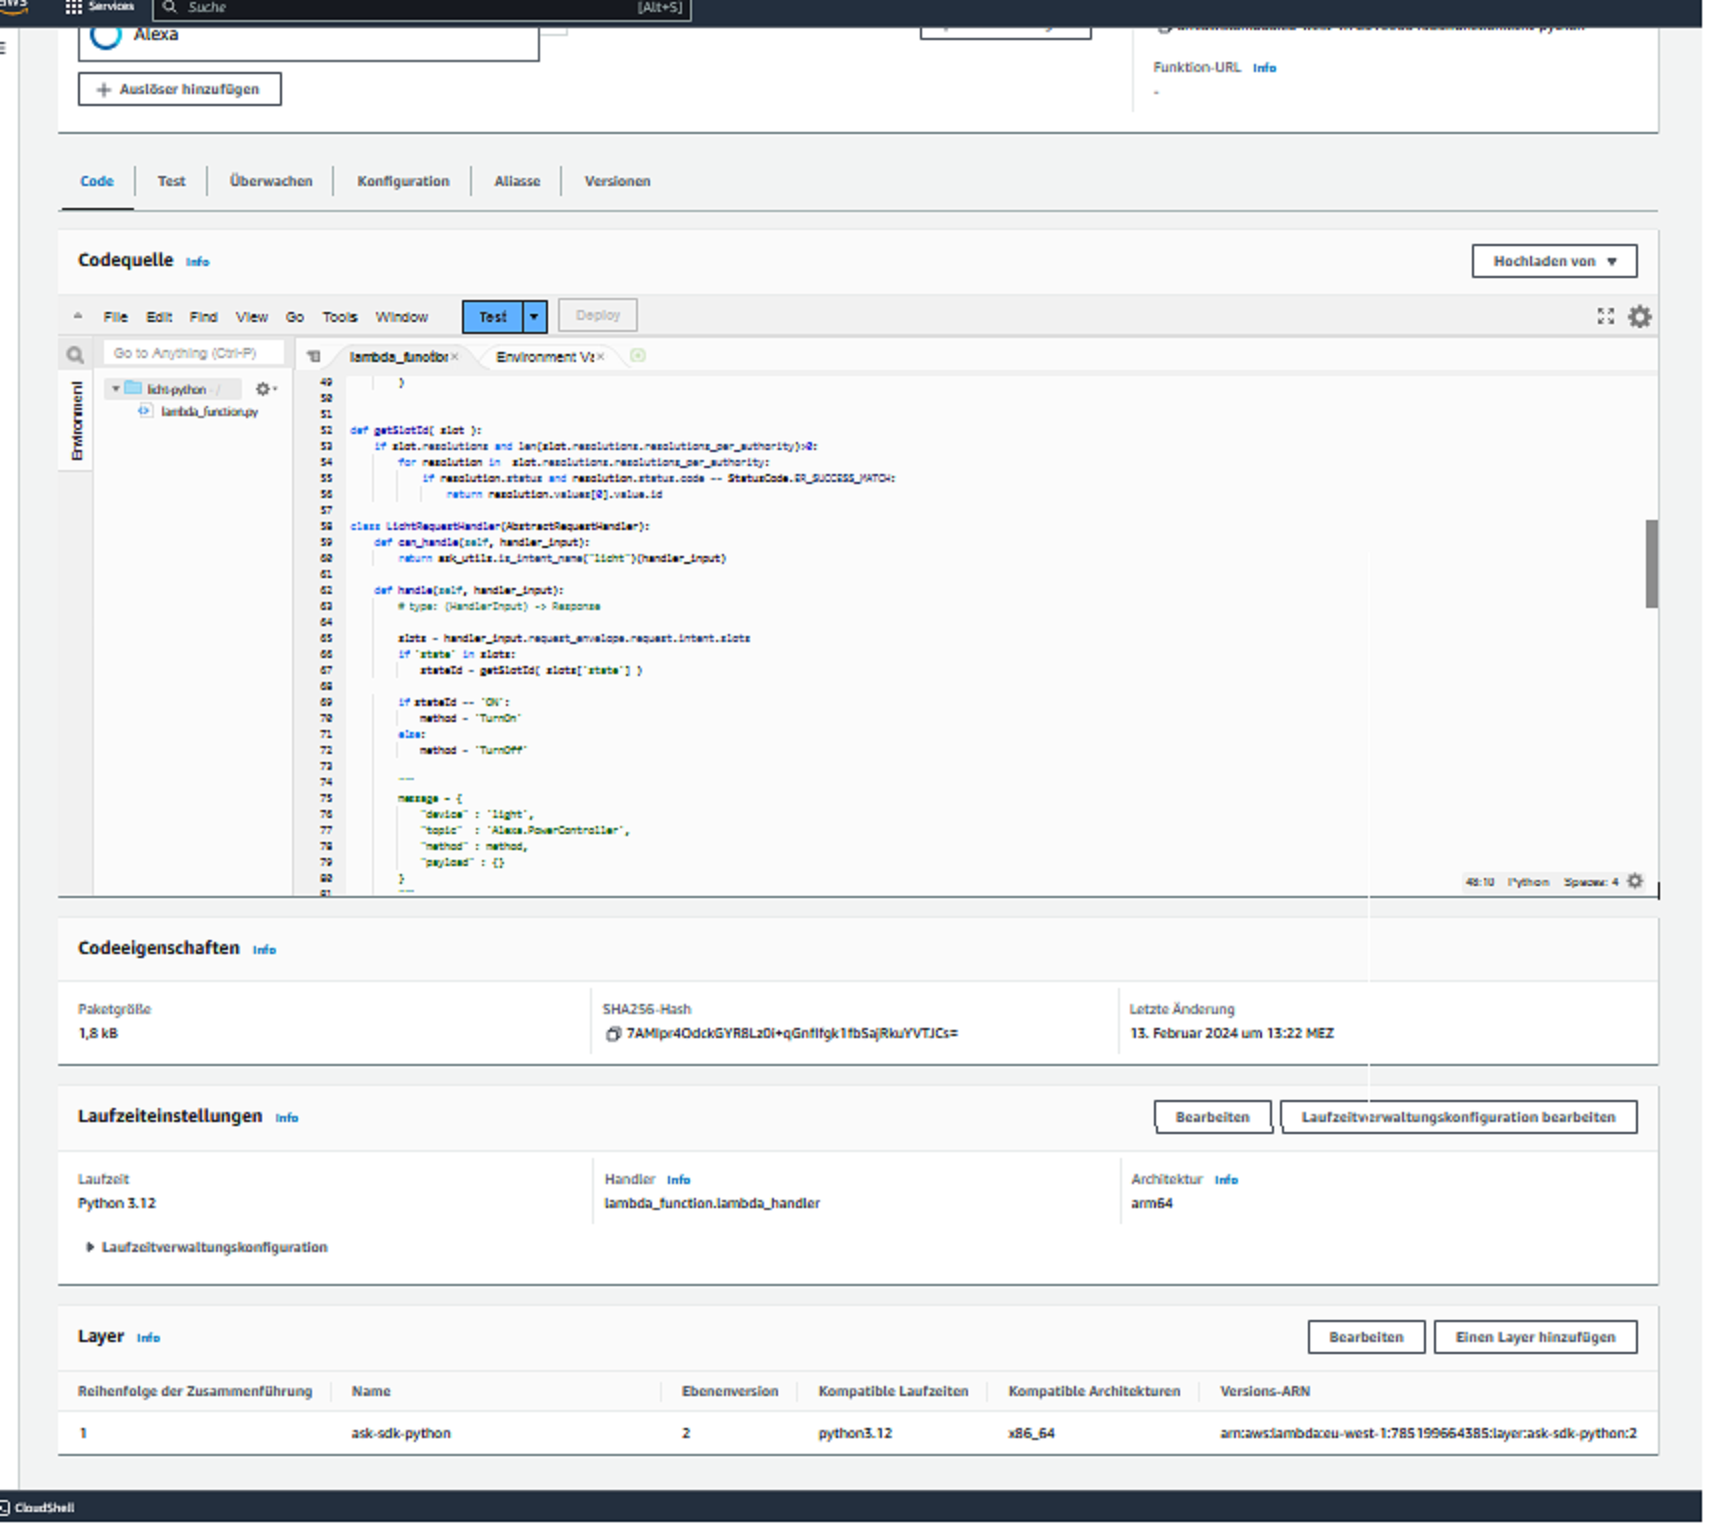
Here is the Python Lambda definition on the console for this:
with this source code:
#- coding: utf-8 -*-

# This sample demonstrates handling intents from an Alexa skill using the Alexa Skills Kit SDK for Python.
# Please visit https://alexa.design/cookbook for additional examples on implementing slots, dialog management,
# session persistence, api calls, and more.
# This sample is built using the handler classes approach in skill builder.
import logging
import ask_sdk_core.utils as ask_utils

from ask_sdk_core.skill_builder import SkillBuilder
from ask_sdk_core.dispatch_components import AbstractRequestHandler
from ask_sdk_core.dispatch_components import AbstractExceptionHandler
from ask_sdk_core.handler_input import HandlerInput
from ask_sdk_model import Response
from ask_sdk_model.slu.entityresolution.status_code import StatusCode

import socket
import struct

UDP_HOST = '<host>'
UDP_PORT =  <port>

class LaunchRequestHandler(AbstractRequestHandler):
    """Handler for Skill Launch."""
    def can_handle(self, handler_input):
        # type: (HandlerInput) -> bool
        return ask_utils.is_request_type("LaunchRequest")(handler_input)

    def handle(self, handler_input):
        # type: (HandlerInput) -> Response

        return (
            handler_input.response_builder
                .speak('sprich!')
                .ask('was soll ich tun?')
                .response
        )

def getSlotId( slot ):
    if slot.resolutions and len(slot.resolutions.resolutions_per_authority)>0:
        for resolution in  slot.resolutions.resolutions_per_authority:
            if resolution.status and resolution.status.code == StatusCode.ER_SUCCESS_MATCH:
                return resolution.values[0].value.id

class LichtRequestHandler(AbstractRequestHandler):
    def can_handle(self, handler_input):
        return ask_utils.is_intent_name("licht")(handler_input)

    def handle(self, handler_input):
        # type: (HandlerInput) -> Response

        slots = handler_input.request_envelope.request.intent.slots
        if 'state' in slots:
            stateId = getSlotId( slots['state'] )

        if stateId == 'ON':
            method = 'TurnOn'
        else:
            method = 'TurnOff'

        """
        message = {
            "device" : 'light',
            "topic"  : 'Alexa.PowerController',
            "method" : method,
            "payload" : {}
        }
        """
        message='{"device":"light","topic":"Alexa.PowerController","method":"%s","payload":{}}' % method

        with socket.socket(socket.AF_INET, socket.SOCK_DGRAM) as s:
          s.sendto( message.encode(),(UDP_HOST, UDP_PORT))

        return (
            handler_input.response_builder
                .speak('OK! Schalte Licht ' + slots['state'].value)
                .ask('und weiter?')
                .response
        )

class CancelOrStopIntentHandler(AbstractRequestHandler):
    """Single handler for Cancel and Stop Intent."""
    def can_handle(self, handler_input):
        # type: (HandlerInput) -> bool
        return (ask_utils.is_intent_name("AMAZON.CancelIntent")(handler_input) or
                ask_utils.is_intent_name("AMAZON.StopIntent")(handler_input))

    def handle(self, handler_input):
        # type: (HandlerInput) -> Response

        return (
            handler_input.response_builder
                .speak("Goodbye!")
                .response
        )

class FallbackIntentHandler(AbstractRequestHandler):

    def can_handle(self, handler_input):
        # type: (HandlerInput) -> bool
        return ask_utils.is_intent_name("AMAZON.FallbackIntent")(handler_input)

    def handle(self, handler_input):
        # type: (HandlerInput) -> Response
        return (
            handler_input.response_builder
                .speak("Hmm, Ich bin mir nicht sicher. Bitte wiederhole deine Absicht.")
                .ask("Bitte wiederhole deine Absicht.")
                .response
        )

class SessionEndedRequestHandler(AbstractRequestHandler):
    """Handler for Session End."""
    def can_handle(self, handler_input):
        # type: (HandlerInput) -> bool
        return ask_utils.is_request_type("SessionEndedRequest")(handler_input)

    def handle(self, handler_input):
        # type: (HandlerInput) -> Response

        # Any cleanup logic goes here.

        return handler_input.response_builder.response

class CatchAllExceptionHandler(AbstractExceptionHandler):
    """Generic error handling to capture any syntax or routing errors. If you receive an error
    stating the request handler chain is not found, you have not implemented a handler for
    the intent being invoked or included it in the skill builder below.
    """
    def can_handle(self, handler_input, exception):
        # type: (HandlerInput, Exception) -> bool
        return True

    def handle(self, handler_input, exception):
        # type: (HandlerInput, Exception) -> Response
        logger.error(exception, exc_info=True)

        speak_output = "Sorry, Ich habe Schwierigkeiten mit dem was du sagst. Bitte versuche es erneut."

        return (
            handler_input.response_builder
                .speak(speak_output)
                .ask(speak_output)
                .response
        )

# The SkillBuilder object acts as the entry point for your skill, routing all request and response
# payloads to the handlers above. Make sure any new handlers or interceptors you've
# defined are included below. The order matters - they're processed top to bottom.

sb = SkillBuilder()

sb.add_request_handler(LichtRequestHandler())
sb.add_request_handler(LaunchRequestHandler())
sb.add_request_handler(CancelOrStopIntentHandler())
sb.add_request_handler(FallbackIntentHandler())
sb.add_request_handler(SessionEndedRequestHandler())
sb.add_exception_handler(CatchAllExceptionHandler())

lambda_handler = sb.lambda_handler()
The handle() method of the LichtRequestHandler class first determines the value/id of the state slot. Then a message (json-object) containing control data for the recipient is sent per UDP to a host (it's my home IP-address of an active 24/7 running raspberry pi via No-IP) on a special port. On the Raspi, there is a service running listening to this port. This servicê is realized as a Node-Red node. Other Node-Red nodes do then all what is to do: parsing the received (json) message, generate commands for Zigbee2MQTT. A USB-Zigbee-Coordinator sends these commands to a Zigbee controlled led strip.
Here are the measured milliseconds and the 'billed milliseconds' for both - the Python and the C++ solution - of the dialog above:
You see the milliseconds for the 4 requests (1 x LaunchRequest, 2 x LichtRequest, 1 x StopRequest) of the dialog for two sessions - yellow and green marked.
Python
C++
As you can see, there is enough reason in terms of 'billed milliseconds' to prefer a solution based on a compiled programming language like C++.
How to Put the C++ Runtime into a Layer
Go to AWS Lambda C++ Runtime and follow the instructions to build the runtime and also the demo example. I've done it on my Raspberry Pi. When demo is running fine (42!), we will modify some things. First, we will separate the runtime from the application. Our goal is for a zip package containing only the runtime (under the lib folder) and another zip package with the application.
- Extract demo from the zip package.
- Extract the bootstrap and replace it with a modified one.
#!/bin/bash
set -euo pipefail
export AWS_EXECUTION_ENV=lambda-cpp
exec $LAMBDA_TASK_ROOT/lib/ld-linux-aarch64.so.1 --library-path $LAMBDA_TASK_ROOT/lib $LAMBDA_TASK_ROOT/bin/demo ${_HANDLER}
The modified bootstrap now looks like:
#!/bin/bash set -euo pipefail export AWS_EXECUTION_ENV=lambda-cpp exec /opt/lib/ld-linux-aarch64.so.1 --library-path /opt/lib $LAMBDA_TASK_ROOT/bin/lambda_handler ${_HANDLER}- Extract bootstrap
- Edit bootstrap
- Replace the bold marked first two occurences of
$LAMBDA_TASK_ROOTwith/opt - Now we choose a generic name for all apps using this runtime in the future. So, for instance, name it
lambda_handler. Replacedemoin bootstrap withlambda_handler.
- Replace the bold marked first two occurences of
- Reinsert bootstrap into the zip-package and name it, for instance, lambda_handler.zip.
Our zip package lambda_handler.zip now looks like:
lib/<runtime module>
bootstrap
- Use this zip package to install the layer.
It can be done using the CLI or via the Lambda console. I will show the way over the console.
Login to the Lambda console Applications page.
(In the following, you see here screenshots from the german locale of this page)
(On the right side, you see my Lambda functions demonstrated here.)
On the left side, click Layer:
Now, click on the right side Layer erstellen/create layer.
Fill the mask fields:
- Name:
cpp-runtime - We will upload a zip package.
- Select the zip in the opening file browser.
- Select the architecture arm64 (if you have compiled the runtime for this architecture; my is built on a Raspberry Pi)
- Select runtime and Amazon Linux 2023.
- Name:
Create a Lambda Function using this Layer
Create a zip package named lambda_handler.zip:
bin/lambda_handler
lambda-handler here is a compiled executable (the formerly demo).
Optionally, you can add a folder src/ with the source code. So the zip package looks like this:
bin/lambda_handler

src/lambda_handler.cpp
This src folder has no effect when invoking the Lambda function. It is only for your convenience to have the source code near the executable to quickly watch what goes on when executing the Lambda function. See below.
Now create a Lambda function, say test-cpp-skill, the usual way. As runtime, select Amazon Linux 2023 and as Architekture arm64. Note that you must specify arm64 when you compile for such a cpu architecture, for instance, on Raspberry Pi.
Click Hochladen von and upload the zip package. You get this:
Note: You have here the optionally source code, but unlike for Python, you can't modify it and then just click Deploy. You must compile locally when you made any change on the source, create a zip package and upload it again. (Don't forget to refresh the console page with this Lambda function, when this upload is done via CLI.)
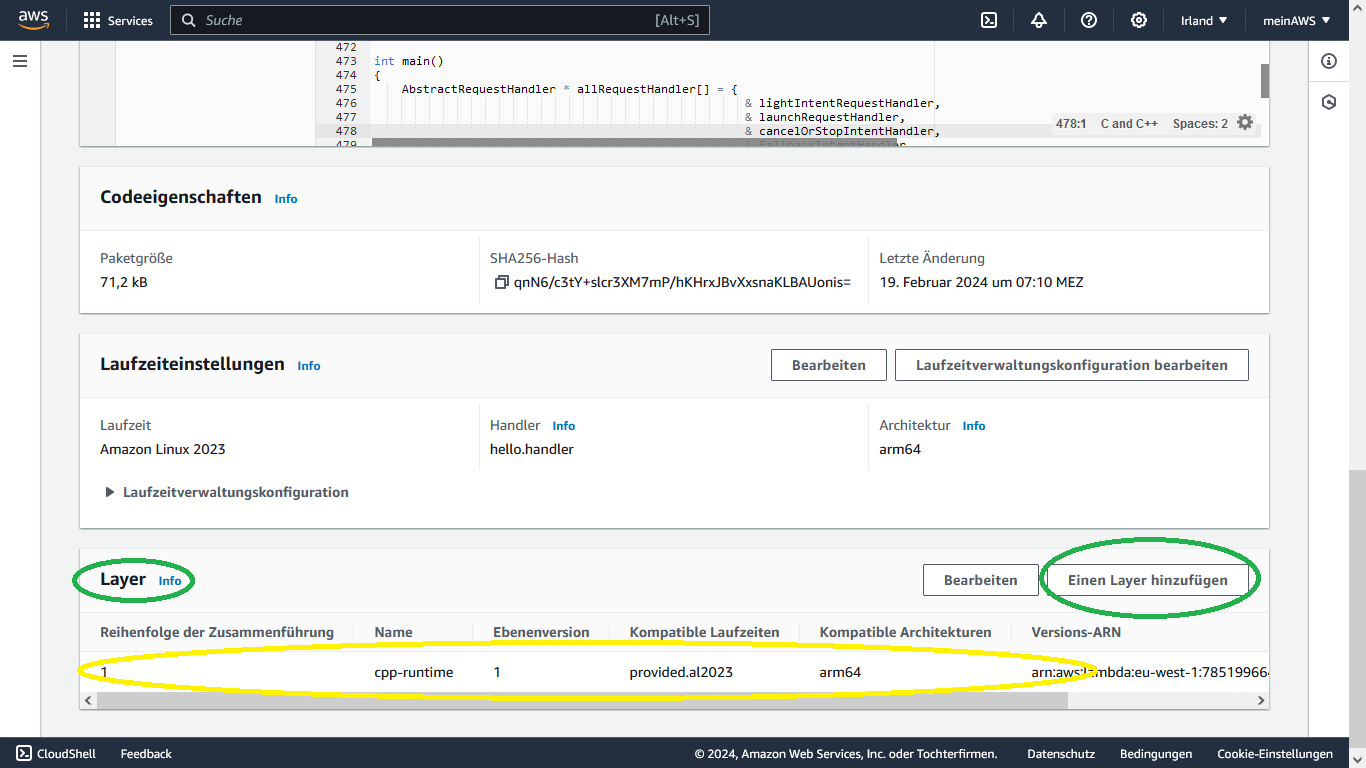
Now assign the layer to the function. With Code tab selected, scroll down the page to the end.
Yellow marked is the already assigned layer. To achieve this, click Einen Layer hinzufügen.
In the opening mask, select Benutzerdefinierte Ebenen, then select your above generated cpp-runtime from the opening file browser and select a version. When ready, click Hinzufügen.
Conclusion
It's possible to put the C++ Runtime into a layer and use this layer from C++ compiled Lambda functions. C++ compiled Lambda functions have great benefits in terms of 'billedMS'.
History
- 21st February, 2024: Initial version


