
wexCommerce - Minimalistic and Powerful eCommerce Platform
4.78/5 (10 votes)
Minimalistic and Powerful eCommerce Platform
Table of Contents
- Introduction
- Features
- Live Demo
- Prerequisites
- Quick Overview
- Background
- Installing (Self-hosted)
- Installing (Docker)
- Setup Stripe
- Change Language and Currency
- Add New Language
- Demo Database
- Run from Source
- Logs
- Using the Code
- History
Introduction
wexCommerce is a minimalistic and powerful eCommerce platform built with React using SSR, MongoDB and Stripe for payments.
With the following solution, you can build a fully customizable eCommerce website optmized for SEO with an operational Stripe payment gateway at very low cost by hosting it on a Docker droplet with at least 1GB of RAM.
wexCommerce is composed of a frontend and an admin dashboard. From the frontend, customers can search for the products they want, add them to their cart and checkout. Customers can sign up with Google, Facebook, Apple or Email, and pay with a Credit Card, Cash On Delivery, Wire Transfer, PayPal, Google Pay, Apple Pay, Link or other Stripe payment methods. Once logged in, they can have access to the history of their purshases and follow their orders. From the admin dashboard, admins can manage orders, payments, products, categories, customers and general settings such as the default language, the currency, delivery, shipping and payment methods accepted.
A key design decision was made to use TypeScript instead of JavaScript due to its numerous advantages. TypeScript offers strong typing, tooling, and integration, resulting in high-quality, scalable, more readable and maintainable code that is easy to debug and test.
wexCommerce can run in a Docker container. Follow this step by step guide to walk you through on how to build wexCommerce Docker image and run it in a Docker container.
In this article, you will learn how wexCommerce was made including a description of the main parts of the source code and the software architecture, how to deploy it, and how to run the source code. But before we dig in, we'll start with a quick overview of the platform.
Features
- Stock management
- Order management
- Payment management
- Customer management
- Multiple payment options (Credit Card, Cash On Delivery, Wire Transfer, PayPal, Google Pay, Apple Pay, Link)
- Operational Stripe Payment Gateway
- Multiple delivery options (Home delivery, Store withdrawal)
- Multiple language support (English, French)
- Multiple login options (Google, Facebook, Apple, Email)
- Responsive backend and frontend
Live Demo
- URL: https://wexcommerce.dynv6.net:8002/
- Login: jdoe@wexcommerce.com
- Password: sh0ppingC4rt
Prerequisites
- Node.js
- Express
- MongoDB
- Next.js
- SSR
- React
- MUI
- TypeScript
- MVC
- JWT
- Docker
- NGINX
- Git
Quick Overview
In this section, you'll see a quick overview of the main pages of the backend and the frontend.
Frontend
From the frontend, the user can search for available products, add products to cart and checkout.
Below is the landing page of the frontend:

Below is the search page of the frontend:

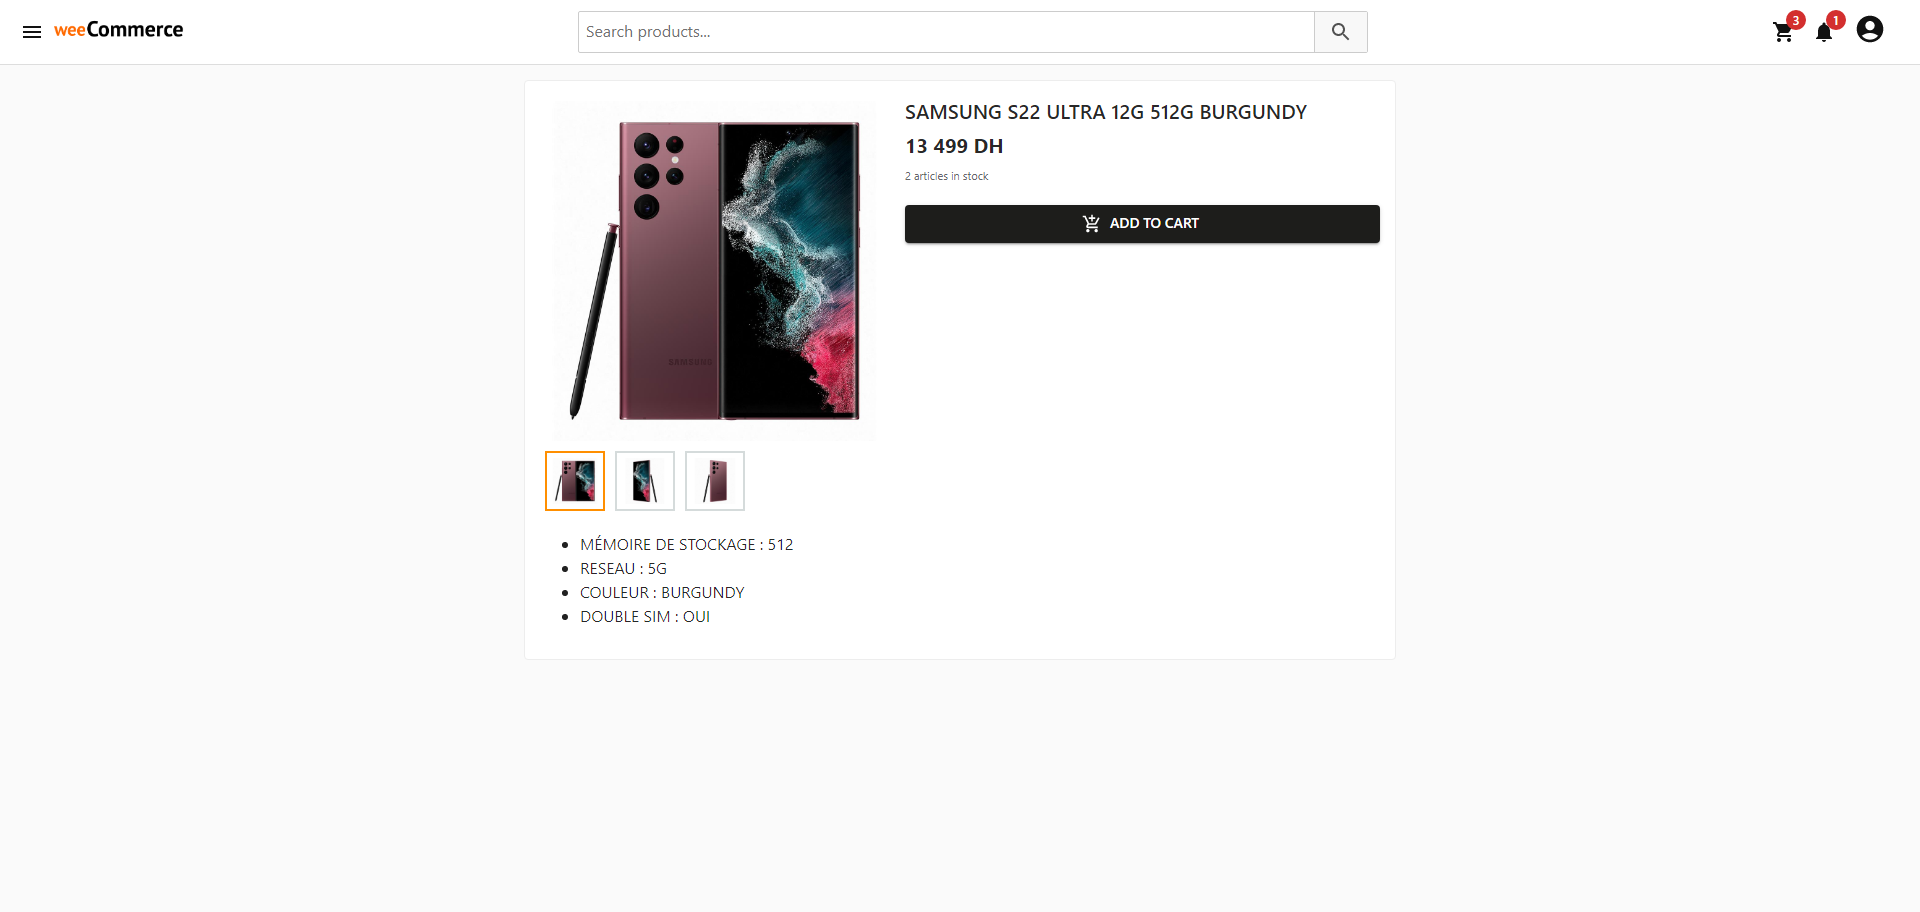
Below is a sample product page:
Below is a fullscreen view of product images:

Below is cart page:

Below is checkout page:

Below is the sign in page:

Below is the sign up page:
Below is the page where the user can see his orders:

That's it! Those are the main pages of the frontend.
Backend
From the backend, admins can manage categories, products, users and orders.
Admins can also manage the following settings:
- Locale Settings: Language of the platform (English or French) and currency
- Delivery Settings: Delivery methods enabled and the cost of each one
- Payment Settings: Payment methods enabled (Credit card, Cash on delivery or Wire transfer)
- Bank Settings: Bank information for wire transfer (IBAN and other info)
Below is the sign in page of the backend:

Below is the dashboard page of the backend from which admins can see and manage orders:

Below is the page from which admins manage categories:

Below is the page from which admins can see and manage products:

Below is the page from which admins edit products:

Below is a fullscreen view of product images:

Below is backend settings page:

That's it. Those are the main pages of the backend.
Background
The basic idea behind wexCommerce is very simple:
- A backend: From which admins create and manage categories and products. A dashboard from which admins can see new orders and get notified by email on a new order.
- A frontend: From which users can search for the products they want, add them to their cart and then checkout with multiple payment methods and multiple delivery methods.
The backend and the frontend rely on wexCommerce API which is a RESTful API that exposes functions to access wexCommerce database.
Installing (Self-hosted)
wexCommerce is cross-platform and can run and be installed on Windows, Linux and macOS.
Below are the installation instructions on Ubuntu Linux.
Prerequisites
-
Install git, Node.js, NGINX or IIS, MongoDB and mongosh. If you want to use MongoDB Atlas, you can skip installing and configuring MongoDB.
- Configure MongoDB:
mongosh
Create admin user:
db = db.getSiblingDB('admin')
db.createUser({ user: "admin" , pwd: "PASSWORD",
roles: ["userAdminAnyDatabase", "dbAdminAnyDatabase", "readWriteAnyDatabase"]})
Replace
PASSWORDwith a strong password.Secure MongoDB:
sudo nano /etc/mongod.conf
Change configuration as follows:
net:
  port: 27017
  bindIp: 0.0.0.0

security:
  authorization: enabled
Restart MongoDB service:
sudo systemctl restart mongod.service
sudo systemctl status mongod.service
Instructions
- Clone wexCommerce repo:
cd /opt
sudo git clone https://github.com/aelassas/wexcommerce.git
- Add permissions:
sudo chown -R $USER:$USER /opt/wexcommerce
sudo chmod -R +x /opt/wexcommerce/__scripts
- Create deployment shortcut:
sudo ln -s /opt/wexcommerce/__scripts/wc-deploy.sh /usr/local/bin/wc-deploy
- Create wexCommerce services:
sudo cp /opt/wexcommerce/__services/wexcommerce.service /etc/systemd/system
sudo systemctl enable wexcommerce.service

sudo cp /opt/wexcommerce/__services/wexcommerce-backend.service /etc/systemd/system
sudo systemctl enable wexcommerce-backend.service

sudo cp /opt/wexcommerce/__services/wexcommerce-frontend.service /etc/systemd/system
sudo systemctl enable wexcommerce-frontend.service
- Add /opt/wexcommerce/api/.env file:
NODE_ENV=production
WC_PORT=4005
WC_HTTPS=false
WC_PRIVATE_KEY=/etc/ssl/wexcommerce.key
WC_CERTIFICATE=/etc/ssl/wexcommerce.crt
WC_DB_URI=mongodb://127.0.0.1:27017/wexcommerce?authSource=admin&appName=wexcommerce
WC_DB_SSL=false
WC_DB_SSL_KEY=/etc/ssl/wexcommerce.key
WC_DB_SSL_CERT=/etc/ssl/wexcommerce.crt
WC_DB_SSL_CA=/etc/ssl/wexcommerce.ca.pem
WC_DB_DEBUG=false
WC_COOKIE_SECRET=COOKIE_SECRET
WC_AUTH_COOKIE_DOMAIN=localhost
WC_JWT_SECRET=JWT_SECRET
WC_JWT_EXPIRE_AT=86400
WC_TOKEN_EXPIRE_AT=86400
WC_SMTP_HOST=in-v3iljet.com
WC_SMTP_PORT=587
WC_SMTP_USER=USER
WC_SMTP_PASS=PASSWORD
WC_SMTP_FROM=admin@wexcommerce.com
WC_CDN_USERS=/var/www/cdn/wexcommerce/users
WC_CDN_TEMP_USERS=/var/www/cdn/wexcommerce/temp/users
WC_CDN_CATEGORIES=/var/www/cdn/wexcommerce/categories
WC_CDN_TEMP_CATEGORIES=/var/www/cdn/wexcommerce/temp/categories
WC_CDN_PRODUCTS=/var/www/cdn/wexcommerce/products
WC_CDN_TEMP_PRODUCTS=/var/www/cdn/wexcommerce/temp/products
WC_BACKEND_HOST=http://localhost:8005/
WC_FRONTEND_HOST=http://localhost/
WC_DEFAULT_LANGUAGE=en
WC_DEFAULT_CURRENCY=$
WC_DEFAULT_STRIPE_CURRENCY=USD
WC_STRIPE_SECRET_KEY=STRIPE_SECRET_KEY
WC_STRIPE_SESSION_EXPIRE_AT=82800
WC_ADMIN_EMAIL=admin@wexcommerce.com
WC_RECAPTCHA_SECRET=RECAPTCHA_SECRET
You must configure the following options:
WC_DB_URI=mongodb://127.0.0.1:27017/wexcommerce?authSource=admin&appName=wexcommerce
WC_SMTP_HOST=in-v3iljet.com
WC_SMTP_PORT=587
WC_SMTP_USER=USER
WC_SMTP_PASS=PASSWORD
WC_STRIPE_SECRET_KEY=STRIPE_SECRET_KEY
WC_BACKEND_HOST=http://localhost:8001/
WC_FRONTEND_HOST=http://localhost/
If you want to enable SSL, You must configure the following options:
WC_HTTPS=true
WC_PRIVATE_KEY=/etc/ssl/wexcommerce.key
WC_CERTIFICATE=/etc/ssl/wexcommerce.crt
If you want to use MongoDB Atlas, put you MongoDB Atlas URI in
WC_DB_URIotherwise replacePASSWORDinWC_DB_URIwith your MongoDB password. ReplaceJWT_SECRETwith a secret token. Finally, set the SMTP options. SMTP options are necessary for sign up. You can use sendgrid or any other transactional email provider.If you choose sendgrid, create an account on sendgrid.com, login and go to the dashboard. On the left panel, click on Email API, then on Integration Guide. Then, choose SMTP Relay and follow the steps. You will be prompted to create an API Key. Once you create the API Key and verify the smtp relay, copy the API key in
WC_SMTP_PASSin ./api/.env. Sendgrid's free plan allows to send up to 100 emails/day. If you need to send more than 100 emails/day, switch to a paid plan or choose another transactional email provider.COOKIE_SECRETandJWT_SECRETshould at least be 32 characters long, but the longer the better. You can use an online password generator and set the password length to 32 or longer.The following settings are very important and if they are not set properly, authentication won't work:
WC_AUTH_COOKIE_DOMAIN=localhost
WC_BACKEND_HOST=http://localhost:8001/
WC_FRONTEND_HOST=http://localhost/
To enable stripe payment gateway, sign up for a stripe account, fill the forms and save the publishable key and the secret key from stripe dashboard. Then, set the secret key in the following option in api/.env:
WC_STRIPE_SECRET_KEY=STRIPE_SECRET_KEY
Don't expose stripe secret key on a website or embed it in a mobile application. It must be secret and stored securely in the server-side.
In stripe, all accounts have a total of four API keys by default-two for test mode and two for live mode:
Test mode secret key: Use this key to authenticate requests on your server when in test mode. By default, you can use this key to perform any API request without restriction.
Test mode publishable key: Use this key for testing purposes in your web or mobile app’s client-side code.
Live mode secret key: Use this key to authenticate requests on your server when in live mode. By default, you can use this key to perform any API request without restriction.
Live mode publishable key: Use this key, when you’re ready to launch your app, in your web or mobile app’s client-side code.
Use only your test API keys for testing. This ensures that you don't accidentally modify your live customers or charges.
If you want to enable HTTPS, you have to set the following options:
WC_HTTPS=true
WC_PRIVATE_KEY=/etc/ssl/wexcommerce.com.key
WC_CERTIFICATE=/etc/ssl/wexcommerce.com.crt
Replace
localhostwith an IP or FQDN. That is if you access the backend from https://<FQDN>:8001/.WC_BACKEND_HOSTshould be https://<FQDN>:3001/. The same goes forWC_FRONTEND_HOST. AndWC_AUTH_COOKIE_DOMAINshould be FQDN.
- Add /opt/wexcommerce/backend/.env file and set the following options:
NEXT_PUBLIC_WC_SERVER_API_HOST=http://localhost:4005
NEXT_PUBLIC_WC_CLIENT_API_HOST=http://localhost:4005
NEXT_PUBLIC_WC_CDN_USERS=http://localhost/cdn/wexcommerce/users
NEXT_PUBLIC_WC_CDN_TEMP_USERS=http://localhost/cdn/wexcommerce/temp/users
NEXT_PUBLIC_WC_CDN_CATEGORIES=http://localhost/cdn/wexcommerce/categories
NEXT_PUBLIC_WC_CDN_TEMP_CATEGORIES=http://localhost/cdn/wexcommerce/temp/categories
NEXT_PUBLIC_WC_CDN_PRODUCTS=http://localhost/cdn/wexcommerce/products
NEXT_PUBLIC_WC_CDN_TEMP_PRODUCTS=http://localhost/cdn/wexcommerce/temp/products
Replace
localhostwith an IP, hostname or FQDN. - Add /opt/wexcommerce/frontend/.env file and set the following options:
NEXT_PUBLIC_WC_SERVER_API_HOST=http://localhost:4005
NEXT_PUBLIC_WC_CLIENT_API_HOST=http://localhost:4005
NEXT_PUBLIC_WC_PAGE_SIZE=30
NEXT_PUBLIC_WC_CDN_USERS=http://localhost/cdn/wexcommerce/users
NEXT_PUBLIC_WC_CDN_CATEGORIES=http://localhost/cdn/wexcommerce/categories
NEXT_PUBLIC_WC_CDN_PRODUCTS=http://localhost/cdn/wexcommerce/products
NEXT_PUBLIC_WC_FB_APP_ID=XXXXXXXXXX
NEXT_PUBLIC_WC_APPLE_ID=XXXXXXXXXX
NEXT_PUBLIC_WC_GG_APP_ID=XXXXXXXXXX
NEXT_PUBLIC_WC_STRIPE_PUBLISHABLE_KEY=STRIPE_PUBLISHABLE_KEY
NEXT_PUBLIC_WC_GOOGLE_ANALYTICS_ENABLED=false
NEXT_PUBLIC_WC_GOOGLE_ANALYTICS_ID=G-XXXXXXXXXX
Replace
localhostwith an IP, hostname or FQDN. -
Add your domain name to backend/next.config.mjs:
/** @type {import('next').NextConfig} */
const nextConfig = {
  reactStrictMode: false,
  poweredByHeader: false,
  images: {
    //
    // Add your backend domain here
    //
    remotePatterns: [
      {
        protocol: 'http',
        hostname: 'localhost',
        pathname: '**',
      },
      {
        protocol: 'https',
        hostname: 'wexcommerce.com',
        pathname: '**',
      },
    ],
    unoptimized: true,
  },
  //
  // Nginx will do gzip compression. We disable
  // compression here so we can prevent buffering
  // streaming responses
  //
  compress: false,
  //
  // Add your backend domain here
  //
  experimental: {
    serverActions: {
      allowedOrigins: ['localhost:8001', 'wexcommerce.com:8001'],
    },
  },
}

export default nextConfig
Replace wexcommerce.com with your domain.
-
Add your domain name to frontend/next.config.mjs:
/** @type {import('next').NextConfig} */
const nextConfig = {
  reactStrictMode: false,
  poweredByHeader: false,
  images: {
    //
    // Add your frontend domain here
    //
    remotePatterns: [
      {
        protocol: 'http',
        hostname: 'localhost',
        pathname: '**',
      },
      {
        protocol: 'https',
        hostname: 'wexcommerce.com',
        pathname: '**',
      },
    ],
    unoptimized: true,
  },
  //
  // Nginx will do gzip compression. We disable
  // compression here so we can prevent buffering
  // streaming responses
  //
  compress: false,
  //
  // Add your frontend domain here
  //
  experimental: {
    serverActions: {
      allowedOrigins: ['localhost', 'wexcommerce.com'],
    },
  },
}

export default nextConfig
Replace wexcommerce.com with your domain.
- Configure NGINX:
sudo nano /etc/nginx/sites-available/default
Change the configuration as follows (NGINX reverse proxy):
#
# redirect http to https
#
server
{
    listen 80 default_server;
    server_name _;
    return 301 https://$host$request_uri;
}

#
# frontend
#
server
{
    listen 443 ssl;
    server_name _;

    ssl_certificate_key /etc/letsencrypt/live/wexdev.dynv6.net/privkey.pem;
    ssl_certificate /etc/letsencrypt/live/wexdev.dynv6.net/fullchain.pem;

    include /etc/letsencrypt/options-ssl-nginx.conf; # managed by Certbot
    ssl_dhparam /etc/letsencrypt/ssl-dhparams.pem; # managed by Certbot

    error_page 497 301 =307 https://$host:$server_port$request_uri;

    access_log /var/log/nginx/wexcommerce.frontend.access.log;
    error_log /var/log/nginx/wexcommerce.frontend.error.log;

    location /cdn
    {
        alias /var/www/cdn;
    }

    location /
    {
        proxy_pass http://127.0.0.1:8006;

        proxy_http_version 1.1;
        proxy_read_timeout 900;

        proxy_set_header Upgrade $http_upgrade;
        proxy_set_header Connection 'upgrade';
        proxy_set_header Host $host;
        proxy_set_header X-Forwarded-Host $host;
        proxy_set_header X-Forwarded-For $proxy_add_x_forwarded_for;
        proxy_set_header X-Real-IP $remote_addr;

        proxy_cache_bypass $http_upgrade;
    }
}

#
# backend
#
server
{
    listen 8001 ssl;
    server_name _;

    error_page 497 301 =307 https://$host:$server_port$request_uri;

    ssl_certificate_key /etc/letsencrypt/live/wexdev.dynv6.net/privkey.pem;
    ssl_certificate /etc/letsencrypt/live/wexdev.dynv6.net/fullchain.pem;

    include /etc/letsencrypt/options-ssl-nginx.conf; # managed by Certbot
    ssl_dhparam /etc/letsencrypt/ssl-dhparams.pem; # managed by Certbot

    access_log /var/log/nginx/wexcommerce.backend.access.log;
    error_log /var/log/nginx/wexcommerce.backend.error.log;

    location /
    {
        proxy_pass http://127.0.0.1:8005;

        proxy_http_version 1.1;
        proxy_read_timeout 900;

        proxy_set_header Upgrade $http_upgrade;
        proxy_set_header Connection 'upgrade';
        proxy_set_header Host $host;
        proxy_set_header X-Forwarded-Host $host;
        proxy_set_header X-Forwarded-For $proxy_add_x_forwarded_for;
        proxy_set_header X-Real-IP $remote_addr;

        proxy_cache_bypass $http_upgrade;
    }
}
Then, check nginx configuration and start nginx service:
sudo nginx -t
sudo systemctl restart nginx.service
sudo systemctl status nginx.service
enablefirewall and open wexCommerce ports:sudo ufw enable sudo ufw allow 4005/tcp sudo ufw allow 80/tcp sudo ufw allow 443/tcp sudo ufw allow 8001/tcp
- Deploy wexCommerce:
wc-deploy all
wexCommerce backend is accessible on port 3000 and the frontend is accessible on port 80 or 443 if SSL is enabled.
-
You can change language and currency from settings page from the backend.
Installing (Docker)
wexCommerce can run in a Docker container on Linux and Docker Desktop for Windows or Mac.
Docker Image
This section describes how to build wexCommerce Docker image and run it in a Docker container.
- Make sure that the ports 80, 443, 8001, 4005 and 27017 are not used by any other application on the host machine.
- Clone wexCommerce repo:
git clone https://github.com/aelassas/wexcommerce.git
- Set your MongoDB password in ./docker-compose.yml:
version: "3.8"
services:
  api:
    build:
      context: .
      dockerfile: ./api/Dockerfile
    restart: always
    ports:
      - 4005:4005
    depends_on:
      - mongo
    volumes:
      - cdn:/var/www/cdn/wexcommerce

  mongo:
    image: mongo:latest
    command: mongod --quiet --logpath /dev/null
    restart: always
    environment:
      # Provide your credentials here
      MONGO_INITDB_ROOT_USERNAME: admin
      MONGO_INITDB_ROOT_PASSWORD: PASSWORD
    ports:
      - 27017:27017

  backend:
    build:
      context: .
      dockerfile: ./backend/Dockerfile
    depends_on:
      - api
    ports:
      - 8005:8005
    restart: always

  nginx-backend:
    build:
      context: .
      dockerfile: ./backend/nginx/Dockerfile
    depends_on:
      - backend
    ports:
      - 8001:8001
    restart: always

  frontend:
    build:
      context: .
      dockerfile: ./frontend/Dockerfile
    depends_on:
      - api
    ports:
      - 8006:8006
    volumes:
      - cdn:/var/www/cdn/wexcommerce
    restart: always

  nginx-frontend:
    build:
      context: .
      dockerfile: ./frontend/nginx/Dockerfile
    depends_on:
      - frontend
    ports:
      - 80:80
      - 443:443
    volumes:
      - cdn:/var/www/cdn/wexcommerce
    restart: always

volumes:
  cdn:
- Create ./api/.env.docker:
NODE_ENV=development
WC_PORT=4005
WC_HTTPS=false
WC_PRIVATE_KEY=/etc/ssl/wexcommerce.key
WC_CERTIFICATE=/etc/ssl/wexcommerce.crt
WC_DB_URI=mongodb://admin:PASSWORD@mongo:27017/wexcommerce?authSource=admin&appName=wexcommerce
WC_DB_SSL=false
WC_DB_SSL_KEY=/etc/ssl/wexcommerce.key
WC_DB_SSL_CERT=/etc/ssl/wexcommerce.crt
WC_DB_SSL_CA=/etc/ssl/wexcommerce.ca.pem
WC_DB_DEBUG=false
WC_COOKIE_SECRET=COOKIE_SECRET
WC_AUTH_COOKIE_DOMAIN=localhost
WC_JWT_SECRET=JWT_SECRET
WC_JWT_EXPIRE_AT=86400
WC_TOKEN_EXPIRE_AT=86400
WC_SMTP_HOST=in-v3iljet.com
WC_SMTP_PORT=587
WC_SMTP_USER=USER
WC_SMTP_PASS=PASSWORD
WC_SMTP_FROM=admin@wexcommerce.com
WC_CDN_USERS=/var/www/cdn/wexcommerce/users
WC_CDN_TEMP_USERS=/var/www/cdn/wexcommerce/temp/users
WC_CDN_CATEGORIES=/var/www/cdn/wexcommerce/categories
WC_CDN_TEMP_CATEGORIES=/var/www/cdn/wexcommerce/temp/categories
WC_CDN_PRODUCTS=/var/www/cdn/wexcommerce/products
WC_CDN_TEMP_PRODUCTS=/var/www/cdn/wexcommerce/temp/products
WC_BACKEND_HOST=http://localhost:8001/
WC_FRONTEND_HOST=http://localhost/
WC_DEFAULT_LANGUAGE=en
WC_DEFAULT_CURRENCY=$
WC_DEFAULT_STRIPE_CURRENCY=USD
WC_STRIPE_SECRET_KEY=STRIPE_SECRET_KEY
WC_STRIPE_SESSION_EXPIRE_AT=82800
WC_ADMIN_EMAIL=admin@wexcommerce.com
WC_RECAPTCHA_SECRET=RECAPTCHA_SECRET
Set the following settings:
WC_DB_URI=mongodb://admin:PASSWORD@mongo:27017/wexcommerce?authSource=admin&appName=wexcommerce
WC_SMTP_HOST=in-v3iljet.com
WC_SMTP_PORT=587
WC_SMTP_USER=USER
WC_SMTP_PASS=PASSWORD
WC_STRIPE_SECRET_KEY=STRIPE_SECRET_KEY
- Create ./backend/.env.docker:
NEXT_PUBLIC_WC_SERVER_API_HOST=http://api:4005
NEXT_PUBLIC_WC_CLIENT_API_HOST=http://localhost:4005
NEXT_PUBLIC_WC_PAGE_SIZE=30
NEXT_PUBLIC_WC_CDN_USERS=http://localhost/cdn/wexcommerce/users
NEXT_PUBLIC_WC_CDN_CATEGORIES=http://localhost/cdn/wexcommerce/categories
NEXT_PUBLIC_WC_CDN_TEMP_CATEGORIES=http://localhost/cdn/wexcommerce/temp/categories
NEXT_PUBLIC_WC_CDN_PRODUCTS=http://localhost/cdn/wexcommerce/products
NEXT_PUBLIC_WC_CDN_TEMP_PRODUCTS=http://localhost/cdn/wexcommerce/temp/products
- Create ./frontend/.env.docker:
NEXT_PUBLIC_WC_SERVER_API_HOST=http://api:4005
NEXT_PUBLIC_WC_CLIENT_API_HOST=http://localhost:4005
NEXT_PUBLIC_WC_PAGE_SIZE=30
NEXT_PUBLIC_WC_CDN_USERS=http://localhost/cdn/wexcommerce/users
NEXT_PUBLIC_WC_CDN_CATEGORIES=http://localhost/cdn/wexcommerce/categories
NEXT_PUBLIC_WC_CDN_PRODUCTS=http://localhost/cdn/wexcommerce/products
NEXT_PUBLIC_WC_FB_APP_ID=XXXXXXXXXX
NEXT_PUBLIC_WC_APPLE_ID=XXXXXXXXXX
NEXT_PUBLIC_WC_GG_APP_ID=XXXXXXXXXX
NEXT_PUBLIC_WC_STRIPE_PUBLISHABLE_KEY=STRIPE_PUBLISHABLE_KEY
NEXT_PUBLIC_WC_GOOGLE_ANALYTICS_ENABLED=false
NEXT_PUBLIC_WC_GOOGLE_ANALYTICS_ID=G-XXXXXXXXXX
- Run the compose:
docker compose up
If you want to rebuild and run the images, run the following command:
docker compose up --build --force-recreate --no-deps api backend frontend
If you want to rebuild and run the images without cache, run the following command:
docker compose build --no-cache api backend frontend
docker compose up --force-recreate --no-deps api backend frontend
Demo database
To restore the demo database, follow these instructions.
SSL
This section will walk you through how to enable SSL in the API, the backend and the frontend.
Copy your private key wexcommerce.key and your certificate wexcommerce.crt in ./.
wexcommerce.key will be loaded as /etc/ssl/wexcommerce.key and wexcommerce.crt will be loaded as /etc/ssl/wexcommerce.crt in ./docker-compose.yml.
API
For the API, update ./api/.env.docker as follows to enable SSL:
WC_HTTPS=true
WC_PRIVATE_KEY=/etc/ssl/wexcommerce.key
WC_CERTIFICATE=/etc/ssl/wexcommerce.crt
WC_BACKEND_HOST=https://domain.com:8001/
WC_FRONTEND_HOST=https://domain.com/
Backend
For the backend, update the following options in ./backend/.env.docker:
NEXT_PUBLIC_WC_CLIENT_API_HOST=https://domain.com:4005
NEXT_PUBLIC_WC_PAGE_SIZE=30
NEXT_PUBLIC_WC_CDN_USERS=https://domain.com/cdn/wexcommerce/users
NEXT_PUBLIC_WC_CDN_CATEGORIES=https://domain.com/cdn/wexcommerce/categories
NEXT_PUBLIC_WC_CDN_TEMP_CATEGORIES=https://domain.com/cdn/wexcommerce/temp/categories
NEXT_PUBLIC_WC_CDN_PRODUCTS=https://domain.com/cdn/wexcommerce/products
NEXT_PUBLIC_WC_CDN_TEMP_PRODUCTS=https://domain.com/cdn/wexcommerce/temp/products
Then, update ./backend/nginx/nginx.conf as follows to enable SSL:
server
{
    listen 8001 ssl;

    ssl_certificate_key /etc/ssl/wexcommerce.key;
    ssl_certificate /etc/ssl/wexcommerce.crt;

    error_page 497 301 =307 https://$host:$server_port$request_uri;

	location /
	{
		proxy_pass http://backend:8005;

		proxy_http_version 1.1;
		proxy_read_timeout 900;

		proxy_set_header Upgrade $http_upgrade;
		proxy_set_header Connection 'upgrade';
		proxy_set_header Host $host;
		proxy_set_header X-Forwarded-Host $host;
		proxy_set_header X-Forwarded-For $proxy_add_x_forwarded_for;
		proxy_set_header X-Real-IP $remote_addr;

		proxy_cache_bypass $http_upgrade;
	}
}
Frontend
For the frontend, update the following options in ./frontend/.env.docker:
NEXT_PUBLIC_WC_CLIENT_API_HOST=https://domain.com:4005
NEXT_PUBLIC_WC_PAGE_SIZE=30
NEXT_PUBLIC_WC_CDN_USERS=https://domain.com/cdn/wexcommerce/users
NEXT_PUBLIC_WC_CDN_CATEGORIES=https://domain.com/cdn/wexcommerce/categories
NEXT_PUBLIC_WC_CDN_PRODUCTS=https://domain.com/cdn/wexcommerce/products
NEXT_PUBLIC_WC_FB_APP_ID=XXXXXXXXXX
NEXT_PUBLIC_WC_APPLE_ID=XXXXXXXXXX
NEXT_PUBLIC_WC_GG_APP_ID=XXXXXXXXXX
NEXT_PUBLIC_WC_STRIPE_PUBLISHABLE_KEY=STRIPE_PUBLISHABLE_KEY
NEXT_PUBLIC_WC_GOOGLE_ANALYTICS_ENABLED=false
NEXT_PUBLIC_WC_GOOGLE_ANALYTICS_ID=G-XXXXXXXXXX
Then, update ./frontend/nginx.conf as follows to enable SSL:
server {
    listen 80;
    return 301 https://$host$request_uri;
}
server
{
    listen 443 ssl;

    ssl_certificate_key /etc/ssl/wexcommerce.key;
    ssl_certificate /etc/ssl/wexcommerce.crt;

	location /
	{
		proxy_pass http://frontend:8006;

		proxy_http_version 1.1;
		proxy_read_timeout 900;

		proxy_set_header Upgrade $http_upgrade;
		proxy_set_header Connection 'upgrade';
		proxy_set_header Host $host;
		proxy_set_header X-Forwarded-Host $host;
		proxy_set_header X-Forwarded-For $proxy_add_x_forwarded_for;
		proxy_set_header X-Real-IP $remote_addr;

		proxy_cache_bypass $http_upgrade;
	}

	location /cdn
	{
		alias /var/www/cdn;
	}
}
docker-compose.yml
Update ./docker-compose.yml to load your private key wexcommerce.key and your certificate wexcommerce.crt, and add the port 443 to the frontend as follows:
version: "3.8"
services:
  api:
    build:
      context: .
      dockerfile: ./api/Dockerfile
    restart: always
    ports:
      - 4005:4005
    depends_on:
      - mongo
    volumes:
      - cdn:/var/www/cdn/wexcommerce
      - ./wexcommerce.key:/etc/ssl/wexcommerce.key
      - ./wexcommerce.crt:/etc/ssl/wexcommerce.crt

  mongo:
    image: mongo:latest
    command: mongod --quiet --logpath /dev/null
    restart: always
    environment:
      # Provide your credentials here
      MONGO_INITDB_ROOT_USERNAME: admin
      MONGO_INITDB_ROOT_PASSWORD: PASSWORD
    ports:
      - 27017:27017

  backend:
    build:
      context: .
      dockerfile: ./backend/Dockerfile
    depends_on:
      - api
    ports:
      - 8005:8005
    restart: always

  nginx-backend:
    build:
      context: .
      dockerfile: ./backend/nginx/Dockerfile
    depends_on:
      - backend
    ports:
      - 8001:8001
    restart: always
    volumes:
      - ./wexcommerce.key:/etc/ssl/wexcommerce.key
      - ./wexcommerce.crt:/etc/ssl/wexcommerce.crt

  frontend:
    build:
      context: .
      dockerfile: ./frontend/Dockerfile
    depends_on:
      - api
    ports:
      - 8006:8006
    volumes:
      - cdn:/var/www/cdn/wexcommerce
    restart: always

  nginx-frontend:
    build:
      context: .
      dockerfile: ./frontend/nginx/Dockerfile
    depends_on:
      - frontend
    ports:
      - 80:80
      - 443:443
    volumes:
      - cdn:/var/www/cdn/wexcommerce
      - ./wexcommerce.key:/etc/ssl/wexcommerce.key
      - ./wexcommerce.crt:/etc/ssl/wexcommerce.crt
    restart: always

volumes:
  cdn:
Rebuild and run Docker images:
docker compose up --build --force-recreate --no-deps api nginx-backend nginx-frontend
Setup Stripe
If you want to enable Stripe payment gateway, sign up for a Stripe account, fill the forms and save the publishable key and the secret key from Stripe Developers Dashboard.
Don't expose the secret key on a website or embed it in a mobile application. It must be secret and stored securely in the server-side.
In Stripe, all accounts have a total of four API keys by default-two for test mode and two for live mode:
- Test mode secret key: Use this key to authenticate requests on your server when in test mode. By default, you can use this key to perform any API request without restriction.
- Test mode publishable key: Use this key for testing purposes in your web or mobile app’s client-side code.
- Live mode secret key: Use this key to authenticate requests on your server when in live mode. By default, you can use this key to perform any API request without restriction.
- Live mode publishable key: Use this key, when you’re ready to launch your app, in your web or mobile app’s client-side code.
You can find your secret and publishable keys on the API keys page in Stripe Developers Dashboard.
Use only your test API keys for testing and development. This ensures that you don't accidentally modify your live customers or charges.
On production, use HTTPS in the API, the backend and the frontend to be able to use Stripe payment gateway.
API
Set Stripe secret key in the following option in api/.env:
WC_STRIPE_SECRET_KEY=STRIPE_SECRET_KEY
Frontend
Set Stripe publishable key and currency in the following options in frontend/.env:
NEXT_PUBLIC_WC_STRIPE_PUBLISHABLE_KEY=STRIPE_PUBLISHABLE_KEY
Change Language and Currency
To change the language and the currency, go to the settings page from the admin dashboard and change the language (English or French), the currency and Stripe currency in Locale settings section.
For Stripe currency, it should be one of the following supported currencies.
Add New Language
To add a new language proceed as follow:
API
- Add the new language ISO 639-1 code to
LANGUAGESsetting in api/src/config/env.config.ts. - Create a new file <ISO 639-1 code>.ts in src/lang folder and add the translations in it.
- Add your translations to src/lang/i18n.ts
Backend
- Add the new language ISO 639-1 code and its label in src/config/env.config.ts in
LANGUAGESconstant. - Add the translations in src/lang/*.ts.
Frontend
Add the translations in src/lang/*.ts.
Demo Database
Windows, Linux, macOS
- Download and install MongoDB Command Line Database Tools.
- On Windows, add MongoDB Command Line Database Tools folder to
Pathenvironment variable. - Download wexcommerce-db.zip down to your machine.
- Restore wexCommerce demo db by using the following command:
mongorestore --verbose --drop --gzip --host=127.0.0.1 --port=27017 --username=admin --password=$PASSWORD --authenticationDatabase=admin --nsInclude="wexcommerce.*" --archive=wexcommerce.gz
Don't forget to set $PASSWORD.
If you are using MongoDB Atlas, put your MongoDB Atlas URI in --uri= command line argument:
mongorestore --verbose --drop --gzip --uri="mongodb://admin:$PASSWORD@127.0.0.1:27017/wexcommerce?authSource=admin&appName=wexcommerce" --nsInclude="wexcommerce.*" --nsFrom="wexcommerce.*" --nsTo="wexcommerce.*" --archive=wexcommerce.gz
Unzip cdn.zip on your web server so that the files will be accessible through http://localhost/cdn/wexcommerce/
cdn/wexcommerce/ contains the following folders:
- cdn/wexcommerce/users: This folder contains users images.
- cdn/wexcommerce/categories: This folder contains categories images.
- cdn/wexcommerce/products: This folder contains products images.
- cdn/wexcommerce/temp: This folder contains temporay files.
Admin user: admin@wexcommerce.com
Password: sh0ppingC4rt
Frontend user: jdoe@wexcommerce.com
Password: sh0ppingC4rt
Docker
To restore wexCommerce demo database in Docker containers, proceed as follow:
-
Make sure that the ports 80, 8001, 4005 and 27017 are not used by any application.
-
Download and install MongoDB Command Line Database Tools on the host machine.
-
Add MongoDB Command Line Database Tools folder to Path environment variable in your host machine.
-
Download wexcommerce-db.zip down to your host machine and unzip it.
-
Run the compose:
docker compose up
-
Go to wexcommerce-db folder and restore the demo database with the following command:
mongorestore --verbose --drop --gzip --host=127.0.0.1 --port=27017 --username=admin --password=$PASSWORD --authenticationDatabase=admin --nsInclude="wexcommerce.*" --archive=wexcommerce.gz
Replace $PASSWORD with your MongoDB password set in your docker-compose.yml.
-
Get API Docker container name with the following command:
docker container ls
The name should be something like this: src-api-1 -
Go to wexcommerce-db/cdn folder and copy the content of the folder in API container with the following commands:
docker cp ./cdn/categories src-api-1:/var/www/cdn/wexcommerce
docker cp ./cdn/products src-api-1:/var/www/cdn/wexcommerce
Replace src-api-1 with your API container name.
-
Go to the backend http://localhost:8001 and login with the following credentials:
Admin user: admin@wexcommerce.com
Password: sh0ppingC4rt -
Go to the frontend http://localhost and login with the following credentials:
Frontend user: jdoe@wexcommerce.com
Password: sh0ppingC4rt
Run from Source
Below are the instructions to run wexCommerce from code.
Prerequisites
Install git, Node.js, NGINX or IIS, MongoDB and mongosh. If you want to use MongoDB Atlas, you can skip installing and configuring MongoDB.
Configure MongoDB:
mongosh
Create admin user:
db = db.getSiblingDB('admin')
db.createUser({ user: "admin" , pwd: "PASSWORD",
roles: ["userAdminAnyDatabase", "dbAdminAnyDatabase", "readWriteAnyDatabase"]})
Replace PASSWORD with a strong password.
Secure MongoDB by changing mongod.conf as follows:
net:
  port: 27017
  bindIp: 0.0.0.0

security:
  authorization: enabled
Restart MongoDB service.
Instructions
- Clone wexCommerce repo:
sudo git clone https://github.com/aelassas/wexcommerce.git
- Add api/.env file:
NODE_ENV=development
WC_PORT=4005
WC_HTTPS=false
WC_PRIVATE_KEY=/etc/ssl/wexcommerce.key
WC_CERTIFICATE=/etc/ssl/wexcommerce.crt
WC_DB_URI=mongodb://127.0.0.1:27017/wexcommerce?authSource=admin&appName=wexcommerce
WC_DB_SSL=false
WC_DB_SSL_KEY=/etc/ssl/wexcommerce.key
WC_DB_SSL_CERT=/etc/ssl/wexcommerce.crt
WC_DB_SSL_CA=/etc/ssl/wexcommerce.ca.pem
WC_DB_DEBUG=false
WC_COOKIE_SECRET=COOKIE_SECRET
WC_AUTH_COOKIE_DOMAIN=localhost
WC_JWT_SECRET=JWT_SECRET
WC_JWT_EXPIRE_AT=86400
WC_TOKEN_EXPIRE_AT=86400
WC_SMTP_HOST=in-v3iljet.com
WC_SMTP_PORT=587
WC_SMTP_USER=USER
WC_SMTP_PASS=PASSWORD
WC_SMTP_FROM=admin@wexcommerce.com
WC_CDN_USERS=/var/www/cdn/wexcommerce/users
WC_CDN_TEMP_USERS=/var/www/cdn/wexcommerce/temp/users
WC_CDN_CATEGORIES=/var/www/cdn/wexcommerce/categories
WC_CDN_TEMP_CATEGORIES=/var/www/cdn/wexcommerce/temp/categories
WC_CDN_PRODUCTS=/var/www/cdn/wexcommerce/products
WC_CDN_TEMP_PRODUCTS=/var/www/cdn/wexcommerce/temp/products
WC_BACKEND_HOST=http://localhost:8005/
WC_FRONTEND_HOST=http://localhost:8006/
WC_DEFAULT_LANGUAGE=en
WC_DEFAULT_CURRENCY=$
WC_DEFAULT_STRIPE_CURRENCY=USD
WC_STRIPE_SECRET_KEY=STRIPE_SECRET_KEY
WC_STRIPE_SESSION_EXPIRE_AT=82800
WC_ADMIN_EMAIL=admin@wexcommerce.com
WC_RECAPTCHA_SECRET=RECAPTCHA_SECRET
You must configure the following options:
WC_DB_URI=mongodb://127.0.0.1:27017/wexcommerce?authSource=admin&appName=wexcommerce
WC_SMTP_HOST=in-v3iljet.com
WC_SMTP_PORT=587
WC_SMTP_USER=USER
WC_SMTP_PASS=PASSWORD
WC_STRIPE_SECRET_KEY=STRIPE_SECRET_KEY

WC_CDN_USERS=/var/www/cdn/wexcommerce/users
WC_CDN_TEMP_USERS=/var/www/cdn/wexcommerce/temp/users
WC_CDN_CATEGORIES=/var/www/cdn/wexcommerce/categories
WC_CDN_TEMP_CATEGORIES=/var/www/cdn/wexcommerce/temp/categories
WC_CDN_PRODUCTS=/var/www/cdn/wexcommerce/products
WC_CDN_TEMP_PRODUCTS=/var/www/cdn/wexcommerce/temp/products
On Windows, install IIS and update the following settings with these values:
WC_CDN_USERS=C:\inetpub\wwwroot\cdn\wexcommerce\users
WC_CDN_TEMP_USERS=C:\inetpub\wwwroot\cdn\wexcommerce\temp\users
WC_CDN_CATEGORIES=C:\inetpub\wwwroot\cdn\wexcommerce\categories
WC_CDN_TEMP_CATEGORIES=C:\inetpub\wwwroot\cdn\wexcommerce\temp\categories
WC_CDN_PRODUCTS=C:\inetpub\wwwroot\cdn\wexcommerce\products
WC_CDN_TEMP_PRODUCTS=C:\inetpub\wwwroot\cdn\wexcommerce\temp\products
Add full access permissions to the user who is running wexCommerce API on
C:\inetpub\wwwroot\cdn\wexcommerce.If you want to use MongoDB Atlas, put you MongoDB Atlas URI in
WC_DB_URIotherwise replacePASSWORDinWC_DB_URIwith your MongoDB password. ReplaceJWT_SECRETwith a secret token. Finally, set the SMTP options. SMTP options are necessary for sign up. You can use sendgrid or any other transactional email provider.If you choose sendgrid, create an account on sendgrid.com, login and go to the dashboard. On the left panel, click on Email API, then on Integration Guide. Then, choose SMTP Relay and follow the steps. You will be prompted to create an API Key. Once you create the API Key and verify the smtp relay, copy the API key in
WC_SMTP_PASSin ./api/.env. Sendgrid's free plan allows to send up to 100 emails/day. If you need to send more than 100 emails/day, switch to a paid plan or choose another transactional email provider.COOKIE_SECRETandJWT_SECRETshould at least be 32 characters long, but the longer the better. You can use an online password generator and set the password length to 32 or longer.To enable stripe payment gateway, sign up for a stripe account, fill the forms and save the publishable key and the secret key from stripe dashboard. Then, set the secret key in the following option in api/.env:
WC_STRIPE_SECRET_KEY=STRIPE_SECRET_KEY
Don't expose stripe secret key on a website or embed it in a mobile application. It must be secret and stored securely in the server-side. Use stripe in test mode.
Use only your test API keys for testing. This ensures that you don't accidentally modify your live customers or charges.
Run the api:
cd ./api
npm install
npm run dev
- Add backend/.env file and set the following options:
NEXT_PUBLIC_WC_SERVER_API_HOST=http://localhost:4005
NEXT_PUBLIC_WC_CLIENT_API_HOST=http://localhost:4005
NEXT_PUBLIC_WC_PAGE_SIZE=30
NEXT_PUBLIC_WC_CDN_USERS=http://localhost/cdn/wexcommerce/users
NEXT_PUBLIC_WC_CDN_TEMP_USERS=http://localhost/cdn/wexcommerce/temp/users
NEXT_PUBLIC_WC_CDN_CATEGORIES=http://localhost/cdn/wexcommerce/categories
NEXT_PUBLIC_WC_CDN_TEMP_CATEGORIES=http://localhost/cdn/wexcommerce/temp/categories
NEXT_PUBLIC_WC_CDN_PRODUCTS=http://localhost/cdn/wexcommerce/products
NEXT_PUBLIC_WC_CDN_TEMP_PRODUCTS=http://localhost/cdn/wexcommerce/temp/products
Run backend:
cd ./backend
npm install
npm run dev
- Add frontend/.env file:
NEXT_PUBLIC_WC_SERVER_API_HOST=http://localhost:4005
NEXT_PUBLIC_WC_CLIENT_API_HOST=http://localhost:4005
NEXT_PUBLIC_WC_PAGE_SIZE=30
NEXT_PUBLIC_WC_CDN_USERS=http://localhost/cdn/wexcommerce/users
NEXT_PUBLIC_WC_CDN_CATEGORIES=http://localhost/cdn/wexcommerce/categories
NEXT_PUBLIC_WC_CDN_PRODUCTS=http://localhost/cdn/wexcommerce/products
NEXT_PUBLIC_WC_FB_APP_ID=XXXXXXXXXX
NEXT_PUBLIC_WC_APPLE_ID=XXXXXXXXXX
NEXT_PUBLIC_WC_GG_APP_ID=XXXXXXXXXX
NEXT_PUBLIC_WC_STRIPE_PUBLISHABLE_KEY=STRIPE_PUBLISHABLE_KEY
NEXT_PUBLIC_WC_GOOGLE_ANALYTICS_ENABLED=false
NEXT_PUBLIC_WC_GOOGLE_ANALYTICS_ID=G-XXXXXXXXXX
You must configure the following options:
NEXT_PUBLIC_WC_CDN_USERS=http://localhost/cdn/wexcommerce/users
NEXT_PUBLIC_WC_CDN_CATEGORIES=http://localhost/cdn/wexcommerce/categories
NEXT_PUBLIC_WC_CDN_PRODUCTS=http://localhost/cdn/wexcommerce/products
NEXT_PUBLIC_WC_STRIPE_PUBLISHABLE_KEY=STRIPE_PUBLISHABLE_KEY
To use social login, set these options:
NEXT_PUBLIC_WC_FB_APP_ID=XXXXXXXXXX
NEXT_PUBLIC_WC_APPLE_ID=XXXXXXXXXX
NEXT_PUBLIC_WC_GG_APP_ID=XXXXXXXXXX
To enable stripe payment gateway, set stripe publishable key in
NEXT_PUBLIC_WC_STRIPE_PUBLISHABLE_KEY. You can retrieve it from stripe dashboard.Run frontend:
cd ./frontend
npm install
npm run dev
- Configure http://localhost/cdn
- On Windows, install IIS and create C:\inetpub\wwwroot\cdn folder.
- On Linux, install NGINX and add cdn folder by changing /etc/nginx/sites-available/default as follows:
server { listen 80 default_server; server_name _; ... location /cdn { alias /var/www/cdn; } } - Create an admin user from http://localhost:8005/sign-up
You can change language and currency from settings page in the backend.
Logs
All API logs are written in ./api/logs/all.log.
API Error logs are also written in ./api/logs/error.log.
Using the Code

This section describes the software architecture of wexCommerce including the API, the frontend and the backend.
wexCommerce API is a Node.js server application that exposes a RESTful API using Express which gives access to wexCommerce MongoDB database.
wexCommerce frontend is a Next.js web application that is the main web interface for searching and purshasing products.
wexCommerce backend is a Next.js web application that lets admins manage categories, products, orders, customers, payments and settings.
API

wexCommerce API exposes all wexCommerce functions needed for the backend and the frontend. The API follows the MVC design pattern. JWT is used for authentication. There are some functions that need authentication such as functions related to managing products and orders, and others that do not need authentication such as retrieving categories and available products for non authenticated users.
- ./api/src/models/ folder contains MongoDB models.
- ./api/src/routes/ folder contains Express routes.
- ./api/src/controllers/ folder contains controllers.
- ./api/src/middlewares/ folder contains middlewares.
- ./api/src/app.ts is the main server where routes are loaded.
- ./api/src/index.ts is the main entry point of wexCommerce API.
index.ts
index.ts is in the main server:
import 'dotenv/config'
import process from 'node:process'
import fs from 'node:fs/promises'
import http from 'node:http'
import https, { ServerOptions } from 'node:https'
import * as env from './config/env.config'
import * as databaseHelper from './common/databaseHelper'
import app from './app'
import * as logger from './common/logger'

if (
  await databaseHelper.connect(env.DB_URI, env.DB_SSL, env.DB_DEBUG) && await databaseHelper.initialize()
) {
  let server: http.Server | https.Server

  if (env.HTTPS) {
    https.globalAgent.maxSockets = Number.POSITIVE_INFINITY
    const privateKey = await fs.readFile(env.PRIVATE_KEY, 'utf8')
    const certificate = await fs.readFile(env.CERTIFICATE, 'utf8')
    const credentials: ServerOptions = { key: privateKey, cert: certificate }
    server = https.createServer(credentials, app)

    server.listen(env.PORT, () => {
      logger.info('HTTPS server is running on Port', env.PORT)
    })
  } else {
    server = app.listen(env.PORT, () => {
      logger.info('HTTP server is running on Port', env.PORT)
    })
  }

  const close = () => {
    logger.info('Gracefully stopping...')
    server.close(async () => {
      logger.info(`HTTP${env.HTTPS ? 'S' : ''} server closed`)
      await databaseHelper.close(true)
      logger.info('MongoDB connection closed')
      process.exit(0)
    })
  }

  ['SIGINT', 'SIGTERM', 'SIGQUIT'].forEach((signal) => process.on(signal, close))
}
This is a TypeScript file that starts a server using Node.js and Express. It imports several modules including dotenv, process, fs, http, https, mongoose, and app. It then establishes a connection with wexCommerce MongoDB database. It then checks if the HTTPS environment variable is set to true, and if so, creates an HTTPS server using the https module and the provided private key and certificate. Otherwise, it creates an HTTP server using the http module. The server listens on the port specified in the PORT environment variable.
The close function is defined to gracefully stop the server when a termination signal is received. It closes the server and the MongoDB connection, and then exits the process with a status code of 0. Finally, it registers the close function to be called when the process receives a SIGINT, SIGTERM, or SIGQUIT signal.
app.ts
app.ts is the main entry point of wexCommerce API:
import express from 'express'
import compression from 'compression'
import helmet from 'helmet'
import nocache from 'nocache'
import cookieParser from 'cookie-parser'
import i18n from './lang/i18n'
import * as env from './config/env.config'
import cors from './middlewares/cors'
import allowedMethods from './middlewares/allowedMethods'
import userRoutes from './routes/userRoutes'
import categoryRoutes from './routes/categoryRoutes'
import productRoutes from './routes/productRoutes'
import cartRoutes from './routes/cartRoutes'
import orderRoutes from './routes/orderRoutes'
import notificationRoutes from './routes/notificationRoutes'
import deliveryTypeRoutes from './routes/deliveryTypeRoutes'
import paymentTypeRoutes from './routes/paymentTypeRoutes'
import settingRoutes from './routes/settingRoutes'
import stripeRoutes from './routes/stripeRoutes'
import * as helper from './common/helper'

const app = express()

app.use(helmet.contentSecurityPolicy())
app.use(helmet.dnsPrefetchControl())
app.use(helmet.crossOriginEmbedderPolicy())
app.use(helmet.frameguard())
app.use(helmet.hidePoweredBy())
app.use(helmet.hsts())
app.use(helmet.ieNoOpen())
app.use(helmet.noSniff())
app.use(helmet.permittedCrossDomainPolicies())
app.use(helmet.referrerPolicy())
app.use(helmet.xssFilter())
app.use(helmet.originAgentCluster())
app.use(helmet.crossOriginResourcePolicy({ policy: 'cross-origin' }))
app.use(helmet.crossOriginOpenerPolicy())

app.use(nocache())
app.use(compression({ threshold: 0 }))
app.use(express.urlencoded({ limit: '50mb', extended: true }))
app.use(express.json({ limit: '50mb' }))

app.use(cors())
app.options('*', cors())
app.use(cookieParser(env.COOKIE_SECRET))
app.use(allowedMethods)

app.use('/', userRoutes)
app.use('/', categoryRoutes)
app.use('/', productRoutes)
app.use('/', cartRoutes)
app.use('/', orderRoutes)
app.use('/', notificationRoutes)
app.use('/', deliveryTypeRoutes)
app.use('/', paymentTypeRoutes)
app.use('/', settingRoutes)
app.use('/', stripeRoutes)

i18n.locale = env.DEFAULT_LANGUAGE

await helper.mkdir(env.CDN_USERS)
await helper.mkdir(env.CDN_TEMP_USERS)
await helper.mkdir(env.CDN_CATEGORIES)
await helper.mkdir(env.CDN_TEMP_CATEGORIES)
await helper.mkdir(env.CDN_PRODUCTS)
await helper.mkdir(env.CDN_TEMP_PRODUCTS)

export default app
First of all, we create an Express app and load middlewares such as cors, compression, helmet, and nocache. We set up various security measures using the helmet middleware library. we also import various route files for different parts of the application such as productRoutes, orderRoutes, categoryRoutes, notificationRoutes, userRoutes. Finally, we load Express routes and export app.
Routes
There are 10 routes in wexCommerce API. Each route has its own controller following the MVC design pattern and SOLID principles. Below are the main routes:
userRoutes: Provides REST functions related to userscategoryRoutes: Provides REST functions related to categoriesproductRoutes: Provides REST functions related to productscartRoutes: Provides REST functions related to cartsdeliveryTypeRoutes: Provides REST functions related to delivery methodspaymentTypeRoutes: Provides REST functions related to payment methodsorderRoutes: Provides REST functions related to ordersnotificationRoutes: Provides REST functions related to notificationssettingRoutes: Provides REST functions related to settingsstripeRoutes: Provides REST functions related to Stripe payment gateway
We are not going to explain each route one by one. We'll take, for example, categoryRoutes and see how it was made:
import express from 'express'
import multer from 'multer'
import routeNames from '../config/categoryRoutes.config'
import authJwt from '../middlewares/authJwt'
import * as categoryController from '../controllers/categoryController'

const routes = express.Router()

routes.route(routeNames.validate).post(authJwt.verifyToken, categoryController.validate)
routes.route(routeNames.checkCategory).get(authJwt.verifyToken, categoryController.checkCategory)
routes.route(routeNames.create).post(authJwt.verifyToken, categoryController.create)
routes.route(routeNames.update).put(authJwt.verifyToken, categoryController.update)
routes.route(routeNames.delete).delete(authJwt.verifyToken, categoryController.deleteCategory)
routes.route(routeNames.getCategory).get(authJwt.verifyToken, categoryController.getCategory)
routes.route(routeNames.getCategories).get(categoryController.getCategories)
routes.route(routeNames.getFeaturedCategories).get(categoryController.getFeaturedCategories)
routes.route(routeNames.searchCategories).get(authJwt.verifyToken, categoryController.searchCategories)
routes.route(routeNames.createImage).post([authJwt.verifyToken, multer({ storage: multer.memoryStorage() }).single('image')], categoryController.createImage)
routes.route(routeNames.updateImage).post([authJwt.verifyToken, multer({ storage: multer.memoryStorage() }).single('image')], categoryController.updateImage)
routes.route(routeNames.deleteImage).post(authJwt.verifyToken, categoryController.deleteImage)
routes.route(routeNames.deleteTempImage).post(authJwt.verifyToken, categoryController.deleteTempImage)

export default routes
First of all, we create an Express Router. Then, we create routes using its name, its method, middlewares and its controller.
routeNames contains categoryRoutes route names:
export default {
    validate: '/api/validate-category',
    checkCategory: '/api/check-category/:id',
    create: '/api/create-category',
    update: '/api/update-category/:id',
    delete: '/api/delete-category/:id',
    getCategory: '/api/category/:id/:language',
    getCategories: '/api/categories/:language/:imageRequired',
    getFeaturedCategories: '/api/featured-categories/:language/:size',
    searchCategories: '/api/search-categories/:language',
    createImage: '/api/create-category-image',
    updateImage: '/api/update-category-image/:id',
    deleteImage: '/api/delete-category-image/:id',
    deleteTempImage: '/api/delete-temp-category-image/:image',
}
categoryController contains the main business logic regarding categories. We are not going to see all the source code of the controller since it's quite large but we'll take create and getCategories controller functions for example.
Below is Category model:
import { Schema, model } from 'mongoose'
import * as env from '../config/env.config'

const categorySchema = new Schema<env.Category>({
  values: {
    type: [Schema.Types.ObjectId],
    ref: 'Value',
    validate: (value: any) => Array.isArray(value),
  },
  image: {
    type: String,
  },
  featured: {
    type: Boolean,
    default: false,
  },
}, {
  timestamps: true,
  strict: true,
  collection: 'Category',
})

const Category = model<env.Category>('Category', categorySchema)

export default Category
A Category has multiple values. One value per language. By default, English and French languages are supported.
Below is Value model:
import { Schema, model } from 'mongoose'
import * as env from '../config/env.config'

const locationValueSchema = new Schema<env.Value>(
  {
    language: {
      type: String,
      required: [true, "can't be blank"],
      index: true,
      trim: true,
      lowercase: true,
      minLength: 2,
      maxLength: 2,
    },
    value: {
      type: String,
      required: [true, "can't be blank"],
      index: true,
      trim: true,
    },
  },
  {
    timestamps: true,
    strict: true,
    collection: 'Value',
  },
)

const Value = model<env.Value>('Value', locationValueSchema)

export default Value
A Value has a language code (ISO 639-1) and a string value.
Below is create controller function:
/**
 * Create a category.
 *
 * @async
 * @param {Request} req
 * @param {Response} res
 * @returns {unknown}
 */
export const create = async (req: Request, res: Response) => {
  const { body }: { body: wexcommerceTypes.UpsertCategoryPayload } = req
  const { values, image, featured } = body

  try {
    if (image) {
      const _image = path.join(env.CDN_TEMP_CATEGORIES, image)

      if (!await helper.exists(_image)) {
        logger.error(i18n.t('CATEGORY_IMAGE_NOT_FOUND'), body)
        return res.status(400).send(i18n.t('CATEGORY_IMAGE_NOT_FOUND'))
      }
    }

    const _values = []
    for (const value of values) {
      const _value = new Value({
        language: value.language,
        value: value.value,
      })
      await _value.save()
      _values.push(_value._id)
    }

    const category = new Category({ values: _values, featured })
    await category.save()

    if (image) {
      const _image = path.join(env.CDN_TEMP_CATEGORIES, image)

      if (await helper.exists(_image)) {
        const filename = `${category._id}_${Date.now()}${path.extname(image)}`
        const newPath = path.join(env.CDN_CATEGORIES, filename)

        await fs.rename(_image, newPath)
        category.image = filename
        await category.save()
      }
    }

    return res.sendStatus(200)
  } catch (err) {
    logger.error(`[category.create] ${i18n.t('DB_ERROR')} ${req.body}`, err)
    return res.status(400).send(i18n.t('DB_ERROR') + err)
  }
}
In this function, we retrieve the body of the request, we iterate through the values provided in the body (one value per language) and we create a Value. Finally, we create the category depending on the created values and image file.
Below is getCategories controller function:
/**
 * Get categories.
 *
 * @async
 * @param {Request} req
 * @param {Response} res
 * @returns {unknown}
 */
export const getCategories = async (req: Request, res: Response) => {
  try {
    const { language, imageRequired } = req.params
    const _imageRequired = helper.StringToBoolean(imageRequired)

    let $match: mongoose.FilterQuery<env.Category> = {}
    if (_imageRequired) {
      $match = { image: { $ne: null } }
    }

    const categories = await Category.aggregate([
      {
        $match,
      },
      {
        $lookup: {
          from: 'Value',
          let: { values: '$values' },
          pipeline: [
            {
              $match: {
                $and: [
                  { $expr: { $in: ['$_id', '$$values'] } },
                  { $expr: { $eq: ['$language', language] } },
                ],
              },
            },
          ],
          as: 'value',
        },
      },
      { $unwind: { path: '$value', preserveNullAndEmptyArrays: false } },
      { $addFields: { name: '$value.value' } },
      { $project: { value: 0, values: 0 } },
      { $sort: { name: 1 } },
    ], { collation: { locale: env.DEFAULT_LANGUAGE, strength: 2 } })

    return res.json(categories)
  } catch (err) {
    logger.error(`[category.getCategories] ${i18n.t('DB_ERROR')}`, err)
    return res.status(400).send(i18n.t('DB_ERROR') + err)
  }
}
In this controller function, we retrieve categories from database using aggregate MongoDB function depending on the language provided.
Frontend
The frontend is a web application built with Node.js, Next.js, React and MUI. From the frontend, the user can search for available products, add them to cart and proceed to checkout depending on delivery and payment methods.
- ./frontend/public/ folder contains public assets.
- ./frontend/src/styles/ folder contains CSS styles.
- ./frontend/src/components/ folder contains React components.
- ./frontend/src/lang contains locale files.
- ./frontend/src/app/ folder contains Next.js pages.
- ./frontend/src/lib/ contains server actions.
- ./frontend/next.config.mjs is the main configuration file of the frontend.
The frontend was created with create-next-app:
npx create-next-app@latest
In Next.js, a page is a React Component exported from a .js, .jsx, .ts, or .tsx file in the pages directory. Each page is associated with a route based on its file name.
By default, Next.js pre-renders every page. This means that Next.js generates HTML for each page in advance, instead of having it all done by client-side JavaScript. Pre-rendering can result in better performance and SEO.
Each generated HTML is associated with minimal JavaScript code necessary for that page. When a page is loaded by the browser, its JavaScript code runs and makes the page fully interactive. (This process is called hydration.)
wexCommerce uses Server-Side Rendering for SEO optimization so that products can be indexed by search engines.
Backend
The backend is a web application built with Node.js, Next.js, React and MUI. From the backend, admins can manage categories, products, orders and users. When a new order is created, the admin user gets a notification in the backend and receives an automatic email.
- ./backend/public/ folder contains public assets.
- ./backend/src/styles/ folder contains CSS styles.
- ./backend/src/components/ folder contains React components.
- ./backend/src/lang contains locale files.
- ./backend/src/app/ folder contains Next.js pages.
- ./backend/src/lib/ contains server actions.
- ./backend/next.config.mjs is the main configuration file of the backend.
The backend was created with create-next-app too:
npx create-next-app@latest
That's it! I hope you enjoyed reading this article.