
WebAPI and Node
5.00/5 (2 votes)
This post will help you to have a look at how to implement RESTful in node in a simple way.
There are some libraries doing this already. I did not intend to replace that, just make some crazy code. Hope this can help us in future if we need some tricks to solve our problem.
Check out the code from github at https://github.com/techcoaching/node_controller.

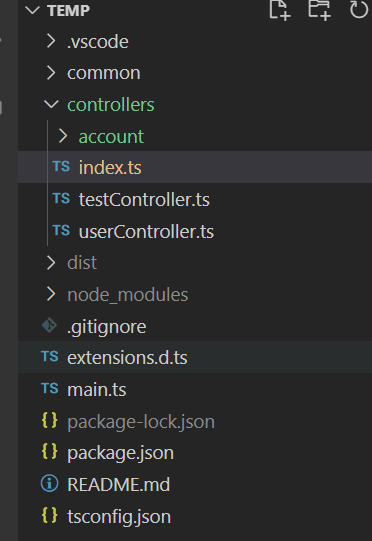
Open this in visual code, we can see:

Just a few files, let me explain a little:
- common folder: This is where the common code, feature will be located.
- main.ts: This is startup file.
- controllers folder: This is where the controller of your app like in .NET
WebAPIproject. There are two sample controllers, you can look at them for more understanding if needed. - In main.ts, there is special trick, just new an application type of node (using express), register routes and start, so simple right:
let option:ICreateApplicationArg=<ICreateApplicationArg>{
    type:ApplicationType.NODE_EXPRESS
};

let routeConfigs:Hashtable<IRouteConfig>=BaseController.getRouteConfigs(CONTROLLERS);
let app:IApplication=ApplicationFactory.create(option);
app.configRoutes(routeConfigs);
app.start();
Run "npm install", this will download necessary packages from npm.
Run "npm run start", this will start the code and listen request at 3001 port. You can change this in common\application\nodeApplication.ts, you can improve the app to load these settings from external file. This was out of scope of this article:

Let's use any rest client and send some request to http://localhost:3001 as below, just want to make sure that we have the right setup:
Say hello:

Call with parameter:

Post data:

Please look at the testCotroller and usercontroller for more information.
OK, we can start the code, and make some noise with the API call. Let's continue creating a new controller.
Let's see the use-case:
I want to have the API which allows me to be able to:
- get the list of available accounts
- update account information
- get account info
- delete account
- add new account.
Account info includes:- account Id, guid value
- account name
- status: value can be: normal, deleted
Let's analyze:
- Get the list of accounts, we need:
- GET request
- uri:<base uri>/accounts
- return: array of accounts in json
- Update account info:
POSTrequest, we usePOSTfor bothcreateandupdate- uri:<base uri>/accounts/<account id>
- body: account in json format
- return: none
- Get account info:
GETrequest- uri: <base uri>/accounts/<account id>
- return: account info
- Delete account:
DELETErequest- uri: <base uri>/accounts/<account id>
- return: account was deleted
- Add new account:
POSTrequest- uri: <base uri>/accounts
- body: account information in json format
Let's implement.
Step 1: Add New Controller for Account (Named AccountController)
import { UriPrefix } from "../common";
import { BaseController } from "../common/models/baseController";
@UriPrefix("/api/accounts")
export class AccountController extends BaseController{
}
and register this controller with the list of controllers:
import { TestController } from "./testController";
import { UserController } from "./userController";
import {AccountController} from "./Account/accountController";
export const CONTROLLERS:Array<any>=[
    TestController,
    UserController,
    AccountController
];
Step 2: Get the List of Available Accounts
Add new AccountController.ts:
import { Route, UriPrefix } from "../../common";
import guidHelper from "../../common/helpers/guidHelper";
import { BaseController } from "../../common/models/baseController";
import {Account} from "./account";
import {AccountService} from "./accountService";
@UriPrefix("/api/accounts")
export class AccountController extends BaseController{
    constructor(){
        super()
        if(!AccountService.accounts || AccountService.accounts.length==0){
            AccountService.accounts=[
                <Account>{id:guidHelper.create(), name:"Account 1", status: "normal"},
                <Account>{id:guidHelper.create(), name:"Account 2", status: "deleted"},
            ];
        }
    }
    @Route("")
    public getAccounts():Array<Account>{
        return AccountService.accounts;
    }
}
At line 5 and 7, this creates the final uri mapped to getAccounts which is "/ap/accounts". Just simply return the list of in-memory list.
And Account model:
export class Account{
    public id:string;
    public name:string;
    public status:string;
}
And AccountService:
import { Account } from "./account";

export class AccountService{
    public static accounts:Array<Account>=[];
}
It was rather simple at the moment, and the folder structure we have:
Just add a new folder named "account" and move all the code for account into this folder.
Let run the code again, send request to "/api/accounts", we have the list with two accounts at the moment:

For now, we completed the first task which is "get the list of available accounts", see the code in "feature/get_accounts" for more information on this.
Step 3: Update Account
It was mostly the same with "get accounts" task. Add a new method which handles update request:
 @Route(":id")
    @HttpPost()
    public updateAccount(id:string, name:string, status:string):string{
        let result:string=AccountService.updateAccount(id, name, status);
        return result;
    }
There are some notes:
- At line 1, we register route which receives
idas parameter. - At line 2, this handles
postrequest for the above uri. - At line 3, parameters will be injected automatically for us.
nameandstatusfrom the body of request.
Please do not pay attention to the logic of method body. It was out of scope.
For the rest of the code, you can checkout from "feature/update_account" branch.
Let update an account:

Get the list of accounts, appropriated account was updated:

Step 4: Get an Account
Add getAccount method which handles get request:
@Route(":id")
    @HttpGet()
    public getAccount(id:string):any{
        return AccountService.getAccount(id);
    }

For adding new and delete account, please continue to do on your own with some hints:
- Add new
HttpDeletefor handlingdeleteaccount, simlar toHttpPost. - You can use
HttpPostfor adding a new account.
Thank you for reading!
Note: Please like and share with your friends if you think this is a useful article, I really appreciate it.