
GFX In Depth: Part 2 - E-Paper Displays
5.00/5 (3 votes)
Use GFX effectively with e-paper/e-ink displays
Introduction
Note that there is no code directly associated with this article, because it's already incorporated into the main codebase at the above link.
This is part two in my GFX In Depth series. Part one is here.
E-Paper displays are modern electronic devices that use actual ink to render graphics and text, like a common inkject printer. However, unlike a printer, they can reuse the same surface indefinitely, allowing them to be used as displays for things like e-readers. That said, the properties of these displays are wildly different than a traditional TFT, LCD or OLED display so using them requires some care.
First of all, e-paper displays are most typically single color, black on white. There is no capability in most of them to do grayscale, because unlike light based displays, you can't simply change the intensity of a color.
Second, the color ones are typically expensive and have a very limited color palette of usually 3 colors, and up to 7 colors that I've seen for the really fancy (read expensive) displays. There is no capability to mix the ink involved so you can't combine yellow and blue to make green, for example.
Finally, the display refresh rate can take seconds, especially for color displays. Animation is out of the question with these displays and care must be taken when using them with GFX to avoid performance issues because of this.
Concepts
We'll be using the drivers for the two e-paper displays I have currently written. E-Paper display drivers for GFX can virtualize grayscales and color mixing through dithering, which is a technique wherein we fool the eye by mixing colors using adjacent pixels. For example, instead of a series of gray pixels, you can have a series of alternating black and white pixels to fool the eye into seeing a gray-ish line. Colors work the same way. To draw purple, you'd alternate red and blue.
In GFX, this works by virtualizing a "deeper" pixel type than the device natively supports. For example, instead of exposing a monochrome pixel (gsc_pixel<1>) you can expand that into grayscale, like gsc_pixel<4> or gsc_pixel<8>. Black and white displays allow grayscale virtualization only, while color displays can virtualize any pixel type except for indexed pixels.
This feature makes my e-paper drivers best of class in terms of display capabilities. If there are other drivers out there that support this for IoT, I'm not aware of them.
The cost is memory use and speed, especially for the color displays. Your frame buffer is in memory and the size is based on the virtualized pixel, meaning if you're virtualizing 16-bit color over a 3 color e-paper display, the frame buffer will end up being 8 times the size! Therefore, when you're using virtualization, especially on color drivers, you're not going to have a lot of RAM for anything else, unless you have an ESP32 WROVER 8MB or similar.
Even if you opt out of dithering by virtualization, GFX always does nearest color matching to the palette when converting to indexed pixel format, and that includes color e-paper display palettes. Ergo, on a black, white and red display, if you load a JPEG with red in it, the red portions of the JPEG will show up as red on the display.
Let's take a look at this in action:
Here's a print of famous Warhol piece, which we'll load on to a 3-color, black white and red display:
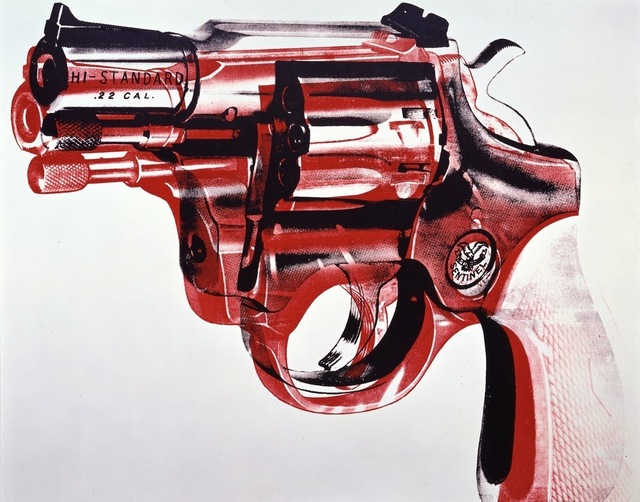
Pardon my atrociously messy workbench, but here is the image displayed on the 3 color display without dithering by virtualization:

And here is the same image with dithering by way of virtualizating a 16-bit RGB color pixel:

Finally, let's take a look at Andy Warhol's face on a black and white display with dithering, just so you can see how the greys turn out:

See the definition in his face? Without virtualization, you'd just see the sunglasses and mouth.
Using Virtualization
I've tried to make this as simple as possible. There is only one change needed in your code to support these features, and that's in the driver's type instantiation:
// instantiate a color e-paper driver with
// virtualization
using lcd_type = gdeh0154z90<PIN_NUM_CS,
                        PIN_NUM_DC,
                        PIN_NUM_RST,
                        PIN_NUM_BUSY,
                        rgb_pixel<16>>;
Notice there's a final parameter that specifies a 16 bit RGB pixel type. Specifying a pixel type is how you enable virtualization by dithering. If you did not specify this, only nearest color matching will be used.
It's slightly different for a black and white driver, since you can't specify an arbitrary pixel type. In this case, you simply specify the bit depth as the final parameter. Specifying 8 for example, will net you a 256-color grayscale by way of virtualization/dithering.
// instantiate a black and white e-paper
// driver with virtualization
using lcd_type = depg0290b<PIN_NUM_CS,
                        PIN_NUM_DC,
                        PIN_NUM_RST,
                        PIN_NUM_BUSY,
                        8>;
After that, you just use them as you normally would, except now you have access to effectively more colors and greys.
Dealing with Refresh
E-Paper displays do not refresh quickly. Due to this, it is strongly recommended that you suspend while drawing, and only resume when you have finished drawing the entire frame.
draw::suspend(lcd);
draw::filled_rectangle(lcd,(srect16)lcd.bounds(),lcd_color::white);
rect16 image_bounds(0,0,335,255);
rect16 crop_bounds(0,0,127,127);
File fs = SPIFFS.open("/image3.jpg");
draw::image(lcd,(srect16)crop_bounds,&fs,crop_bounds.center(image_bounds));
fs.close();
fs = SPIFFS.open("/image3.jpg");
draw::image(lcd,{0,lcd.height-128,127,lcd.height-1},&fs,crop_bounds.center(image_bounds));
fs.close();
const font& f = Bm437_Acer_VGA_8x8_FON;
const char* text = "GFX Demo by\r\n honey the\r\n codewitch";
ssize16 fd=f.measure_text({128,128},text);
draw::text(lcd,fd.bounds().center((srect16)lcd.bounds()),text,f,lcd_color::black);
draw::resume(lcd);
Notice how the drawing calls are bookended by suspend<>() and resume<>() calls? If that hadn't been done, the display would have refreshed several times while attempting to render that frame.
Points of Interest
In the bowels of the GFX, there are 3 dithering algorithms implemented which you can potentially use in your own code. I won't cover using them here since they are basically an implementation detail, but you can take a look at the drivers which use that code to see how to do it yourself.
History
- 18th June, 2021 - Initial submission