
DeepFaceLab: A Pre-Packaged Alternative DIY Deep Fakes
5.00/5 (2 votes)
In this article we’ll explore DeepFaceLab as an alternative to our last approach.
Deep fakes - the use of deep learning to swap one person's face into another in video - are one of the most interesting and frightening ways that AI is being used today.
While deep fakes can be used for legitimate purposes, they can also be used in disinformation. With the ability to easily swap someone's face into any video, can we really trust what our eyes are telling us? A real-looking video of a politician or actor doing or saying something shocking might not be real at all.
In this article series, we're going to show how deep fakes work, and show how to implement them from scratch. We'll then take a look at DeepFaceLab, which is the all-in-one Tensorflow-powered tool often used for creating convincing deep fakes.
In the previous article we completed the pipeline for our Deep Fakes DIY solution. For this article, I want to give you an overview on how to use DeepFaceLab to achieve similar results to the video we obtained before. I already gave you an intro about DeepFaceLab, so in this section I’ll show you how to implement it from a somewhat unusual angle: Instead of following the regular local path, I want to continue with the Cloud operations point of view, so I’ll explain to you how to use DeepFaceLab running on top of Google Colab, that way you can still follow this tutorial even if you don’t have a super powerful local machine.
Before getting started, take a brief moment read to their GitHub repository and the DFL Google Colab guide. You can get their official Colab notebook here and mine here. With that said, let’s get this done!
Preparing the Input Data and Setting up the Notebook
DFL requires you to create a folder called "workspace" that contains two videos: data_src.mp4 and data_dst.mp4. These are going to be the source video where you want to insert the transformed faces and the video where you’ll take the destination faces from, respectively. Once you’ve done that, compress the folder into a file called "workspace.zip". Upload this file to your Google Drive’s root directory. If you use the example that I’ve been using from the beginning, you can find this file here, just download it and upload it to your Drive.
Now copy the official DFL Notebook (or mine) and make sure that your Notebook instance has its GPU enabled by going to Runtime > Change runtime type > Hardware accelerator: GPU.

Also, go to Edit > Notebook Settings and make sure that you see the same option as above.
Initializing the Notebook and Installing the Dependencies
I won’t go too deep into the Notebook explanation because it’s extremely well documented. Instead, I’ll show you how to obtain the best possible video. Once you’ve double checked that your instance has its GPU enabled, run the first three cells of your notebook:


IMPORTANT: make sure that you select the "Install" option in the dropdown list and select the "Download_FFHQ" option before running the third cell.
Dataset Importing
Once the DFL installation has been completed, expand the fourth cell and run the first and second blocks of code as they are. This will import the dataset you’ve uploaded to your Drive and set notebook output exportation to your Drive as well:

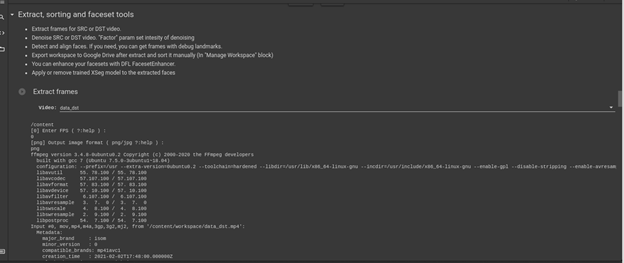
Extracting and Denoising the Frames from the Raw Videos
Let’s process the videos obtained from your Drive. To do so, expand the fifth cell, select "data_src" from the dropdown list and run the block. The script will require a few inputs from you: Enter "0" as the FPS (frames per second) and "png" when it asks the output image format and then let it extract the frames.
Then, when it finishes the extraction, go back to the dropdown list, this time selecting "data_dst", and repeat the process:
Once both groups of frames have been extracted, it’s time to denoise those frames. This step is totally optional but I would do it anyway. Proceed to run the second block for both "data_src" and "data_dst" and whenever it asks for denoise factor, use the default of 7:

Face Detection
Once the frames have been denoised, it’s time to detect faces on them. Proceed to run the sixth block for "data_src" and "data_dst" with "S3FD" detector. It will require you to enter a few parameters: Set "Face type" to "wf" (which means "whole face"), "Max number of faces from image" to 0, and "JPEG quality" to 90:

Optional: Sorting and Enhancing Facesets
Even though these steps are optional, I encourage you to run them. The first one is to sort the datasets by histogram similarities and the second one is to enhance the facesets and therefore get better results at training. Run both blocks for "data_src" and "data_dst", the faceset enhancing with GPU (enter option 0 when required) and agree when it asks if you want to merge the datasets:

Model Training
To start this process, select "SAEHD" in the dropdown list for the "Model" option, select the option to backup every hour and also select "Silent start". You’ll be asked to define several parameters about the training. Use all the default options, modifying only "Autobackup every N hour" to 1:


The training default period is extremely long for our reduced dataset, so after 2 or 3 hours you can stop it by pressing Enter. It will stop the training process and will save the last model. For reference, these are some sample results that I’ve obtained during training after 8200, 23000 and 37300 iterations. Notice how the right hand side column improves while iterations increase:


Once the model training starts to output acceptable transformation previews, stop it. (You can see them in the Colab file explorer on the left hand side, under Model. Find DFL_SAEHD_preview_SAEHD masked.jpg file and download it)
Merging the Resulting Frames
Run the next block with the "SAEHD" model and all default parameters except:
- Choose mode: enter "3" for seamless face swapping.
- Choose sharpen mode: enter "2" for gaussian. This is to improve the face swapping quality.
- Choose super resolution power: enter "20".


Getting the Resulting Video: a Deep Fake
Finally, get the resulting video by running the last block. Select the "Copy to drive" option if you need and leave the parameters as default:

Once it ends, you’ll find the final video saved in your Drive and at /content/workspace/result.mp4. This is how my final deep fake looks:

Amazing, isn’t it? Find the final video here if you want to check it out. As a final thought, I want to highlight that DFL results are substantially better than the ones that we achieved with our DIY solution, but keep in mind that there is tons of time and dedication behind DeepFaceLab, in contrast with our DIY solution that took us only a few days. I encourage you to improve upon my results on your own. It’s just a matter of dedicating time to adjust the details and training your autoencoders for many more epochs.
We’ve reached the end of this article series. I hope you’ve enjoyed this long but exciting journey! Remember, use deep fakes with good intentions. I hope to see you around. Thanks for your time!