
Creating a Snapchat-Style Virtual Glasses Face Filter in the Browser with TensorFlow.js
5.00/5 (3 votes)
In this article we are going to use the key facial points to render a 3D model virtually over our webcam feed for some Augmented Reality fun.
Introduction
Apps like Snapchat offer an amazing variety of face filters and lenses that let you overlay interesting things on your photos and videos. If you’ve ever given yourself virtual dog ears or a party hat, you know how much fun it can be!
Have you wondered how you’d create these kinds of filters from scratch? Well, now’s your chance to learn, all within your web browser! In this series, we’re going to see how to create Snapchat-style filters in the browser, train an AI model to understand facial expressions, and do even more using Tensorflow.js and face tracking.

You are welcome to download the demo of this project. You may need to enable WebGL in your web browser for performance.
You can also download the code and files for this series.
We are assuming that you are familiar with JavaScript and HTML and have at least a basic understanding of neural networks. If you are new to TensorFlow.js, we recommend that you first check out this guide: Getting Started with Deep Learning in Your Browser Using TensorFlow.js.
If you would like to see more of what is possible in the web browser with TensorFlow.js, check out these AI series: Computer Vision with TensorFlow.js and Chatbots using TensorFlow.js.
Let’s get back to the original goal of this series, which is to create a Snapchat-style face filter in the browser. This time, we are going to use the key facial points to render a 3D model virtually over our webcam feed for some Augmented Reality fun.
Adding 3D Graphics with ThreeJS
This project will build on the face tracking project code we built at the start of this series. We will add a 3D scene overlay above the original canvas.
ThreeJS makes it relatively easy to work with 3D graphics, so we are going to use it to render virtual glasses on top of our faces.
There are two script files we need to include at the top of the page for adding ThreeJS and a GLTF file format loader for the virtual glasses model we’ll use:
<script src="https://cdn.jsdelivr.net/npm/three@0.123.0/build/three.min.js"></script>
<script src="https://cdn.jsdelivr.net/npm/three@0.123.0/examples/js/loaders/GLTFLoader.js"></script>
To keep things simple and not worry about how to put a webcam texture in the scene, we can overlay an additional – transparent – canvas and draw the virtual glasses on it. We’ll use the following CSS code above the <body>, wrap the output canvas with a container, and add the overlay canvas.
<style>
    .canvas-container {
        position: relative;
        width: auto;
        height: auto;
    }
    .canvas-container canvas {
        position: absolute;
        left: 0;
        width: auto;
        height: auto;
    }
</style>
<body>
    <div class="canvas-container">
        <canvas id="output"></canvas>
        <canvas id="overlay"></canvas>
    </div>
    ...
</body>
There are a couple of variables to keep for the 3D scene, and we can add a 3D model loading utility function for GLTF files:
<style>
    .canvas-container {
        position: relative;
        width: auto;
        height: auto;
    }
    .canvas-container canvas {
        position: absolute;
        left: 0;
        width: auto;
        height: auto;
    }
</style>
<body>
    <div class="canvas-container">
        <canvas id="output"></canvas>
        <canvas id="overlay"></canvas>
    </div>
    ...
</body>
Now we can initialize everything inside our async block, starting with the overlay canvas size, same as we did with the output canvas:
(async () => {
    ...

    let canvas = document.getElementById( "output" );
    canvas.width = video.width;
    canvas.height = video.height;

    let overlay = document.getElementById( "overlay" );
    overlay.width = video.width;
    overlay.height = video.height;

    ...
})();
The renderer, scene, and camera also need to be set up but don’t worry if you are not familiar with the 3D perspective and camera math. This code just places the scene camera at a spot that would make the width and height of the webcam video match the 3D space coordinates:
(async () => {
    ...

    // Load Face Landmarks Detection
    model = await faceLandmarksDetection.load(
        faceLandmarksDetection.SupportedPackages.mediapipeFacemesh
    );

    renderer = new THREE.WebGLRenderer({
        canvas: document.getElementById( "overlay" ),
        alpha: true
    });

    camera = new THREE.PerspectiveCamera( 45, 1, 0.1, 2000 );
    camera.position.x = videoWidth / 2;
    camera.position.y = -videoHeight / 2;
    camera.position.z = -( videoHeight / 2 ) / Math.tan( 45 / 2 ); // distance to z should be tan( fov / 2 )

    scene = new THREE.Scene();
    scene.add( new THREE.AmbientLight( 0xcccccc, 0.4 ) );
    camera.add( new THREE.PointLight( 0xffffff, 0.8 ) );
    scene.add( camera );

    camera.lookAt( { x: videoWidth / 2, y: -videoHeight / 2, z: 0, isVector3: true } );

    ...
})();
We only need to add one line of code to render the scene on top of the face tracking output inside trackFace:
async function trackFace() {
    const video = document.querySelector( "video" );
    output.drawImage(
        video,
        0, 0, video.width, video.height,
        0, 0, video.width, video.height
    );
    renderer.render( scene, camera );

    const faces = await model.estimateFaces( {
        input: video,
        returnTensors: false,
        flipHorizontal: false,
    });

    ...
}
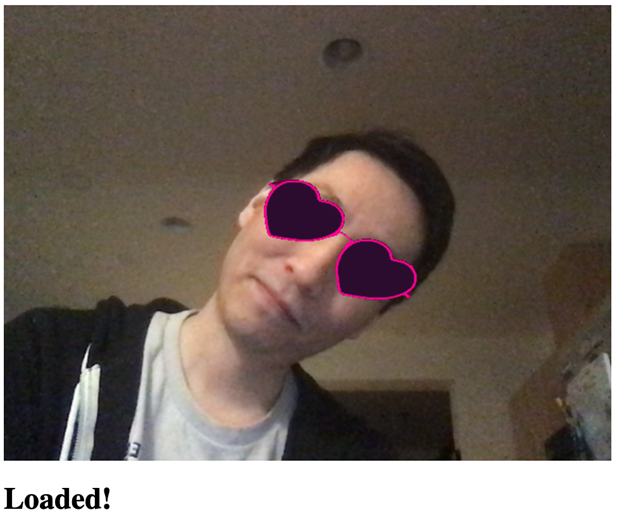
The last piece of this puzzle before mapping virtual objects to our face is to load a 3D model of the virtual glasses. We found a pair of Heart Glasses by Maximkuzlin on SketchFab. Feel free to download and use a different object if you would like.
Here’s how we can load the object and add it to the scene before we call trackFace:
glasses = await loadModel( "web/3d/heart_glasses.gltf" );
scene.add( glasses );
Placing Virtual Glasses on the Tracked Face
Now comes the fun part: Putting on our virtual glasses.
The labeled annotations provided by TensorFlow’s face tracking model includes the midwayBetweenEyes coordinate where the X and Y coordinates map to the screen, and the Z coordinate adds depth to the screen. This makes placing the glasses at our eyes rather simple.
We need to negate the Y coordinate because the positive Y-axis points down in 2D screen coordinates but points up in 3D coordinates. We also subtract the camera’s distance or depth from the Z coordinate value for proper distance in the scene.
glasses.position.x = face.annotations.midwayBetweenEyes[ 0 ][ 0 ];
glasses.position.y = -face.annotations.midwayBetweenEyes[ 0 ][ 1 ];
glasses.position.z = -camera.position.z + face.annotations.midwayBetweenEyes[ 0 ][ 2 ];
Now we have to calculate the orientation and scale of the glasses. This becomes possible once we figure out which direction is “up” relative to our face and points towards the top of our head, and how far apart the eyes are.
To estimate the “up” direction, we can use a vector from the midwayBetweenEyes point we’d used for the glasses, along with the tracked point for the bottom of the nose, and then normalize its length like this:
glasses.up.x = face.annotations.midwayBetweenEyes[ 0 ][ 0 ] - face.annotations.noseBottom[ 0 ][ 0 ];
glasses.up.y = -( face.annotations.midwayBetweenEyes[ 0 ][ 1 ] - face.annotations.noseBottom[ 0 ][ 1 ] );
glasses.up.z = face.annotations.midwayBetweenEyes[ 0 ][ 2 ] - face.annotations.noseBottom[ 0 ][ 2 ];
const length = Math.sqrt( glasses.up.x ** 2 + glasses.up.y ** 2 + glasses.up.z ** 2 );
glasses.up.x /= length;
glasses.up.y /= length;
glasses.up.z /= length;
To get a relative size of the head, we can compute the distance between the eyes:
const eyeDist = Math.sqrt(
    ( face.annotations.leftEyeUpper1[ 3 ][ 0 ] - face.annotations.rightEyeUpper1[ 3 ][ 0 ] ) ** 2 +
    ( face.annotations.leftEyeUpper1[ 3 ][ 1 ] - face.annotations.rightEyeUpper1[ 3 ][ 1 ] ) ** 2 +
    ( face.annotations.leftEyeUpper1[ 3 ][ 2 ] - face.annotations.rightEyeUpper1[ 3 ][ 2 ] ) ** 2
);
Finally, we scale the glasses based on the eyeDist value and orient the glasses on the Z-axis using the angle between the “up” vector and the Y-axis, and voila!
Run your code and check out the result.


Finish Line
Before we move to the next part of this series, let us show you the full code put together:
<html>
    <head>
        <title>Creating a Snapchat-Style Virtual Glasses Face Filter</title>
        <script src="https://cdn.jsdelivr.net/npm/@tensorflow/tfjs@2.4.0/dist/tf.min.js"></script>
        <script src="https://cdn.jsdelivr.net/npm/@tensorflow-models/face-landmarks-detection@0.0.1/dist/face-landmarks-detection.js"></script>
        <script src="https://cdn.jsdelivr.net/npm/three@0.123.0/build/three.min.js"></script>
        <script src="https://cdn.jsdelivr.net/npm/three@0.123.0/examples/js/loaders/GLTFLoader.js"></script>
    </head>
    <style>
        .canvas-container {
            position: relative;
            width: auto;
            height: auto;
        }
        .canvas-container canvas {
            position: absolute;
            left: 0;
            width: auto;
            height: auto;
        }
    </style>
    <body>
        <div class="canvas-container">
            <canvas id="output"></canvas>
            <canvas id="overlay"></canvas>
        </div>
        <video id="webcam" playsinline style="
            visibility: hidden;
            width: auto;
            height: auto;
            ">
        </video>
        <h1 id="status">Loading...</h1>
        <script>
        function setText( text ) {
            document.getElementById( "status" ).innerText = text;
        }

        function drawLine( ctx, x1, y1, x2, y2 ) {
            ctx.beginPath();
            ctx.moveTo( x1, y1 );
            ctx.lineTo( x2, y2 );
            ctx.stroke();
        }

        async function setupWebcam() {
            return new Promise( ( resolve, reject ) => {
                const webcamElement = document.getElementById( "webcam" );
                const navigatorAny = navigator;
                navigator.getUserMedia = navigator.getUserMedia ||
                navigatorAny.webkitGetUserMedia || navigatorAny.mozGetUserMedia ||
                navigatorAny.msGetUserMedia;
                if( navigator.getUserMedia ) {
                    navigator.getUserMedia( { video: true },
                        stream => {
                            webcamElement.srcObject = stream;
                            webcamElement.addEventListener( "loadeddata", resolve, false );
                        },
                    error => reject());
                }
                else {
                    reject();
                }
            });
        }

        let output = null;
        let model = null;
        let renderer = null;
        let scene = null;
        let camera = null;
        let glasses = null;

        function loadModel( file ) {
            return new Promise( ( res, rej ) => {
                const loader = new THREE.GLTFLoader();
                loader.load( file, function ( gltf ) {
                    res( gltf.scene );
                }, undefined, function ( error ) {
                    rej( error );
                } );
            });
        }

        async function trackFace() {
            const video = document.querySelector( "video" );
            output.drawImage(
                video,
                0, 0, video.width, video.height,
                0, 0, video.width, video.height
            );
            renderer.render( scene, camera );

            const faces = await model.estimateFaces( {
                input: video,
                returnTensors: false,
                flipHorizontal: false,
            });

            faces.forEach( face => {
                // Draw the bounding box
                const x1 = face.boundingBox.topLeft[ 0 ];
                const y1 = face.boundingBox.topLeft[ 1 ];
                const x2 = face.boundingBox.bottomRight[ 0 ];
                const y2 = face.boundingBox.bottomRight[ 1 ];
                const bWidth = x2 - x1;
                const bHeight = y2 - y1;
                drawLine( output, x1, y1, x2, y1 );
                drawLine( output, x2, y1, x2, y2 );
                drawLine( output, x1, y2, x2, y2 );
                drawLine( output, x1, y1, x1, y2 );

                glasses.position.x = face.annotations.midwayBetweenEyes[ 0 ][ 0 ];
                glasses.position.y = -face.annotations.midwayBetweenEyes[ 0 ][ 1 ];
                glasses.position.z = -camera.position.z + face.annotations.midwayBetweenEyes[ 0 ][ 2 ];

                // Calculate an Up-Vector using the eyes position and the bottom of the nose
                glasses.up.x = face.annotations.midwayBetweenEyes[ 0 ][ 0 ] - face.annotations.noseBottom[ 0 ][ 0 ];
                glasses.up.y = -( face.annotations.midwayBetweenEyes[ 0 ][ 1 ] - face.annotations.noseBottom[ 0 ][ 1 ] );
                glasses.up.z = face.annotations.midwayBetweenEyes[ 0 ][ 2 ] - face.annotations.noseBottom[ 0 ][ 2 ];
                const length = Math.sqrt( glasses.up.x ** 2 + glasses.up.y ** 2 + glasses.up.z ** 2 );
                glasses.up.x /= length;
                glasses.up.y /= length;
                glasses.up.z /= length;

                // Scale to the size of the head
                const eyeDist = Math.sqrt(
                    ( face.annotations.leftEyeUpper1[ 3 ][ 0 ] - face.annotations.rightEyeUpper1[ 3 ][ 0 ] ) ** 2 +
                    ( face.annotations.leftEyeUpper1[ 3 ][ 1 ] - face.annotations.rightEyeUpper1[ 3 ][ 1 ] ) ** 2 +
                    ( face.annotations.leftEyeUpper1[ 3 ][ 2 ] - face.annotations.rightEyeUpper1[ 3 ][ 2 ] ) ** 2
                );
                glasses.scale.x = eyeDist / 6;
                glasses.scale.y = eyeDist / 6;
                glasses.scale.z = eyeDist / 6;

                glasses.rotation.y = Math.PI;
                glasses.rotation.z = Math.PI / 2 - Math.acos( glasses.up.x );
            });

            requestAnimationFrame( trackFace );
        }

        (async () => {
            await setupWebcam();
            const video = document.getElementById( "webcam" );
            video.play();
            let videoWidth = video.videoWidth;
            let videoHeight = video.videoHeight;
            video.width = videoWidth;
            video.height = videoHeight;

            let canvas = document.getElementById( "output" );
            canvas.width = video.width;
            canvas.height = video.height;

            let overlay = document.getElementById( "overlay" );
            overlay.width = video.width;
            overlay.height = video.height;

            output = canvas.getContext( "2d" );
            output.translate( canvas.width, 0 );
            output.scale( -1, 1 ); // Mirror cam
            output.fillStyle = "#fdffb6";
            output.strokeStyle = "#fdffb6";
            output.lineWidth = 2;

            // Load Face Landmarks Detection
            model = await faceLandmarksDetection.load(
                faceLandmarksDetection.SupportedPackages.mediapipeFacemesh
            );

            renderer = new THREE.WebGLRenderer({
                canvas: document.getElementById( "overlay" ),
                alpha: true
            });

            camera = new THREE.PerspectiveCamera( 45, 1, 0.1, 2000 );
            camera.position.x = videoWidth / 2;
            camera.position.y = -videoHeight / 2;
            camera.position.z = -( videoHeight / 2 ) / Math.tan( 45 / 2 ); // distance to z should be tan( fov / 2 )

            scene = new THREE.Scene();
            scene.add( new THREE.AmbientLight( 0xcccccc, 0.4 ) );
            camera.add( new THREE.PointLight( 0xffffff, 0.8 ) );
            scene.add( camera );

            camera.lookAt( { x: videoWidth / 2, y: -videoHeight / 2, z: 0, isVector3: true } );

            // Glasses from https://sketchfab.com/3d-models/heart-glasses-ef812c7e7dc14f6b8783ccb516b3495c
            glasses = await loadModel( "web/3d/heart_glasses.gltf" );
            scene.add( glasses );

            setText( "Loaded!" );

            trackFace();
        })();
        </script>
    </body>
</html>
What’s Next? What If We Add Facial Emotion Detection Too?
Can you believe that all of this was possible inside one web page? By adding 3D objects to real-time face tracking capability, we made camera magic happen right in the web browser. You might be thinking, “But heart glasses exist in real-life...” And this is true – so what if we create something really magical, like a hat… that knows how we’re feeling?
Let’s build a Magical Emotion Detection Hat in the next article and see if we can make the impossible possible with more TensorFlow.js!