
Windows Authentication with Angular and .NET Core Web API
5.00/5 (3 votes)
This article shows you how to add Windows Authentication to Angular and .NET Core Web API projects.
You can see the source and latest updates to this project HERE. This project was built using the starter application HERE
The first thing to do is to enable Windows Authentication for .NET Core Web API. You can run the API under IIS Express first to make sure everything is ok, then publish to a location to be hosted by IIS.
Running API Under IIS Express
Running the API under IIS Express is the easiest way to test your setup. First, add the code below to Startup.ConfigureServices method to force Windows Authentication on the API. Without the code below, the API will not be able to accept Http Post and Put request from Angular:
//add Windows authentication for http options request
            services.AddAuthentication(IISDefaults.AuthenticationScheme);
            services.AddMvc(config =>
            {
                var policy = new AuthorizationPolicyBuilder()
                    .RequireAuthenticatedUser()
                    .Build();
                config.Filters.Add(new AuthorizeFilter(policy));
            });
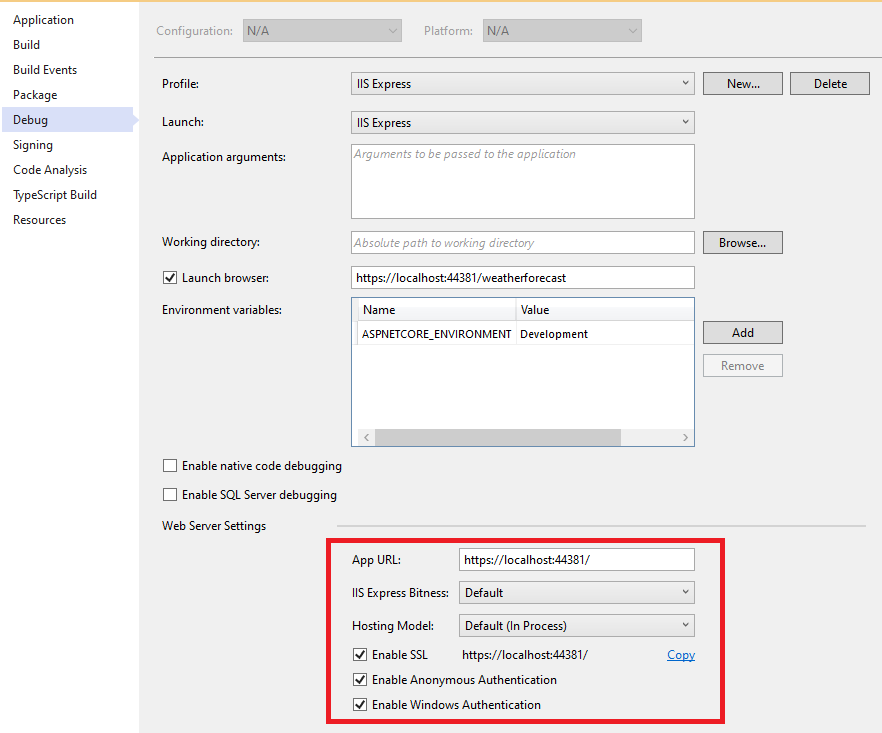
Go to the properties window of the API project, in the Debug tab, enable SSL, Anonymous Authentication, and Windows Authentication. You can set the App URL as https.
In the API project, it has the AccountHelper class to get the windows account name from HttpContext:
public class AccountHelper
    {
        public static string GetWinAuthAccount(HttpContext context)
        {
            IPrincipal p = context.User;
            return p.Identity.Name;
        }
    }
The AccountController will return the windows account with Http Get:
[Route("api/[controller]")]
    [ApiController]
    public class AccountController : ControllerBase
    {
        // GET: api/<AccountController>
        [HttpGet]
        public string Get()
        {
            return AccountHelper.GetWinAuthAccount(HttpContext);
        }
    }
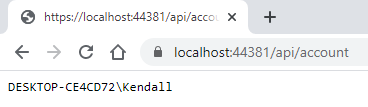
Therefore, if you just go to the url in the browser, it should give you the windows account name:
The CustomerController class also calls the AccountHelper to save the user that added or modified the customer:
[HttpPut("{id}")]
        public async Task<ActionResult<Customer>> PutCustomer(int id, Customer customer)
        {
            customer.UpdatedBy = AccountHelper.GetWinAuthAccount(HttpContext);
            return Ok(await this.CustomerData.Update(customer));
        }

        [HttpPost]
        public async Task<ActionResult<Customer>> PostCustomer(Customer customer)
        {
            customer.UpdatedBy = AccountHelper.GetWinAuthAccount(HttpContext);
            return Ok(await this.CustomerData.Add(customer));
        }
To set up the database, update the database connection string in appsettings.Development.json to point to your SQL Server, then from the command prompt, navigate to the Data folder of the API and run the command below, which will create the database and the objects needed in the database:
dotnet ef database update -s ..\Api\Api.csproj
Angular Setup
The WinAuthInterceptor class is added to include the Windows Account credential when making Http request to the API:
@Injectable()
export class WinAuthInterceptor implements HttpInterceptor{

    constructor(){}

    intercept(req: HttpRequest<any>, next: HttpHandler): Observable<HttpEvent<any>> {
        req = req.clone({ withCredentials: true });
        return next.handle(req);
    }
}
The interceptor is added to app.module.ts:
providers: [{
        provide: HTTP_INTERCEPTORS,
        useClass: WinAuthInterceptor,
        multi: true
    }
  ], ...
The AccountService class is added for getting the windows account name from the API so that it can be shown to the user:
@Injectable({
  providedIn: 'root'
})
export class AccountService {
    ...
    //get the user's windows account from api
    get(): Observable<string> {
        return this.http.get(this.url, {responseType: 'text'});
    }
}
The TopBarComponent calls the AccountService for displaying the windows account name.
With the API running in IIS Express and Angular running locally, you should be able to view, add, edit, and delete customers. Once the testing is ok, the next step is to publish the API to an IIS server and have Angular call it for testing.
IIS Setup for API
First, make sure to install .NET Core Hosting Bundle for your IIS, it cannot run .NET Core projects without it.
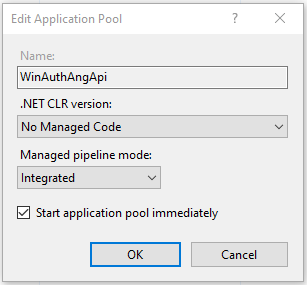
Create the application pool for the API, choose No Managed Code:
The Advanced Settings of the application pool should Disable the 32-bit applications (assuming you are running on x64), and update the Identity to an user account that has Admin privilege on the server:

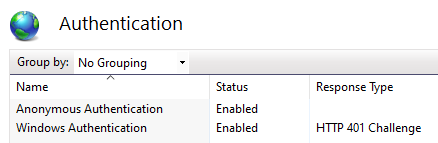
Now you can create the website in IIS. For the website, make sure both Anonymous and Windows Authentication are enabled:
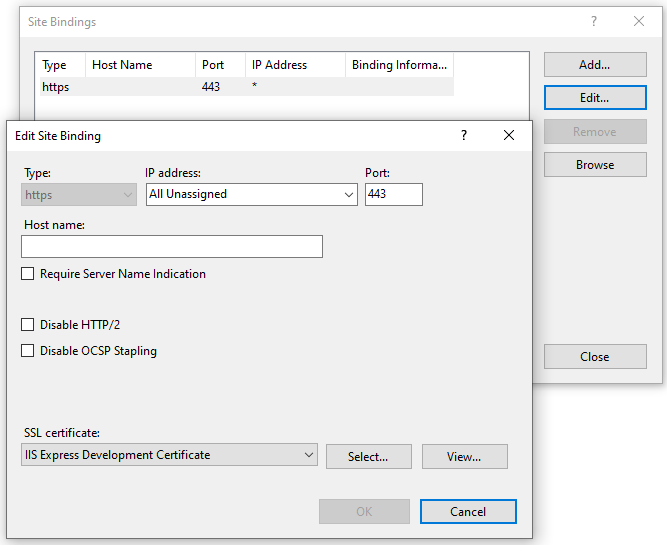
For the Bindings, choose https with IIS Express Development Certificate is ok for testing purposes:
Point the website to a directory where you will publish your API project, then you can publish your API project to location. When publish, make sure to choose the correct target runtime. The below example assumes you have the .NET Core framework installed on the server and therefore choosing Framework-Dependent will be ok.

Now you can go to the url under IIS and see that it will also return the windows account, and pointing your Angular application to it will work as well.

And that’s all. Hope you will find this article useful in adding Windows Authentication to your projects.