
A C# Visual Studio Add-In to Display Pictures Referenced in Source-Code Files
5.00/5 (2 votes)
C# implementation and using Visual Studio add-in to display pictures referenced in source-code files
Introduction and Motivation
An age-old wish of programmers has been to be able to have pictures in code, rather than cumbersome ASCII “diagrams,” to illustrate what the code is doing. This wish can be fulfilled, at least indirectly, by means of a Visual Studio Add-In, which is a dynamic link library (DLL) that extends the functionality of the Integrated Development Environment (IDE). When built under Visual Studio, an add-in has an entry in the Tools menu of the IDE, and runs when it is selected as any other entry of the Tools menu.
To illustrate the desirability of the add-in to be implemented, consider a typical programming interview question such as “Given a 32-bit hex number, write code to reverse it.” For example, given the number 0x1234BCDA, the result should be 0xADCB4321.
This problem can be solved by means of the familiar swap operation. The steps involved in the implementation of the solution are, in words:
- swap the 16-bit halves of the number,
- in each of the halves, swap the upper and lower 8 bits, and
- in each of the 8-bit quarters, swap the upper and lower 4 bits.
All the swappings can be performed by bitwise-and operations with appropriate masks, and logical shifts. The problem is so simple that a complete program implementing the solution can be written as follows:
// C:\Documents\C#\HexNumbers\Program.cs
//
// Solution to a typical interview question:
//
// Given an unsigned 32-bit integer such as 0x010A1234, write code to reverse it:
// 0x4321A010.
//
// Programmer:  Jorge L. Orejel
//
// Last update: 07/23/2020

using System;

namespace HexNumbers
{
   class Program
   {
      static void Main( string[] args )
      {
         UInt32 number1 = (UInt32)0x010A1234,
                number2 = (UInt32)0x10010055;

         ReverseHexNumber( number1 );
         ReverseHexNumber( number2 );

         Console.WriteLine();
      }// Main

      static void ReverseHexNumber( UInt32 number )
      {
         UInt32 upper16bitMask = (UInt32)0xFFFF0000,
                lower16bitMask = (UInt32)0x0000FFFF,

                 upper8bitMask = (UInt32)0xFF00FF00,
                 lower8bitMask = (UInt32)0X00FF00FF,

                 upper4bitMask = (UInt32)0xF0F0F0F0,
                 lower4bitMask = (UInt32)0x0F0F0F0F;

         Console.WriteLine( "\nReverseHexNumber: " );
         Console.WriteLine( "\n   Original number: 0x{0,8}",
                            number.ToString( "X" ).PadLeft( 8, '0' ) );

         // Swap 16-bit halves (16-bit masks.JPG)

         UInt32 swappedBits =   ( ( number & upper16bitMask ) >> 16 )
                              | ( ( number & lower16bitMask ) << 16 );

         Console.WriteLine( "Apply 16-bit masks: 0x{0,8}",
                            swappedBits.ToString( "X" ).PadLeft( 8, '0' ) );

         // Swap 8-bit quarters (8-bit masks.JPG)

         swappedBits =   ( ( swappedBits & upper8bitMask ) >> 8 )
                       | ( ( swappedBits & lower8bitMask ) << 8 );

         Console.WriteLine( " Apply 8-bit masks: 0x{0,8}",
                            swappedBits.ToString( "X" ).PadLeft( 8, '0' ) );

         // Swap 4-bit eighths (4-bit masks.JPG)

         swappedBits =   ( ( swappedBits & upper4bitMask ) >> 4 )
                       | ( ( swappedBits & lower4bitMask ) << 4 );

         Console.WriteLine( " Apply 4-bit masks: 0x{0,8}  <-- reversed number",
                            swappedBits.ToString( "X" ).PadLeft( 8, '0' ) );
      }// ReverseHexNumber
   }// Program (class)
}// HexNumbers (namespace)
The output from the program upon execution is:
ReverseHexNumber:
Original number: 0x010A1234
Apply 16-bit masks: 0x1234010A
 Apply 8-bit masks: 0x34120A01
 Apply 4-bit masks: 0x4321A010  <-- reversed number
ReverseHexNumber:
Original number: 0x10010055
Apply 16-bit masks: 0x00551001
 Apply 8-bit masks: 0x55000110
 Apply 4-bit masks: 0x55001001  <-- reversed number
Press any key to continue . . .
Observe that in the comments about swapping sections of the 32-bit hex number, there are references to .JPG files, namely (16-bit masks.JPG), (8-bit masks.JPG) and (4-bit masks.JPG). The parentheses are not necessary but just an aid in the selection of the figure names.
Suppose now that the programmer highlights the name of one of the .JPG files, say 16-bit masks.JPG, and then selects the Visual Studio Tools menu and in that menu, clicks on an add-in entry named DisplayFigure, which has a yellow smiling face as its icon on the left. If the add-in is able to find the file in an appropiate place, a figure (JPG image) illustrating the purpose of the masks used would be shown in the Visual Studio IDE on top of the source code editor window, as shown in the following figure:

The figure illustrates what the code is accomplishing: the red halves are used to mask off the corresponding bits, and the green halves of the 32-bit hex number are swapped. A similar behavior would take place with the references to the figures for the 8-bit and 4-bit masks. This is thus a partial fulfillment of the wish of programmers to have figures in code that are not cumbersome ASCII “illustrations”.
After discussing the implementation of the add-in, it will be apparent that figure references are not only independent from each other, but can be shown simultaneously.
Implementation of the Visual Studio Add-In to Display Figures
Visual Studio add-ins can be implemented manually, a process that is error-prone. The best approach is to use the Add-in Wizard, which is part of Visual Studio. To do so, start Visual Studio and select File->New->Project. In the New Project window, under Other Project Types select Extensibility, leaving the Visual Studio Add-in option selected in the center panel. Type DisplayFigure as the name of the add-in and make sure that the location is the directory Addins within your Visual Studio directory. Uncheck the box labeled Create directory for solution and click on OK. All these steps are illustrated in the following figure:

The next window shows a number of radio buttons with the one labeled Create an Add-in using Visual C# already selected. Click on Next. Then the Select An Application Host window appears. Uncheck the box labeled Microsoft Visual Studio xxxx Macros and click on Next. (The xxxx stand for your version of Visual Studio.)

The next window is titled Enter a Name and Description. Type DisplayFigure as the name of the add-in, and whatever you prefer as the description. Then click on Next.

In the next window, Choose Add-in Options, check the boxes labeled Yes, create a ‘Tools’ menu item and I would like my Add-in to load when the host application starts, and click on Next.

A window titled Choosing ‘Help About’ Information is shown next. Unless you have a means of providing help about the add-in, leave the check box unchecked and click on Next. The last, Summary window should look like the following:

When you click on Finish, the Add-in Wizard will generate a code skeleton for the add-in. This process may take a little while. At the end of the code generation, the Visual Studio editor window will display the C# source code for the add-in. When you see the code in Connect.cs, click on the Build menu in the IDE and then click on Build Solution.
After the build ends successfully, click on the Tools menu and then click on Add-in Manager, which will open a window listing the available add-ins. Unless you or someone else has created an add-in on your computer before, the Add-in Manager window will look like the following:

Check the box to the left of the label DisplayFigure and click on OK. After the window closes, close the solution and exit Visual Studio. Run Visual Studio again and re-open the solution DisplayFigure. If you go to the Add-in Manager window as before, you will see that both the DisplayFigure and Startup boxes are checked, meaning that the add-in was loaded with Visual Studio and that it is active (i.e., ready to run) even though at this moment it does nothing.
There are several functions defined in the Connect.cs file shown in the editor window. Of those, the only two you will be concerned with are the constructor Connect at the beginning of the file, and function Exec at the end of the file.
The constructor Connect is where any initialization code must be placed. For the purposes of the add-in to display figures, no initialization is required. However, some using statements must be added at the beginning of the file. In the Solution Explorer, right-click on References and then click on Add reference. In the window that appears, select the .NET tab, scroll down to reach the entry System.Drawing and click on it. Right-click on References again, and do the same to add a reference to System.Windows.Forms. The first reference is needed to handle image files (such as BMP and JPG), and the second reference is needed because later on a Windows form to display pictures will be added to the solution. The Solution Explorer panel should have the following contents:

After the references have been added, add the corresponding using statements at the beginning of the Connect.cs file, as follows:
using System;
using Extensibility;
using EnvDTE;
using EnvDTE80;
using Microsoft.VisualStudio.CommandBars;
using System.Resources;
using System.Reflection;
using System.Globalization;

using System.ComponentModel; // For object-sharing among applications.
using System.Drawing;        // For images.
using System.IO;             // For file I/O.
using System.Windows.Forms;  // For Windows forms.

using System.Threading;      // For thread creation and execution.

namespace DisplayFigure
{
   /// <summary>Add-in to display BMP or JPG images referenced in
   ///          source-code files.
   /// </summary>
   /// <seealso class='IDTExtensibility2' />
   public class Connect : IDTExtensibility2, IDTCommandTarget
   {
      /// <summary>Implements the constructor for the Add-in object.
      ///          Place your initialization code within this method.
      /// </summary>
      public Connect()
      {
      }
As before, click on Build and then on Build Solution. The build ends with the following error in the Error List tab.

The reason for the error is that the DisplayFigure add-in is loaded and ready to run, and hence the DLL cannot be deleted under those conditions. So, before proceeding any further, the following procedure must be performed every time the code for an active add-in is to be modified and re-built. The procedure is given as a comment from the originally-developed add-in.
// NOTE: If there is a need to make changes and re-build, the add-in must be stopped
//       with the Visual Studio Add-in Manager:
//
//          Tools->Add-in Manager
//
//       1. Uncheck the checkbox next to the DisplayFigure add-in name, and under the
//             Startup option.
//
//       2. Exit the Visual Studio IDE and run it again.
//
//       3. Verify that the check boxes remain unchecked.
//
//       4. Make the changes and re-build the add-in.
//
//       5. Check the boxes that were unchecked and exit the Visual Studio IDE.
//
//       6. Run Visual Studio again and verify that the boxes are checked.
The next, and final, step is to write the code that does the actual work of the add-in. Such code must be placed in function Connect.Exec, which at present looks like the following (with two private data members of the class after it).
/// <summary>Implements the Exec method of the IDTCommandTarget interface.
///          This is called when the command is invoked.
/// </summary>
/// <param term='commandName'>The name of the command to execute.</param>
/// <param term='executeOption'>Describes how the command should be run.</param>
/// <param term='varIn'>Parameters passed from the caller to the command handler.</param>
/// <param term='varOut'>Parameters passed from the command handler to the caller.</param>
/// <param term='handled'>Informs the caller if the command was handled or not.</param>
/// <seealso class='Exec' />
public void Exec( string commandName, vsCommandExecOption executeOption,
                  ref object varIn, ref object varOut, ref bool handled )
{
    handled = false;
    if(executeOption == vsCommandExecOption.vsCommandExecOptionDoDefault)
    {
        if( commandName == "DisplayFigure.Connect.DisplayFigure" )
        {
           handled = true;
           return;
        }
    }
}
private DTE2 _applicationObject;
private AddIn _addInInstance;
What function Connect.Exec must do is rather simple to describe. When the programmer highlights a figure name referenced in the source code (displayed in the Visual Studio code editor), clicks on Tools, and then clicks on the DisplayFigure entry of the menu, the add-in must (1) open a Windows form suitable for displaying an image, read the image (say, from a .BMP or .JPG file), and load it into the form.
To begin with, add a Windows form as a new item in the solution for the add-in. Right-click on the DisplayFigure solution name and select Add->New Item. In the window that appears, select Windows Form in the center panel, name it LoadImage.cs and click on Add.

Visual Studio will display an empty Windows form named LoadImage. Hover the mouse over the toolbox tab on the left edge of the Visual Studio window and double-click on the PictureBox entry. A picture box will appear in the upper left corner of the active area of the Windows form. Position and re-size the picture box, so that the form and the box look as in the following figure. (Keep the name of the picture box as pictureBox1.)
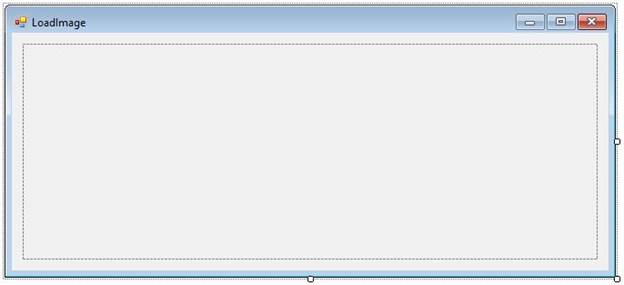
The LoadImage form size is (672, 300) and the size of pictureBox1 is (632, 237). Set the SizeMode property of pictureBox1 to Zoom. This will force images to be scaled down if they are larger than the picture box area. For the moment, the code for the LoadImage form will not be changed.
Click on the Connect.cs tab in the code editor and go down to the definition of the Exec function. Before the statement handled = true, Type the function call DoDisplay(). Then, after the declaration of the two private data members of the class, copy from the downloaded code the following definitions of functions DoDisplay and ChildThread.
      private void DoDisplay()
      {
         Document doc = _applicationObject.ActiveDocument;

         if ( doc != null )
         {
            var selection = (TextSelection)doc.Selection;

            if ( selection != null )
            {
               string text = selection.Text;

               if ( !String.IsNullOrEmpty( text ) )
               {
                  string docPath = doc.Path; // Path to the document open in Visual Studio

                  System.Threading.Thread thread
                     = new System.Threading.Thread( () => ChildThread( docPath, text ) );

                  thread.Start();
               }
               else MessageBox.Show( "Null or empty selection" );
            }
            else MessageBox.Show( "Nothing selected in document" );
         }
         else MessageBox.Show( "No active document" );
      }// DoDisplay

      private void ChildThread( string filePath, string fileName )
      {
         LoadImage imageLoad = new LoadImage( filePath, fileName );

         imageLoad.ImageToPictureBox();
      }// ChildThread
Function DoDisplay gets a reference to the document currently open in Visual Studio and a reference to the selection (highlighted text) in the document. If there is some text selected (hopefully a figure name), the function gets a reference to the document’s path and starts a thread executing function ChildThread, which receives the path and the figure name as arguments. Function ChildThread creates an instance of the LoadImage Windows form and calls its public function ImageToPictureBox. The reason for using threads is that several figures referenced in a source-code file can be shown simultaneously, each one by a separate thread.
Click now on the LoadImage.cs [Design] tab. Click in the region outside pictureBox1 and within the LoadImage area. Then, right-click and select View Code. Visual Studio will show a tab labeled LoadImage.cs. Change the entire body of class LoadImage to the following:
      private string filePath;
      private string fileName;

      /// <summary>
      /// Create an instance of the LoadImage Windows form.
      /// </summary>
      /// <param name="_filePath"> Path to the document opened in Visual Studio.
      /// </param>
      /// <param name="_fileName"> Name of a file (figure) selected in the document.
      /// </param>
      public LoadImage( string _filePath, string _fileName )
      {
         InitializeComponent();

         filePath = _filePath;
         fileName = _fileName;
      }// LoadImage

      /// <summary>
      /// Set the Image property of pictureBox1 to a BMP or JPG image read from a file.
      /// </summary>
      public void ImageToPictureBox()
      {
         string subDir = String.Empty;

         if ( fileName.EndsWith( ".bmp", StringComparison.InvariantCultureIgnoreCase ) )
         {
            subDir = @"_BMP\";
         }
         else if ( fileName.EndsWith( ".jpg", StringComparison.InvariantCultureIgnoreCase ) )
         {
            subDir = @"_JPG\";
         }
         string fullName = filePath + subDir + fileName;

         if ( File.Exists( fullName ) )
         {
            Text = fullName;
            Image image = Image.FromFile( fullName );
            pictureBox1.Image = image;
            this.ShowDialog();
         }
         else
         {
            MessageBox.Show( String.Format( "The file '{0}' does not exist", fullName ) );
         }
      }// ImageToPictureBox
As written, function LoadImage.ImageToPictureBox handles only .BMP or .JPG files. In the case of .BMP files, the function assumes that they reside in the _BMP sub-directory of the solution open in Visual Studio, while .JPG files are assumed to reside in the _JPG subdirectory. The following figure shows the directory structure for the solution dealing with the reversal of hex numbers.

The _JPG subdirectory contains the files 4-bit masks.JPG, 8-bit masks.JPG and 16-bit masks, which are referenced in the program implementing the reversal.
To verify that everything works as expected, save all the files open in the Visual Studio editor, select Tools->Add-in Manager, uncheck all the checked boxes, close the Add-in Manager by clicking on OK, and exit Visual Studio. Re-start Visual Studio, load the DisplayImage solution, and select Build->Build Solution. If the build succeeds (as it should), open again the Add-in Manager, check the DisplayImage and Startup checkboxes, click on OK, and again exit Visual Studio.
Re-start Visual Studio and open the HexNumbers solution, which should have a _JPG sub-directory in place. Then in the code editor, highlight the 16-bit masks.JPG image name, and select Tools->DisplayImage. The figure corresponding to the 16-bit masks should appear on top of the code. Do the same for the other two image names. You will have to move each open figure so that it is not obliterated by the Visual Studio window when selecting another name. Shown in cascade on top of the code, the three figures referenced in the HexNumbers program will look as follows:

The figures can be moved around and re-sized to some extent.
Using the Code
It is customary to download a .ZIP file containing some code, unzip it, build it and start using it. In the case of an add-in, that will not do. The add-in must be built from scratch using the Visual Studio Add-in Wizard. Once the skeleton of the add-in has been built by the wizard, the downloaded source code can be copied and pasted at the appropriate places. The same applies to the creation of Windows Forms.
Conclusion
This article has presented the implementation and use of a C# Visual Studio add-in that allows programmers to display images documenting what a code fragment accomplishes. As stated, the add-in is just a partial fulfillment of many a programmer’s wish to have figures in code, because the figures are shown on top of the code. However, the ability to display images is far superior to the time-consuming task of creating cumbersome ASCII “diagrams” within the code. The use of the add-in was illustrated with a simple C# program, but the add-in can be used with source code written in any language supported by Visual Studio.
History
- 27th July, 2020: Initial version