
Home Automation via XBEE modules
4.97/5 (15 votes)
Wireless Home Automation via XBEE Modules
Download c__project_files1.zip
Introduction
This project has been done by Shayan Ali Bhatti & Shahbaz Hasan, students of 3rd Year doing B.E. from Institute of Industrial Electronics Engineering (I.I.E.E.), Pakistan. It is a Home Automation application employing XBEE wireless transceiver modules. We are able to send the signals from a Personal Computer to the AVR ATmega16 microcontroller wirelessly using XBEE module. We just have to connect an XBEE module to PC via USB port and it will be able to send & receive data to & from the other XBEE module. In this project default XBEE settings will be used provided both XBEEs have same address, so they can communicate with each other. This project has total 5 forms including 2 main GUI forms. The first GUI controls DC & Stepper motor’s parameters such as speed, rotation and step angle. The 2nd GUI enables user to control Lights, write on a 16x2 LCD and monitor the temperature as well as set alarm temperature as per desire. All the programming is done in C# using visual studio windows forms and with the devcomponents dotnetbar & NI Measurement Studio tools.

Background
Before using the XBEE modules, it is necessary to have sound knowledge about them. So, the basic info about all the hardware used in this project is given below :
1. XBEE Modules
XBee is the brand name from Digi International for a family of form factor compatible radio modules. These radios use a microchip made by Freescale to provide simple, standards-based point-to-point communications, as well as a proprietary implementation of mesh networking. Due to their very less power consumption and distinct features, they are readily used in wireless networking applications.
These modules are capable of transmitting and receiving data according to protocol IEEE 802.15.4, which is for wireless communication. XBEE radios provide a 30 meters range of successful data transmission & reception and the range can be 100 meters in the line-of-sight. XBEE modules provide a UART connection which is used for data in-out.

We have used an XBEE Series 1 transceiver module pair, each transceiver is capable of transmitting and receiving data via UART module wirelessly. The XBEE module is responsible for the transmission and reception of all signals generated by the PC and links them to the Microcontroller via RX and TX pins serially.
2. DC Motor
In this project, a 5V dc motor is used for moving clockwise and anti-clockwise and its direction and speed (PWM) are varied by the operator.
3. Stepper Motor
In this project, a 5V stepper motor is used and its direction, number of rotation and step angle are controlled as per requirement by the user.
4. AVR ATmega16 microcontroller
In this project, an AVR ATmega16 microcontroller is used for controlling dc motor, stepper motor and for sending and receiving data via XBEE module. The microcontroller also controls a 16x2 Text LCD and a Bargraph LED.
5. Text LCD
In this project, a 16x2 Text LCD is used, for typing data and displaying on LCD. It is controlled by the microcontroller and is interfaced via open-source Peter Fleury LCD library.
6. LM35 Temperature Sensor
An lm35 temperature sensor is used to send the current room temperature to the Microcontroller and gets displayed on the thermometer display in the GUI. The AVR receives its signal on ADC0 pin and converts it via ADC to make it readable for user on the GUI.
7. Bargraph LED
In this project, a 10 digit LED bargraph is used to switch the lights desired by the operator.
8. Power Supply Adapter
In this project, 2 variable power supply adapters are being used. One adapter is responsible to supply 5V to XBEE modules, Text LCD and ATmega16. The other adapter is used to run DC Motor and Stepper Motor.
9. Veroboard
A large veroboard is used for mounting all the above mentioned components.
The Code
We have made 5 forms for our project “Home Automation via XBEE”. Since our project involves UART module so we have used USB-to-serial cable to interface XBEE module with the PC and COM5 is being used as serial port with 9600 baud-rate and 1 stop bit.
Let us go through all the windows forms one-by-one.
1. The Welcome Flash Form
As a welcome form, we have created a flash form which appears at the centre of the screen for 4 seconds and shows the Title of the Project and names of project members, then disappears. Here is a picture of it.

To make this form in my project namespace serialporthypterm, I selected a Windows form and disabled its maximize, minimize buttons and set its Start position property as Center Screen while Control Box property is also set as false. The pictures are added via Picture Box tool. A timer is also used to make sure the form runs for 4 seconds and then vanishes. Timer is initially enabled via the Properties box. In timer1_Tick event I have set the time as 4000 ticks, rest of the code is as follows:
namespace serialporthypterm
{
    public partial class Form2 : Form
    {
        public Form2()
        {
            InitializeComponent();
        }

        // When the timer1 ticks 4000 times i.e. 4s, then welcome form vanishes,
        // and wizard form i.e. Form4 appears.
        private void timer1_Tick(object sender, EventArgs e)
        {
            this.Visible = false;           // form invisible
            FORM4 fo = new FORM4();         // constructor of Form4
            fo.Show();                      // show Form4
            timer1.Enabled = false;         // timer disabled
        }
    }

}
2. The Wizard Forms
The welcome form, after 4 seconds initializes a constructor which is bound to show the Form4 which is the Wizard form in our Project. This form shows a bit of detail about the project and also asks what GUI a user wants to select. Here is how it looks :

The above form is used from an application Devcomponents Dotnetbar which has a built-in form in the toolbar menu for selecting Wizard form. I have placed the XBEE hardware picture in the picture box and have written the details of project in it. When user presses cancel button, the whole project closes, when next button pressed then next page appears as :

The user selects the desired GUI and a detail of that GUI appears just on the top border to indicate the user about GUI operation. Finally, on pressing Finish button, the GUI proceeds to the next form. Hence this form disappears and another form i.e. Motor control or Temperature sensor forms appears as per user’s desire. The code is given below:
namespace serialporthypterm
{
    public partial class FORM4 : Form
    {
        public FORM4()
        {
            InitializeComponent();
        }

        // disable textbox on loading FORM4
        private void FORM4_Load(object sender, EventArgs e)
        {
            textBox1.Visible = false;
        }

        //if cancel button is pressed, then whole app closes down
        private void wizard1_CancelButtonClick(object sender, CancelEventArgs e)
        {
            Close();
            Environment.Exit(1);
        }

        // On press of next button, 2nd page of wizard form appers,
        // asking the GUI to be selected
        private void wizard1_NextButtonClick(object sender, CancelEventArgs e)
        {
            textBox1.Visible = true;
            radioButton1.Checked = false;
            radioButton2.Checked = false;
            wizardPage2.Select();
	    // title of wizard form
wizardPage2.PageTitle = "Select the GUI you want to use";

            wizardPage2.PageDescription = null;
	    // disable finish button
wizardPage2.FinishButtonEnabled = DevComponents.DotNetBar.eWizardButtonState.False;

	    // disable next button
wizardPage2.NextButtonEnabled = DevComponents.DotNetBar.eWizardButtonState.False;


}

        // On selecting radio button1, Motor control GUI is displayed
        // and Finish button is enabled
        private void radioButton1_CheckedChanged(object sender, EventArgs e)
        {
textBox1.Text = "Enables you to control DC motor";
	// enable finish button
wizardPage2.FinishButtonEnabled=DevComponents.DotNetBar.eWizardButtonState.True;


        // On selecting radio button2, Temperature and Light control
        // GUI is selected and Finish button is enabled
        private void radioButton2_CheckedChanged(object sender, EventArgs e)
       {
	textBox1.Text = "Enables you to monitor temperature, control lights and write on LCD";
	// enable finish button
wizardPage2.FinishButtonEnabled = DevComponents.DotNetBar.eWizardButtonState.True;
        }

        // The backbutton takes wizard page back to 1st page from 2nd page
        private void wizard1_BackButtonClick(object sender, CancelEventArgs e)
        {
            textBox1.Visible = false;
// disable finish button
wizardPage2.FinishButtonEnabled = DevComponents.DotNetBar.eWizardButtonState.False;
        }

        // When the finish button is clicked, form vanishes and selects
        // either the form1 or form3 selected via the radio button by user
        private void wizard1_FinishButtonClick(object sender, CancelEventArgs e)
        {
            // show motor control form if 1st option selected
            this.Visible = false;
            if (radioButton1.Checked == true)
            {
                Form3 hee = new Form3();
                hee.Show();
            }

            // show temperature sensor form if 2nd gui selected
            else if (radioButton2.Checked == true)
            {
                Form1 cs = new Form1();
                cs.Show();
            }
            else { }
        }
    }
}
3. Motor Control GUI
In this form, the user has the liberty to choose either the Stepper motor or the DC motor and vary its parameters. First, the user needs to press the Connect button to ensure that hardware is connected. Then select either the DC or Stepper Motor. On selecting each option, the motor's picture becomes evident and the other motor's panel becomes transparent.
Now suppose you have connected Stepper Motor, then you choose either you want to give a Step or a Continuous rotation. In step rotation, the motor will move only to the specified angle and stop. In continuous rotation, the motor will keep moving till the entered no. of rotations are performed in the direction chosen by the user.
If you have connected the DC Motor then select it, and choose either you want to give it a clockwise or anti-clockwise rotation. Moreover, you have the liberty to choose the Speed, you want the motor to be moving with. Here is its picture :

The code required to make this form is as follows:
using System;
using System.Collections.Generic;
using System.ComponentModel;
using System.Data;
using System.Drawing;
using System.Linq;
using System.Text;
using System.Windows.Forms;
namespace serialporthypterm
{
public partial class Form3 : Form
{
Int32 c, g, b, z, f, q, mn;
char[] buff = new char[1];
char[] w = new char[1];
string recvd;
public Form3()
{
InitializeComponent();
}
/* main dcmotor control part */
private void DCMotor(int dir, int spd)
{
switch (dir)
{
case 0:
//for speed 25% clock wise
if (spd == 25)
{
buff[0] = 'd';
serialPort1.Write(buff, 0, 1);
buff[0] = 'e';
serialPort1.Write(buff, 0, 1);
}
//for speed 50% clock wise
else if (spd == 50)
{
buff[0] = 'd';
serialPort1.Write(buff, 0, 1);
buff[0] = 'f';
serialPort1.Write(buff, 0, 1);
}
//for speed 75% clock wise
else if (spd == 75)
{
buff[0] = 'd';
serialPort1.Write(buff, 0, 1);
buff[0] = 'g';
serialPort1.Write(buff, 0, 1);
}
//for speed 100% clock wise
else if (spd == 100)
{
buff[0] = 'd';
serialPort1.Write(buff, 0, 1);
buff[0] = 'h';
serialPort1.Write(buff, 0, 1);
}
break;
case 1:
/* for speed 25% anti-clock wise */
if (spd == 25)
{
buff[0] = 'd';
serialPort1.Write(buff, 0, 1);
buff[0] = 'a';
serialPort1.Write(buff, 0, 1);
}
/* for speed 50% anti-clock wise */
else if (spd == 50)
{
buff[0] = 'd';
serialPort1.Write(buff, 0, 1);
buff[0] = 'b';
serialPort1.Write(buff, 0, 1);
}
/* for speed 75% anti-clock wise */
else if (spd == 75)
{
buff[0] = 'd';
serialPort1.Write(buff, 0, 1);
buff[0] = 'c';
serialPort1.Write(buff, 0, 1);
}
/* for speed 100% anti-clock wise */
else if (spd == 100)
{
buff[0] = 'd';
serialPort1.Write(buff, 0, 1);
buff[0] = 'd';
serialPort1.Write(buff, 0, 1);
}
break;
}
}
/* Stepper Motor control : continuous rotation panel */
public void continuousrotation(char[] e, int f)
{
switch (f)
{
/* sending no. of rotations with clock wise rotation */
case 0:
buff[0] = 'a';
serialPort1.Write(buff, 0, 1);
serialPort1.Write(e, 0, 1);
break;
/* sending no. of rotations with anti-clock wise rotation */
case 1:
buff[0] = 'c';
serialPort1.Write(buff, 0, 1);
serialPort1.Write(e, 0, 1);
break;
}
}
/* Stepper Motor Control: Step rotation part */
public void stepcontrol(int s, int cc)
{
switch (cc)
{
/* step rotation:45 degree,clockwise */
case 0:
if (s == 45)
{
buff[0] = 's';
serialPort1.Write(buff, 0, 1);
buff[0] = 'e';
serialPort1.Write(buff, 0, 1);
}
/* step rotation:90 degree,clockwise */
else if (s == 90)
{
buff[0] = 's';
serialPort1.Write(buff, 0, 1);
buff[0] = 'f';
serialPort1.Write(buff, 0, 1);
}
/* step rotation:180 degree,clockwise */
else if (s == 180)
{
buff[0] = 's';
serialPort1.Write(buff, 0, 1);
buff[0] = 'g';
serialPort1.Write(buff, 0, 1);
}
//step rotation:360 degree,clockwise
else if (s == 360)
{
buff[0] = 's';
serialPort1.Write(buff, 0, 1);
buff[0] = 'h';
serialPort1.Write(buff, 0, 1);
}
break;
case 1:
/* step rotation:45 degrees,anti-clockwise */
if (s == 45)
{
buff[0] = 's';
serialPort1.Write(buff, 0, 1);
buff[0] = 'a';
serialPort1.Write(buff, 0, 1);
}
/* step rotation:90 degrees,anti-clockwise */
else if (s == 90)
{
buff[0] = 's';
serialPort1.Write(buff, 0, 1);
buff[0] = 'b';
serialPort1.Write(buff, 0, 1);
}
/* step rotation:180 degrees,anti-clockwise */
else if (s == 180)
{
buff[0] = 's';
serialPort1.Write(buff, 0, 1);
buff[0] = 'c';
serialPort1.Write(buff, 0, 1);
}
/* step rotation:360 degrees,anti-clockwise */
else if (s == 360)
{
buff[0] = 's';
serialPort1.Write(buff, 0, 1);
buff[0] = 'd';
serialPort1.Write(buff, 0, 1);
}
break;
}
}
/* selecting continuous rotation part of stepper motor control */
private void radioButton2_CheckedChanged(object sender, EventArgs e)
{
groupBox1.Enabled = false;
groupBox2.Enabled = true;
}
/* entered in the stepper control portion & choosing the step rotation panel */
private void radioButton1_CheckedChanged(object sender, EventArgs e)
{
groupBox2.Enabled = false;
groupBox1.Enabled = true;
}
/* entering no. of rotations */
private void textBox1_Click(object sender, EventArgs e)
{
textBox1.Clear();
}
/* choosing the step rotation angle */
private void comboBox1_SelectedIndexChanged(object sender, EventArgs e)
{
g = Int32.Parse(comboBox1.Text);
}
/* choosing clockwise rotation in step rotation part of stepper motor control */
private void radioButton3_CheckedChanged(object sender, EventArgs e)
{
c = 0;
}
/* choosing anti-clockwise rotation in step rotation part of stepper motor control */
private void radioButton4_CheckedChanged(object sender, EventArgs e)
{
c = 1;
}
/* choosing step rotation panel in Stepper Motor control */
private void radioButton1_Click(object sender, EventArgs e)
{
serialPort1.Write("0");
z = 0;
}
/* choosing continuous rotation panel in Stepper Motor control */
private void radioButton2_Click(object sender, EventArgs e)
{
serialPort1.Write("1");
z = 1;
}
/* choosing clockwise rotation in continuous rotation part of stepper motor control */
private void radioButton5_CheckedChanged(object sender, EventArgs e)
{
b = 0;
}
/* choosing anti-clockwise rotation in continuous rotation part of stepper motor control */
private void radioButton6_CheckedChanged(object sender, EventArgs e)
{
b = 1;
}
/* calling main function to run DC motor */
private void button4_Click(object sender, EventArgs e)
{
DCMotor(f, q);
}
/* choosing clockwise rotation in DC motor control */
private void radioButton7_CheckedChanged(object sender, EventArgs e)
{
f = 0;
}
/* choosing anti-clockwise rotation in DC motor control */
private void radioButton8_CheckedChanged(object sender, EventArgs e)
{
f = 1;
}
/* selecting speed(duty cycle) for running dc motor */
private void comboBox3_SelectedIndexChanged(object sender, EventArgs e)
{
q = Int32.Parse(comboBox3.Text);
}
/* selecting stepper Motor control and its image appears */
private void radioButton9_CheckedChanged(object sender, EventArgs e)
{
mn = 0;
groupBox6.Enabled = true;
groupBox3.Enabled = false;
this.reflectionImage1.Image = Image.FromFile(@"C:\Documents and Settings\evo\My Documents\My Pictures\stepper motor.jpg");
}
/* selecting DC Motor control and its image appears */
private void radioButton10_CheckedChanged(object sender, EventArgs e)
{
mn = 1;
groupBox3.Enabled = true;
groupBox6.Enabled = false;
this.reflectionImage1.Image = Image.FromFile(@"C:\Documents and Settings\evo\My Documents\My Pictures\dc motor.jpg");
}
/* FORM CHANGE if selected from File menu by user */
private void changeFormToolStripMenuItem_Click(object sender, EventArgs e)
{
serialPort1.Write("="); // tell AVR microcontroller to change FORM
serialPort1.Close();
this.Hide();
FORM4 hoo = new FORM4();
hoo.Show(); // display wizard form
}
/* Exit the whole program */
private void exitToolStripMenuItem_Click(object sender, EventArgs e)
{
serialPort1.Close();
Close();
Environment.Exit(1);
}
/* Open the About box */
private void projectInfoToolStripMenuItem_Click(object sender, EventArgs e)
{
AboutBox1 loo = new AboutBox1();
loo.Show();
}
/* Initializing serial port communication at COM5, 9600 baud rate */
private void buttonX1_Click(object sender, EventArgs e)
{
serialPort1.PortName = "COM5";
serialPort1.BaudRate = 9600;
serialPort1.Open();
if (serialPort1.IsOpen)
{
radioButton1.Enabled = true;
radioButton2.Enabled = true;
buttonX1.Enabled = false;
groupBox1.Enabled = false;
groupBox2.Enabled = false;
}
}
/* rotating either step rotation part or continuous part */
private void buttonX2_Click(object sender, EventArgs e)
{
switch (z)
{
case 0:
stepcontrol(g, c);
break;
case 1:
w[0] = char.Parse(textBox1.Text);
continuousrotation(w, b);
break;
}
}
/* calling main function to run DC motor */
private void buttonX3_Click(object sender, EventArgs e)
{
DCMotor(f, q);
}
/* Close serial port on exiting program */
private void Form3_FormClosing(object sender, FormClosingEventArgs e)
{
serialPort1.Close();
Environment.Exit(1);
}
/* Tell microcontroller that DC Motor form is active */
private void Form3_Activated(object sender, EventArgs e)
{
if (serialPort1.IsOpen)
{
serialPort1.Write("1");
}
else
{
serialPort1.Open();
serialPort1.Write("1");
}
}
}
}
4. Temperature and lights control GUI
In this form, we can observe real time temperature, room temperature and control Lights as well as write text on a 16x2 text LCD.
Suppose, you want to write on the LCD. Then you just have to write on the text box shown in the GUI, and all characters will be sent to the LCD serially by the PC.
If the user wants to control the lights, then you just have to click on that appropriate green colored Light button and that light will be lit with on the bargraph LED connected to the AVR Micro controller.
Now, in the meantime, the LM35 Temperature sensor's output will be constantly received by the micro controller and sent via XBEE module to the PC every second. So the temperature in the Thermometer will keep varying according to the room temperature. First reading will get saved in the Room Temperature Text box indicating room temperature, however after that, GUI will keep showing the current temperature and update it per second. There is also provision for setting the Alarm Temperature through which the user can set the Alarm temperature. When the temperature will exceed the set alarm temperature then an alarm will be raised. The GUI looks like this :

The thermometer is drawn via the NI Measurement Studio toolbar, which indicates current temperature and displays the room temperature as well as current temperature in the text box.
Here is the visual studio code to do the necessary operations and display on GUI:
using System;
using System.Collections.Generic;
using System.ComponentModel;
using System.Data;
using System.Drawing;
using System.Linq;
using System.Text;
using System.Media;
using System.Windows.Forms;
using System.Windows.Forms.VisualStyles;
using System.Threading;

namespace serialporthypterm
{
    public partial class Form1 : Form
    {
        double t = 0, global = 0;
        string handle,current;
        int a = 0, b = 0, c = 0, d = 0, i = 0, f = 0, g = 0, h = 0,alarmtemp=100;
        public Form1()
        {
            InitializeComponent();
        }

        /* Open serial port and select form 1 on form load */
        private void Form1_Load(object sender, EventArgs e)
        {
            /* Check if serial port is open, and select GUI2 on AVR */
            if (serialPort1.IsOpen)
            {
            }
            else
            {
                serialPort1.Open();
            }
        }


        /* On serial port receive event take temperature readings per second and */
        /* display it on thermometer and textbox */
private void serialPort1_DataReceived(object sender, System.IO.Ports.SerialDataReceivedEventArgs e)
        {
            /* update temperature reading per second */
                   timer1.Start();
            if (timer1.Interval == 1000)
            {
                /* read room temperature once only */
                if (global == 0)
                {
                    handle = serialPort1.ReadExisting();
                    textBox4.Text = handle;       // display on room temperature box
                    global++;
                }
                /* now keep reading current temperature */
                else
                {
                    current = serialPort1.ReadExisting();
                    textBox2.Text = current;     //display on current temperature box
                    t = Convert.ToDouble(current);
                    thermometer1.value = t;

                /* give various colors to thermometer on temperature ranges */
                    if (t >= 10 && t < 20)
                    {
                        thermometer1.FillColor = Color.Red;
                        thermometer1.BackColor = Color.Blue;
                    }

                    if (t >= 20 && t < 30)
                    {
                        thermometer1.FillColor = Color.Red;
                        thermometer1.BackColor = Color.Aqua;
                    }

                    if (t >= 30 && t < 40)
                    {
                        thermometer1.FillColor = Color.Red;
                        thermometer1.BackColor = Color.Yellow;
                    }

                    if (t >= 40 && t < 100)
                    {
                        thermometer1.FillColor = Color.Red;
                        thermometer1.BackColor = Color.Red;
                    }

        /* if temperature exceeds 100 degree Celsius then show message */
                    if (t >= 100)
                    {
                        MessageBox.Show("Temperature out of range");
                    }

        /* if temperature exceeds alarm temperature then raise alarm */
                    if (t >= alarmtemp)
                    {
  System.Media.SoundPlayer sound = new System.Media.SoundPlayer(@"C:\WINDOWS\Media\smokealarm.wav");
                        sound.Play();
                    }

                    else { }
                    current = null;
                }
            }
        }
        /* Transfer characters written on textbox to LCD */
        private void textBox1_TextChanged(object sender, EventArgs e)
        {
            serialPort1.Write("[");
            serialPort1.Write(textBox1.Text);
        }

        /* LCD Clear on button press */
        private void buttonX1_Click(object sender, EventArgs e)
        {
               serialPort1.Write("[");
        }

        /* Textbox clear on button press */
        private void buttonX2_Click(object sender, EventArgs e)
        {
               textBox1.Clear();
        }

        /* Led 1 status toggle if button 1 is pressed with a beep sound */
        private void led9_Click(object sender, EventArgs e)
        {
                        if (a==0)
            {
                a = 1;
                serialPort1.Write("1");
                led9.Value=true;
 System.Media.SoundPlayer sound = new System.Media.SoundPlayer(@"C:\WINDOWS\Media\windows xp hardware insert.wav");
                sound.Play();
            }
            else
            {
                a = 0;
                serialPort1.Write("1");
                led9.Value = false;
 System.Media.SoundPlayer sound = new System.Media.SoundPlayer(@"C:\WINDOWS\Media\windows xp hardware remove.wav");
                sound.Play();
            }
        }

        /* Led 2 status toggle if button 2 is pressed with a beep sound */
        private void led10_Click(object sender, EventArgs e)
        {
            if (b == 0)
            {
                led10.Value = true;
                b = 1;
                serialPort1.Write("2");
  System.Media.SoundPlayer sound = new System.Media.SoundPlayer(@"C:\WINDOWS\Media\windows xp hardware insert.wav");
                sound.Play();
            }
            else
            {
                b = 0;
                led10.Value = false;
                serialPort1.Write("2");
  System.Media.SoundPlayer sound = new System.Media.SoundPlayer(@"C:\WINDOWS\Media\windows xp hardware remove.wav");
                sound.Play();
            }
        }

        /* Led 3 status toggle if button 3 is pressed with a beep sound */
        private void led11_Click(object sender, EventArgs e)
        {
            if (c == 0)
            {
                led11.Value = true;
                c = 1;
                serialPort1.Write("3");
  System.Media.SoundPlayer sound = new System.Media.SoundPlayer(@"C:\WINDOWS\Media\windows xp hardware insert.wav");
                sound.Play();
            }
            else
            {
                c = 0;
                led11.Value = false;
                serialPort1.Write("3");
 System.Media.SoundPlayer sound = new System.Media.SoundPlayer(@"C:\WINDOWS\Media\windows xp hardware remove.wav");
                sound.Play();
            }
        }

        /* Led 4 status toggle if button 4 is pressed with a beep sound */
        private void led12_Click(object sender, EventArgs e)
        {
            if (d == 0)
            {
                led12.Value = true;
                d = 1;
                serialPort1.Write("4");
  System.Media.SoundPlayer sound = new System.Media.SoundPlayer(@"C:\WINDOWS\Media\windows xp hardware insert.wav");
                sound.Play();
            }
            else
            {
                d = 0;
                led12.Value = false;
                serialPort1.Write("4");
 System.Media.SoundPlayer sound = new System.Media.SoundPlayer(@"C:\WINDOWS\Media\windows xp hardware remove.wav");
                sound.Play();
            }
        }

        /* Led 5 status toggle if button 5 is pressed with a beep sound */
        private void led13_Click(object sender, EventArgs e)
        {
            if (f == 0)
            {
                led13.Value = true;
                f = 1;
                serialPort1.Write("5");
 System.Media.SoundPlayer sound = new System.Media.SoundPlayer(@"C:\WINDOWS\Media\windows xp hardware insert.wav");
                sound.Play();
            }
            else
            {
                f = 0;
                led13.Value = false;
                serialPort1.Write("5");
  System.Media.SoundPlayer sound = new System.Media.SoundPlayer(@"C:\WINDOWS\Media\windows xp hardware remove.wav");
                sound.Play();
            }
        }

        /* Led 6 status toggle if button 6 is pressed with a beep sound */
        private void led14_Click(object sender, EventArgs e)
        {
            if (g == 0)
            {
                led14.Value = true;
                g = 1;
                serialPort1.Write("6");
  System.Media.SoundPlayer sound = new System.Media.SoundPlayer(@"C:\WINDOWS\Media\windows xp hardware insert.wav");
                sound.Play();
            }
            else
            {
                g = 0;
                led14.Value = false;
                serialPort1.Write("6");
 System.Media.SoundPlayer sound = new System.Media.SoundPlayer(@"C:\WINDOWS\Media\windows xp hardware remove.wav")
                sound.Play();
            }
        }

        /* Led 7 status toggle if button 7 is pressed with a beep sound */
        private void led15_Click(object sender, EventArgs e)
        {
            if (h == 0)
            {
                led15.Value = true;
                h = 1;
                serialPort1.Write("7");
  System.Media.SoundPlayer sound = new System.Media.SoundPlayer(@"C:\WINDOWS\Media\windows xp hardware insert.wav");
                sound.Play();
            }
            else
            {
                h = 0;
                led15.Value = false;
                serialPort1.Write("7");
  System.Media.SoundPlayer sound = new System.Media.SoundPlayer(@"C:\WINDOWS\Media\windows xp hardware remove.wav");
                sound.Play();
            }
        }

        /* Led 8 status toggle if button 8 is pressed with a beep sound */
        private void led16_Click(object sender, EventArgs e)
        {
            if (i == 0)
            {
                led16.Value = true;
                i = 1;
                serialPort1.Write("8");
 System.Media.SoundPlayer sound = new System.Media.SoundPlayer(@"C:\WINDOWS\Media\windows xp hardware insert.wav");
                sound.Play();
            }
            else
            {
                i = 0;
                led16.Value = false;
                serialPort1.Write("8");
System.Media.SoundPlayer sound = new System.Media.SoundPlayer(@"C:\WINDOWS\Media\windows xp hardware insert.wav");
  sound.Play();
            }
        }

                    /* sets the alarm temperature in textbox4 */
        private void buttonX4_Click(object sender, EventArgs e)
        {
            try
            {
                alarmtemp = Convert.ToInt16(textBox3.Text);
            }
            catch (FormatException)
            {
            }

        }

                       /* Show GUI selection menu and change FORM */
        private void changeGUIToolStripMenuItem_Click(object sender, EventArgs e)
        {
            serialPort1.Write("=");             // tell AVR to change form
            timer1.Start();

            while (timer1.Interval == 200) ; // wait for 200ms

            serialPort1.Close();
            this.Hide();
            FORM4 he = new FORM4();
            he.Show();
        }
                        /* Exit the program */
        private void exitToolStripMenuItem_Click(object sender, EventArgs e)
        {
            serialPort1.Close();
            Close();
            Environment.Exit(1);
        }

                        /* Show the Project details in About box */
        private void projectInfoToolStripMenuItem_Click(object sender, EventArgs e)
        {
            AboutBox1 lo = new AboutBox1();
            lo.Show();
        }

                        /* Close the whole program and serial port */
        private void buttonX3_Click(object sender, EventArgs e)
        {
            /* close the serial PORT and previously ON leds */
            if (a != 0)
                serialPort1.Write("1");     // close LED1
                if (b != 0)
                    serialPort1.Write("2");     // close LED2
                    if (c != 0)
                        serialPort1.Write("3");     // close LED3
                        if (d != 0)
                            serialPort1.Write("4");     // close LED4
                           if (f != 0)
                              serialPort1.Write("5");     // close LED5
                                if (g != 0)
                                    serialPort1.Write("6");     // close LED6
                                    if (h != 0)                                                                                       serialPort1.Write("7");     // close LED7
                                        if (i != 0)
                                           serialPort1.Write("8");     // close LED8
                                        else { }
                    /* Clear the LCD screen */
                     serialPort1.Write("[");
                    /* Close serial Port */
                     serialPort1.Close();
            Environment.Exit(1);            // terminates the whole program
            Close();
        }

        /* open serial port and select form 1 every time this form is selected */
        private void Form1_Activated(object sender, EventArgs e)
        {
            if (serialPort1.IsOpen)
            {

            }
            else
            {
                serialPort1.Open();
            }
        }
    }
}
5. About Box
In this form, we show description about the project. As can be seen below :
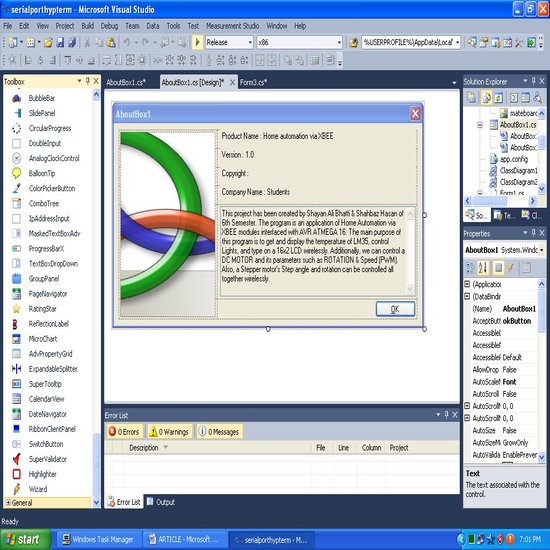
Since you get a ready made AboutBox from devcomponents dotnetbar toolbar so most of the code is auto-generated, the rest is given below with comments. I am showing the Project Info in the About Box which can be accessed via the menu bar on the GUI. Here is the code :
namespace serialporthypterm
{
    partial class AboutBox1 : Form
    {
        public AboutBox1()
        {
            InitializeComponent();
            this.Text = String.Format("About {0}", AssemblyTitle);
            this.labelProductName.Text = AssemblyProduct;
            this.labelVersion.Text = String.Format("Version {0}", AssemblyVersion);
            this.labelCopyright.Text = AssemblyCopyright;
            this.labelCompanyName.Text = AssemblyCompany;
            this.textBoxDescription.Text = AssemblyDescription;
        }

        #region Assembly Attribute Accessors

        public string AssemblyTitle
        {
            get
            {
                object[] attributes = Assembly.GetExecutingAssembly().GetCustomAttributes(typeof(AssemblyTitleAttribute), false);
                if (attributes.Length > 0)
                {
                    AssemblyTitleAttribute titleAttribute = (AssemblyTitleAttribute)attributes[0];
                    if (titleAttribute.Title != "")
                    {
                        return titleAttribute.Title;
                    }
                }
                return System.IO.Path.GetFileNameWithoutExtension(Assembly.GetExecutingAssembly().CodeBase);
            }
        }

        public string AssemblyVersion
        {
            get
            {
                return Assembly.GetExecutingAssembly().GetName().Version.ToString();
            }
        }

        public string AssemblyDescription
        {
            get
            {
                object[] attributes = Assembly.GetExecutingAssembly().GetCustomAttributes(typeof(AssemblyDescriptionAttribute), false);
                if (attributes.Length == 0)
                {
                    return "";
                }
                return ((AssemblyDescriptionAttribute)attributes[0]).Description;
            }
        }

        public string AssemblyProduct
        {
            get
            {
                object[] attributes = Assembly.GetExecutingAssembly().GetCustomAttributes(typeof(AssemblyProductAttribute),false);
                if (attributes.Length == 0)
                {
                    return "";
                }
                return ((AssemblyProductAttribute)attributes[0]).Product;
            }
        }

        public string AssemblyCopyright
        {
            get
            {
                object[] attributes = Assembly.GetExecutingAssembly().GetCustomAttributes(typeof(AssemblyCopyrightAttribute), false);
                if (attributes.Length == 0)
                {
                    return "";
                }
                return ((AssemblyCopyrightAttribute)attributes[0]).Copyright;
            }
        }

        public string AssemblyCompany
        {
            get
            {
                object[] attributes = Assembly.GetExecutingAssembly().GetCustomAttributes(typeof(AssemblyCompanyAttribute),false);
                if (attributes.Length == 0)
                {
                    return "";
                }
                return ((AssemblyCompanyAttribute)attributes[0]).Company;
            }
        }
        #endregion

        /* Hide this form on clicking OK button */
        private void okButton_Click(object sender, EventArgs e)
        {
            this.Hide();
        }

        /* Set description text, product name, company name and version labels */
        private void AboutBox1_Load(object sender, EventArgs e)
        {
            textBoxDescription.Text = "This project has been created by Shayan Ali Bhatti & Shahbaz Hasan of 6th Semester. The program is an application of Home Automation via XBEE modules interfaced with AVR ATMEGA 16. It has 2 GUI forms. The 1st GUI's purpose is to observe and change the various parameters such as the PWM(Speed) and ROTATION of a DC Motor. Also, a Stepper Motor's rotations and step angle can be varied as per requirement.The 2nd GUI's purpose is to get and display the temperature sensed by LM35, control Lights, and type on a 16x2 LCD wirelessly via XBEE modules.";

            labelProductName.Text = "Home Automation via XBEE";
            labelCompanyName.Text = "Students";
            labelVersion.Text = "Version : 1.00";
        }
    }
}
Schematic design
Here is the Proteus schematic of the simulation. 16x2 Text LCD is being used for display. The lights get displayed on bargraph. The Stepper Motor driver used is ULN 2003 while L293D is used as the DC Motor driver. ATmega16 AVR controller is used for handling all hardware while LM35 is the temperature sensor being used. Virtual terminal was originally connected during simulation in place of XBEE picture.

Original hardware
Here is the original harware picture of the board :

Things I learnt during this project
By doing this project, we became able to use serial port and understood the vast scope of C# whilst working with the hardware. We also concluded that by using Devcomponents Dotnetbar application and NI Measurement Studio tools, one can easily make a very good GUI which is easy to make & use. Also, whilst using LM35 temperature sensor, proper measures should be taken to filter noise, otherwise temperature will keep changing producing a bad output.
Final Word
We, Shayan Ali Bhatti & Shahbaz Hasan are very much thankful to Almighty Allah and our teacher Sir Sajid Hussain, who kept guiding us with the best of his knowledge about C# programming and helped us to develop our programming skills. We hope that this project will be helpful to the members of Code Project website. Dont forget to download the main project file attachment which includes visual studio and avr code as well.
About the Authors
The authors Shayan Ali Bhatti & Shahbaz Hasan are 3rd Year students doing B.E. from Institute of Industrial Electronics Engineering, Pakistan. Both have a keen interest in doing projects based on micro controllers.