
My First Android App
4.85/5 (52 votes)
A bundle of tutorials which I hope will be useful for Android developers (beginners) to start with
Introduction
Most of the tutorials starts with "Hello World" applications for beginners to start with. In this article, I have jumped a step forward to come up with a bundle of tutorials which I hope will be useful for Android developers (beginners) to start with.
The application is a simple Job Search. From an Android phone, the user can search for jobs in a Job website (ASP.NET website) based on user current location (using GPS) and Job Location. The user will enter the search keyword and the number of miles and he will get all the jobs within the distance he entered based on his current location.
The application will cover the following tutorials:
- Creating splash screen using thread and wait command
- Navigating between different screens and using Android navigation menu
- Using GPS to get current location
- Communicating with .NET web service using ksoap library
- Listing the records in a table with functionality to click each row
- Passing parameters between various screens
- Displaying Google Map
Tools and IDEs
Here are the tools and IDEs used to develop the above application:
- Android SKD: Development kit for Android including emulator. Download from here.
- Eclipse: A JavaScript Development IDE
- Visual Studio 2010: .NET to develop the web service
Server Side Code
First of all, let me explain the hosted web service with the database table that contains the Jobs Adverts records. Below are the records we have added in the "Jobs" table.

Note that we have added the "Latitude" and "Longitude" values for each job. This will be compared with the current location from the GPS and calculate the distance in miles.
I have a function in SQL Server that will calculate the distance in miles between two Geo Points (Latitude, Longitude). See the code below:
Create FUNCTION [dbo].[CoordinateDistanceMiles]
(
    @Latitude1 float,
    @Longitude1 float,
    @Latitude2 float,
    @Longitude2 float
)

RETURNS float
AS
BEGIN
    declare @retVal float;

    if (@Latitude1=0 and @Longitude1=0)
        set @retVal =0
    else

    begin

    -- CONSTANTS
    DECLARE @EarthRadiusInMiles float;
    DECLARE @PI  float;

    SET @EarthRadiusInMiles = 3963.1
    SET @PI = PI();

    -- RADIANS conversion
    DECLARE @lat1Radians float;
    DECLARE @long1Radians float;
    DECLARE @lat2Radians float;
    DECLARE @long2Radians float;

    SET @lat1Radians = @Latitude1 * @PI / 180;
    SET @long1Radians = @Longitude1 * @PI / 180;
    SET @lat2Radians = @Latitude2 * @PI / 180;
    SET @long2Radians = @Longitude2 * @PI / 180;

    set @retVal = Acos
        (
        Cos(@lat1Radians) * Cos(@long1Radians) * Cos(@lat2Radians) * Cos(@long2Radians) +
        Cos(@lat1Radians) * Sin(@long1Radians) * Cos(@lat2Radians) * Sin(@long2Radians) +
        Sin(@lat1Radians) * Sin(@lat2Radians)
        ) * @EarthRadiusInMiles;

    end

    return @retVal
END
Next, I have a .NET web service hosted in the localhost with a web method "JobSearch". The web method will accept Search keyword, number of miles, current latitude value and current longitude value from the user and it will query the database to get the results. The above function is used in the query to calculate the distance.
 [WebMethod]
    public job[] JobSearch(string keyword, string miles, string latitude, string longitude)
    {
        List<job> retVal = new List<job>();
        SqlConnection conn = new SqlConnection
        (ConfigurationManager.ConnectionStrings["test_db"].ConnectionString);

        try
        {
            int miles_int = Convert.ToInt32(miles);
            if (miles_int == 0)
            {
                latitude = "0";
                longitude = "0";

            }
            string sql = "select *,dbo.CoordinateDistanceMiles
        (" + latitude + "," + longitude + ",latitude,longitude)
        'DistanceMiles' from jobs where ";
            if (miles_int > 0)
                sql +=" dbo.CoordinateDistanceMiles(" + latitude + "," +
        longitude + ",latitude,longitude) <" + miles+ " and ";

            sql +=" (jobtitle like '%" + keyword  +  "%' or jobdesc like '%" +
        keyword  + "%')   order by jobpostdate desc ";

            SqlCommand cmd = new SqlCommand(sql, conn);
            conn.Open();
            SqlDataReader dr = cmd.ExecuteReader(CommandBehavior.CloseConnection);

            while (dr.Read())
            {
                job jb = new job(Convert.ToInt32(dr["jobid"]), dr["jobtitle"].ToString(),
        Convert.ToString(dr["jobdesc"]), Convert.ToDateTime(dr["jobpostdate"]),
        Convert.ToString(dr["city"]), Convert.ToString(dr["country"]),
        ((double)(dr["DistanceMiles"])), ((double)(dr["latitude"])),
        ((double)(dr["longitude"])));
                retVal.Add(jb);
            }
        }

        finally
        {
            conn.Close();
            conn.Dispose();
        }

        return retVal.ToArray();
    }
The above method is using the following C# class "job.cs":
using System;
using System.Collections.Generic;
using System.Linq;
using System.Web;

/// <summary>
/// Summary description for job
/// </summary>
public class job
{
    private int _JobID = 0;
    private string _JobTitle = null;
    private string _JobDesc = null;
    private DateTime _JobPostDate = new DateTime();

    private string _country = null;
    private string _city = null;

    private double _Latitude = 0;
    private double _Longitude = 0;
    private string _distancemiles = "0";

    public int JobID
    {
        set { _JobID = value; }
        get { return _JobID; }
    }

    public string JobTitle
    {
        set { _JobTitle = value; }
        get { return _JobTitle; }
    }

    public string JobDesc
    {
        set { _JobDesc = value; }
        get { return _JobDesc; }
    }

    public DateTime JobPostDate
    {
        set { _JobPostDate = value; }
        get { return _JobPostDate; }
    }

    public string Country
    {
        set { _country = value; }
        get { return _country; }
    }

    public string City
    {
        set { _city = value; }
        get { return _city; }
    }

    public double Latitude
    {
        set { _Latitude = value; }
        get { return _Latitude; }
    }

    public double Longitude
    {
        set { _Longitude = value; }
        get { return _Longitude; }
    }

    public string DistanceMiles
    {
        set { _distancemiles = value; }
        get { return _distancemiles; }
    }

    public job(){}

    public job(int jobid, string jobtitle, string jobdesc,
    DateTime jobpostdate, string cit, string cnt, double miles,
    double lat, double longt)
    {
        _JobID = jobid;
        _JobTitle = jobtitle;
        _JobDesc = jobdesc;
        _JobPostDate = jobpostdate;
        _distancemiles = miles.ToString("0.00");
        _Latitude = lat;
        _Longitude = longt;
        _city = cit;
        _country = cnt;
    }
}
Client Side Code
Assuming that Eclipse and Android SKD are already installed and configured, for more information, click here.
I have started my application with a splash screen. It is just the first screen that contains the application name logo, will be displayed for around 5 seconds and will navigate to the main application screen.
Layout file: main.xml file
<?xml version="1.0" encoding="utf-8"?>
<AbsoluteLayout
android:id="@+id/widget0"
android:layout_width="fill_parent"
android:layout_height="fill_parent"
xmlns:android="http://schemas.android.com/apk/res/android"
>
<ImageView
android:id="@+id/widget30"
android:layout_width="wrap_content"
android:layout_height="wrap_content"
android:layout_x="150px"
android:layout_y="80px"
android:src="@drawable/jobs_logo"
>
</ImageView>
<TextView
android:id="@+id/widget32"
android:layout_width="wrap_content"
android:layout_height="wrap_content"
android:layout_x="110px"
android:layout_y="20px" android:text="JOBS IN MY AREA - Android Job Search">
</TextView>
</AbsoluteLayout>
Here is the Java class which contains the thread function that calls the splash screen.
import android.app.Activity;
import android.content.Intent;
import android.os.Bundle;
import android.view.MotionEvent;

public class job_engine extends Activity {
    /** Called when the activity is first created. */

     protected boolean _active = true;
     protected int _splashTime = 2000;

    @Override
    public void onCreate(Bundle savedInstanceState) {
        //initially call the main screen which is the splash screen
        super.onCreate(savedInstanceState);
        setContentView(R.layout.main);

        // thread for displaying the next screen
        Thread splashTread = new Thread() {
            @Override
            public void run() {
                try {
                    int waited = 0;
                    while(_active && (waited < _splashTime)) {
                        sleep(100);
                        if(_active) {
                            waited += 100;
                        }
                    }
                } catch(InterruptedException e) {
                    // do nothing
                } finally {
                    //the finish function will close the current activity
                    //which is the "main" screen.
                    finish();

                    //after waiting.. display the "home" screen: application main screen.
                    Intent i = new Intent(job_engine.this, homescreen.class);
                     startActivity(i);
                    stop();//stop thread.
                }
            }
        };
        splashTread.start();
    }

    @Override
    public boolean onTouchEvent(MotionEvent event) {
        if (event.getAction() == MotionEvent.ACTION_DOWN) {
            _active = false;
        }
        return true;
    }
}
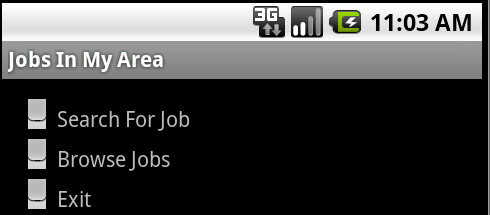
Navigation and Menu
Next, is the "Home" screen, which is just containing three buttons and three lables for just building the menu.
Note: Here, I am not focusing on laying out components in Android, I am assuming the developer already knows how to build layout. For more information about Android layouts, see Understanding User Interface in Android.
Just a quick look, the below code is showing how to attach click event to a button.
    //define the controls
    Button btn1;
    Button btn2;
    Button btn3;
    TextView Label4;

   public void onCreate(Bundle icicle)
   {
      //set the contentview to the homescreen
      super.onCreate(icicle);
      setContentView(R.layout.homescreen);

      //get the buttons objects.
      btn1 = (Button) findViewById(R.id.btn1);
      btn2 = (Button) findViewById(R.id.btn2);
      btn3 = (Button) findViewById(R.id.btn3);

      Label4 = (TextView) findViewById(R.id.Lable4);

      //create onclick event handler
      btn1.setOnClickListener(new OnClickListener()
      {
            @Override
            public void onClick(View v) {
                // TODO Auto-generated method stub

                //this will open new screen
                Intent i = new Intent(homescreen.this, jobsearch.class);

                startActivity(i);
            }
        });

      //=======================================================
      btn2.setOnClickListener(new OnClickListener()
      {
        @Override
        public void onClick(View v) {
            // TODO Auto-generated method stub

            //the browse functionality is not implemented yet
            NotImplemented();
        }
    });

      //=======================================================
      btn3.setOnClickListener(new OnClickListener()
      {
        @Override
        public void onClick(View v) {
            // TODO Auto-generated method stub

              //this will close the application
              finish();
        }
    });
Alternatively, you could utilize the Android Menu to build up your menu system. In this case, you will need to press the "Menu" button in your phone in order to display the menu and it will be displayed in the bottom of your phone screen.

Here is the code to implement Android Menu:
/* Creates the menu items */
   public boolean onCreateOptionsMenu(Menu menu) {
       menu.add(0,1,0, "Job Search");
       menu.add(0,2,1, "Browse Jobs");
       menu.add(0,3,1, "Exit");

       return true;
   }

   /* Handles item selections */
   public boolean onOptionsItemSelected(MenuItem item) {
       switch (item.getItemId()) {
       case 1:
           Intent i = new Intent(homescreen.this, jobsearch.class);
           startActivity(i);
           return true;
       case 2:
           NotImplemented();
           return true;

       case 3:
          finish();
           return true;
       }
       return false;
   }
Get Current Location using GPS
In the same screen "Home", I have GPS functionality to sense the current location of the user. For this functionality, I have created a new class that implements the "LocationListener", so each time the GPS senses a new location, this callback function will be called from the Android system.
We will add our own personal Location listener, and override the mandatory functions. In our case, we will just print a message to the screen in the following cases:
onLocationChanged(Location Update)onProviderDisabled(GPS Off)onProviderEnabled(GPS On)- And add another mandatory method, which will do nothing:
onStatusChanged(We are not adding anything here).See the below code:
/* Class My Location Listener */

   public class MyLocationListener implements LocationListener
   {

    @Override
   public void onLocationChanged(Location loc)
   {
   //just passing the current latitude and logtude values to an external class
   //for later use.
   CurrentLocation.Latitude =Double.toString(loc.getLatitude());
   CurrentLocation.Longitude = Double.toString(loc.getLongitude());

   String Text = "My current location is: " +

   "Latitud = " + loc.getLatitude() +

   "Longitud = " + loc.getLongitude();

   Toast.makeText(getApplicationContext(), Text, Toast.LENGTH_SHORT).show();
   }

   @Override

   public void onProviderDisabled(String provider)
   {
   Toast.makeText(getApplicationContext(), "Gps Disabled", Toast.LENGTH_SHORT ).show();
   }

   @Override
   public void onProviderEnabled(String provider)
   {
   Toast.makeText( getApplicationContext(), "Gps Enabled", Toast.LENGTH_SHORT).show();
   }

   @Override
   public void onStatusChanged(String provider, int status, Bundle extras)
   {
   }
   }/* End of Class MyLocationListener */
Now, in order to show the current location information, we need to add the following code in the "OnCreate" method:
 //code to get the current GPS location

      LocationManager mlocManager = (LocationManager)getSystemService
                (Context.LOCATION_SERVICE);
      LocationListener mlocListener = new MyLocationListener();

      mlocManager.requestLocationUpdates( LocationManager.GPS_PROVIDER,
                0, 0, mlocListener);
Note: In order to be able to access the GPS, we will have to add the permission in the AndroidManifest.xml file:
Add the permission line right after the "manifest" tag. See below:
<?xml version="1.0" encoding="utf-8"?>
<manifest xmlns:android="http://schemas.android.com/apk/res/android"
      package="job.engine"
      android:versionCode="1"
      android:versionName="1.0">

        <uses-permission android:name="android.permission.ACCESS_FINE_LOCATION"/>
To simulate a location update, we need to connect to the simulator by telnet, and do the following:
telnet localhost 5554

geo fix 30 28
You should get these results:

Connecting to the Web service
Next, is the "Job Search" screen which contains two TextBoxes and a Search Button. The user in this screen will enter the Search Keyword and the Distance in Miles and click search to query the jobs records from the web service.
I have used KSoap2 Library to communicate with .NET Web Service.
In order to be able to communicate with the web service, you have to add the following permission line in the manifest file:
<uses-permission android:name="android.permission.INTERNET" />
The "OnClick" method of the search button takes too long to execute. So, I need to have some solution which will do my task in the background. Handler is very good solution for this problem.
If you will not use such an approach, then the user will see that program appears to hang.
How to use it. First you need to override the handleMessage method.
private Handler handler = new Handler() {
@Override
public void handleMessage(Message msg) {
super.handleMessage(msg);
// do something
}
};
Secondly, you need to create Thread.
new Thread() {
public void run() {
//long time method
handler.sendEmptyMessage(0);
}
}.start();
Here is the "OnClick" event for the Search button.
      btn_search.setOnClickListener(new OnClickListener() {

        @Override
        public void onClick(View v) {
            // TODO Auto-generated method stub
            //on clicking the search button.. will call the "StartThread"
            //function that contains the thread running the handler
            StartThread();
        }
    });
Here is the "StartThread" function called above:
//this will start the search thread.
   protected void StartThread()
   {
       //show process dialog
       pd = ProgressDialog.show(this, "Job Searching",
        "Contacting Web Service, Please Wait...");

       SearchTread = new Thread() {
           @Override
           public void run() {

              handler.sendEmptyMessage(0);
           }
       };
       SearchTread.start();
   }

    private Handler handler = new Handler()
   {
        public void handleMessage(Message msg)
        {
            //this is the function that do the search
            DoSearch();
        }
    };
Here is the "DoSearch" function which contains the entire search process.
private static final String NAMESPACE="http://tempuri.org/";
private static final String
    URL ="http://10.0.2.2/webservice/service.asmx"; //Web Service URL
private static final
   String HelloWorld_SOAP_ACTION ="http://tempuri.org/JobSearch"; //specifies the action
private static final String METHOD_NAME1 =
    "JobSearch";  //specify the method name what you are calling

//this function is taking long time.. that is why we use handler and thread
   protected void DoSearch()
   {
       try
          {
           // get the text entered in the search box
           String keyword = key_txt.getText().toString();

           //show alert if the user did not enter anything to search
           if (keyword.equals(""))
           {
                   Dialog dlg = new AlertDialog.Builder(this)
                    .setIcon(R.drawable.icon)
                    .setTitle("Jobs In My Area")
                    .setPositiveButton("OK", null)
                    .setMessage("Please, Enter Keyword to search")
                    .create();
            dlg.show();
           }
           else
           {
              lbl_ws.setText("");

              TableLayout tbl1 = (TableLayout) findViewById(R.id.tbl1);

             tbl1.removeAllViews();

              //start calling the web service.
             //create soap request
             SoapObject request = new SoapObject(NAMESPACE, METHOD_NAME1);

             //send the parameters
            request.addProperty("methodName","JobSearch");
            request.addProperty("keyword", keyword);
            request.addProperty("miles",miles_txt.getText().toString());
            request.addProperty("latitude", lat);
            request.addProperty("longitude", lng);

            //create soap client
            SoapSerializationEnvelope envelope =new  SoapSerializationEnvelope
                        (SoapEnvelope.VER11);
            envelope.dotNet = true;

            envelope.setOutputSoapObject(request);
            HttpTransportSE androidHttpTransport = new HttpTransportSE(URL);

             //call the web method from the URL
            androidHttpTransport.call(HelloWorld_SOAP_ACTION, envelope);

            //get the response as raw;
            SoapObject  objs = (SoapObject)envelope.getResponse();

            //check the there is a results or not
            if (objs.getPropertyCount()==0)
            {
                   Dialog dlg = new AlertDialog.Builder(this)
                  .setIcon(R.drawable.icon)
                  .setTitle("Jobs In My Area")
                  .setPositiveButton("OK", null)
                  .setMessage("No Jobs Found for the search keyword specified!")
                  .create();
          dlg.show();
          return;
            }

              //loop through the results set
              for(int i=0;i< objs.getPropertyCount();i++)
              {
                  //JobList +=objs.getPropertyCount();
                  SoapObject obj = (SoapObject) objs.getProperty(i);

                  //making the job title bold. using the "SpannableString"
                  SpannableString jobTitle = new SpannableString
                (obj.getProperty("JobTitle").toString());
                  jobTitle.setSpan(new StyleSpan(Typeface.BOLD),0,0,0);


                 // Date d = (Date) obj.getProperty("JobPostDate");
                  String date_raw = obj.getProperty("JobPostDate").toString();
                  String Formatted_Date = date_raw.substring(8,10) +
        "-" + date_raw.substring(5,7) + "-" + date_raw.substring(0,4);

                  SpannableString jobPostDate = new SpannableString(Formatted_Date);
                  jobPostDate.setSpan(new StyleSpan(Typeface.ITALIC), 0, 0, 0);

                  String JobDesc =  obj.getProperty("Country").toString();
                  JobDesc += "," + obj.getProperty("City").toString();
                  JobDesc += "(" + obj.getProperty
            ("DistanceMiles").toString() + " Miles)";
                  JobDesc += " : " + obj.getProperty("JobDesc").toString();

                  if (!JobDesc.equals(""))
                  {
                      if (JobDesc.length()>200)
                          JobDesc =   JobDesc.substring(0, 200) + " ...";
                  }

                  TextView lbl = new TextView(this);
                  TextView lbl2 = new TextView(this);
                  TextView lbl3 = new TextView(this);

                  lbl.setText(jobTitle);
                  lbl2.setText(" (" + jobPostDate + ")");

                  lbl3.setText(JobDesc);
                  lbl3.setTextSize(10);

                  //start build up the table
                  //creating table row
                  TableRow tr = new TableRow(this);

                  LinearLayout Cell1 = new LinearLayout(this);
                  Cell1.addView(lbl);
                  Cell1.addView(lbl2);

                  //adding the cell to the row.
                  tr.addView(Cell1);

                  TableRow tr2 = new TableRow(this);
                  LinearLayout Cell2 = new LinearLayout(this);
                  Cell2.addView(lbl3, new LinearLayout.LayoutParams
                (450, LayoutParams.WRAP_CONTENT));
                  tr2.addView(Cell2);

                  TableRow tr3 = new TableRow(this);
                  LinearLayout Cell3 = new LinearLayout(this);

                  View hr = new View(this);
                  //hr.setBackgroundColor(Color.WHITE);
                  hr.setMinimumHeight(9);

                  Cell3.addView(hr); //adding spacer only
                  tr3.addView(Cell3);

                  //registering click for the row.

                  tr.setClickable(true);
                  tr.setId(Integer.parseInt(obj.getProperty("JobID").toString()));

                     // Register handler for UI elements
                  tr.setOnClickListener(new View.OnClickListener() {
                      public void onClick(View v) {
                         // Log.d(TAG, "mAddAccountButton clicked");
                          int rowid;
                          rowid = v.getId();
                          String args = Integer.toString(rowid);

                        //function to be called when the row is clicked.
                          GetRowID(args);
                      }
                  });

                  //adding the row to the table.
                  tbl1.addView(tr); //adding job title row
                  tbl1.addView(tr2); // job desc text
                  tbl1.addView(tr3); // spacer row
              }
           }
          }
          catch(Exception e)
          {
             lbl_ws.setText(e.toString()) ;
          }
          finally
          {
             pd.dismiss();
             SearchTread.stop();
          }
   }
Note: If you need to refer to your host computer's localhost, such as when you want the emulator client to contact a server running on the same host, use the alias 10.0.2.2 to refer to the host computer's loopback interface. From the emulator's perspective, localhost (127.0.0.1) refers to its own loopback interface. That's why I have the Web Service URL as:
private static final String
    URL ="http://10.0.2.2/webservice/service.asmx"; //Web Service URL
Displaying the results in a table format
In the same function above, we create a Table Layout to hold our records:
//outside the loop
 TableLayout tbl1 = (TableLayout) findViewById(R.id.tbl1);

 //inside the loop
  TableRow tr = new TableRow(this);

                  LinearLayout Cell1 = new LinearLayout(this);
                  Cell1.addView(lbl);
                  Cell1.addView(lbl2);

                  //adding the cell to the row.
                  tr.addView(Cell1);

                  TableRow tr2 = new TableRow(this);
                  LinearLayout Cell2 = new LinearLayout(this);
                  Cell2.addView(lbl3, new LinearLayout.LayoutParams
                (450, LayoutParams.WRAP_CONTENT));
                  tr2.addView(Cell2);

                  TableRow tr3 = new TableRow(this);
                  LinearLayout Cell3 = new LinearLayout(this);

                  View hr = new View(this);
                  //hr.setBackgroundColor(Color.WHITE);
                  hr.setMinimumHeight(9);

                  Cell3.addView(hr); //adding spacer only
                  tr3.addView(Cell3);
//outside the loop
//adding the row to the table.
                  tbl1.addView(tr); //adding job title row
                  tbl1.addView(tr2); // job desc text
                  tbl1.addView(tr3); // spacer row

To make the table row clickable so that user can view jobs details, we registered a click event.
//registering click for the row.

                  tr.setClickable(true);
                  tr.setId(Integer.parseInt(obj.getProperty("JobID").toString()));

                     // Register handler for UI elements
                  tr.setOnClickListener(new View.OnClickListener() {
                      public void onClick(View v) {

                          int rowid;
                          rowid = v.getId();
                          String args = Integer.toString(rowid);

                        //function to be called when the row is clicked.
                          GetRowID(args);
                      }
                  });
View the Job Details Screen by passing Job ID
The "GetRowID" function will open the "Job Details" screen passing the job id parameter. Here is how to pass parameters to "Intent":
 public void GetRowID(String Args)
   {
             //open the job details
          Intent i = new Intent(jobsearch.this, jobdetails.class);

          //passing the parameters - Job ID
          i.putExtra("JobID",Args);
           startActivity(i);
   }
Next, in the "Job Details" screen, we will need to read the parameters passed from the previous screen. To do that, we need to add the following code in the "OnCreate":
 Intent  i = super.getIntent();
      //get all parameters passed from previous screen
      Bundle bun =  i.getExtras();

      //get the parameter by name
      String JobID = bun.getString("JobID");

      //this will again connect to the web service and get the job details by id.
      PopulateJob(JobID);
Show the Job Location in the MAP
When the user clicks on the job to see the job details, he have the option to view the job location in the MAP. I have used Google MAP library for Android. Note: You will need to have Google API Key.
In the layout file, I have the following code:
<com.google.android.maps.MapView
        android:id="@+id/mapview1"
        android:layout_width="fill_parent"
        android:layout_height="fill_parent"
        android:clickable="true"
        android:apiKey="your key is here"
    />
And here is the complete Java file for displaying the map:
import android.os.Bundle;

import com.google.android.maps.GeoPoint;
import com.google.android.maps.MapActivity;
import com.google.android.maps.MapController;
import com.google.android.maps.MapView;

public class map extends MapActivity
{
     private MapView myMap;

      private double lat;
      private double lon;

    @Override
     public void onCreate(Bundle icicle)
       {
          super.onCreate(icicle);
          setContentView(R.layout.map);

          myMap = (MapView) findViewById(R.id.mapview1); //Get map from XML

          lat = Double.parseDouble(CurrentLocation.Latitude);
          lon = Double.parseDouble(CurrentLocation.Longitude);
          navigateToLocation((lat * 1000000),
        (lon * 1000000), myMap); //display the found address
       }

    @Override
    protected boolean isRouteDisplayed() {
        // TODO Auto-generated method stub
        return false;
    }

    public static void navigateToLocation
    (double latitude, double longitude, MapView mv) {
        GeoPoint p = new GeoPoint((int) latitude, (int) longitude); //new GeoPoint
        mv.displayZoomControls(true); //display Zoom
        MapController mc = mv.getController();
        mc.animateTo(p); //move map to the given point
        int zoomlevel = mv.getMaxZoomLevel(); //detect maximum zoom level
        mc.setZoom(zoomlevel - 1); //zoom
        mv.setSatellite(false); //display only "normal" mapview
      }
}
Conclusion
For more details of the source code, please download the source code from the link at the top of this article. The source code is easy and well commented.
Hope this tutorial is useful and I am willing to see other comments and votes.