
LinqDataSource with ASP.NET Data Controls [Part III]
Using LinqDataSource with ASP.NET data controls like gridview and dropdown list
Topics Covered
Intro, LINQ to SQL class file, LINQ DataSource and .dbml file structure |
DataContext class, writing LINQ in C# 3.0 and parameter zing LINQ queries |
Change underlying TSQL on the fly using LinqDataSource and part of CRUD operation [update and delete] |
Insert using LinqDataSource.Insert() and managing database connection via web.config |
| LinqDataSource Part I |
LinqDataSource Part II |
LinqDataSource Part III |
LinqDataSource Part IV |
Using LinqDataSource with ASP.NET Data Controls
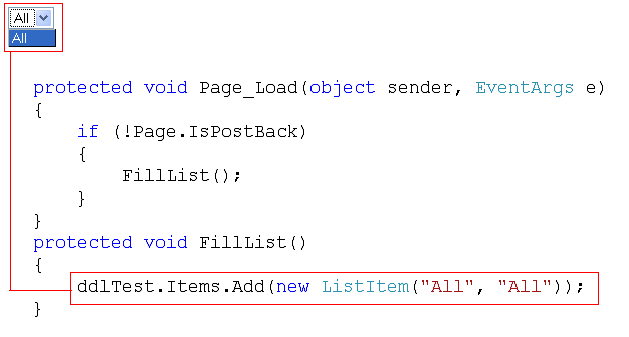
A few queries were pointing to the question - how to add “All” value in dropdown list? We need this for selecting all customers. As shown above, we can achieve this by using Items property of the Dropdown list. Drop Down list is a collection of ListItems and takes key-value pair as an input. FillList() will do the job for us.
We will continue from where we left in part II [Part I is available here]. Task in part III should take 25 minutes or so to complete. Here we will cover how to change the underlying TSQL on the fly using LinqDataSource and part of CRUD operation [everything but insert, insert and web.config nuances will be covered in part IV]. In part II, we used a drop down list as a filter. What if we want to see all the records? [Say customers of type student, corporate as well as normal – all customers]. This is very common in web application as shown in figure 1.
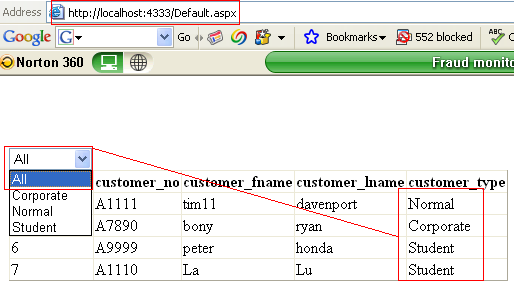
Now let’s look at the code that will produce this output. Did you notice a trick – this output is as good as “select * from customer” –correct! No where clause or filter. So what we need is to take out the where condition from LINQ based on some condition. In this case, the condition will be if (DropDownList1.SelectedValue == "All").
The million dollar question is where to write this code? The logical answer is just before select query hits the database. Figure 2 will walk you through this process.
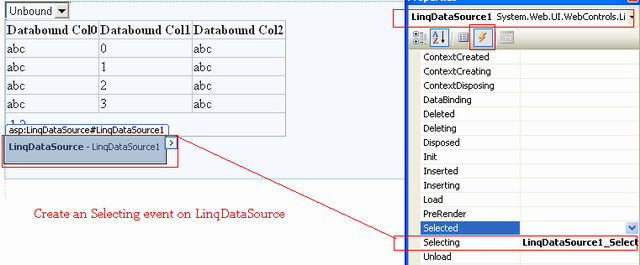

LinqDataSource selecting event will be raised before select operation is executed. So what we did is to remove the where condition just before the select operation is executed. This trick is really useful in order to construct dynamic LINQ queries on the fly. This and other events like inserting / deleting can be used in many scenarios. We will leave these events as an exercise.
Let’s enable paging, sorting in Gridview. As shown in figure 3, right click on Gridview and from smart tags, select paging and sorting checkboxes.

Page size property will decide how many records you want per page of the Gridview. Enabling paging and sorting is trivial. What is not trivial is the underlying TSQL. In fact, TSQL generated by LINQ is as good as any other paging logic. If you have 11 records and you set the Gridview page size to less than 11 records per page, then LINQ will produce a true paging logic as shown in figure 4. It shows 3 different TSQL snippets. SQL Server query profiler is used to capture these queries.
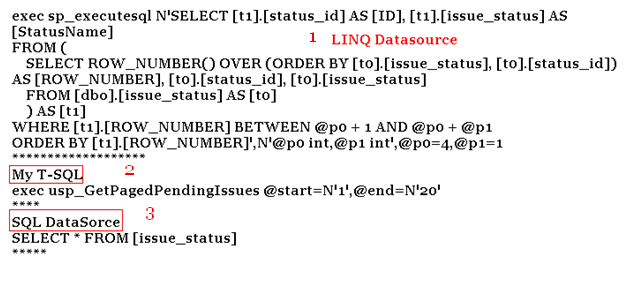
Number 1 represents TSQL generated by LINQ. Number 2 is almost the same paging logic I wrote in stored procedure and number 3 is the TSQL generated by SQLDataSource. So the crux of the LINQ is its capacity to produce dynamic execution strategy.
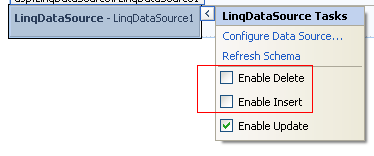
Quite often, we saw a new technology compared with its contemporaries. How LinqDataSource is different than SqlDataSource and ObjectDataSource? Dino wrote this pointed blog entry on this comparison. I don’t think LINQ will be a panacea for problems associated with database driven web application. LINQ is a new kid on the block and one should take it seriously – that’s it. Moving on, we are going to enable Gridview for an in-line update. Right click on LinqDataSource and from smart tag, click on Enable update checkbox as shown in figure 5.
Next, right click on Gridview and from its smart tag, select checkbox – Enable editing. That’s it – we are done with update operation. Follow figure 6 for details.
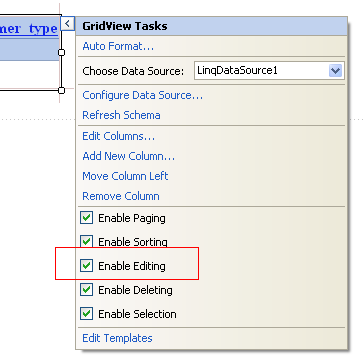
One small trap, first enable update on LinqDataSource, then only you will find enable editing option on Gridview. A workaround to this is to set the properties on *.aspx page. End result would be as shown in figure 7.
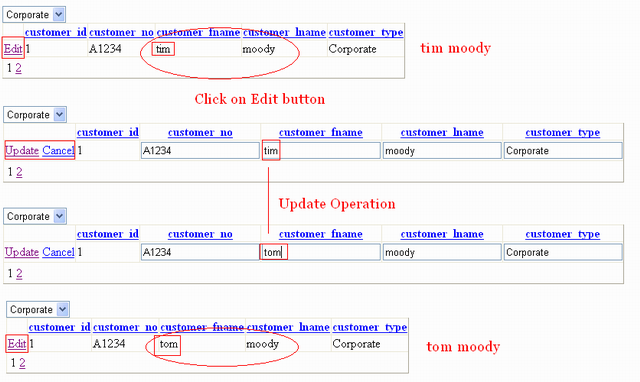
With a few clicks, we got complete update functionality. Now we will move on to delete operation. From LinqDatasource smart tags, select Enable Delete, refer to figure 5. As shown in figure 6, enable deleting option on Gridview. With this – we are done with delete operation. Since delete is a destructive thing, one should double protect this operation. So we will add a JavaScript that will prompt user for conformation as shown in figure 13.
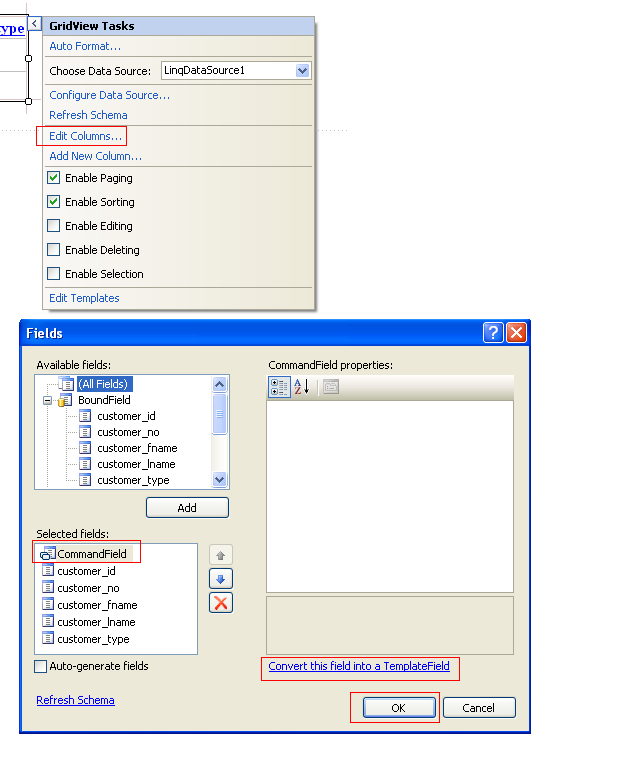
To add this confirmation functionality, right click on Gridview and from smart tag options, select Edit columns as shown in figure 8. On the following fields prompt screen, from selected field list –choose CommonField and click on convert this field to a template field link. Click on OK button to complete this operation.
Again right click on Gridview and from smart tags, click on Edit Template as shown in figure 9.

On the resulting screen, you will find three command buttons / link buttons based on your previous selection. Now right click on Delete button and select properties as shown in figure 10.
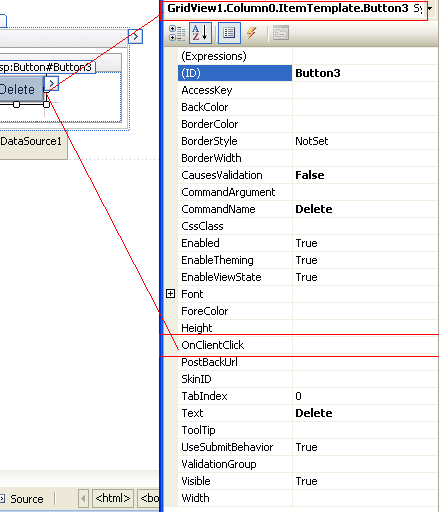
This is what you need to type in OnClientClick property –“return confirm('Are you sure you want to delete?');” Alternate option is to directly code this in your *.aspx file as shown in figure 11.
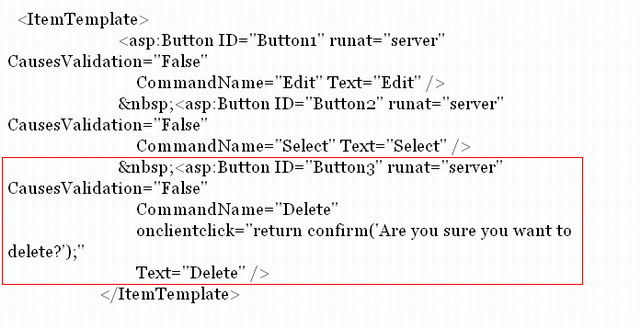
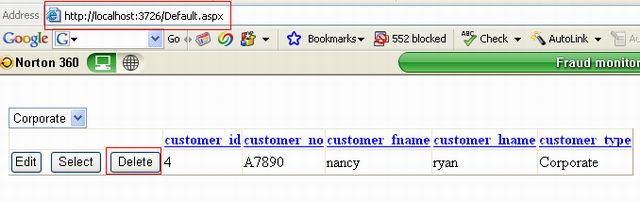
Irrespective of how you code [using point and click or in *.aspx file], the end result should be the same as shown in figure 12.
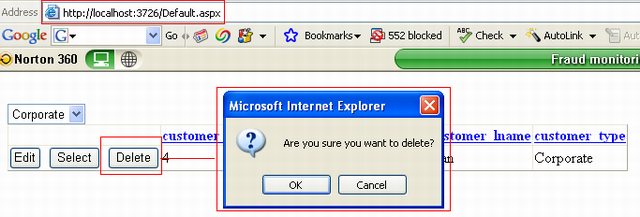
Now if you click on the Delete button, a confirmation box will be displayed as shown in figure 13. If you click on yes button, then only the record will be deleted from the database. This double checking will prevent any accidental deletion of records.
In this part, we covered how to intercept LINQ before it hits the SQL Server, how to enable update and delete using LinqDataSource. In part IV, we will focus on inserting records using LinqDataSource and impact of LINQ on web.config. We will cover how LINQ manages database connection in part IV. [Part I and part II are available here for your reference].
Best of luck and happy programming!
Note: Please vote and give your feedback on this series so that future efforts can be improved / aligned with your expectation.
Thanks!