
10 Steps to Creating a Windows Mobile Database Application Using .NET and SQL Anywhere 10
4.20/5 (4 votes)
The purpose of this article is to help get a user started in building a mobile database application using SQL Anywhere and Visual Studio .NET (C#)
Introduction
I chose to create this sample after completing my previous article: 10 Steps to Creating a Windows Mobile Database Application Using .NET and UltraLite 10. I have had a few requests to write a similar article, this time targeting SQL Anywhere 10.
The purpose of this article is to help get a user started in building a mobile database application using SQL Anywhere 10 and Visual Studio .NET (C#).
What is SQL Anywhere 10?
SQL Anywhere is an extremely powerful enterprise caliber relational database which is available on platforms such as Linux, Windows, UNIX, MacOSX and Windows Mobile. From a Windows Mobile developer perspective, SQL Anywhere can be very attractive because of its support for enterprise database features such as stored procedures, triggers, database events and a full transaction log for rollback and recovery. Although SQL Anywhere is larger (~5.6 MB) than many of the "embedded" databases currently on the market for Windows Mobile, it also has a far greater subset of SQL support and the optimizer allows for extremely complicated queries to be executed on Windows Mobile in a very short period of time. SQL Anywhere is also binary compatible across platforms which means that you can create the SQL Anywhere database on an operating system such as Linux and physically copy the database (.db and .log) to any supported platform to get equivalent functionality. In Windows Mobile environments, SQL Anywhere is typically involved in database synchronization, however, it can also be used as a simple standalone database.
Requirements
The following tools are required to get started with developing the application:
- SQL Anywhere 10 Developer Edition (Please choose to install SQL Anywhere CE components)
- Visual Studio .NET 2005
- Windows Mobile 5 Software Development Kits (Standard and Professional)
Step 1 - Create the Database
There are multiple ways to create an SQL Anywhere database, such as Sybase Central which is a GUI tool for administering database and synchronization. For this tutorial, I will be using command line utilities to create the database and populate it with some tables and data. To do this, please download the attached project and execute the following batch file:
create_db.bat
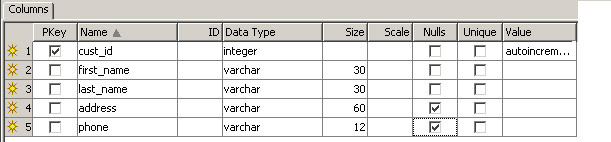
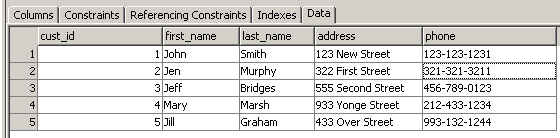
After the batch file has completed, you should have a database that looks like the following. You can verify this by executing: dbisql -c "dbf=simplesa.db;uid=dba;pwd=sql" and then executing the query: Select * from customer
Step 2 - Create the Project
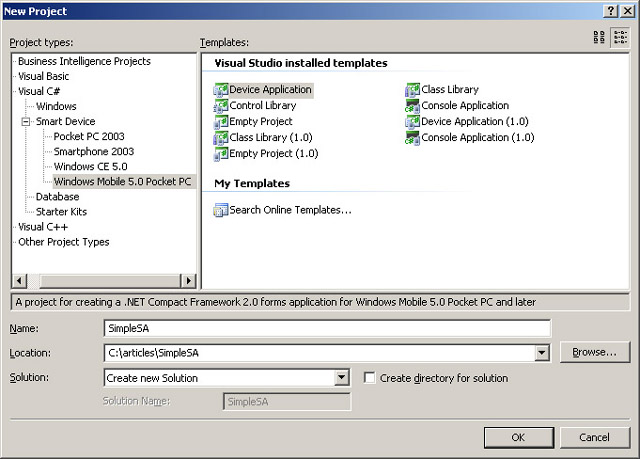
The next step is to create a new project. To do this, open Visual Studio .NET 2005 and choose New | Project. In the new project types window expand Visual C# | Smart Devices and choose "Windows Mobile 5.0 Pocket PC". In the template window choose "Device Application". Finally name the project SimpleSA, choose a location to save the project and press OK.
Step 3 - Add SQL Anywhere Namespace
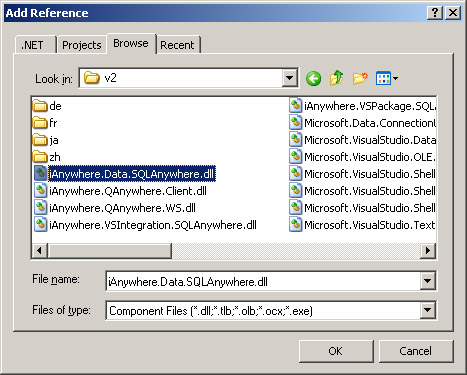
Now that we have created a template C# application, we will now want to add the SQL Anywhere ADO.NET namespace. To do this, choose Project | Add Reference | Browse. Then locate the iAnywhere.Data.SQLAnywhere.dll file which is located in your SQL Anywhere 10 install directory under \ce\assembly\v2 and press OK.
Note: If the component is not listed, please ensure that you have installed the SQL Anywhere 10 CE components within the main install (it is not installed by default).
Step 4 - Add SQL Anywhere Database Engine Components
During your install of SQL Anywhere 10, you likely have already installed SQL Anywhere 10 to your device. This installed multiple megabytes of files which you may very well not use within your application. As such, I prefer to only include the components I require and include them within my project. For our simple sample, we only need the database components (e.g. we do not need the synchronization or messaging components) so we can choose to include only the following components:
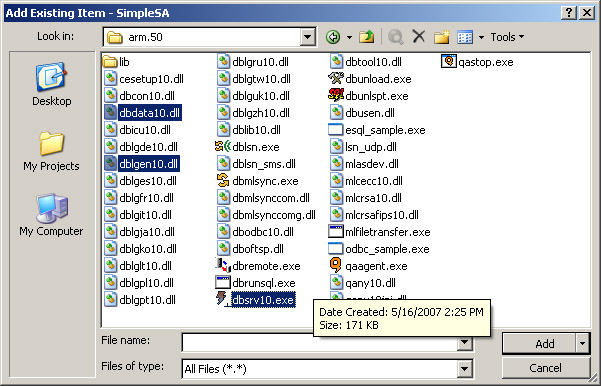
- dbdata10.dll: Support file (e.g. error messages, etc.)
- NOTE: As of 10.0.1 this file is now built into iAnywhere.Data.SQLAnywhere.dll and as such is not required
- dblgen10.dll: English language DLL
- dbsrv10.exe: Main database server engine
To include these components, choose Project | Add Existing Item. In the File Name directory, switch to the SQL Anywhere 10 installation directory and choose \ce\arm.50. Next change the File Types to "All Files (*.*)". Choose the above three files and press Add. Choose these three files in the Solution Explorer and change the "Copy to Output Directory" property to "Copy always". You will also need to mark the "Build Action" property as "Content".
For more information about deploying specific components, please refer to this documentation.
Step 5 - Add SQL Anywhere Database
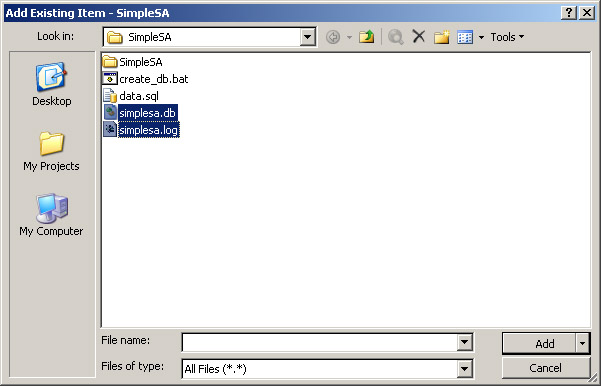
We are now going to include the SQL Anywhere database within the application. To attach the database, choose File | Add Existing Item and switch to the directory in which you ran create_db.bat in Step 1. Choose simplesa.db and simplesa.log and press Add. Just as we did in the previous step, choose the simplesa.db and simplesa.log files in the Solution Explorer and change the "Copy to Output Directory" property to "Copy always". You will also need to mark the "Build Action" property as "Content".
Step 6 - Add Form Controls
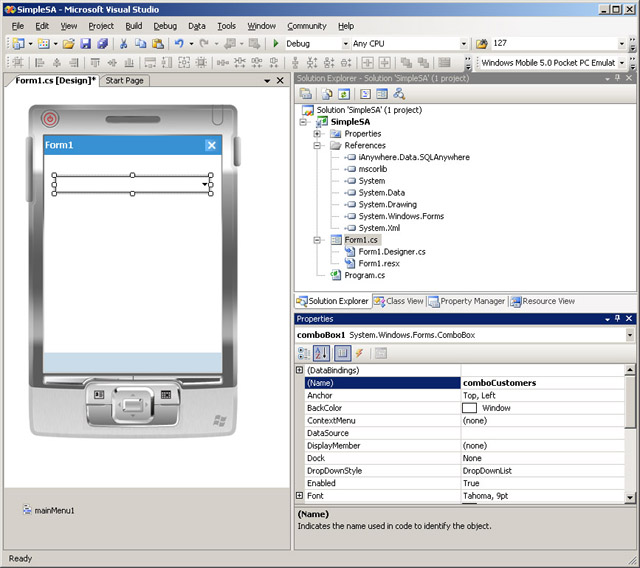
Next we will want to start adding controls to query the database. For this we will choose a combo box. As such drag a combo box on to the form and name it comboCustomers as follows:
Step 7 - Add Reference to SQL Anywhere Namespace
To do this right click on the form and choose "View Code". At the top near the other references add a reference to the SQL Anywhere namespace by adding the following line:
using iAnywhere.Data.SQLAnywhere;
Step 8 - Connect and Query the SQL Anywhere Database
Now that we have created and attached an SQL Anywhere database, the next step is to add the logic to connect and query the database. To start, we will simply select from the database. For additional capabilities please see the SQL Anywhere 10 Online Help.
Once again switch to the code for the Form1.cs and add the following line to the end of the Form1 function:
Connect();
Next add a new function as follows:
private void Connect()
{
    SAConnection conn = new SAConnection
            ("DBF=\\Program Files\\SimpleSA\\SIMPLESA.DB;UID=DBA;PWD=sql");

    try
    {
        conn.Open();

        SACommand cmd = new SACommand
            ("select last_name + ', '+
            first_name from customers order by last_name", conn);
        SADataReader reader = cmd.ExecuteReader();

        while (reader.Read())
            comboCustomers.Items.Add(reader.GetString(0));

        reader.Close();
        conn.Close();
    }
    catch (SAException ex)
    {
        MessageBox.Show(ex.Errors[0].Message);
    }
}
Notice how we can refer to the SQL Anywhere database file and have the application automatically start and stop the engine as required.
Step 9 - Compile and Deploy the Applications
For this sample, I will use the Windows Mobile emulator as the application target. To compile and deploy, make sure the target is one of the Windows Mobile 5 emulator (top left combo box). Next choose Build | Deploy Solution. You should see the application compile, start the emulator and deploy the application.
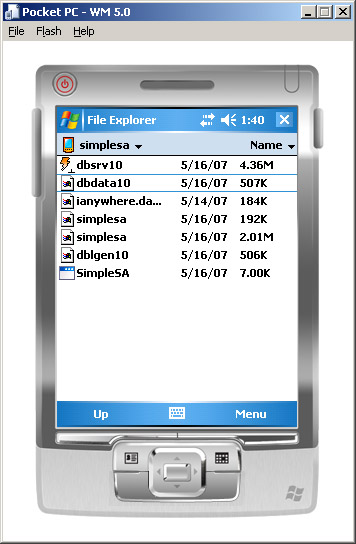
Once the deployment is completed, you should be able to see the following files listed in the device File Explorer under \program files\simplesa.
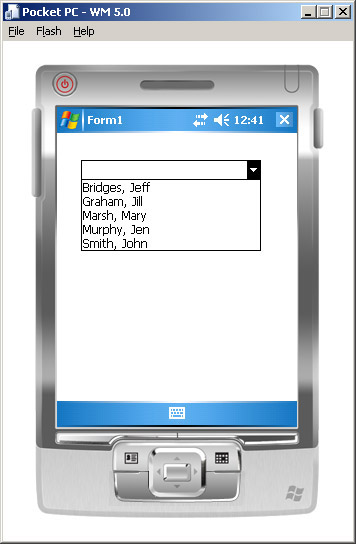
Step 10 - Run the Applications
From the device emulator, click on the SimpleSA application. When the application launches, it will connect and populate the Customer combo box as follows:
Next Steps
Some next steps you might want to take to enhance the application might be to:
- Populate a text box with a
customeraddress once acustomeris chosen - Add the ability to update or delete a
customer - Add database replication using MobiLink (don't forget to include the additional DLL and EXE components)
Summary
As we have seen in the above project, even though SQL Anywhere is an enterprise caliber database, it is also an extremely embeddable database. As you start using the database, you will also appreciate the performance and functionality included in the database engine. The complex database optimizer and superior database functionality make it a perfect companion for even the most complex mobile application.