How to access Control Template parts from Code Behind
4.95/5 (11 votes)
In this article, we will learn how to access the template parts from code behind to do various operations in the UI front.
Here is the last chapter of the series for Silverlight Custom Control. In this article, we will learn how to access the template parts from code behind to do various operations in the UI front.
Hope you read the previous three articles and are familiar with the Custom control as of now. This article will help you to understand accessibility of the template parts from the code. So, let's start discussing now. I appreciate your feedback as always.
Background
I hope you read my previous three articles. Those will help you to understand the context of this one very easily. If you didn't read them or want to brush up before starting this chapter, find them here:
- How to create a Custom Control in Silverlight?
- How to design a Custom Control by editing the Part Template?
- How to implement Template Binding in Silverlight Custom Control?
Once you are familiar with the previous code, let's start with this one. We will use the same example here which will give you better visualization on the sample code.
Brush up Previous Chapter on Parts
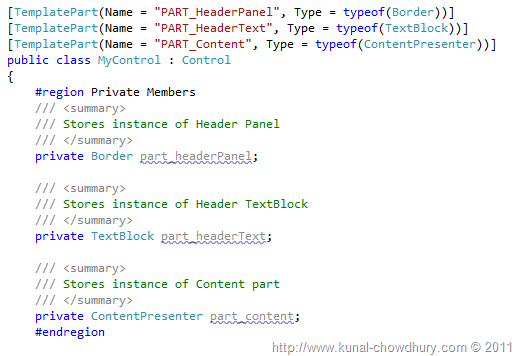
In our previous article, we discussed about template parts. These are the UI elements available in your style of the custom control. Generally, we prefix their name with PART_. In the control's class, we initialize them with the attribute called TemplatePart as shown below. This is to make sure that the metadata of the class shows them properly and your user can easily understand which UI elements you used there. Also, this is beneficial for you to easily access the parts in the file.

Once you marked the template parts in the class, you can declare the member variables to store the instance of those parts, so that you can access them easily. Remember that only get the instance whenever required. If you need them multiple times, better declare them as member variable and use throughout the life of the control.
Declaring Private Members for Part Instance
We need to declare the member variables now to store the instance of the template parts. In this example, we used three parts called Border, TextBlock and ContentPresenter. Declare the private instances of them. This is simple enough. The below screenshot will help you to understand:

Always make sure that you are declaring them as Private members. Never declare as Public because it will make your control vulnerable. Declaring as public will give your user direct access to the template part and thus your control will never be secure.
Getting Template Part Instance
It's time for us to get the instance of the part, so that we can do whatever we need with them. Try to get the instance locally whenever required but if you are accessing them from multiple places inside your control, it is recommended to load them at the beginning or at the time of first access.
To make you familiar with it, we will use it at the first load. Before describing more, I want to tell you one thing: "Don't get the instance in the constructor. In the constructor, you may get them as null if they are not already loaded in memory."
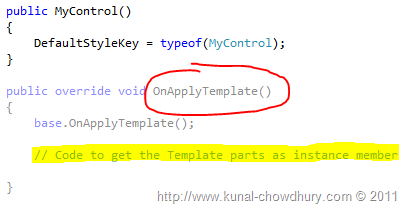
So what to do? There is overridable method named OnApplyTemplate(). This is part of the base class Control. You can get the instance of the parts there. This method gets called automatically when you apply a template to your custom control. So, whenever the template is applied, you have to refresh the instances.
Here is the implementation of the same:

Inside the OnApplyTemplate() method, you can call GetTemplateChild(...) method to get the instance of the template part.

You have to specify the name of the template part i.e. child name there. The method will search for the named template part and fetches the instance of the same.

For our example, we will get all the three template child instances and will store them in the declared member variables to use them later.
Here is the actual code snippet, for your reference:

It is always recommended to check whether the retrieved instance of the template part is available or null, before doing any operation. Because, it may change or be removed in future from XAML mistakenly. Hence, just check for null instance and throw a NullReferenceException to the user.
Get the full source code here:
public override void OnApplyTemplate()
{
    base.OnApplyTemplate();

    // Code to get the Template parts as instance member
    part_headerPanel = GetTemplateChild("PART_HeaderPanel") as Border;
    part_headerText = GetTemplateChild("PART_HeaderText") as TextBlock;
    part_content = GetTemplateChild("PART_Content") as ContentPresenter;

    if (part_headerPanel == null || part_headerText == null || part_content == null)
    {
        throw new NullReferenceException("Template parts not available");
    }
}
This null check is required only once if you place them in the OnApplyTemplate() method. Now, you will be able to use them in the code whenever you require them. I am not going to discuss that here.
What Next?
It's time again to tell you "What's Next?". Hope all the chapters of the series helped you a lot to understand the Custom Control. Once we are done with our demonstration, you will be able to create your custom controls very easily. Do let me know if you need more information on the same or want some help.
Don't forget to provide your feedback at the end of the page. This will help me to energise more to serve you better in future with more detailed articles.
I am going to post the next and last part of the series soon, where we will discuss External Custom Library and how to use it in your project. Till then, read my other articles and give your feedback. Happy coding.
