
Deploying Windows Service using Azure Pipeline
5.00/5 (1 vote)
Setting up automated build and deployment for Windows service using Azure Pipeline
Create Project in GIT Repository
Create a win service project in Visual Studio and configure the git repository to push the code into GIT. Once the code is pushed into GIT, the build will kick start automatically.

Create an Organization in Azure DevOps
We need to create an organization and project in Azure Devops in order to start using Azure Pipeline. The below Microsoft document shows the steps how to create an organization with a personal Microsoft account or a work or school account. Use your work or school account to automatically connect your organization to your Azure AD.
Follow the above link to complete the organization setup and create the project. Once this step is completed, we are ready to setup our first build pipeline.
Setup the Build Pipeline
I created a project named Main. Go to the overview page of the project and then choose Pipelines -> Builds -> New -> New build pipeline.


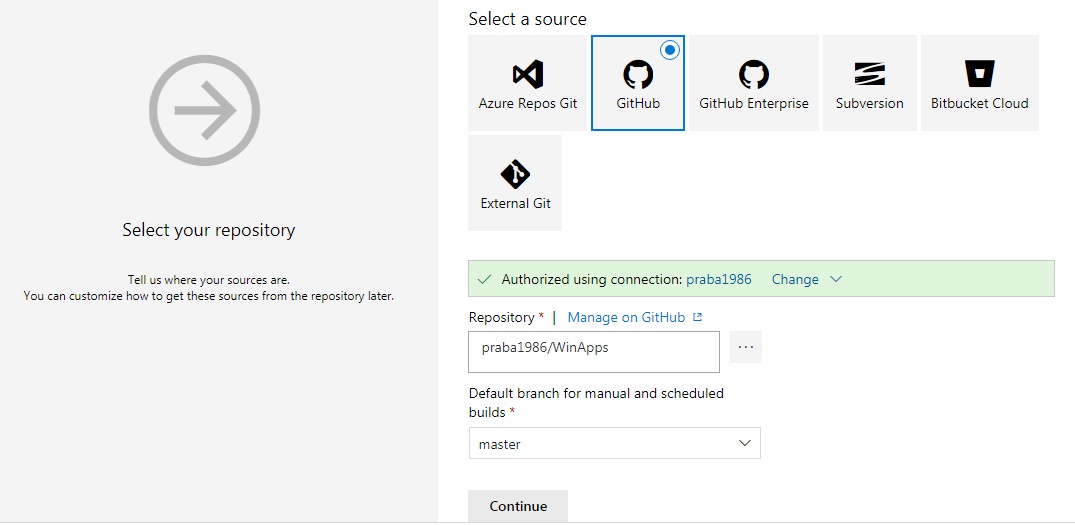
New window will be opened to choose source branch, repository and the source branch for build. Select the options as below according to your project.
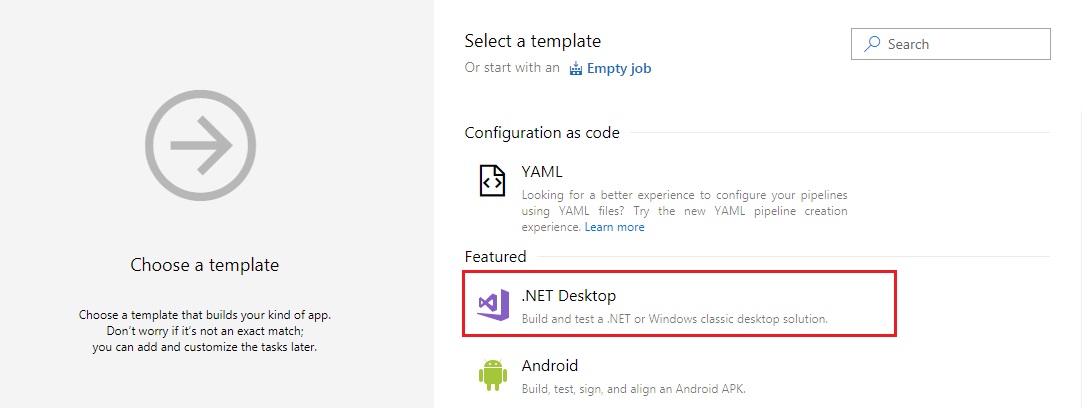
Choose the .NET Desktop template since I can make use of most of the pre-defined pipeline steps which fit for my windows service build, enter the name of the pipeline and choose any given Microsoft hosted agent or you can choose your own job (Default - No agents). For this example, I am using the Microsoft hosted agent (Hosted VS2017) which is a good fit for my build. To understand more about agent pools, click here.

.NET Desktop template has the list of build_pipeline5.JPG default jobs, for this project, I just leave with the default values for Nuget, Nuget restore, Build solution and VsTest tasks. If you don't want any of these tasks, you can just select the specific task under the agent and remove it.
Choose the Publish symbols path task and enter the details as below and leave the other fields with the default values.

Choose the Copy Files task and enter the information as below and leave the other fields with the default values.

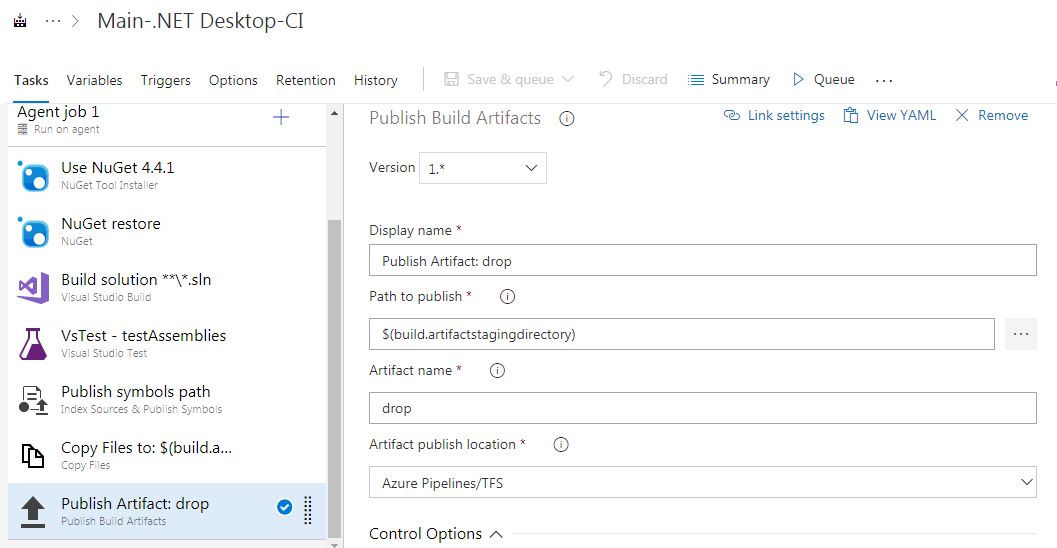
Choose the Publish Artifact task, enter the information as below and leave the other fields with the default values.
Then click Save.
Get the status batch (refer to the section Get the status batch in this Microsoft documentation) and add into the README.md file in github branch as below:

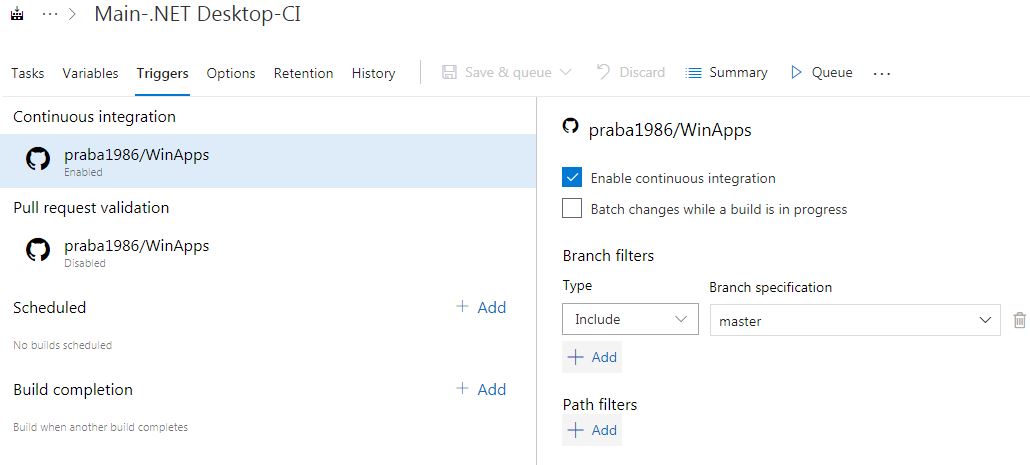
Choose the Trigger menu and select Enable continuous integration option and save it.
First build will be queued and started. Build is triggered and succeeded. Now we automated the build using Azure Pipeline. Hereafter, whenever there is a change in the code, build will be triggered automatically.

Create Deployment Groups and Provision Agents
To access the target server to deploy application, we need to create deployment group. Deployment group is a logical set of deployment target machines that have agents installed on each server.
Follow this link to create deployment group and provision agents in the VM.
In this stage, deployment group is created in Azure DevOps and the agent installation script is run successfully in the target machine. Next, we proceed to setup the release pipeline.
Setup the Release Pipeline
Follow the below steps to setup the release pipeline.
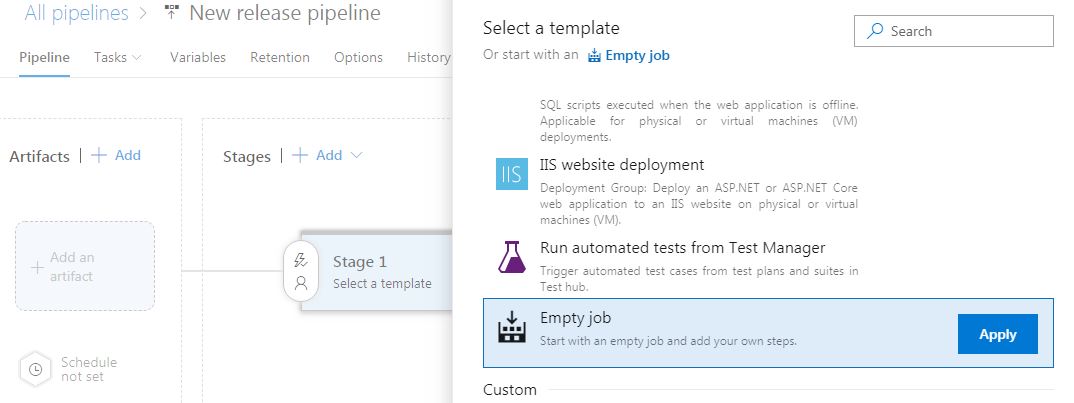
- Choose Release pipeline -> New -> New release pipeline -> Select template -> Choose Empty Job

- Select artifact task and fill in the information as below and click add. This is where we configure the build artifact as the source for the release.

- Enable the continuous release as below. It is applicable mostly for SIT/UAT environments. For production environment, it will not be the case as we deploy based on schedules.

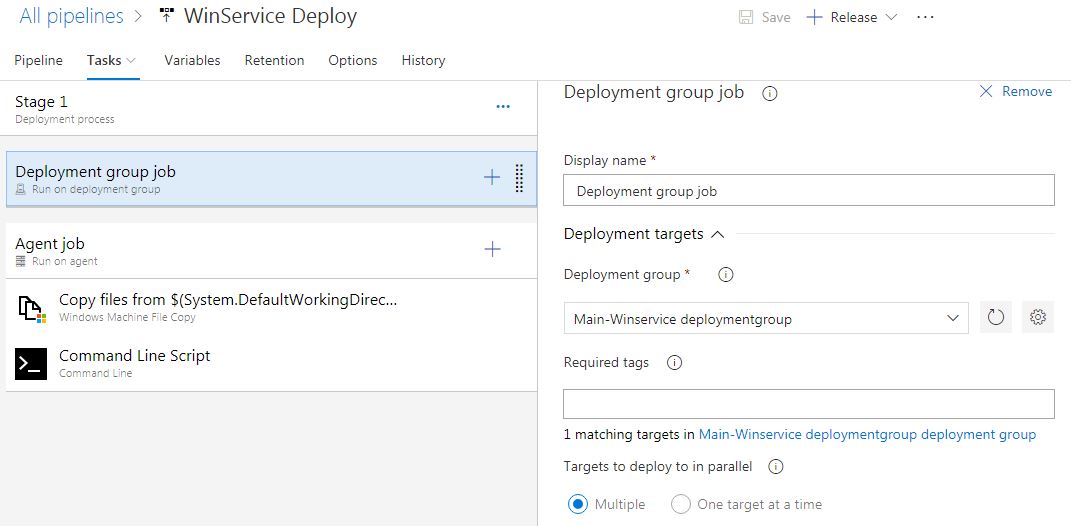
- Select view stage tasks and add/modify the below tasks in sequence. Refer to the below screenshots. Select stage task and add a deployment group job. Once added, select the deployment group job and update the information as below and leave other fields with the default values.

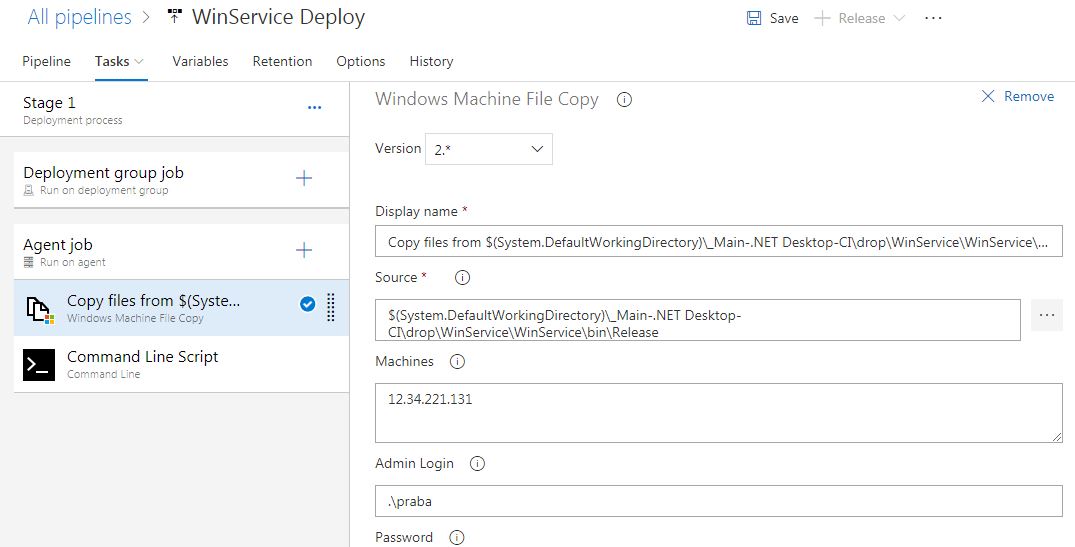
- Select the Agent job and update the information as below.

- Install WinRM File Copy task template from the market place and add this task by clicking Add a task to Agent job.


- DisplayName can be any name
- Source is the path where the artifact resides
- Machine is the Virtual Machine IP (Target server IP)
- Enter the VM Admin Login and Password
- Virtual machine folder path where you want to host your windows service
- Add Command Line task and update the template as below:

This SC commands helps to stop, delete, install and start the windows service in the Virtual Machine. You can modify the scripts according to your needs.
- Click Save and choose Release to start deploying the windows service to the target server.


Here you go! Successfully deployed the win service into the virtual machine.

Points of Interest
It's interesting when I started exploring Azure devops, it makes life easy :). Lot more to learn and make use of it in your projects.
This article makes you understand how to setting up the CI/CD pipeline. You can experiment with other futures of Azure DevOps and strengthen your DevOps skills .
Happy learning! If you have any improvements on this article, please comment below.