
Introduction of Angular and How to Setup Environment in Visual Studio Code - Part 1
5.00/5 (4 votes)
In this article, we'll explore what is angular and why we use JS based frameworks when we've already javascript libraries. We'll explore how we can set up Angular Environment in Visual Studio Code.
Introduction
Huy There, Nice to see you here. In this angular series we’ll explore each and everything about angular. We’ll make a ecommerce application using what we’ll learn in this series. So let’s get started with angular.
Angular is nothing but a framework for building client applications in HTML, CSS and Javascript/Typescript. Typescript compile into Javascript. Typescript is more common in Angular community because Angular is written itself in Typescript. If you never worked before with typescript, don’t worry we’ll explore it in this series.
Why Angular When we already have Javascript/Jquery?
Can we not use plain old Javascript or JQuery, we certainly can and there are a lot of web applications already working on with Javascript and Jquery. As our application get more complex, our Javascript and JQuery code are hard to maintain. We need a way to properly structure our application. Well Javascript Patterns {Module Patterns, Prototype Patterns} we have and these patterns are also help us for structuring, but these patterns are hard to understand for the beginners to Javascript. We already know that Javascript and Jquery are hard to test so among couple of years many frameworks have been built and evolved to make web application development easier. Angular is an example of such frameworks.
It gives our application a clean and loosely structure that is easy to understand and easy to maintain. It also brings a lot of utility code that we can reuse in various applications specially when dealing with users navigation and the browser history. Applications develop by angular is more testable so we can easily write automated test (unit test) to test various parts of our application.
So the final answer is angular is not essential but it makes your life a lot easier.
The architecture of Angular Applications
A lot of modern application has at least 2 parts
- Frontend (UI)
We use HTML, CSS, Javascript, TypeScript, Angular, JQuery to build the front end.
- Backend (Responsible for storing the data and apply operations)
And both of them interact with each other to get and save the data.
How Do We Safe Our Data In Angular?
We don't save the data in Client side becuase it can easily disappear as the user clears the browser data or moves to a different computer thats why we store the data into server. So here we often have one or more databases as well as a bunch of http services or APIs to make this data available to the client.
These http services/APIs are the endpoints that are accessible via the Http Protocol. So we call the simple Http to get or to save the data.

Now let’s make our environment ready for Angular.
Step 1
- Install node.js
Actually node provides some tools that we need to build angular projects.

Download LTS (Recommended For Most Users) Windows Installer and install it. Current (Latest Features) has more features but it is not stable yet.
- Now open command prompt to make sure your node.js installation

As we can see here, node and npm both has installed in the system. NPM basically used to install 3rd party libraries like we do in Package Manager Console in .Net Environment.
Step 2
Now we’ll install Angular CLI through npm. Angular CLI is a command line tool that we used to create a new angular project or generate some boilerplate code (scaffolding) as well as deploy the packages on the server. So let’s install angular cli. The command pattern to install anything in the system with npm is.
npm install -g PackageName
-g means for globally install and if you don’t put –g here, Angular CLI will be installed only in the current folder and it will not be accessibly anywhere else.
Run the command prompt as (Run as Administrator)
C:\Windows\system32> npm install -g @angular/cli
After completing the process we need to make sure that the package is installed or not. So run the command
C:\Windows\system32> ng --version

Step 3
Now if you don’t have installed Visual Studio Code then install it please. And if you’ve installed then open the Visual Studio code.
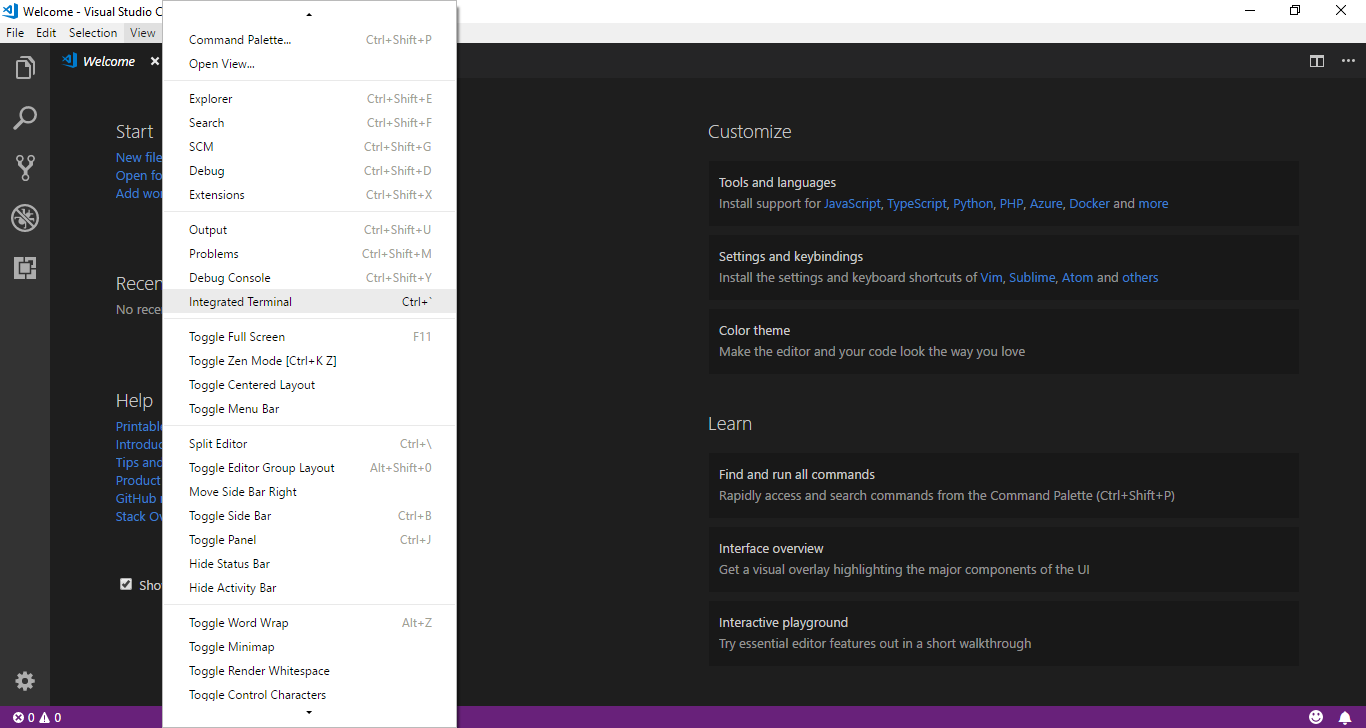
And open the integrated terminal
As we already know that 1 solution or one directory can have multiple projects. So instead of making the project directly, let’s create directory and then make the angular project in that directory through terminal.
PS C:\Users\Ami Jan> mkdir HelloWorld
PS C:\Users\Ami Jan> cd HelloWorld
PS C:\Users\Ami Jan\HelloWorld> ng new MyFirstAngularProject

During creating the project, you might be see this error

In this scenario you just need to run these commands one by one, actually we need here github email address and username
PS C:\Users\Ami Jan\HelloWorld> git config --global user.email <a href="mailto:abc@whatever.com">abc@whatever.com</a>

PS C:\Users\Ami Jan\HelloWorld> git config --global user.name Usama
And then finally your project will be created when you again try to create the angular project.

I’m still facing some warnings here, we should not be bothered about these warnings. These are actually file flags used by IDE under the hood. We can build and run our application without any issue.
PS C:\Users\Ami Jan\HelloWorld> code .
It will open our project in visual studio code editor.

Now we need to make sure that it is running or not on the server. So come back to the Visual Studio code terminal and make sure the directory folder first where you’ve

As we can see our project is compiled successfully with localhost:4200 and angular has created the js and css files for us.
Step 4
Now open the localhost link in the browser.

Angular Project Demonstration
- Here we’ve “e2e” folder. It stands for end to end and here we write the unit test. Unit test is also an automated test and it simulates the real user.
- Another folder is “node_modules” and here we store all the 3rd party libraries which we use in our project. All these node_modules we don’t deploy on the server. So don’t worry about the complete size of our project which might be of 200 mb project. Only few chunks of code that we need in our application become add into the application code, and we just deploy it on the server.

- 3rd folder we’ve “src” folder where the actual code of our application stores.
- Inside this “src” folder we’ve “app” folder and it has module and component files. Every application has atleast 1 module and 1 component.
- Here we also have “assets” folder where we stores the static files of our application. These static files can be images, icons, text files etc.
- Here we’ve “environment” folder and here we stores configuration settings for the different environments. 1st file for the production environment and 2nd file is for development environment.

- Here we also have favicon file and index.html file which loads into the browser.
- Here we’ve “main.ts” file which is the starting point of our application. It is written in typescript. In a lot of programming languages we’ve the concept of main method where application starts its execution. We’ve the same concept in angular applications. So here in angular, we’re actually bootstrapping the main module of our application which is “AppModule”. Angular loads this module and surely everything starts from this main method.
- Here we’ve “polyfills.ts” files which imports some scripts that are required for running angular application. As we already know that there is an issue in Javascript support in different browsers, so we need to write the polyfills to make it responsive on all the browsers. And angular is the JS framework, to run the application on different environments we need polyfills under the hood.
- Here we’ve “style.css” for the global application styling. Each page and each component can has its own style we’ll explore it later on.
- Here we’ve “test.ts”, it is basically used for setting up and testing environment.
Outside of the “src” folder we’ve
- angular.json (related to the angular configuration)
- .editorconfig (It is important when you’re working in team environment, all the team members should have same settings in this file)
- .gitignore (It is used to ignore or exclude certain files and folders from your git repository. Git basically is nothing but managing and versioning your source code)
- package.json (This is a standard and basic file which includes in every single node project has. It has the information about the dependencies (package and libraries) and their version numbers as well)

As we can see each library starts with @angular and then its own names comes. And if you not gonna use any library in your project, you can delete it from here.
Here we also have “devDependencies”, these are the libraries that we need to develop this application. This libraries are purely important for the developer machine, not for the purpose of running the application and deploy on the server.
- Here we’ve “tsconfig.json” which is a configuration file of typescript. Type script compiler looks at these settings and on the basis of these settings, we compile our typescript code into Javascript. In future, if you’re working with complex application then you can change your typescript configuration here in this file.
- And in the end we’ve “tslint.json”, it is basically a static analysis tool for typescript code. It helps us for typescript code in readability, maintainability and functionality errors.
Webpack
Now let’s make some changes here in this application and let me see you the magic of angular.
- Open the “app.component.ts” in app folder.
- Make some changes in title’s value in AppComponent class
- Open the VS Code Terminal
- And hit save (Ctrl + S)

Angular CLI uses the tool web pack which is actually the automation tool, it gets all our stylesheets and javascripts and combine them in a bundle and then minifies that bundle for optimization purpose. Web pack runs whenever we save any changes in the project and updates the data on the server without refreshing the application. This is the feature of web pack is called Hot Module Replacement (HMR).
Now if we open our browser and inspect the page, then we’ll see the references on the page.

And if we open our index.html page from “src” folder, we’ve no file reference in the file.

These references are dynamically added by web pack into the HTML file.
Notice: if you see the page view source, we’ve styles.js it means all our stylesheets are compiled into the javascript bundle. All our styles work inside the javascript.
The difference of Angular Version History
AngularJS was first introduced in 2010 as a JS Framework for building client application. Soon it gains popularity. And angular team started adding new features to the core. But the framework was not designed with the needs of today’s applications in mind and it was overly complex. So angular team decided to rewrite the original framework using typescript.
And as a result, Angular 2 came out in mid-2016. This new version is the entirely different version from Angular 1. And you can feel that it is an entirely different thing. This made a lot of developers unhappy because they had a lot of applications build with Angular1 with each application over a few thousand lines of code had to be rewritten. But this new framework is a much cleaner framework and it is a lot easier to understand and to work with.
And after a few minor upgrades to angular 2, something strange happens eventually.
2.0 -> 2.1 -> 2.2 -> 2.3 -> 4 ( suddenly Angular 4 came out)
This makes developers wondered what happen to Angular 3. But unlike Angular 2, Angular4 was not a new framework with a lot of breaking changes. In fact it wasn't even a major upgrade.
Let's see what happens
Angular consists of few libraries that are distributed as a separate node package via npm i.e.
@angular/code 2.3.0
@angular/compiler 2.3.0
@angular/http 2.3.0
@angular/router 3.3.0
and a few other libraries. All these libraries were the version the same except the router library. So in order to align these versions and avoid confusion in the future, the Angular team decided to Angular version 4.
So Angular 4 is not the major upgrade to Angular 2 and you can even think of it as Angular 2.4 simply.
After all these confusions in the community about Angular versions, the team decided to drop the version suffix and simply call the framework Angular.
So now we have 2 kinds of Angular
AngularJS (1.x) 1st gen of Angular, written JS and it is going to die sooner or later
Angular (2+)
Conclusion
We’ve learned a lot about angular here. We’ve created the angular 6 application using Visual Studio Code Terminal and with the help of angular cli. We’ve also displayed the custom message on the screen and we’ve explored web pack and different versions of angular. See you in the next part of the series.