
Dependency Injection in ASP.NET Core 2.0
4.08/5 (13 votes)
How to use Dependency Injection in ASP.NET Core 2.0 and use the result to bind in our View page

Introduction
In this article, we will see in detail how to use Dependency Injection in ASP.NET Core 2.0. Now it's much easier to use Dependency Injection in our ASP.NET Core application and the fact is that it's very simple. We use the result to bind in our View page. Let’s see in detail how to create our ASP.NET Core project to use Dependency Injection for binding the student details to our View page. Hope you might know what is Dependency Injection and if you are curious to learn more details about Dependency Injection, then start from the articles, The Dependency Injection Design Pattern and Dependency injection in ASP.NET Core.
Background
Prerequisites
Make sure you have installed all the prerequisites in your computer. If not, then download and install all, one by one.
First, download and install Visual Studio 2017 from this link.
Using the Code
Code Part
Now, it’s time to create our first Angular5 and ASP.NET Core application.
Step 1- Create ASP.NET Core Application
After installing the prerequisites listed above, click Start >> Programs >> Visual Studio 2017 >> Visual Studio 2017 on your desktop.
Click New >> Project. Select Visual C# >> Select Angular5Core2. Enter your project name and click OK.

Select ASP.NET Core 2.0, select Web Application(Model-View-Controller) and click OK.

Our project will be created and it's time for us to add a Class, Interface and Service for using Dependency Injection in ASP.NET Core application.
Step 2 – Creating Data Folder for Class
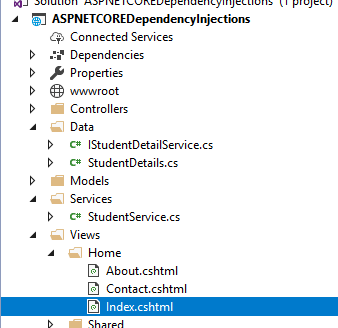
First, we will start with creating a class and for this, from our project, create a folder and name it as Data as shown below:

Now we have created a folder named as Data in our project and the next step will be to create a class named as “StudentDetails”. Right click the Data Folder and add a new class named as “StudentDetails”.

In Studentdetails class, we create property as student name, Subjects and grade for each student like below:
public class StudentDetails
    {
        public string studentName { get; set; }
        public string Subject1 { get;  set; }
        public string Subject2 { get;  set; }
        public string Subject3 { get;  set; }
        public string Subject4 { get;  set; }
        public string Subject5 { get;  set; }
        public string Grade { get;  set; }
    }
Now it’s time for us to create an interface with method named as GetAllStudentDetails() and we will be implementing this interface in our Service. For creating the Interface as we have seen before, add a new class to your data folder and name the class as “IStudentDetailService”. We will change the class to interface as we are going to create a interface to implement in our service. Here in this interface, we declare a method as GetAllStudentDetails() with return type as IEnumerable.
  public interface IStudentDetailService
    {
        IEnumerable<StudentDetails> GetAllStudentDetails();
    }
Step 3 – Creating Service
First, we create a folder named as Services in project, right click your project and create a new folder as “Services”.

Now let’s add a new class in this folder and named as “StudentService” and in this class, we will be implementing our Interface IStudentDetailService. We know that as if we implement the interface, then we should have the interface method in our class. In this service, we use the interface method and we return the list with student details. We will be directly Injecting this in our View page.
using ASPNETCOREDependencyInjection.Data;

namespace ASPNETCOREDependencyInjection.Services
{
    public class StudentService:IStudentDetailService
    {
        public IEnumerable<StudentDetails> GetAllStudentDetails()
        {
            return new List<StudentDetails>
        {
            new  StudentDetails {studentName = "Afreen", Subject1 = ".Net Programming",
                                 Subject2="Operating System",Subject3="Web Programming",
                                 Subject4="Networks",Subject5="C# & OOP",Grade="A"},
            new StudentDetails {studentName = "kather", Subject1 = ".Net Programming",
                                Subject2="Operating System",Subject3="Web Programming",
                                Subject4="Networks",Subject5="C# & OOP",Grade="A" },
            new StudentDetails {studentName = "Asha", Subject1 = ".Net Programming",
                                Subject2="Operating System",Subject3="Web Programming",
                                Subject4="Networks",Subject5="C# & OOP",Grade="A" },
            new  StudentDetails {studentName = "Afraz", Subject1 = ".Net Programming",
                                 Subject2="Operating System",Subject3="Web Programming",
                                 Subject4="Networks",Subject5="C# & OOP",Grade="B" },
            new  StudentDetails {studentName = "Shanu", Subject1 = ".Net Programming",
                                 Subject2="Operating System",Subject3="Web Programming",
                                 Subject4="Networks",Subject5="C# & OOP",Grade="C" }
        };
        }
    }
}
Step 4 – Register the Service
We need to register our created service to the container, Open the Startup.cs from your project to add our service to the container.

In the Startup.cs class, find the method named as ConfigureServices and we add our service “StudentService” like below:
// This method gets called by the runtime. Use this method to add services to the container.
        public void ConfigureServices(IServiceCollection services)
        {
            services.AddTransient<StudentService, StudentService>();

            services.AddMvc();
        }
Step 5 – Inject the Service in View page
Now it’s much simpler and easier as we can directly inject the service in our View page and bind all the results to our view page. For injecting the Service in our View, here we will be using our existing view page from Home >> Index.cshtml.
In the “Index.cshtml”, we inject our StudentService and bind all the results inside the table.
@inject ASPNETCOREDependencyInjection.Services.StudentService student

@if (student.GetAllStudentDetails().Any())
{
<table class='table' style="background-color:#FFFFFF; border:2px#6D7B8D;
       padding:5px;width:99%;table-layout:fixed;" cellpadding="2" cellspacing="2">
    <tr style="height: 30px; background-color:#336699 ;
        color:#FFFFFF ;border: solid1px#659EC7;">
        <td  align="center">
            Student Name
        </td>
        <td  align="center">
            Subject 1
        </td>
        <td   align="center">
            Subject 2
            </td>
            <td align="center">
                Subject 3
            </td>
            <td align="center">
                Subject 4
            </td>
            <td align="center">
                Subject 5
            </td>
            <td   align="center">
                Grade
            </td>
    </tr>
    @foreach (var std in student.GetAllStudentDetails().OrderBy(x => x.studentName))
    {
    <tr>
        <td align="center" style="border: solid1px#659EC7; padding: 5px;table-layout:fixed;">
            <span style="color:#9F000F">
                @std.studentName
            </span>
        </td>
        <td align="center" style="border: solid1px#659EC7; padding: 5px;table-layout:fixed;">
            <span style="color:#9F000F">
                @std.Subject1
            </span>
        </td>
        <td align="center" style="border: solid1px#659EC7; padding: 5px;table-layout:fixed;">
            <span style="color:#9F000F">
                @std.Subject2
            </span>
        </td>
        <td align="center" style="border: solid1px#659EC7; padding: 5px;table-layout:fixed;">
            <span style="color:#9F000F">
                @std.Subject3
            </span>
        </td>
        <td align="center" style="border: solid1px#659EC7; padding: 5px;table-layout:fixed;">
            <span style="color:#9F000F">
                @std.Subject4
            </span>
        </td>
        <td align="center" style="border: solid1px#659EC7; padding: 5px;table-layout:fixed;">
            <span style="color:#9F000F">
                @std.Subject5
            </span>
        </td>
        <td align="center" style="border: solid1px#659EC7; padding: 5px;table-layout:fixed;">
            <span style="color:#9F000F">
                @std.Grade
            </span>
        </td>
    </tr>
   }
</table>
}
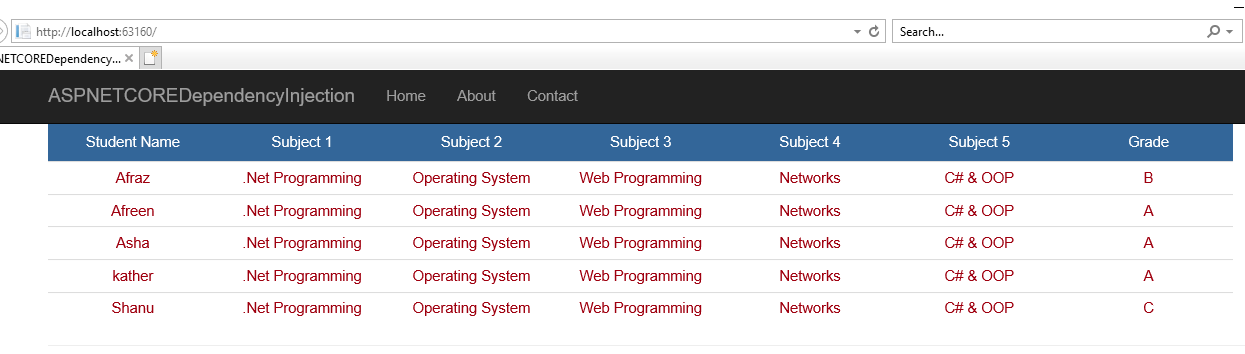
Step 6 – Build and Run the Project
Build and run the project as we can see all our student details will be displayed on our home page.
Points of Interest
We can see clearly as now ASP.NET Core makes our workload much simpler and easy to use Dependency Injection to directly Inject in our View page and bind the results.
History
- 15th February, 2018: Initial version