
A Note on Gradle - 1
5.00/5 (1 vote)
This is a note on building Java applications by Gradle. It will focus on the simple case to build a single-project application.
Background
I was informed of Gradle shortly after I started to use Maven. I did not spend much time on it, because there was no decent IDE integration. But the situation has changed by Buildship. In this note, I will use Eclipse and Buildship to talk about how to create and build a Gradle Java application. To make this note simple, I will only talk about single-project applications. I may prepare a separate note on multi-project applications when I have time.
Install Buildship to Eclipse
You can follow the instructions to make a stand-alone Gradle installation on your computer. But if you use Buildship and Eclipse, you do not need the stand-alone installation on your computer. You can click on Help on the Eclipse menu -> Eclipse Marketplace... and search for Buildship to find the Buildship Gradle Integration plug-in.

You can then follow the instructions to install Buildship to your Eclipse. You will need to restart Eclipse after the installation.
A Minimal Gradle Project & Gradle Wrapper
After the Buildship installation, you can create a Gradle project in Eclipse. Click on File -> New -> Other... -> Gradle -> Gradle Project to launch the Gradle project wizard.

When asked for the Gradle distribution, make sure to choose Gradle wrapper.

By following the wizard all the way to the completion, we can have a minimal Gradle project in Eclipse.

The Gradle Wrapper
There are many Gradle versions available. In order to make sure that the same version of Gradle is used to build the project across the team and the build server with or without a local Gradle installation, the Gradle team recommended the Gradle wrapper. A Gradle wrapper includes four files that we need to check-in to the source control to share with the team.
- /gradle/wrapper/gradle-wrapper.js;
- /gradle/wrapper/gradle-wrapper.properties;
- gradlew;
- gradlew.bat.
The gradle-wrapper.properties file tells which version of Gradle will be used to build the project.
distributionBase=GRADLE_USER_HOME
distributionPath=wrapper/dists
zipStoreBase=GRADLE_USER_HOME
zipStorePath=wrapper/dists
distributionUrl=https\://services.gradle.org/distributions/gradle-4.3-bin.zip
The gradlew and gradlew.bat are batch files to issue Gradle commands through the wrapper. In Linux, we can use gradlew. In Windows, we can use gradlew.bat. If you want to change the Gradle version used by the wrapper, you can issue the following command:
gradlew wrapper --gradle-version=4.5 --distribution-type=bin
The Gradle Files
If you use Maven, you have one POM.XML file to tell Maven about everything how you want to build the project. In Gradle, a typical project needs two files:
- settings.gradle;
- build.gradle
For this minimal project generated by the Buildship wizard, the settings.gradle is the following:
rootProject.name = 'minimal-project'
- The settings.gradle file is mostly used for multi-project applications. In this single-project application, the settings.gradle file only specifies the project name. In fact, if we delete this file from the project, Gradle will build the project just fine;
- In my next note when we talk about multi-project applications, I will spend a little more time on how the settings.gradle is used.
The build.gradle file tells Gradle how the project should be built.
apply plugin: 'java-library'

repositories { jcenter() }

dependencies {
    api 'org.apache.commons:commons-math3:3.6.1'
    testImplementation 'junit:junit:4.12'
}
- The
repositoriessection tells Gradle to look for the dependencies from the Bintray jcenter repository; - The
dependenciessection tells Gradle that thecommons-math3library is needed to build the application andjunitis needed to run the unit test; - The
apply plugin: 'java-library'tells Gradle that the project will be built into a Java library.
The Eclipse External Tools
If you want to issue the build command through gradlew easier in Eclipse, you can use the External Tools capability in Eclipse.

You can click on the External Tools icon -> External Tools Configurations... to add an external tool configuration.

You can choose any name for the configuration. For my convenience, I simply call it gradlew clean build. After the gradlew clean build configuration is added to Eclipse, you can then issue the following command to build the project in Eclipse through the external tool configuration.
gradlew clean build
You should see that the project is built successfully and the unit test runs successfully.
A Spring Boot JAR Example
In order to have a better evaluation than the minimal project created by the Buildship wizard, I converted an Maven project that I created earlier. The example is a Spring Boot executable JAR application. If you want to take a look at this Gradle example, I will strongly recommend you to take a look at my earlier note. This note is about Gradle, it is not about Spring Boot. I will not spend any time on how to bundle a Spring Boot application into a JAR file in this note.
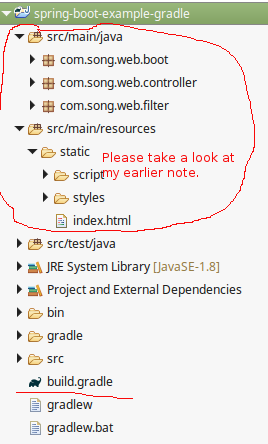
If you have Buildship installed to your Eclipse, you can import the attached project. You can click on File -> Import... -> Gradle -> Existing Gradle Project to import the project. The project structure is exactly the same as the example in my earlier note. The only difference is that this project will be built with Gradle.
The "build.gradle" File
buildscript {
    repositories { jcenter() }

    dependencies {
        classpath 'org.springframework.boot:spring-boot-gradle-plugin:1.5.9.RELEASE'
    }
}

apply plugin: 'java'
apply plugin: 'org.springframework.boot'
apply plugin: 'maven'

group = 'com.song.example'
version = '0.0.1'

sourceCompatibility = 1.8
targetCompatibility = 1.8

repositories { jcenter() }

dependencies {
    compile 'org.springframework.boot:spring-boot-starter-web:1.5.9.RELEASE'
}

bootRepackage {
    mainClass = 'com.song.web.boot.ApplicationStart'
}
If you have a good understanding of my earlier note, you should have been well prepared to understand the build.gradle file.
- The
org.springframework.bootplug-in is responsible to bundle the project into an executable Spring Boot JAR file; - The
mavenplug-in is responsible to install the compiled JAR file into the Maven local storage; - The
bootRepackagesection tells theorg.springframework.bootplug-in that theApplicationStartclass in thecom.song.web.bootpackage is the Spring Boot application's entry point.
Build and Run
If you have successfully imported the project into Eclipse, you can debug/run the application in Eclipse. You can right click on the project -> Debug As/Run As -> Java Application and choose the ApplicationStart as the application's entry class to debug/run the application.

You can issue the following command to build the application by the Gradle wrapper.
gradlew clean build install
After a successful build, the spring-boot-example-gradle-0.0.1.jar file is created in the build/libs directory under the project directory. You can run the JAR file by the following command from the project directory.
java -jar build/libs/spring-boot-example-gradle-0.0.1.jar
Regardless how you start the application, if it is started successfully, you can test it through a browser.

Points of Interest
- This is a note on building a Java application by Gradle. It focused on the simple case to build a single-project Java application;
- I hope you like my posts and I hope this note can help you one way or the other.
History
- 30th January, 2018: First revision