
Custom Authentication and Authorization in Asp.Net Core 2.0
4.31/5 (22 votes)
In this article I am going to explain how we can implement Authentication and Authorization in Web, WebApi as well as for other clients.
Introduction
Authentication and Authorization are two important concepts in any web application. Now we will implement this by using oAuth2.0 and OpenID standards and how we can create a centralized IdentityServer which supports multiple applications such as Web, Mobile, WebApi Etc.
Things to Understand:
Let’s try to get some knowledge on below topics in case you are not aware. Those we are already familiar with these can skip this block.
Token Based Access: Token is nothing but before accessing something we have to retrieve a token.
Example: If we try to relate with real life it will become easier to understand. Suppose we are planning to go for a movie. First we will go to some movie website and book the ticket for the movie which we have planned. After booking the tickets we will be receiving one barcode like as below.

That barcode is nothing but the Token (secret password), after going to the theatre they will be scanning this barcode if it is valid Token then we will be getting access to see the movie. One more thing we need to remember is this token is valid for only this particular show, next time when we come for other movie new valid token to be carried. Here there is no need of giving our username and password of website which we booked the tickets to the security people, just by showing the barcode will do the work. Now we have got some knowledge about how Token works.
Identity Server: Identity Server is an isolated server which will maintain the user information like usernames, passwords, roles or claims of the user etc.User will be redirected to this Identity server whenever authentication is requesting by web clients (MVC, WebAPI..etc). After Identity server validates the user if user is valid then Identity server will issue the token and redirect back to requested client. Here client doesn’t know about user credentials because while entering the user credentials in Identity server there won’t be any leakage of information into the clients, because it is completely isolated server.
Example: when we open some websites, there will an option to sign in with Google or Facebook, once if we select Google we will be redirecting into google identity server, after we provide the google credentials it will issue the token to the requested website saying that he is a valid user in our identity server and Google will provide some information to the client. So instead of providing our username, password to everyone, we will provide a token to validate our identity.
OAuth:(Open standard for Authorization): OAuth 2.0 is the industry-standard protocol for authorization. OAuth 2.0 focuses on client developer simplicity while providing specific authorization flows for web applications, desktop applications, mobile phones, and living room devices.It works over Http, so irrespective of the programming languages java, csharp, php, python.. etc. any client they deal with Http can consume these Identity server features. OAuth tells how to work with tokens, how to obtain token , what information we can include in tokens..etc. Go through this link to know more about OAuth https://oauth.net/2/
OpenID: OpenID Connect 1.0 is a simple identity layer on top of the OAuth 2.0 protocol. It allows Clients to verify the identity of the End-User based on the authentication performed by an Authorization Server, as well as to obtain basic profile information about the End-User in an interoperable and REST-like manner. OpenID Connect allows clients of all types, including Web-based, mobile, and JavaScript clients, to request and receive information about authenticated sessions and end-users. The specification suite is extensible, allowing participants to use optional features such as encryption of identity data, discovery of OpenID Providers, and session management, when it makes sense for them. Go through this link to know more about OpeinID http://openid.net/connect/
Let’s jump into the implementation Brief introduction about what we are going to build We will build isolated Identity server, once it is up and running we will build following clients which will use Identity server for Authentication. Later in Web Application we will see how we can add authorization as well.
1. WebAPI
2. Client Application using Console
3. MVC Web Application
Identity server:
Prerequisites: Visual studio 2017 with .net core 2.0
Development and Implementation:
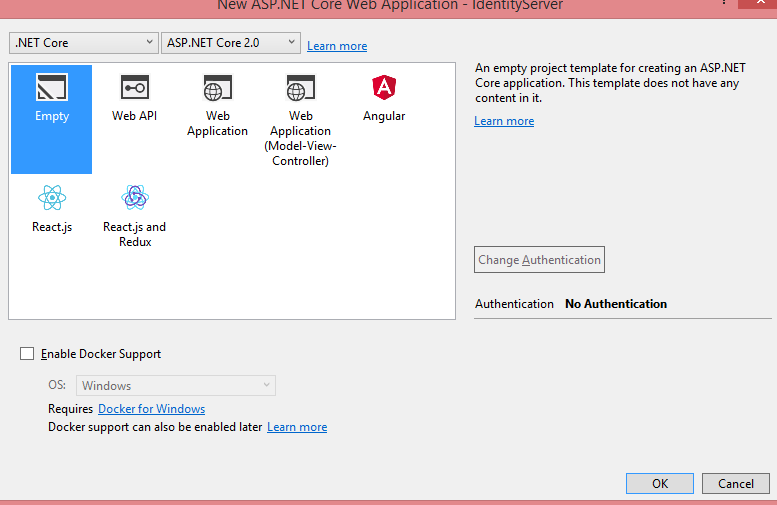
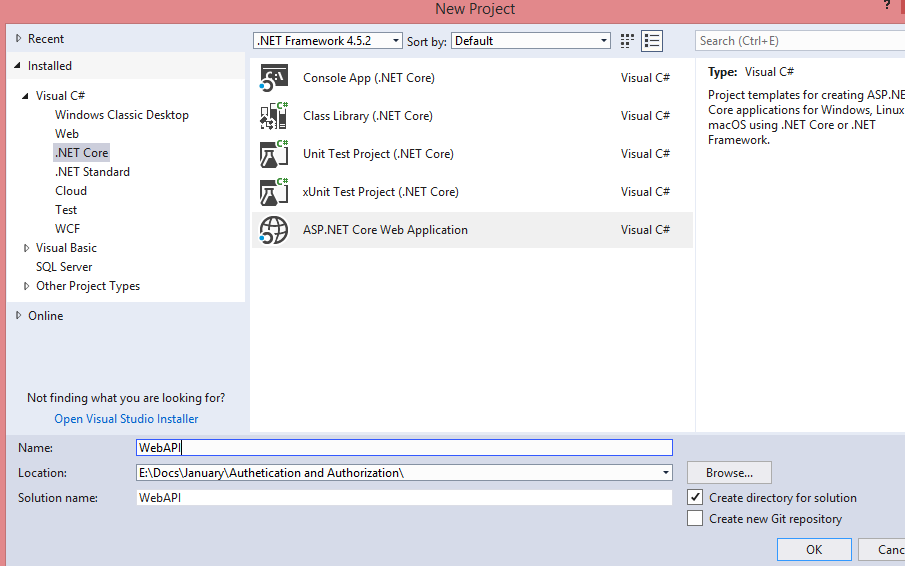
Open VS2017, select .NET Core template, select ASP.NET Core Web Application project type, and click ok.

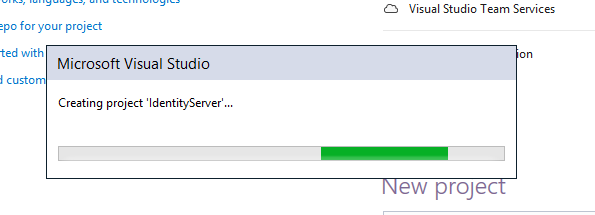
Select “Empty” template, select framework as ASP.NET Core 2.0 from dropdown, and click OK. It will create an empty .net core project
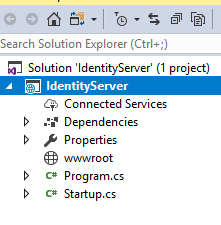
Solution explorer will be having only Starup.cs and Program.cs file
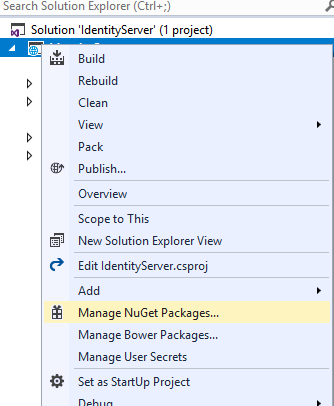
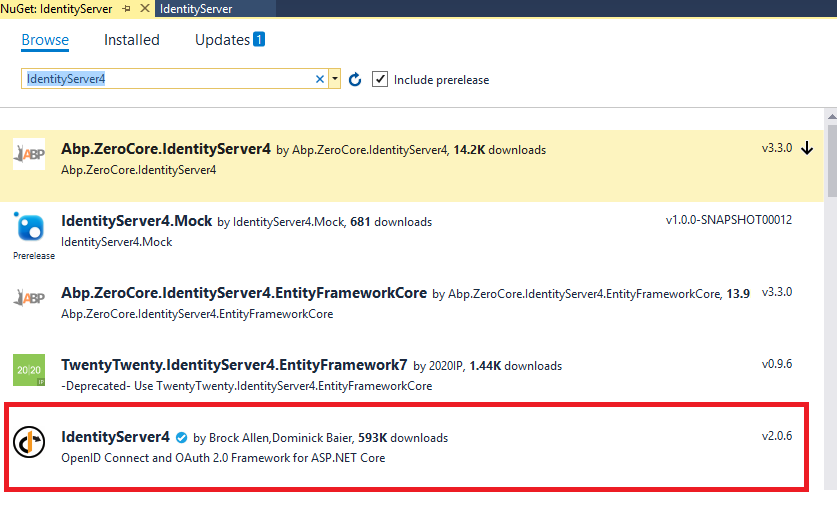
Right click on the IdentityServer project and goto “Manage NuGet Packages”
Goto Browse, type IdenityServer4 in search box and enter, it will show up IdentityServer4 related packages. Select the highlighted one by Brock Allen, Dominick package.
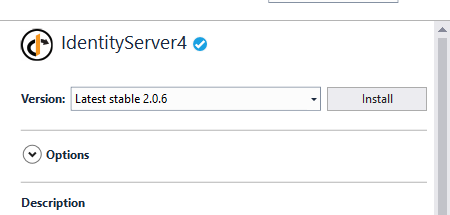
 Hit on install right side
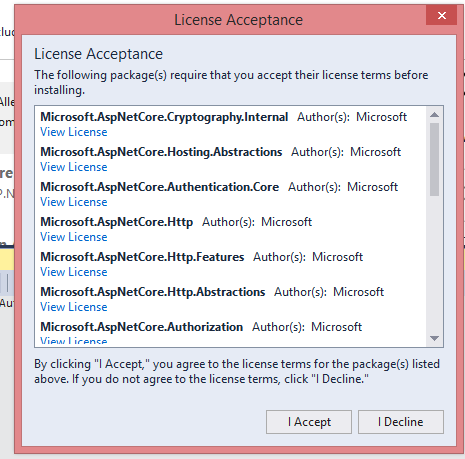
Read and Accept the License, Click on “I Accept” button. 
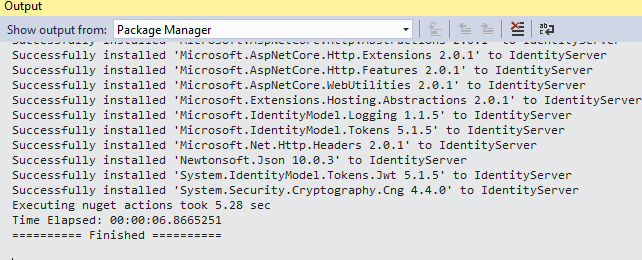
In output window it will show up successfully installed message.
Now goto Startup.cs page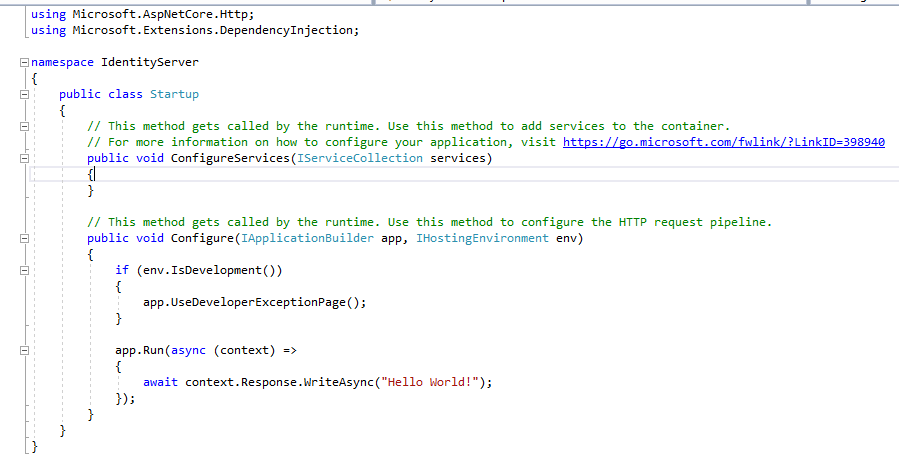 Add the middleware for IdentityServer in Configure section
app.UseIdentityServer();
Add the service to resolve the dependency in ConfigureServices section
services.AddIdentityServer().AddDeveloperSigningCredential();
That’s it now IdentityServer initial setup is done. To make sure everything is correct just paste the below code in Startup.cs page.
using Microsoft.AspNetCore.Builder;
using Microsoft.AspNetCore.Hosting;
using Microsoft.Extensions.DependencyInjection;

namespace IdentityServer
{

 public class Startup
 {

        // This method gets called by the runtime. Use this method to add services to the container.

        // For more information on how to configure your application, visit https://go.microsoft.com/fwlink/?LinkID=398940

        public void ConfigureServices(IServiceCollection services)

        {

            services.AddIdentityServer().AddDeveloperSigningCredential();

        }

        // This method gets called by the runtime. Use this method to configure the HTTP request pipeline.

        public void Configure(IApplicationBuilder app, IHostingEnvironment env)

        {

            if (env.IsDevelopment())

            {

                app.UseDeveloperExceptionPage();

            }

            app.UseIdentityServer();

        }

    }

}
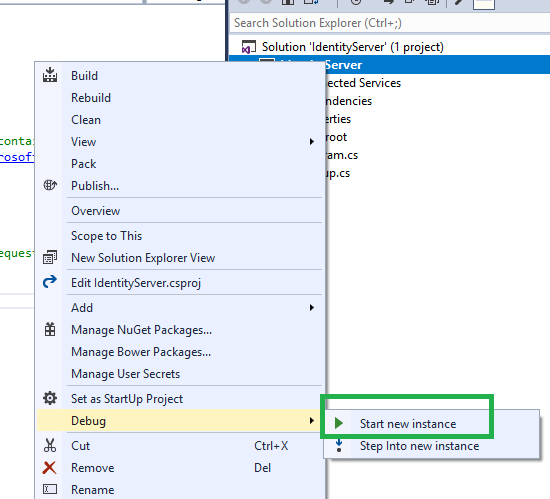
Now rightclick on Identity server, goto debug start new instance.
We will get the below error.
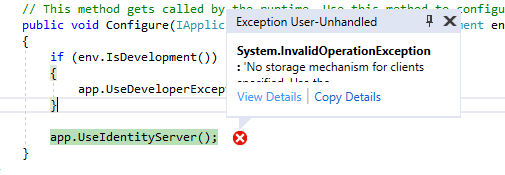
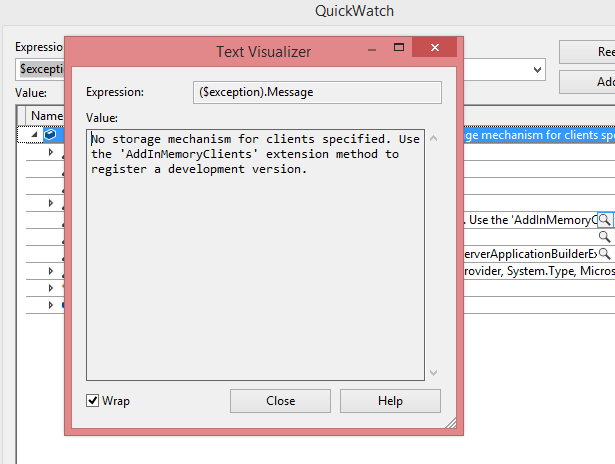
Click on View Details to see the full Exception. “No storage mechanism for clients specified. Use the 'AddInMemoryClients' extension method to register a development version.”
So it is expecting clients, let’s add InMemoryClients.
We will create a new class to define our clients. Right click, goto Add click on Class. 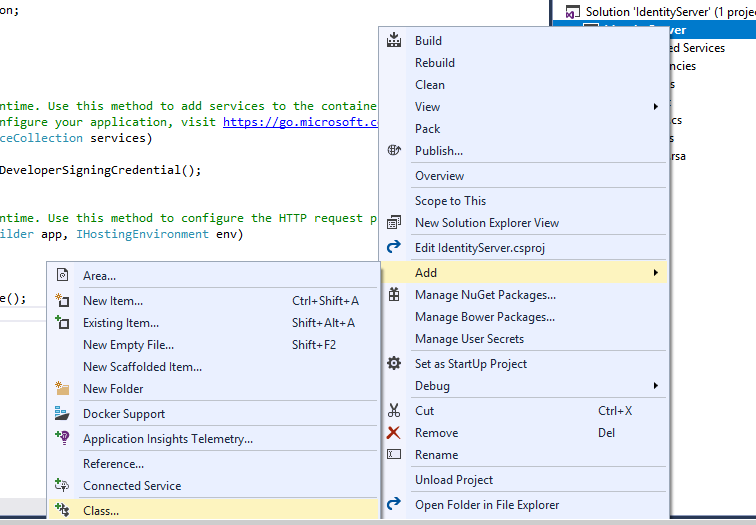 Name it as Config.cs and click on “Add”
Add the below code into Config.cs file.
using IdentityServer4.Models;

using System.Collections.Generic;

namespace IdentityServer

{

    public class Config

    {

        public static IEnumerable<Client> GetClients()

        {

            List<Client> clients = new List<Client>();

            //Client1

            clients.Add(new Client()

            {

                ClientId = "Client1",

                AllowedGrantTypes = GrantTypes.ClientCredentials,

                ClientSecrets =

                {

                    new Secret("secret".Sha256())

                }


            });

            return clients;

        }

    }

}
ConfigureService method as below.
  public void ConfigureServices(IServiceCollection services)
        {
            services.AddIdentityServer().AddDeveloperSigningCredential()
                .AddInMemoryClients(Config.GetClients());
        }
Now we have added the InMemoryClients, now let’s run the application.
We will get the below exception, click on View Details to see the full exception. “No storage mechanism for resources specified. Use the 'AddInMemoryIdentityResources' or 'AddInMemoryApiResources' extension method to register a development version.”
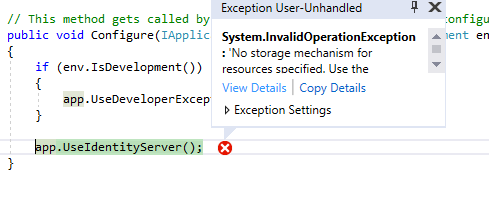
Now it is looking for API Resources, let’s add this to Config.cs class. Replace Config.cs with below code
using IdentityServer4.Models;
using System.Collections.Generic;

namespace IdentityServer
{
    public class Config
    {
        //Defining the InMemory Clients
        public static IEnumerable<Client> GetClients()
        {
            List<Client> clients = new List<Client>();

            //Client1
            clients.Add(new Client()
            {
                ClientId = "Client1",
                AllowedGrantTypes = GrantTypes.ClientCredentials,
                ClientSecrets =
                {
                    new Secret("secret".Sha256())
                }

            });

            return clients;
        }

        //Defining the InMemory API's
        public static IEnumerable<ApiResource> GetApiResources()
        {
            List<ApiResource> apiResources = new List<ApiResource>();

            apiResources.Add(new ApiResource("api1","First API"));

            return apiResources;
        }
    }
}
Now open Startup.cs page and add this apiservice to Identity service.
public void ConfigureServices(IServiceCollection services)
        {
            services.AddIdentityServer().AddDeveloperSigningCredential()
                .AddInMemoryClients(Config.GetClients())
                .AddInMemoryApiResources(Config.GetApiResources());
        }
Now let’s run the application again
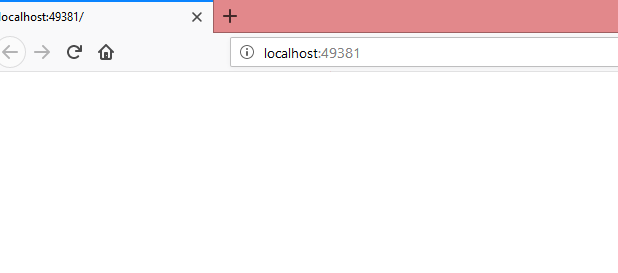
Now we don’t see any errors. Just it will display empty page in browser since we didn’t implement UI for IdentityServer.
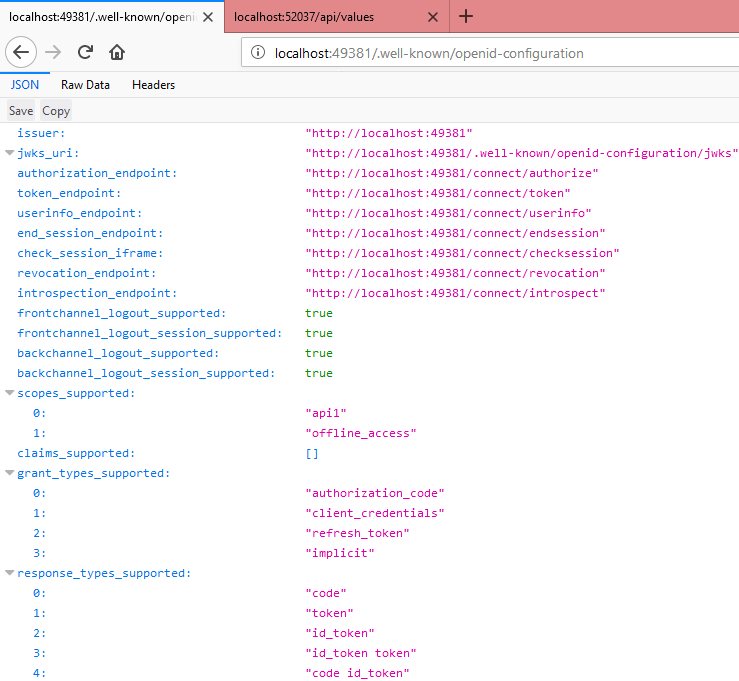
There is a url we can actually see the IdentityServer configuration related information where endpoints defined for token,authorize,userinfo etc.
Just add “/.well-known/openid-configuration” this to our localhost url, my port number here is 49381, so my updated url will be
http://localhost:49381/.well-known/openid-configuration
once if we paste this url and hit enter we will be seeing our IdentityServer details. We can see issuer url, token end point, what api’s are available.etc.
Ideally we will share this url with our clients, they will be knowing which url they should use depends on their requirement, they also will get to know what API’s are registered. 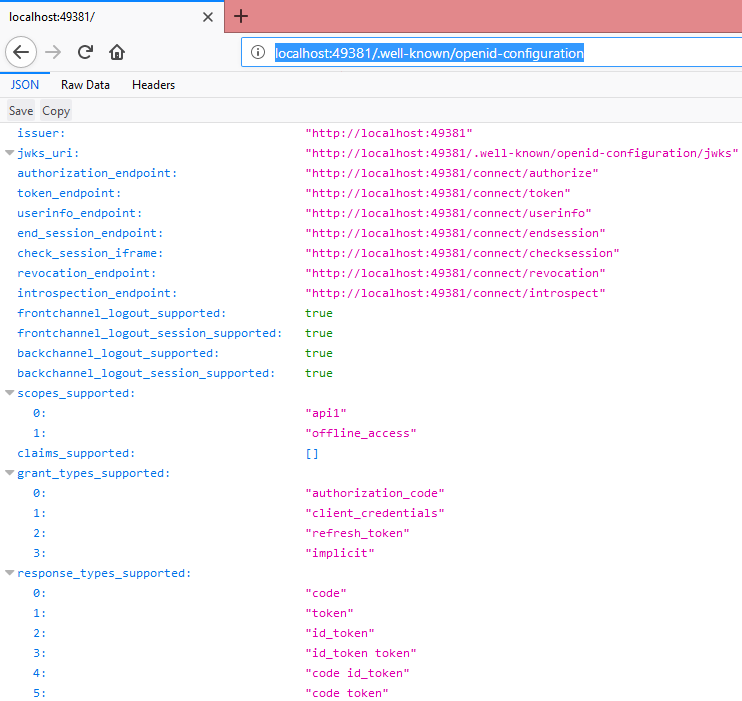
Now IdentityServer is ready. Remember the IdentityServer Address for future reference.
IdentityServer Address: http://localhost:49381
Now let’s build the API
1. WebAPI Implementation:
Now goto visual studio 2017 and create a new project ,I am naming it as WebAPI
Select WebAPI template, click OK.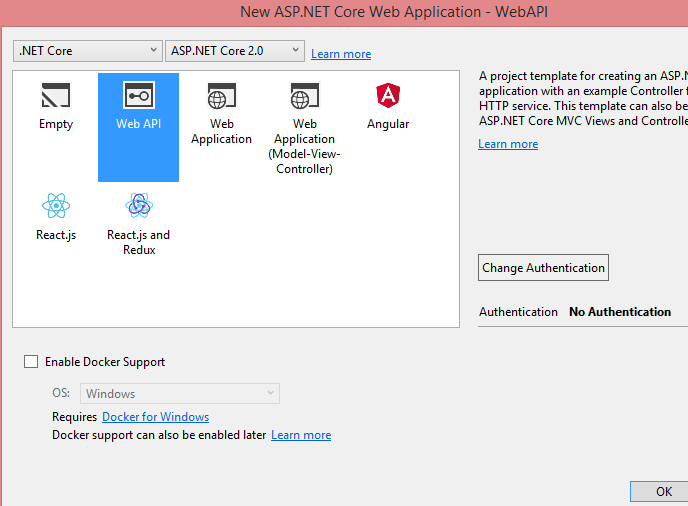
Solution Explorer will be having above files by default.
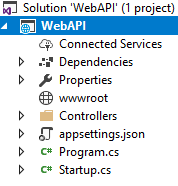
Open the ValuesController.cs file from Controllers folder. Our API is not secure. Just run the API project. 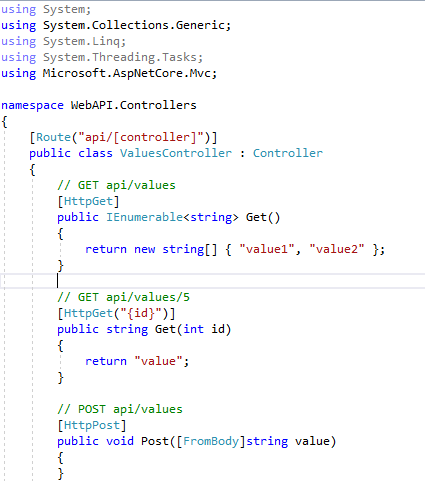
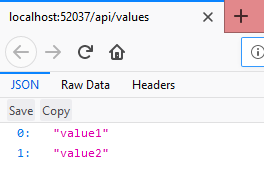
We can able to see data inside the controller method without any authorization. Remember the API url http://localhost:52037/api/values (port number may vary system to system).
Let’s add authorization to this api controller, decorate API controller with [Authorize] attribute.
namespace WebAPI.Controllers
{
    [Route("api/[controller]")]
    [Authorize]
    public class ValuesController : Controller
    {
        // GET api/values
        [HttpGet]
        public IEnumerable<string> Get()
        {
            return new string[] { "value1", "value2" };
        }
Now our API will give access only to registered clients that means they will be sending the Token, API will be validating that across Identity Server, once it is validated then it gives the access to API controller.
Client initially getting the token from IdentityServer, the same will be sending to the API, so this API must validate the token by passing it to the identityserver (http://localhost:49381),
So API should need a package (IdentityServer4.AccessTokenValidation) to do that.
Right click on the API project and goto “Manage NuGet Packages” type IdentityServer4.AccessTokenValidation in search bar and hit enter.  Accept the licence agreement
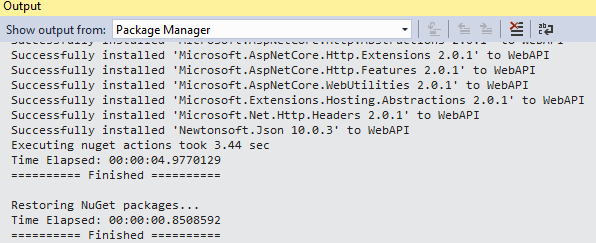
Once it is finished installation, open Startup.cs page and paste the below code.
using Microsoft.AspNetCore.Builder;
using Microsoft.AspNetCore.Hosting;
using Microsoft.Extensions.Configuration;
using Microsoft.Extensions.DependencyInjection;

namespace WebAPI
{
    public class Startup
    {
        public Startup(IConfiguration configuration)
        {
            Configuration = configuration;
        }

        public IConfiguration Configuration { get; }

        // This method gets called by the runtime. Use this method to add services to the container.
        public void ConfigureServices(IServiceCollection services)
        {
            services.AddMvcCore().AddAuthorization().AddJsonFormatters();

            services.AddAuthentication("Bearer") // it is a Bearer token
                .AddIdentityServerAuthentication(options =>
                {
                    options.Authority = "http://localhost:49381"; //Identity Server URL
                    options.RequireHttpsMetadata = false; // make it false since we are not using https
                    options.ApiName = "api1"; //api name which should be registered in IdentityServer
                });
        }

        // This method gets called by the runtime. Use this method to configure the HTTP request pipeline.
        public void Configure(IApplicationBuilder app, IHostingEnvironment env)
        {
            app.UseAuthentication(); // add the Authentication middleware

            app.UseMvc();
        }
    }
}
Things must be taken care:
Authority: here we have to give the Identityserver address
ApiName: here we have to give the same name which is there in GetApiResources() method in Config.cs file (IdentityServer Project).
Now run the API and see, it will be giving “401 Unauthorized” error. 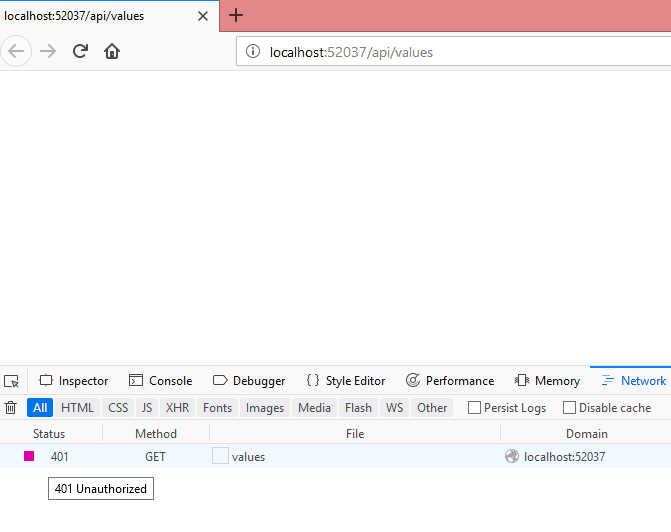
So our WebAPI is secure, it will give the access to only clients having valid token.
Now WebAPI implementation completed. Let’s build the client application.
2. Client Application Implementation:
What we are going to build:
Let’s create a simple console application, which will request a token from IdentityServer(http://localhost:49381) and calling the WebAPI(http://localhost:52037/api/values) by passing that token.
Open visual studio 2017, select “Console App”, click ok.
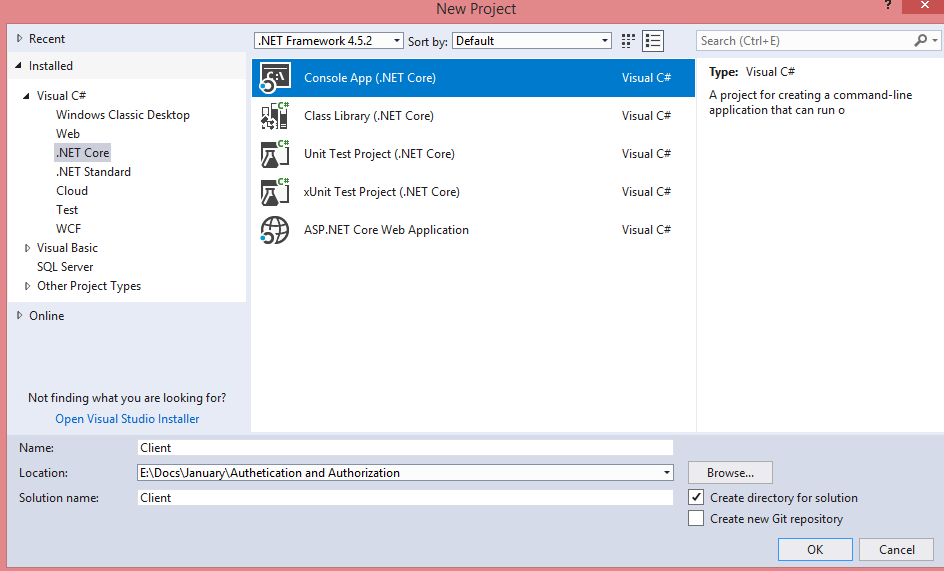
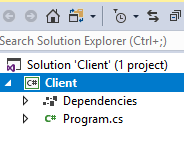
Solution explorer will have only Program.cs page. Let’s open this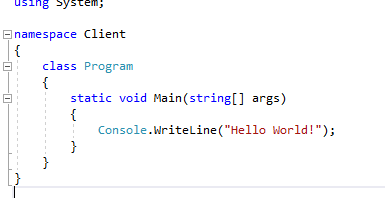
First our client wants to test the IdentityServer(http://localhost:49381) is accessible or not, if it is accessible then store that in a object to discover the endpoint of the token. To discover the IdentityServer we need to install a package called “IdentityModel”.
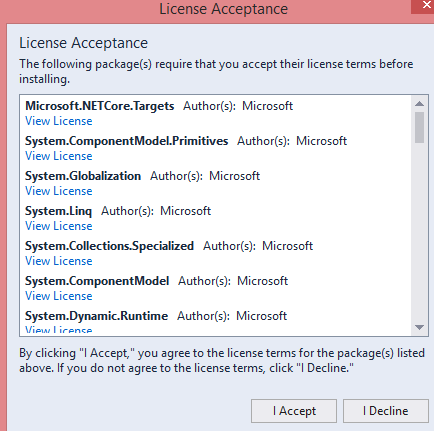
Goto NuGet package Manager, type IdentityModel in searchbox, check for the highlighted one below install it. 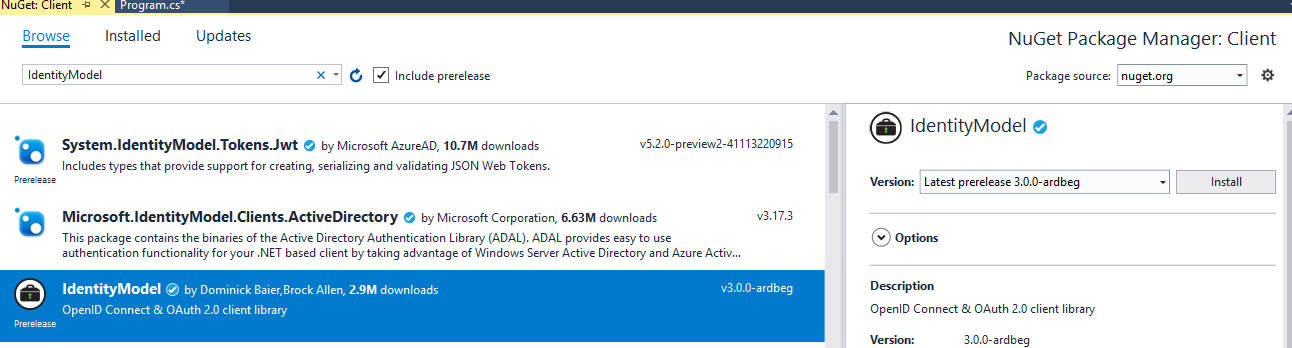 Accept the agreement
First we will call the IdentityServer by using “DiscoveryClient” class as below.
var identityServer = await DiscoveryClient.GetAsync("http://localhost:49381");
If it is giving any error then we will write the error in console, and stops the execution.
            if (identityServer.IsError)
            {
                Console.Write(identityServer.Error);
                return;
            }
Once we have the identityserver object, next step is to get the token.
First we have to define the token client by using our client details.
Note: client details are available in GetClients() method in Config.cs page of IdentityServer project.
var tokenClient = new TokenClient(identityServer.TokenEndpoint, "Client1", "secret");
withtokenClient object we will make a call to IdentityServer to receive the token for particular API.
var tokenResponse = tokenClient.RequestClientCredentialsAsync("api1");
we have to give same api name which we are going to pass this token.
So In “tokenResponse” object we have the token, now we are good with calling the api, let’s make a call to api by passing this token. We have defined in API , token is of type “Bearer”, so we will add this token to HttpClient method SetBearerToken method.
HttpClient client = new HttpClient();
client.SetBearerToken(tokenResponse.AccessToken);
Now make a call to api and display the results in console
            var response = await client.GetAsync("http://localhost:52037/api/values");
            var content = await response.Content.ReadAsStringAsync();
            Console.WriteLine(JArray.Parse(content));
            Console.ReadKey();
So final final code should be as below, paste this in Program.cs page.
using IdentityModel.Client;
using Newtonsoft.Json.Linq;
using System;
using System.Net.Http;
using System.Threading.Tasks;

namespace Client
{
    class Program
    {
static void Main(string[] args) => MainAsync().GetAwaiter().GetResult();
        private static async Task MainAsync()
        {
            var identityServer = await DiscoveryClient.GetAsync("http://localhost:49381"); //discover the IdentityServer
            if (identityServer.IsError)
            {
                Console.Write(identityServer.Error);
                return;
            }

            //Get the token
            var tokenClient = new TokenClient(identityServer.TokenEndpoint, "Client1", "secret");
            var tokenResponse = await tokenClient.RequestClientCredentialsAsync("api1");

            //Call the API

            HttpClient client = new HttpClient();
            client.SetBearerToken(tokenResponse.AccessToken);

            var response = await client.GetAsync("http://localhost:52037/api/values");
            var content = await response.Content.ReadAsStringAsync();
            Console.WriteLine(JArray.Parse(content));
            Console.ReadKey();
        }
    }
}
Now we have implemented our client. Before running this one, IdentityServer, API should be up and running.
First run the IdentityServer Project. http://localhost:49381/.well-known/openid-configuration
Next run the WebAPI Project. 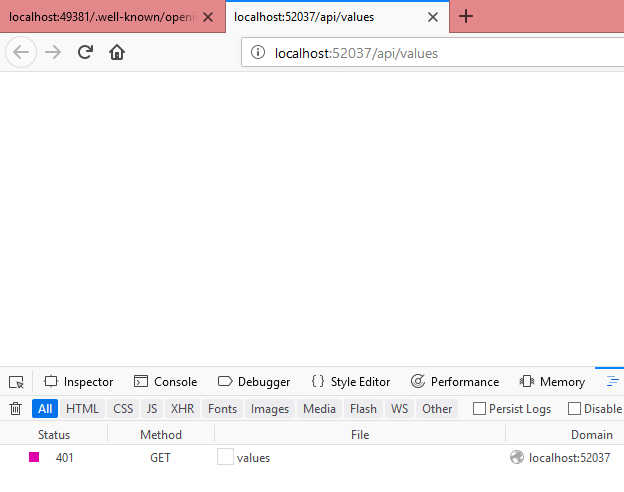
So both are up and running, now let’s run our client application. We will get the below error while getting the token.
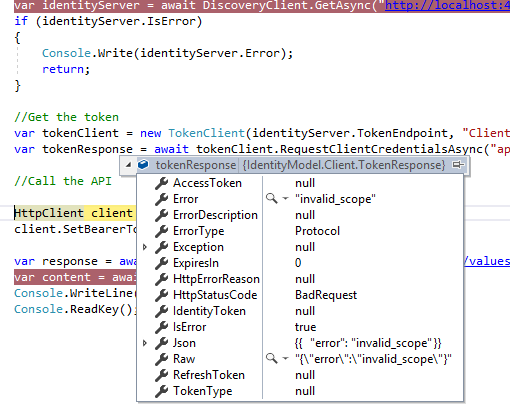
It is telling invalid scope that means, for our client “api1” is not accessible.
To fix this let’s go to Config.cs file in IdenityServer project. Add scope to our client
AllowedScopes = {"api1"}
Update the GetClients method as below
  //Defining the InMemory Clients
        public static IEnumerable<Client> GetClients()
        {
            List<Client> clients = new List<Client>();

            //Client1
            clients.Add(new Client()
            {
                ClientId = "Client1",
                AllowedGrantTypes = GrantTypes.ClientCredentials,
                ClientSecrets =
                {
                    new Secret("secret".Sha256())
                },

                AllowedScopes = {"api1"}

            });  return clients;         }
Now we have added the scope, let’s run now, again IdentityServer,WebAPI should be running before running our client.
Now our client is successfully communicate with IdentityServer as well as WebAPI.
One thing here we need to notice that we are communicating IdentityServer with only client credentials. Now we will increase the security to one more level by introducing passwords.
Goto Config.cs file in IdentityServer project.
Currently “AllowedGrantTypes” for client is ClientCredentials. Let’s update this to use passwords.
//Defining the InMemory Clients
        public static IEnumerable<Client> GetClients()
        {
            List<Client> clients = new List<Client>();

            //Client1
            clients.Add(new Client()
            {
                ClientId = "Client1",
                AllowedGrantTypes = GrantTypes.ResourceOwnerPassword,
                ClientSecrets =
                {
                    new Secret("secret".Sha256())
                },

                AllowedScopes = {"api1"}

            });

            return clients;
        }
Define some test users in Config.cs page.
Add the namespace using IdentityServer4.Test; Copy paste the below method in Config.cs page,
//Defining the InMemory User's
        public static List<TestUser> GetUsers()
        {
            List<TestUser> testUsers = new List<TestUser>();

            testUsers.Add(new TestUser()
            {
                SubjectId="1",
                Username="satya",
                Password="password"
            });

            return testUsers;
        }
In Startup.cs page add these GetUsers method in ConfigureServices method.
public void ConfigureServices(IServiceCollection services)
        {
            services.AddIdentityServer().AddDeveloperSigningCredential()
                .AddInMemoryClients(Config.GetClients())
                .AddInMemoryApiResources(Config.GetApiResources())
                .AddTestUsers(Config.GetUsers());
        }
Now goto Client Application and get the token by using this user credentials.
Open Program.cs page in Client, replace with the below code.
using IdentityModel.Client;
using Newtonsoft.Json.Linq;
using System;
using System.Net.Http;
using System.Threading.Tasks;

namespace Client
{
    class Program
    {
        static void Main(string[] args) => MainAsync().GetAwaiter().GetResult();

        private static async Task MainAsync()
        {
            var identityServer = await DiscoveryClient.GetAsync("http://localhost:49381"); //discover the IdentityServer
            if (identityServer.IsError)
            {
                Console.Write(identityServer.Error);
                return;
            }

            //Get the token
            var tokenClient = new TokenClient(identityServer.TokenEndpoint, "Client1", "secret");
            //var tokenResponse = await tokenClient.RequestClientCredentialsAsync("api1");
            var tokenResponse = await tokenClient.RequestResourceOwnerPasswordAsync("satya", "password", "api1");

            //Call the API

            HttpClient client = new HttpClient();
            client.SetBearerToken(tokenResponse.AccessToken);

            var response = await client.GetAsync("http://localhost:52037/api/values");
            var content = await response.Content.ReadAsStringAsync();
            Console.WriteLine(JArray.Parse(content));
            Console.ReadKey();
}
    }
}
We have modified only tokenResponse type.
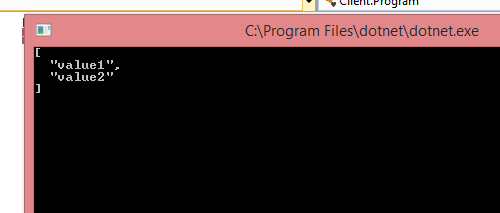
Once identityserver, webapi run and up, run the client application.
We can see the below output. 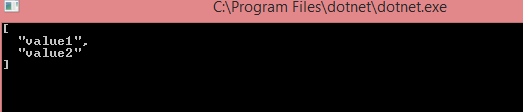
Right now IdentityServer doesn’t have any UI for Login, Logout etc. IdentityServer4 is providing MVC- based sample UI that we can use as a starting point.
Goto this below url https://github.com/IdentityServer/IdentityServer4.Quickstart.UI/tree/release
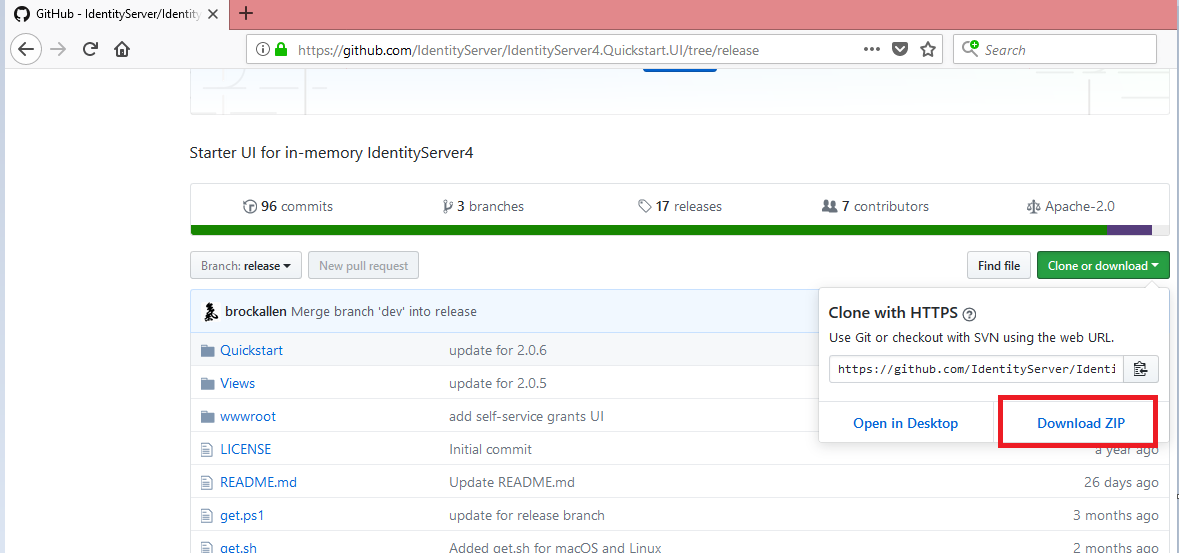
Click on “Download ZIP”
Extract the files from zip as below
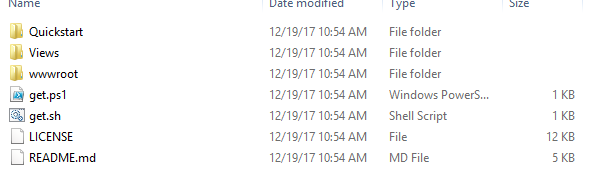
Copy Quickstart,Views and wwwroot folder, paste it into IdentityServer root folder as below. 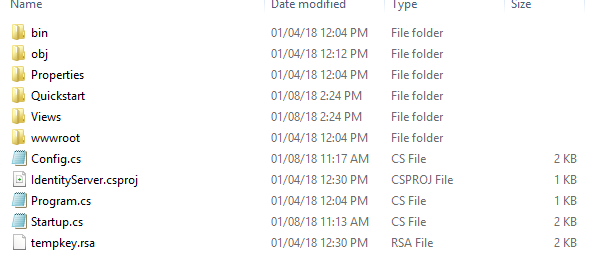
Since it is MVC, we need to add middleware and services in Startup.cs page.
Replace Startup.cs page with below code.
using Microsoft.AspNetCore.Builder;
using Microsoft.AspNetCore.Hosting;
using Microsoft.Extensions.DependencyInjection;

namespace IdentityServer
{
    public class Startup
    {
        // This method gets called by the runtime. Use this method to add services to the container.
        // For more information on how to configure your application, visit https://go.microsoft.com/fwlink/?LinkID=398940
        public void ConfigureServices(IServiceCollection services)
        {
            services.AddMvc();

            services.AddIdentityServer().AddDeveloperSigningCredential()
                .AddInMemoryClients(Config.GetClients())
                .AddInMemoryApiResources(Config.GetApiResources())
                .AddTestUsers(Config.GetUsers());
        }

        // This method gets called by the runtime. Use this method to configure the HTTP request pipeline.
        public void Configure(IApplicationBuilder app, IHostingEnvironment env)
        {
            if (env.IsDevelopment())
            {
                app.UseDeveloperExceptionPage();
            }

            app.UseIdentityServer();
            app.UseStaticFiles();
            app.UseMvcWithDefaultRoute();
        }
    }
}
Now run the “IdentityServer” We can see the beautiful default IdentityServer4, click on second line(manage your stored grants).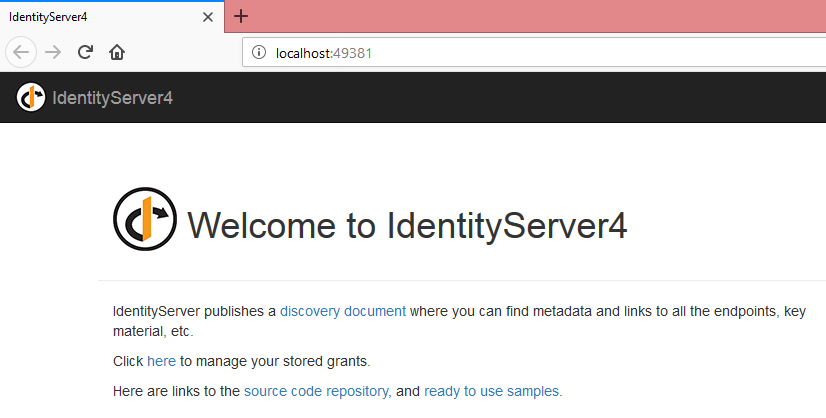
This is already developed login page with all the required features, it will have validations, login mechanism to validate the username, password, logout etc.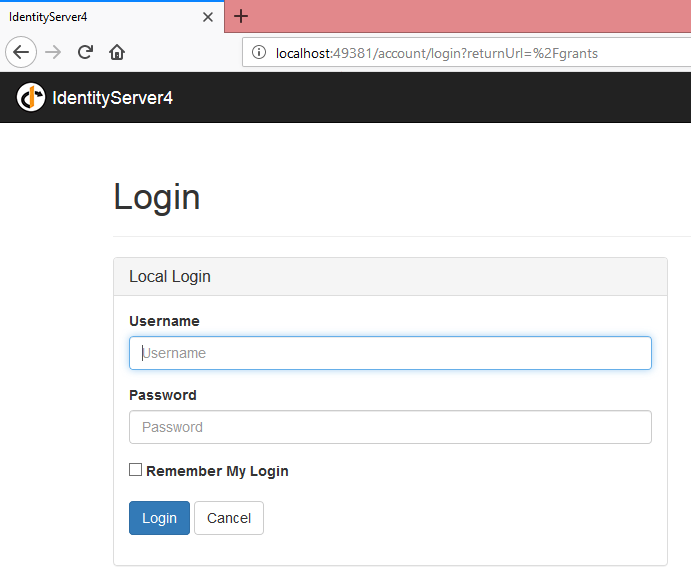
Just try to enter some wrong values in username, password and click on login page. 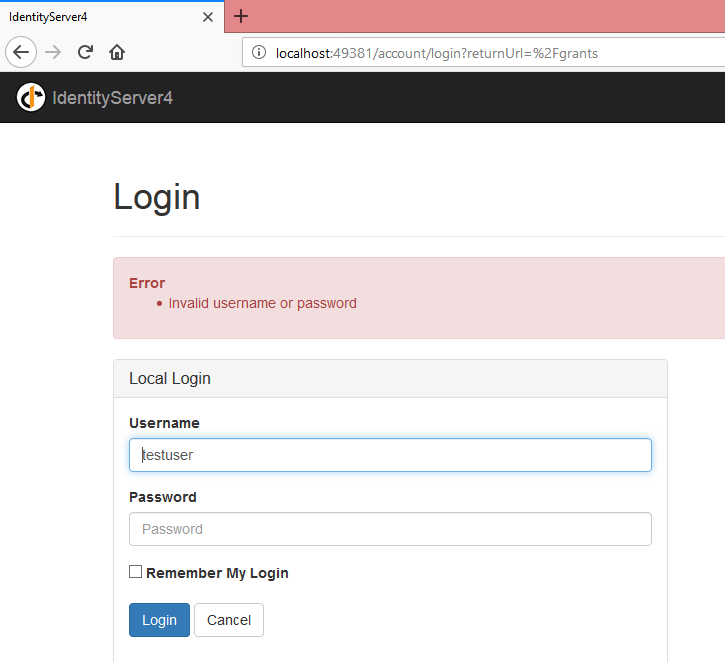 It is validated across our GetUsers(), and displaying error messages.
Now provide the correct credentials.  Now we can see the Username and below Logout button.
So boiler plate is ready, which we can use to integrate with any other applications. We can even modify css, html and functionality as per our project requirement.
3. MVC Web Application:
Now let’s create a MVC Web Application for Authentication and Authorization we will use this centralized IdentityServer.
We will address the below points.
1. Redirect the User to IdentityServer whenever MVC application is requesting Authentication.
2. Once Authentication success in IdentityServer, IdentityServer will redirect the User to MVC application with required details.
Open Visual Studio new instance, go to New-> Project
Select “ASP.NET Core Web Application” project. Name it as MVCWebApplication, click on OK.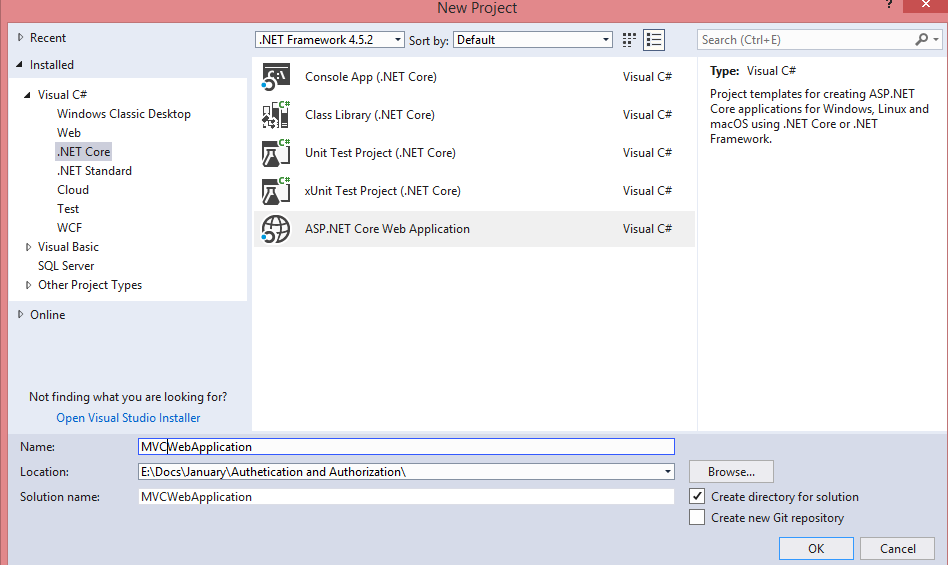
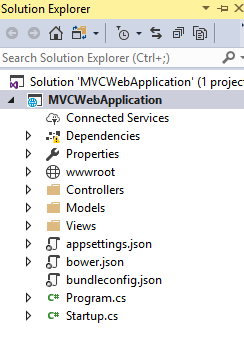
Select the below template click OK. Solution Explorer will be having below files
To use IdentityServer for Authentication, we need to update the Startup.cs page. Paste the below code Startup.cs page.
using Microsoft.AspNetCore.Builder;
using Microsoft.AspNetCore.Hosting;
using Microsoft.Extensions.Configuration;
using Microsoft.Extensions.DependencyInjection;

namespace MVCWebApplication
{
    public class Startup
    {
        public Startup(IConfiguration configuration)
        {
            Configuration = configuration;
        }

        public IConfiguration Configuration { get; }

        // This method gets called by the runtime. Use this method to add services to the container.
        public void ConfigureServices(IServiceCollection services)
        {
            services.AddMvc();

            services.AddAuthentication(options =>
            {
                options.DefaultScheme = "Cookies";
                options.DefaultChallengeScheme = "oidc";
            })
            .AddCookie("Cookies")
            .AddOpenIdConnect("oidc", options =>
            {
                options.SignInScheme = "Cookies";

                options.Authority = "http://localhost:49381/";
                options.RequireHttpsMetadata = false;

                options.ClientId = "mvc";
                options.SaveTokens = true;
            });

        }

        // This method gets called by the runtime. Use this method to configure the HTTP request pipeline.
        public void Configure(IApplicationBuilder app, IHostingEnvironment env)
        {
            if (env.IsDevelopment())
            {
                app.UseDeveloperExceptionPage();
                app.UseBrowserLink();
            }
            else
            {
                app.UseExceptionHandler("/Home/Error");
            }

            app.UseAuthentication();

            app.UseStaticFiles();

            app.UseMvc(routes =>
            {
                routes.MapRoute(
                    name: "default",
                    template: "{controller=Home}/{action=Index}/{id?}");
            });
        }
    }
}
Note: options.Authority = "http://localhost:49381/"; it should be IdentityServer address.
Now run the application and get the MVC Web application url. I have got http://localhost:62024
Note down Url. 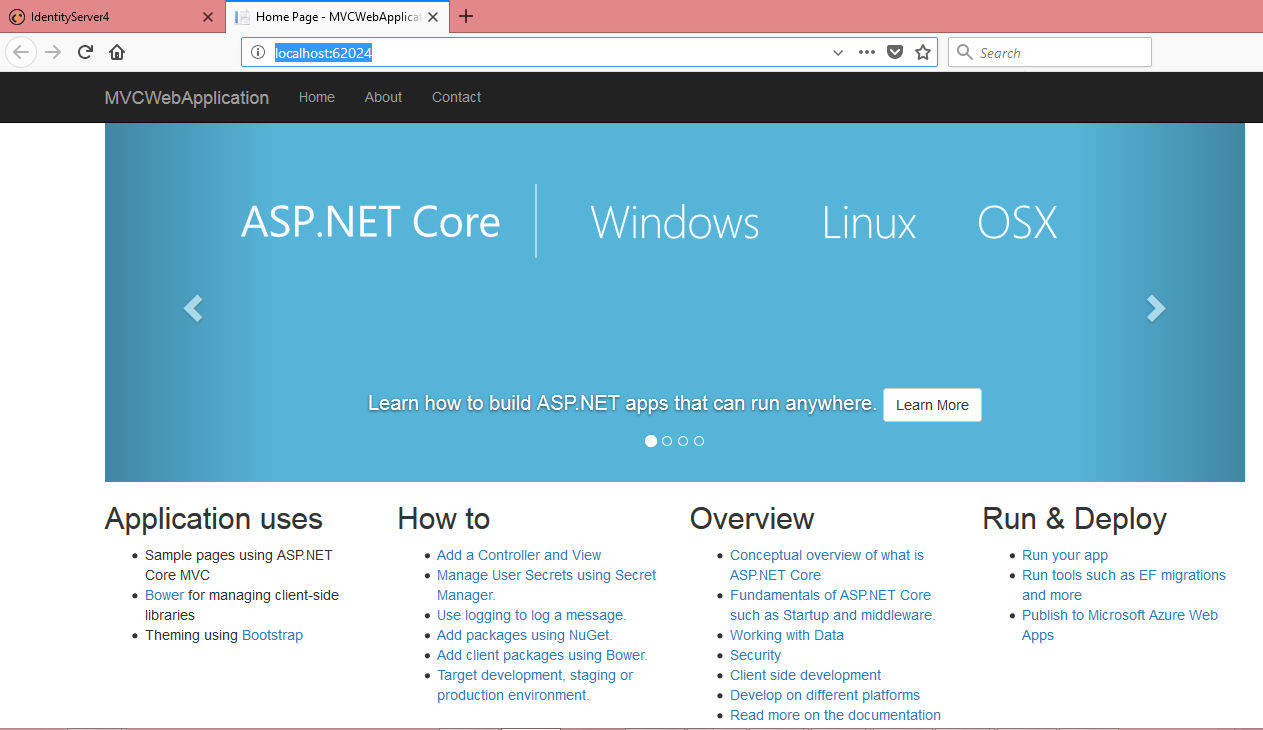 Now we need to make some changes in IdentityServer to use this MVC application.
Open Config.cs file and replace with below code.
using IdentityServer4;
using IdentityServer4.Models;
using IdentityServer4.Test;
using System.Collections.Generic;

namespace IdentityServer
{
    public class Config
    {
        //Defining the InMemory Clients
        public static IEnumerable<Client> GetClients()
        {
            List<Client> clients = new List<Client>();

            //Client1
            clients.Add(new Client()
            {
                ClientId = "Client1",
                AllowedGrantTypes = GrantTypes.ResourceOwnerPassword,
                ClientSecrets =
                {
                    new Secret("secret".Sha256())
                },

                AllowedScopes = { "api1" }

            });

            //Client for MVC
            clients.Add(new Client()
            {
                ClientId = "mvc",
                ClientName = "MVC",
                AllowedGrantTypes = GrantTypes.Implicit,

                // where to redirect to after login
                RedirectUris = { "http://localhost:62024/signin-oidc" },

                // where to redirect to after logout
                PostLogoutRedirectUris = { "http://localhost:62024/signout-callback-oidc" },

                AllowedScopes = new List<string>
                 {
                     IdentityServerConstants.StandardScopes.OpenId,
                     IdentityServerConstants.StandardScopes.Profile
                 }

            });

            return clients;
        }

        //Defining the InMemory API's
        public static IEnumerable<ApiResource> GetApiResources()
        {
            List<ApiResource> apiResources = new List<ApiResource>();

            apiResources.Add(new ApiResource("api1", "First API"));

            return apiResources;
        }

        //Defining the InMemory User's
        public static List<TestUser> GetUsers()
        {
            List<TestUser> testUsers = new List<TestUser>();

            testUsers.Add(new TestUser()
            {
                SubjectId = "1",
                Username = "satya",
                Password = "password"
            });

            return testUsers;
        }

        //Support for OpenId connectivity scopes
        public static IEnumerable<IdentityResource> GetIdentityResources()
        {
            List<IdentityResource> resources = new List<IdentityResource>();

            resources.Add(new IdentityResources.OpenId()); // Support for the OpenId
            resources.Add(new IdentityResources.Profile()); // To get the profile information

            return resources;
        }
    }
}
We have added new method GetIdentityResources() to support OpenId with mvc application.
We have added new client for mvc application.
Note:replace this url http://localhost:62024/ with your mvc url
Now we have register this method in Startup.cs page.
Replace Startup.cs page with below code.
using Microsoft.AspNetCore.Builder;
using Microsoft.AspNetCore.Hosting;
using Microsoft.Extensions.DependencyInjection;

namespace IdentityServer
{
    public class Startup
    {
        // This method gets called by the runtime. Use this method to add services to the container.
        // For more information on how to configure your application, visit https://go.microsoft.com/fwlink/?LinkID=398940
        public void ConfigureServices(IServiceCollection services)
        {
            services.AddMvc();

            services.AddIdentityServer().AddDeveloperSigningCredential()
                .AddInMemoryClients(Config.GetClients())
                .AddInMemoryApiResources(Config.GetApiResources())
                .AddTestUsers(Config.GetUsers())
                .AddInMemoryIdentityResources(Config.GetIdentityResources());
        }

        // This method gets called by the runtime. Use this method to configure the HTTP request pipeline.
        public void Configure(IApplicationBuilder app, IHostingEnvironment env)
        {
            if (env.IsDevelopment())
            {
                app.UseDeveloperExceptionPage();
            }

            app.UseIdentityServer();
            app.UseStaticFiles();
            app.UseMvcWithDefaultRoute();
        }
    }
}
Now run this IdentityServer 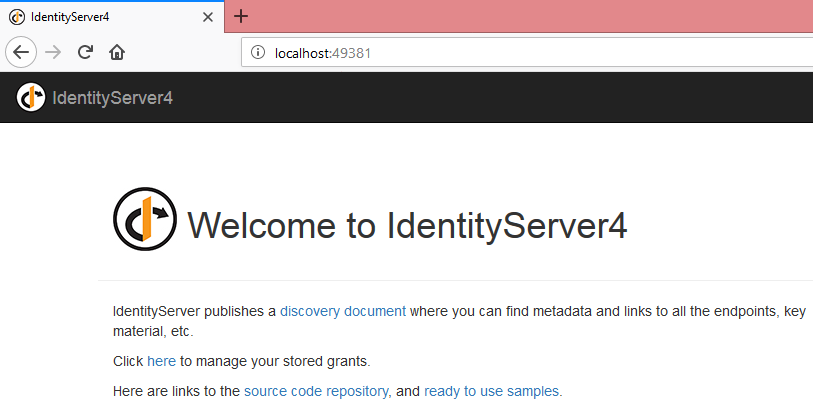 Go to HomeController.cs page in MVC Application and add Authorize attribute to Controller.
    [Authorize]
    public class HomeController : Controller
    {
        public IActionResult Index()
        {
            return View();
        }
Now run the MVC Application. If IdentityServer is not running then we will get the below error page. 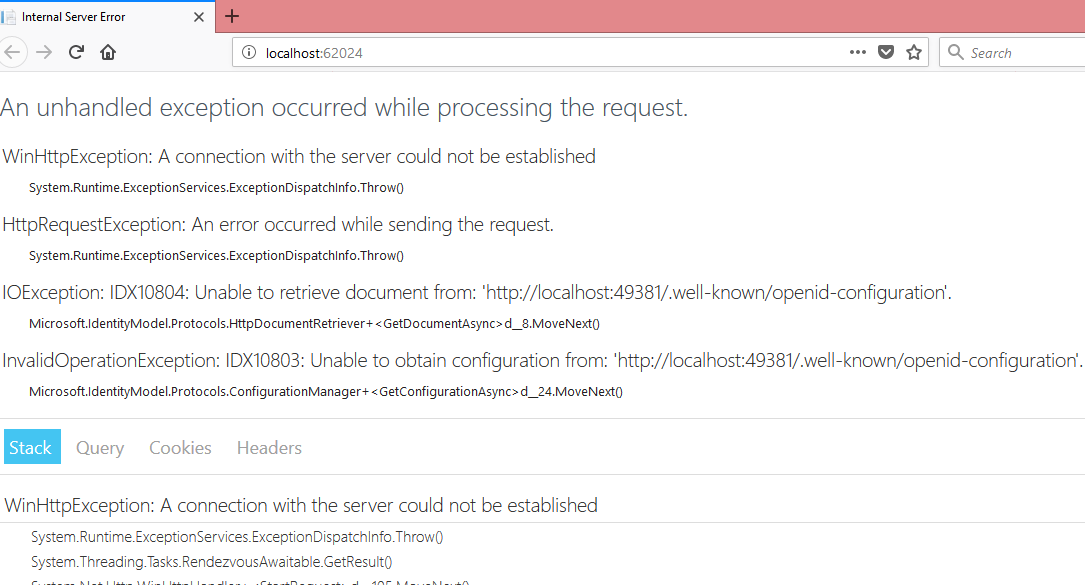
If IdentityServer is available then we will get the login screen as below 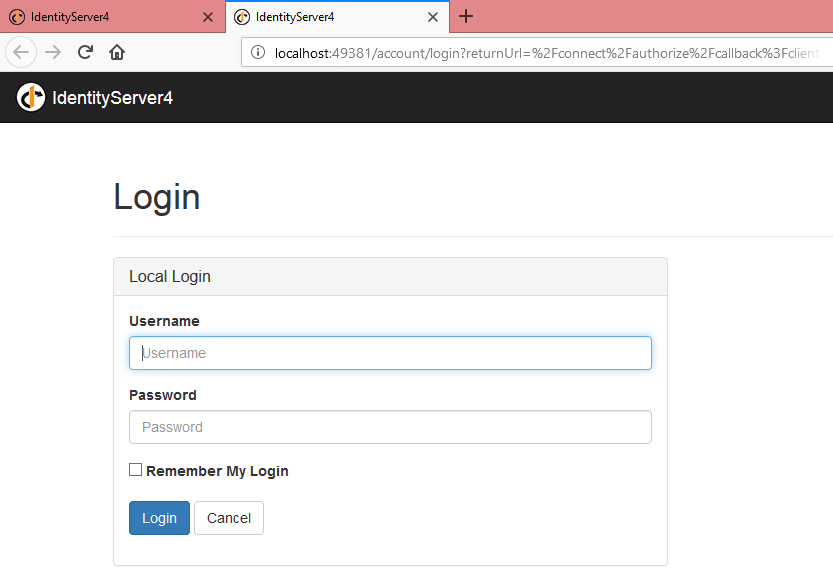
Now enter the correct user credentials, click on login, it will ask whether you want to share the details with MVC application or not. Click on Yes. 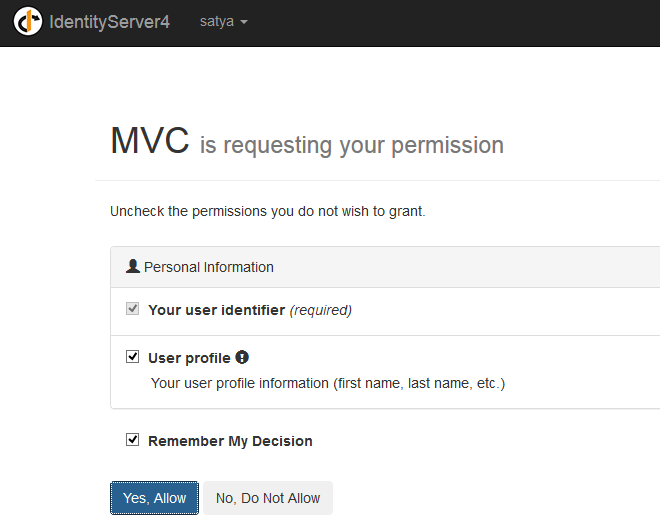
Now we can see our HomeController Index method 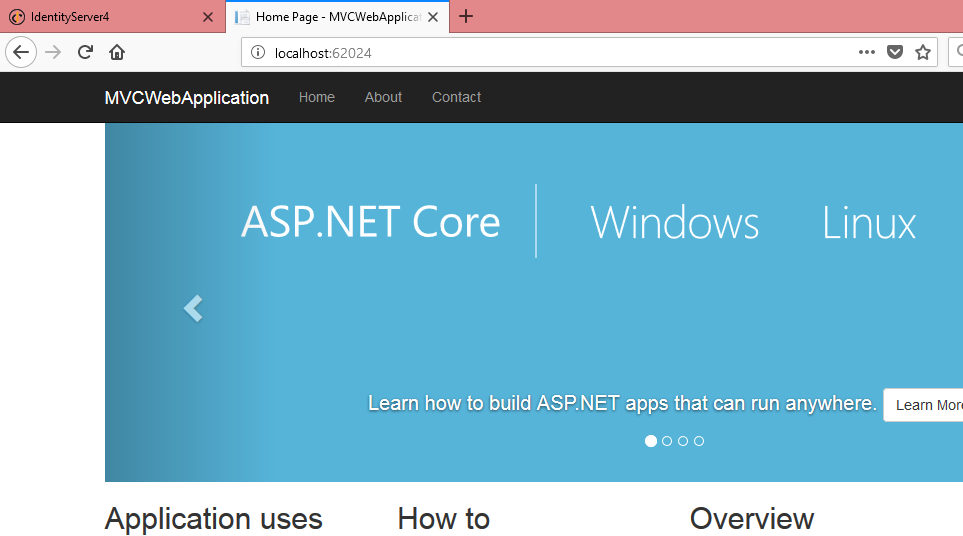
Now we have tested Authentication successfully.
Authorization:
Let’s test Authorization by adding some code.
In identity server we have to create a claims to authorize user roles, In MVC Web Application we have to create a policies to get those claims. So using Policy we will give access to particular resource in MVC application.
IdentityServer: In IdentityServer add “roles” Identiry Resoruce new IdentityResource("roles",new[] {"role"} )
Let’s have 2 users one is admin and other one is editor
new TestUser()
                {
                    SubjectId="1",
                    Username="admin",
                    Password="password",

                    Claims = new List<Claim>
                     {
                         new Claim("role", "admin"),
                     }
                 },
                new TestUser()
                {
                    SubjectId="2",
                    Username="editor",
                    Password="password",

                     Claims = new List<Claim>
                     {
                         new Claim("role", "editor"),
                     }
                }
In MVC Client add “roles” in AllowedScopes
AllowedScopes=new List<string>
                    {
                        IdentityServerConstants.StandardScopes.OpenId,
                        IdentityServerConstants.StandardScopes.Profile,
                        "roles"
                    },

   AlwaysIncludeUserClaimsInIdToken = true
Replace Config.cs with below code
using IdentityServer4;
using IdentityServer4.Models;
using IdentityServer4.Test;
using System.Collections.Generic;
using System.Security.Claims;

namespace IdentityServer
{
    public class Config
    {
        //Defining the InMemory Clients
        public static IEnumerable<Client> GetClients()
        {
            List<Client> clients = new List<Client>();

            //Client1
            clients.Add(new Client()
            {
                ClientId = "Client1",
                AllowedGrantTypes = GrantTypes.ResourceOwnerPassword,
                ClientSecrets =
                {
                    new Secret("secret".Sha256())
                },

                AllowedScopes = { "api1" }

            });

            //Client for MVC
            clients.Add(new Client()
            {
                ClientId = "mvc",
                ClientName = "MVC",
                AllowedGrantTypes = GrantTypes.Implicit,

                // where to redirect to after login
                RedirectUris = { "http://localhost:62024/signin-oidc" },

                // where to redirect to after logout
                PostLogoutRedirectUris = { "http://localhost:62024/signout-callback-oidc" },

                AllowedScopes = new List<string>
                 {
                     IdentityServerConstants.StandardScopes.OpenId,
                     IdentityServerConstants.StandardScopes.Profile,
                      "roles"
                 },
                AlwaysIncludeUserClaimsInIdToken = true //It should be true to send Claims with token

            });

            return clients;
        }

        //Defining the InMemory API's
        public static IEnumerable<ApiResource> GetApiResources()
        {
            List<ApiResource> apiResources = new List<ApiResource>();

            apiResources.Add(new ApiResource("api1", "First API"));

            return apiResources;
        }

        //Defining the InMemory User's
        public static List<TestUser> GetUsers()
        {
            return new List<TestUser>()
            {
                new TestUser()
                {
                    SubjectId="1",
                    Username="admin",
                    Password="password",

                    Claims = new List<Claim>
                     {
                         new Claim("role", "admin"),
                     }
                 },
                new TestUser()
                {
                    SubjectId="2",
                    Username="editor",
                    Password="password",

                     Claims = new List<Claim>
                     {
                         new Claim("role", "editor"),
                     }
                }
            };
        }

        //Support for OpenId connectivity scopes
        public static IEnumerable<IdentityResource> GetIdentityResources()
        {
            List<IdentityResource> resources = new List<IdentityResource>();

            resources.Add(new IdentityResources.OpenId()); // Support for the OpenId
            resources.Add(new IdentityResources.Profile()); // To get the profile information
            resources.Add(new IdentityResource("roles", new[] { "role" }));//To Support Roles

            return resources;
        }
    }
}
IdentityServer is ready to send the roles.
Now go to MVC application Startup.cs page, create a policies for these roles
services.AddAuthorization(options =>
            {
                options.AddPolicy("All", policy => policy.RequireRole("admin", "editor"));
                options.AddPolicy("Admin", policy => policy.RequireRole("admin"));
            });
Here we have created 2 policies
1. All- It is applicable for both admin, edit
2. Admin- It is applicable for only admin role.
Replace the below code in Startup.cs page in MVC web applicaton.
using Microsoft.AspNetCore.Builder;
using Microsoft.AspNetCore.Hosting;
using Microsoft.Extensions.Configuration;
using Microsoft.Extensions.DependencyInjection;

namespace MVCWebApplication
{
    public class Startup
    {
        public Startup(IConfiguration configuration)
        {
            Configuration = configuration;
        }

        public IConfiguration Configuration { get; }

        // This method gets called by the runtime. Use this method to add services to the container.
        public void ConfigureServices(IServiceCollection services)
        {
            services.AddMvc();

            //Admin role can access both admin as well as editor resources
            //Editor role can access only ediotr resources, admin resources are not available for editor
            services.AddAuthorization(options =>
            {
                options.AddPolicy("All", policy => policy.RequireRole("admin", "editor"));
                options.AddPolicy("Admin", policy => policy.RequireRole("admin"));
            });

            services.AddAuthentication(options =>
            {
                options.DefaultScheme = "Cookies";
                options.DefaultChallengeScheme = "oidc";
            })
            .AddCookie("Cookies")
            .AddOpenIdConnect("oidc", options =>
            {
                options.SignInScheme = "Cookies";

                options.Authority = "http://localhost:49381/";
                options.RequireHttpsMetadata = false;

                options.ClientId = "mvc";
                options.Scope.Add("roles");
                options.SaveTokens = true;
            });

        }

        // This method gets called by the runtime. Use this method to configure the HTTP request pipeline.
        public void Configure(IApplicationBuilder app, IHostingEnvironment env)
        {
            if (env.IsDevelopment())
            {
                app.UseDeveloperExceptionPage();
                app.UseBrowserLink();
            }
            else
            {
                app.UseExceptionHandler("/Home/Error");
            }

            app.UseAuthentication();

            app.UseStaticFiles();

            app.UseMvc(routes =>
            {
                routes.MapRoute(
                    name: "default",
                    template: "{controller=Home}/{action=Index}/{id?}");
            });
        }
    }
}
Now goto HomeController.cs page, add these policies
  [Authorize(Policy = "All")]
        public IActionResult Index()
        {
            return View();
        }

        [Authorize(Policy = "Admin")]
        public IActionResult About()
        {
            ViewData["Message"] = "Your application description page.";

            return View();
        }
Index - roles (admin, editor)
About – roles (admin)
Index method can be accessible by either admin or editor, but about method can be accessible only by admin method.
Since we are using cookies, we have to implement the logout functionality also to test the different roles.
Add the below method to HomeController.cs page
  public async Task Logout()
        {
            await HttpContext.SignOutAsync("Cookies");
            await HttpContext.SignOutAsync("oidc");
        }
Goto _Layout.cshtml page
<li><a asp-area="" asp-controller="Home" asp-action="Contact">Contact</a></li>
Update the above line as below
<li><a asp-area="" asp-controller="Home" asp-action="Logout">Logout</a></li>
First IdentityServer should be up and running.

Now run the MVC Web Application.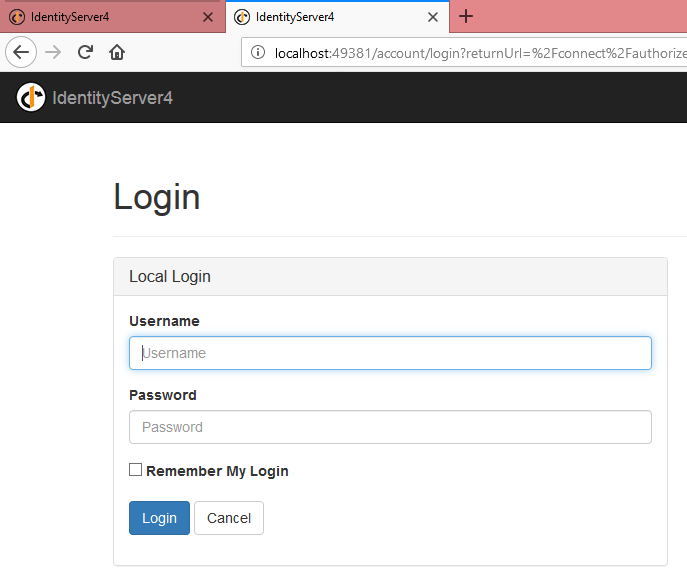
First we will test the editor functionality.
Username: editor
Password:password
He can access only Index but not About method. Let’s test this. 
Enter the credentials, click on Login button. 
Click on Yes 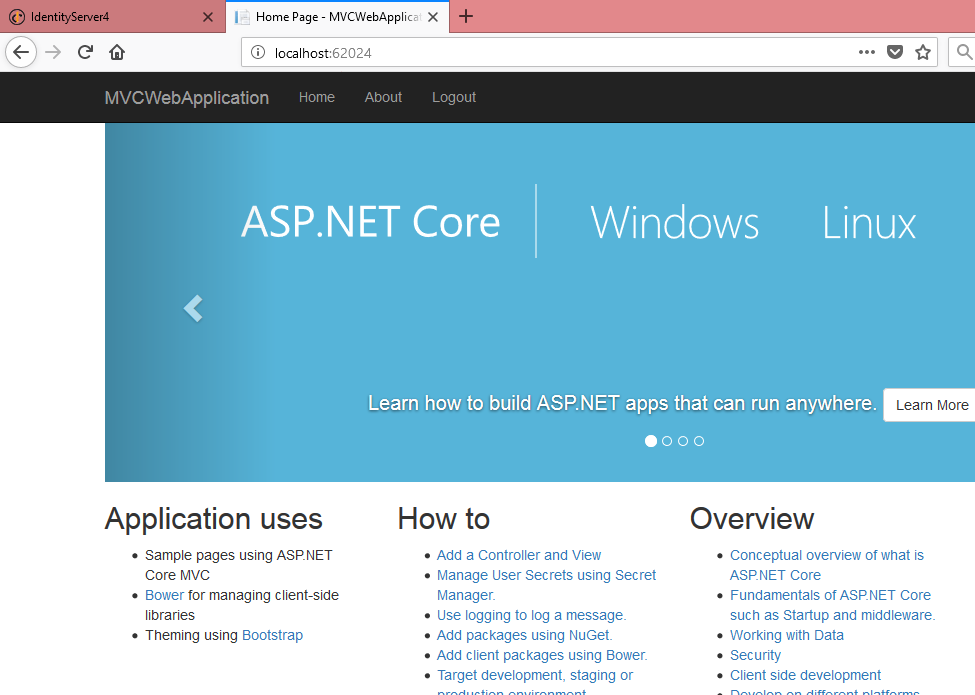 He is successfully authenticated and authorized to access the Index method.
Now click on About link. 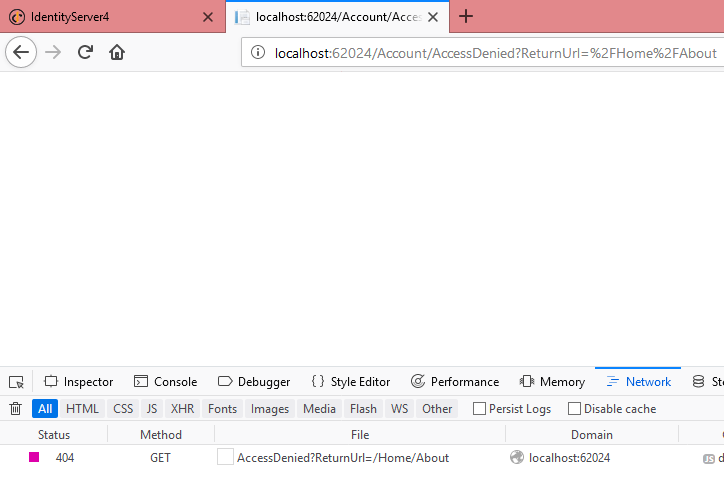 We can see “AccessDenied” message.
Now click on logout link.
Now we will test the admin role.
Username:admin
Password:password
He can access both Index as well as about
Let’s test this 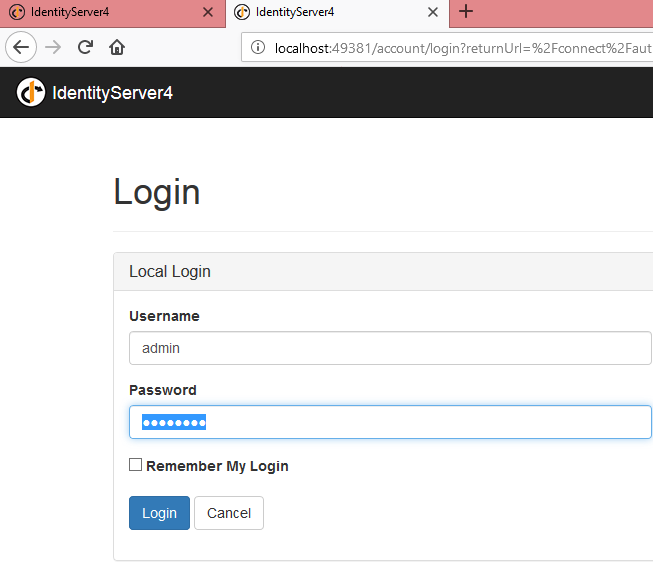
Enter the admin credentials and click on Login.
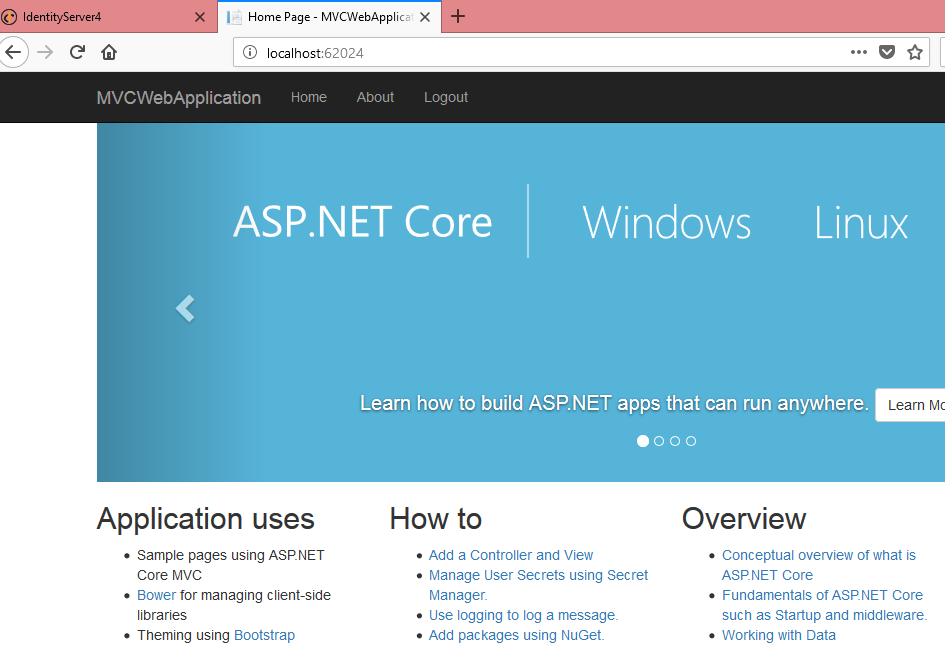
We can see the Index method. Now click on About link 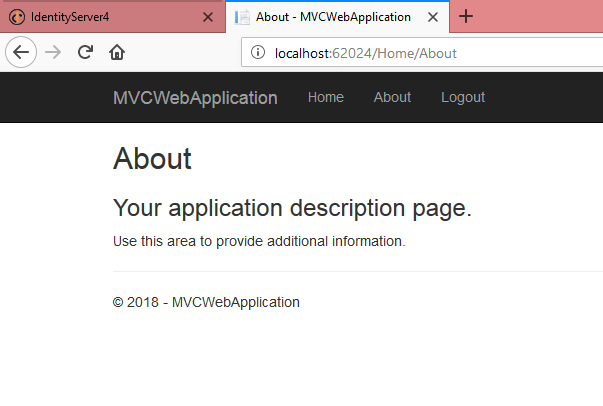
He can access About as well.
We covered both Authentication and Authorization.