
Using MongoDB on Node JS Application Using Mongoose
5.00/5 (3 votes)
How to use a MongoDB on our Node JS application with the help of the package Mongoose
Table of Contents
- Introduction
- Why MongoDB?
- Source Code
- Background
- Setting Up Node Application
- Getting the Required Packages
- Creating the Node App
- Setting up Database
- Creating a Mongoose Model
- Setup the Data
- Inserting the Data into MongoDB
- Verify the Data
- Todo
- Conclusion
- Your Turn. What Do You Think?
Introduction
In this post, we are going to see how we can use a MongoDB on our Node JS application with the help of the package Mongoose. We will also be covering some facts about MongoDB so that as a reader, you will understand why we had chosen MongoDB as our backend. We will be going through some steps to install the required packages using a node package manager terminal, so please be with me. At the end of this article, I guarantee that you will be proficient on how to connect a MongoDB in our Node JS application. I hope you will like this article.
Why MongoDB?
Here, I am going to list down the reasons why I chose MongoDB.
- MongoDB is a NoSQL database. When I say NoSQL, it means that it doesn’t have any structure to be followed
- There are no relationships, we can perform the relation using separate packages like Mongoose
- Everything is JSON, even the data and collections are stored as JSON
- Since the data is stored as JSON, no more conversions are needed. We can directly use it in our application.
Source Code
You can always clone or download the source code here.
Background
Node JS has become a trend now, thus some most used databases. One of the recommended databases for a Node application is MongoDB. As we discussed, MongoDB doesn’t have any structure inbuilt, here we are going to use a package called Mongoose, with that, we can create some structure for our database. Let’s just skip the talking and start developing.
Setting up Node Application
To get started with the Node JS, create a folder and name as per your wish, this is going to be our project directory. Here, I am going to use one of my favorite editors, Visual Studio Code. Now please point to your project container, and run the command below:
npm init
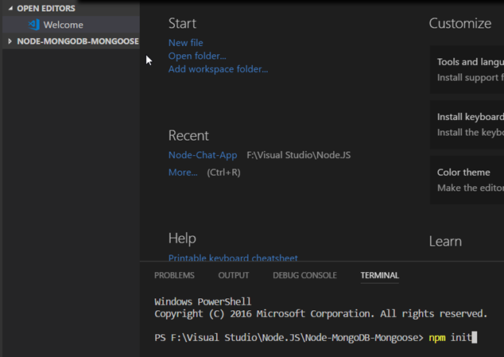
This will create a file named “Package.json” in your directory. We will be adding all of our dependencies in this file very soon. The command may ask you some default questions which you need to answer. If you need to create the package.json file with default values in it, you may consider running the below command.
npm init --yes
Let’s review our package.json file.
{
  "name": "node-mongodb-mongoose",
  "version": "1.0.0",
  "description": "A Node application with MongoDB and Mongoose",
  "main": "index.js",
  "scripts": {
    "test": "echo \"Error: no test specified\" && exit 1"
  },
  "keywords": [
    "Node",
    "Mongoose",
    "MongoDB"
  ],
  "author": "Sibeesh Venu",
  "license": "ISC"
}
Getting the Required Packages
Now that we have the application ready, let’s get the required packages ready.
npm install --save mongoose
This will create a new folder npm_modules on your project directory where you can see the package Mongoose in it.
npm install --save express
The above command will add the package express to our application.
Creating the Node App
Now we can create our server.js file where we are going to write most of our application code.
var express = require("express")
var app = express()
app.listen("3010",()=>{
    console.log("I just started listening!.")
})
Now run the command node server.js and make sure that you are getting a console as ”I just started listening!.”.
If you are getting an error as shown below, please make sure that you are running the application on an unused port.
PS F:\Visual Studio\Node.JS\Node-MongoDB-Mongoose> node server.js
events.js:136
throw er; // Unhandled ‘error’ event
^

Error: listen EADDRINUSE :::3000
at Object._errnoException (util.js:1031:13)
at _exceptionWithHostPort (util.js:1052:20)
at Server.setupListenHandle [as _listen2] (net.js:1367:14)
at listenInCluster (net.js:1408:12)
at Server.listen (net.js:1496:7)
at Function.listen
(F:\Visual Studio\Node.JS\Node-MongoDB-Mongoose\node_modules\express\lib\
application.js:618:24)
at Object.<anonymous> (F:\Visual Studio\Node.JS\Node-MongoDB-Mongoose\server.js:3:5)
at Module._compile (module.js:641:30)
at Object.Module._extensions..js (module.js:652:10)
at Module.load (module.js:560:32)”
Setting Up Database
Now that we have our application ready, let’s go and create our database. I am going to use mLab for creating the database. If you have not installed MongoDB on your machine, I strongly recommend creating a database in mLab. I created a database there and got my connection string as follows:
mongodb://<dbuser>:<dbpassword>@ds038319.mlab.com:38319/mylearning
We will be updating the connection string with actual DB user and password later. Please make sure that you are creating a user for your DB and remember the password.
Creating a Mongoose Model
Let’s create a Mongoose model and set up our connection string now, which is going to be our collection. No worries, it is just a JavaScript model.
var conString = "mongodb://admin:admin@ds038319.mlab.com:38319/mylearning"

/**
 * Models
 */
var User = mongoose.model("User", {
    firstName: String,
    lastName: String
})
Please note that when you move the codes to production, make sure that your password and user fields on the connection string are separated from this file and encrypted.
Now let’s connect our database.
mongoose.connect(conString, { useMongoClient: true }, () => {
    console.log("DB is connected")
})
Setup the Data
We have our model ready, what else is needed now? Yes, you are right, we need data.
var dummyUser = {
    firstName: "Sibeesh",
    lastName: "Venu"
}
Inserting the Data into MongoDB
We have got everything ready, we can insert the model now. Let’s do the saving logic now.
mongoose.connect(conString, { useMongoClient: true }, () => {
    console.log("DB is connected")
    saveData()
})
function saveData() {
    var user = new User(dummyUser);
    user.save();
}
Verify the Data
Once you run your application, go to your database and check for the entries there. I am sure there will be a new collection “User” and our inserted data. As I am using mLab database, here is how my data saved.
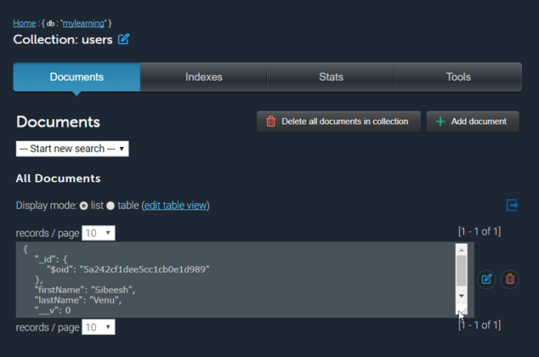
If you have noticed, you can see there are other property names “_id” in our database collection. This is a unique id generated by MongoDB for us, so there is no need to think about it.
Todo
As the purpose of this article is to show how we can insert data to MongoDB, I called the save method right after the database is connected. In our real life, this is not a recommended way. You must create an Ajax post request and handle the same. I am leaving that task to you. Please try to do that and let me know. I would love to hear back from you.
Conclusion
Thanks a lot for reading. Did I miss anything that you think is needed? Could you find this post useful? I hope you liked this article. Please share your valuable suggestions and feedback.
Your Turn. What Do You Think?
A blog isn’t a blog without comments, but do try to stay on topic. If you have a question unrelated to this post, you’re better off posting it on C# Corner, Code Project, Stack Overflow, ASP.NET Forum instead of commenting here. Please post your question in the Comments section below and I’ll definitely try to help if I can.