
Angular 5 Basic Demo Project Overview
5.00/5 (3 votes)
Angular 5 basic demo project overview
Table of Contents
- Introduction
- Source Code
- Background
- Understanding Angular Application
- Conclusion
- Your Turn. What Do You Think?
Introduction
This post is a continuation of the Angular 5 series and you can find the first part of this series here - What Is New and How to Set Up our First Angular 5 Application. So if you haven’t gone through the first part yet, I strongly recommend you do that. In our first part, we saw about the Angular 5 updates and how to set up our first application in Angular 5.
In this post, we are going to discuss few files and application overview. We will also be discussing some key points like Components, Declarations, Modules, Providers, etc. So at the end of this article, you will have some basic understanding of Angular project structures and what really matters when it comes to the project. I hope you will like this article.
Background
Though Angular 5 has exactly the same project architecture as the previous version, we will be explaining some key elements so that beginners can follow this series. I hope you would not mind if you are an experienced professional. Thanks for understanding.
Understanding Angular Application
The Angular project has a clean architecture, it contains the folder structure as shown in the image below:
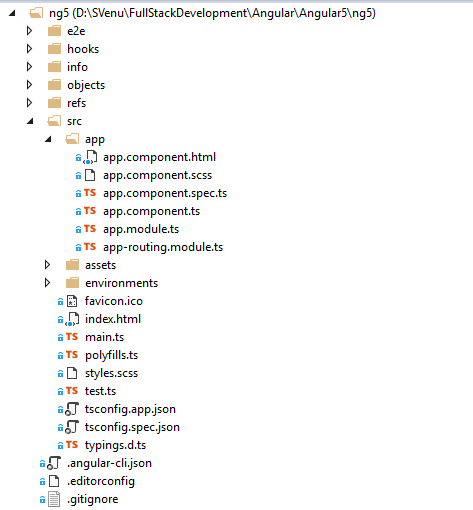
We are going to start developing our application in src/app folder which is our application root folder. For now, let’s go ahead and see what we have got in the existing files. Let us open the file app.component.ts.
import { Component } from '@angular/core';

@Component({
  selector: 'app-root',
  templateUrl: './app.component.html',
  styleUrls: ['./app.component.scss']
})
export class AppComponent {
  title = 'app';
}
In Angular, we are creating components for each selected functionalities, let’s say one component for login, and other for the register, other for navigation, etc., so that each can be maintained separately. In each component, we have three parts:
- Import section
- Decoration
- Export section
Import section helps us to import some existing functionalities available in the framework like we have included Component from Angular/core in the above code snippet.
The Decoration is the place where we decorate the component, giving a selector (which is unique to each component), Style the UI, giving the template URL which points to a particular HTML file where we customize the component. We can also include our template in our decoration itself as a template: ’here's your custom HTML’.
The Export section includes the custom TypeScript code which is specific to that component. Let’s say it is a class, which holds its own functionalities.
Now let us just move our pointer to app.module.ts, this is the place where we register all of our modules, components, providers, etc. We can consider this as a base class. Like components, it has a section for imports and export. It also has a @NgModule section, which contains our declarations (components), imports (modules), providers (services).
import { BrowserModule } from '@angular/platform-browser';
import { NgModule } from '@angular/core';

import { AppComponent } from './app.component';

@NgModule({
  declarations: [
    AppComponent
  ],
  imports: [
    BrowserModule
  ],
  providers: [],
  bootstrap: [AppComponent]
})
export class AppModule { }
I am not going to explain about app.component.css, app.component.html, app.component.spec.ts as you can see what it has, by seeing the code inside. So I am leaving that to you.
If you see the project folder, you can see a folder named Environment. As the name implies, it helps us to set the configurations for our environments, let’s say for development and production, etc.
Index.html is the main page from which we call the app-root, remember we set the app.component’s selector as app-root?
<!doctype html>
<html lang="en">
<head>
  <meta charset="utf-8">
  <title>MyAngular5App</title>
  <base href="/">

  <meta name="viewport" content="width=device-width, initial-scale=1">
  <link rel="icon" type="image/x-icon" href="favicon.ico">
</head>
<body>
  <app-root></app-root>
</body>
</html>
Please make sure that you are giving <base href=”/”> in your index.html file, or else you will get an error in your Angular app.
The tsconfig.app.json file is the place where we can set the configuration for our project, like setting the module versions, compiler options, etc. You can see a sample file as below:
{
  "extends": "../tsconfig.json",
  "compilerOptions": {
    "outDir": "../out-tsc/app",
    "baseUrl": "./",
    "module": "es2015",
    "types": []
  },
  "exclude": [
    "test.ts",
    "**/*.spec.ts"
  ]
}
If you have created your Angular app using Angular CLI, you will see a file named .angular-cli.json in your project. This is the file where all of your custom project settings reside.
{
  "$schema": "./node_modules/@angular/cli/lib/config/schema.json",
  "project": {
    "name": "my-angular5-app"
  },
  "apps": [
    {
      "root": "src",
      "outDir": "dist",
      "assets": [
        "assets",
        "favicon.ico"
      ],
      "index": "index.html",
      "main": "main.ts",
      "polyfills": "polyfills.ts",
      "test": "test.ts",
      "tsconfig": "tsconfig.app.json",
      "testTsconfig": "tsconfig.spec.json",
      "prefix": "app",
      "styles": [
        "styles.css"
      ],
      "scripts": [],
      "environmentSource": "environments/environment.ts",
      "environments": {
        "dev": "environments/environment.ts",
        "prod": "environments/environment.prod.ts"
      }
    }
  ],
  "e2e": {
    "protractor": {
      "config": "./protractor.conf.js"
    }
  },
  "lint": [
    {
      "project": "src/tsconfig.app.json",
      "exclude": "**/node_modules/**"
    },
    {
      "project": "src/tsconfig.spec.json",
      "exclude": "**/node_modules/**"
    },
    {
      "project": "e2e/tsconfig.e2e.json",
      "exclude": "**/node_modules/**"
    }
  ],
  "test": {
    "karma": {
      "config": "./karma.conf.js"
    }
  },
  "defaults": {
    "styleExt": "css",
    "component": {}
  }
}
Last but not the least, package.json is the file where your NPM packages are mentioned, and whenever you run npm install commands, this is the file that command looks into.
{
  "name": "my-angular5-app",
  "version": "0.0.0",
  "license": "MIT",
  "scripts": {
    "ng": "ng",
    "start": "ng serve",
    "build": "ng build",
    "test": "ng test",
    "lint": "ng lint",
    "e2e": "ng e2e"
  },
  "private": true,
  "dependencies": {
    "@angular/animations": "^5.0.0",
    "@angular/common": "^5.0.0",
    "@angular/compiler": "^5.0.0",
    "@angular/core": "^5.0.0",
    "@angular/forms": "^5.0.0",
    "@angular/http": "^5.0.0",
    "@angular/platform-browser": "^5.0.0",
    "@angular/platform-browser-dynamic": "^5.0.0",
    "@angular/router": "^5.0.0",
    "core-js": "^2.4.1",
    "rxjs": "^5.5.2",
    "zone.js": "^0.8.14"
  },
  "devDependencies": {
    "@angular/cli": "1.5.0",
    "@angular/compiler-cli": "^5.0.0",
    "@angular/language-service": "^5.0.0",
    "@types/jasmine": "~2.5.53",
    "@types/jasminewd2": "~2.0.2",
    "@types/node": "~6.0.60",
    "codelyzer": "~3.2.0",
    "jasmine-core": "~2.6.2",
    "jasmine-spec-reporter": "~4.1.0",
    "karma": "~1.7.0",
    "karma-chrome-launcher": "~2.1.1",
    "karma-cli": "~1.0.1",
    "karma-coverage-istanbul-reporter": "^1.2.1",
    "karma-jasmine": "~1.1.0",
    "karma-jasmine-html-reporter": "^0.2.2",
    "protractor": "~5.1.2",
    "ts-node": "~3.2.0",
    "tslint": "~5.7.0",
    "typescript": "~2.4.2"
  }
}
Once the package manager finishes running the install command, all the mentioned packages will be added to the folder node_modules.
In our next article, we will start developing some components in our Angular app.
Conclusion
Thanks a lot for reading! Did I miss anything that you think is needed? Could you find this post useful? I hope you liked this article. Please share your valuable suggestions and feedback.
Your Turn. What Do You Think?
A blog isn’t a blog without comments, but do try to stay on topic. If you have a question unrelated to this post, you’re better off posting it on C# Corner, Code Project, Stack Overflow, ASP.NET Forum instead of commenting here. Please post your question in the Comments section below and I’ll definitely try to help if I can.