
Hadoop Programing with Maven and Netbeans
5.00/5 (2 votes)
Install Pre-requisites Install hadoop 2.7.3 as detailed in this blog Install Netbeans 8.2, download and install instructions are on netbeans download page - https://netbeans.org/downloads/ Install maven sudo apt-get install maven This post shows how to use netbeans IDE to write hadoop java p
Install Pre-requisites
- Install hadoop 2.7.3 as detailed in this blog
- Install Netbeans 8.2, download and install instructions are on netbeans download page - https://netbeans.org/downloads/
- Install maven
sudo apt-get install maven
Demo for hadoop on netbeans with maven
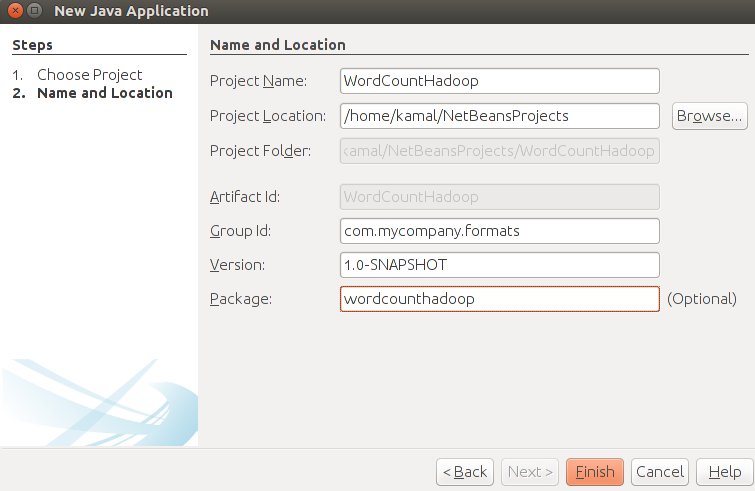
Example uses wordcount example available with Hadoop.If something is not readable, click on the image to get full view.1. Open Netbeans IDE and create Maven Project as in below screenshot

2 Click Next, to go to below screen. Enter project and package name.
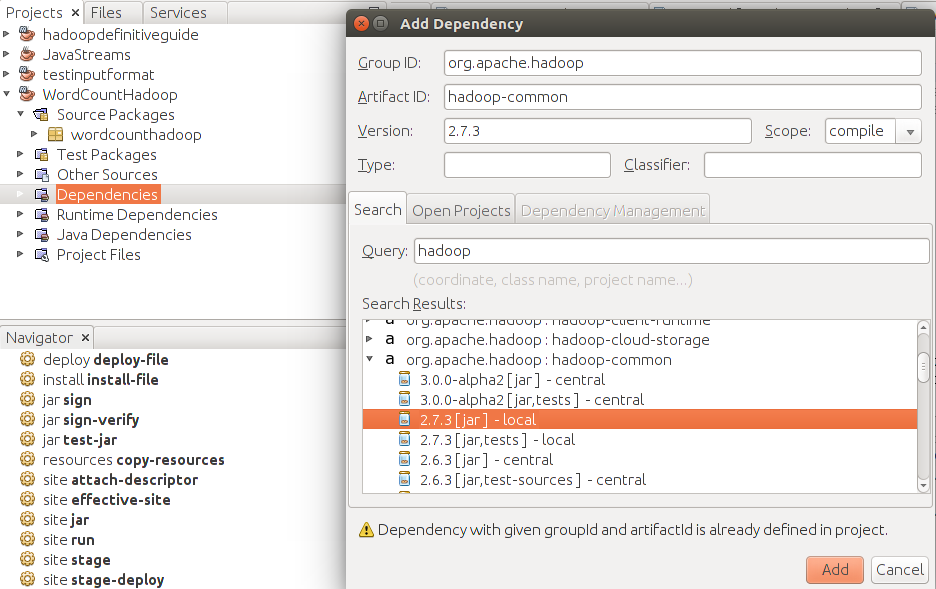
3. Next add dependencies for Maven. We need two jars - Hadoop common and hadoop core. Follow the screenshots for both as below.
Right click the Dependencies under your project. Select Add dependencies, this takes you to below pop-up. In the query, type "hadoop". You will see a list below, select the highlighted option or option suited for your Hadoop install.
Here we add hadoop-core. Caution - First time maven will build and download repository details, so will take a while (30 mins it took me). It will be ok from next time onward.
For the impatient: Skip adding dependencies, move to step 5. Where we create our pom.xml manually.

4. Next we add hadoop-common
5. Next check your POM.xml file to verify all is added ok. This file is located under "project files".
If you have skipped step-4, your pom.xml will be empty and will not have dependencies listed. Add these as below:-
<dependencies>
        <!-- <a href="https://mvnrepository.com/artifact/org.apache.hadoop/hadoop-common">https://mvnrepository.com/artifact/org.apache.hadoop/hadoop-common</a> -->
        <dependency>
            <groupId>org.apache.hadoop</groupId>
            <artifactId>hadoop-common</artifactId>
            <version>2.7.3</version>
        </dependency>
        <!-- <a href="https://mvnrepository.com/artifact/org.apache.hadoop/hadoop-mapreduce-client-core">https://mvnrepository.com/artifact/org.apache.hadoop/hadoop-mapreduce-client-core</a> -->
        <dependency>
            <groupId>org.apache.hadoop</groupId>
            <artifactId>hadoop-mapreduce-client-core</artifactId>
            <version>2.7.3</version>
        </dependency>
    </dependencies>
This is how the file should look.

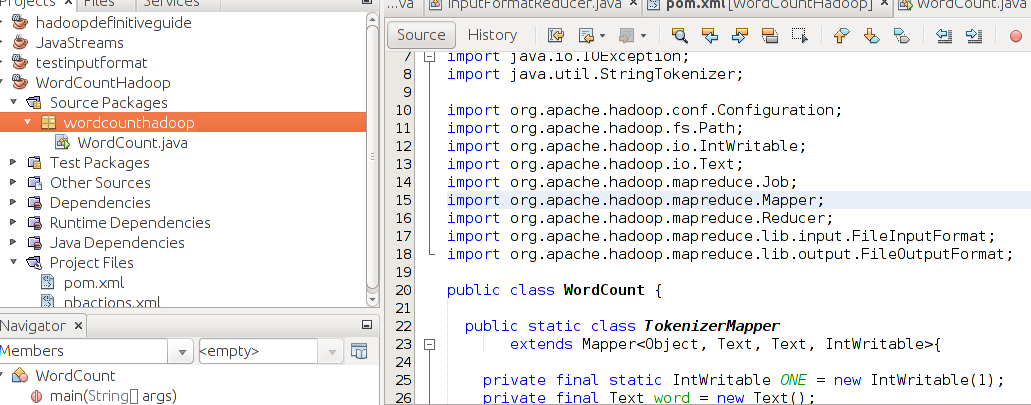
6. Next create java class under package wordcounthadoop and name it WordCount, as in below screen shot. You can download code from here.
Since the dependencies are not yet downloaded, netbeans will mark all imports are erroneous i.e not found.
It's ok. Go to next step to build the code.
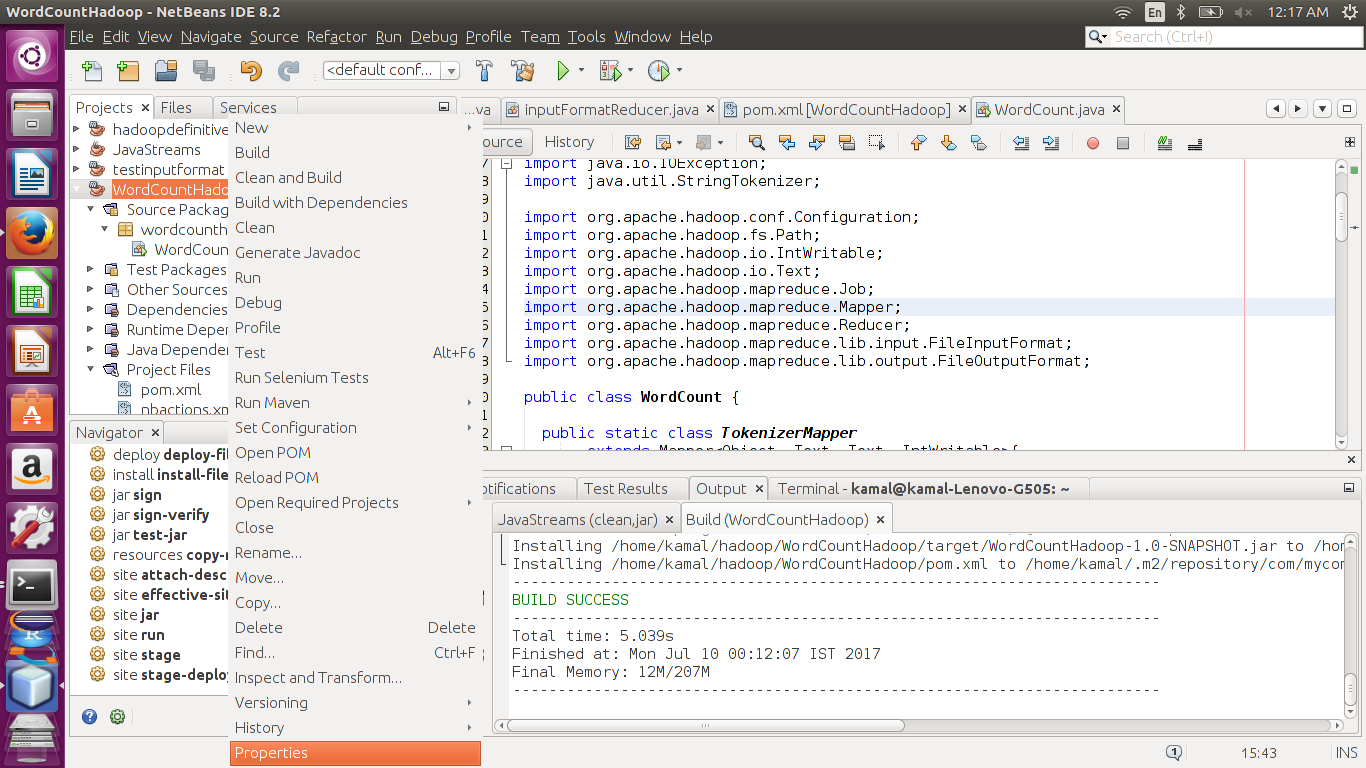
7. Last we build our project. Right click your Project and select "Build" as below. At this point your dependencies will be downloaded. Dependencies are saved in your local machine, so next time these are available locally.
You will see the status at bottom right of tour screen.

8. Next we run the project. We can do that from Netbeans itself or from terminal. First from netbeans.
Right click the project and go to properties, as in screen below.
9. In the properties screen go to actions -> runproject. As in screen below.
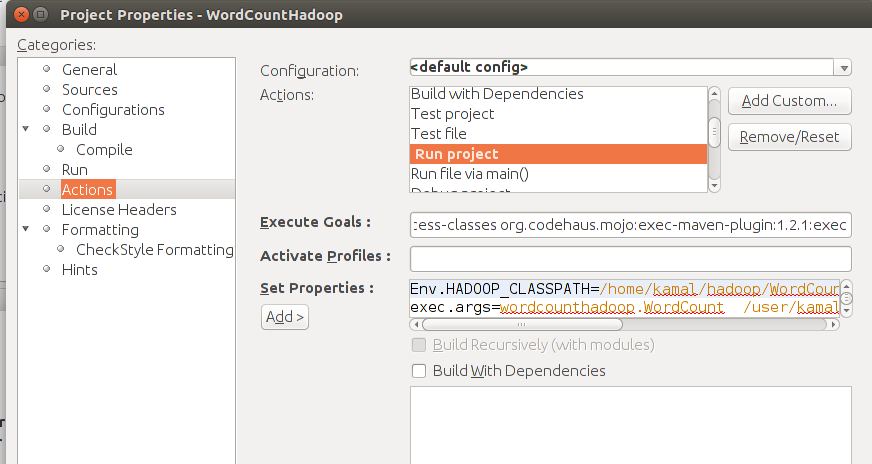
10. In set properties, below are the 3 properties you need to copy. Remove everything else.
- First one is, classpath to the project jar file.
- Next is command line arguments: <package name.Class name> <input dir> <outpur dir>. The <output dir> should not be existing directory in HDFS.
- Last is full path of hadoop binary, change it according to your environment.
Env.HADOOP_CLASSPATH=<Project Location>/WordCountHadoop/target/WordCountHadoop-1.0-SNAPSHOT.jar
exec.args=wordcounthadoop.WordCount  <hdfs input directory> <hdfs output directory>
exec.executable=/usr/local/hadoop/bin/hadoop
11. Now right click your project again and click "Run". (as you did with build). All goes well you should see success in the status window.
12. Now time to check the output. Again no need to go to command line. Go to Windows -> IDE Tools -> Terminal.
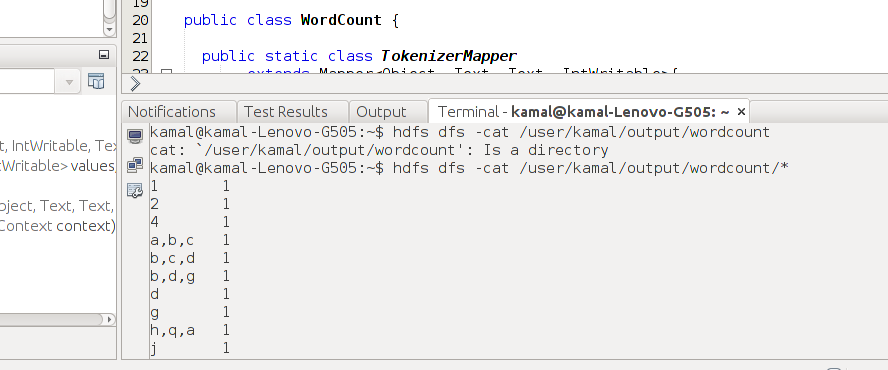
I used some garbage file, hence the output but it is ok.
13. Below is how you run this from command line. Use Root logger setting to avoid the information scroll when running the program. Below output is with different file.
<a href="mailto:kamal@kamal-Lenovo-G505:~$">kamal@kamal-Lenovo-G505:~$</a> export HADOOP_CLASSPATH=/home/kamal/NetBeansProjects/wordcounthadoop/target/wordcounthadoop-1.0-SNAPSHOT.jar
<a href="mailto:kamal@kamal-Lenovo-G505:~$">kamal@kamal-Lenovo-G505:~$</a> export HADOOP_ROOT_LOGGER=ERROR,console
<a href="mailto:kamal@kamal-Lenovo-G505:~$">kamal@kamal-Lenovo-G505:~$</a> hadoop wordcounthadoop.WordCount /user/kamal/input/wordcount /user/kamal/output/wordcount
<a href="mailto:kamal@kamal-Lenovo-G505:~$">kamal@kamal-Lenovo-G505:~$</a> hdfs dfs -cat /user/kamal/output/wordcount/*
a 2
b 3
c 2
cd 1
d 1
g 5
h 3
<a href="mailto:kamal@kamal-Lenovo-G505:~$">kamal@kamal-Lenovo-G505:~$</a>
So all done. Read next blog here, to write your first serious hadoop program and understand the basics of Input Splits.