
Setting up Environment for Angular 2 Development
5.00/5 (3 votes)
In this article we will learn how to setup development environment for Angular 2 using Visual Studio Code and Windows OS.
Note: In attached code, all content of node_modules folder is deleted so it will not run as it is. Please follow the instructions given in article to run it.
Introduction
Recently I was learning Angular 2 using Visual Studio Code. This was my first experience with Visual Studio Code and Angular 2. Visual Studio Code is lightweight but we have to do many thing ourselves if we compare with old good Visual Studio. In this article we will share the set of steps I did in order to setting up development environment.
Basic Installations
- Install Node.js :
Lets start with Node.js which will serve as JavaScript runtime. It is also used for managing JavaScript packages using the npm tool (a package manager for node modules).
Node.js can be installed from here
For more on Node.js various links are given at this stackoverflow discussion. One question also may come in your mind: Is it necessary to use Node.js or any other alternate is also available by using that we can run TypeScript compiler to compile .ts files to get .js files? This is answered at here.
- Install TypeScript :
In Angular 2, we write code in TypeScript language. The TypeScript code needs to be compiled into JavaScript. For that we need to install TypeScript compiler which will convert TypeScript code in javascript code. TypeScript can be installed using following npm command in Command Prompt.npm install -g typescript
Here –g means TypeScript needs to be installed globally so it can be used in any project in your machine.
- Install Visual Studio Code :
We need a source code editor to write the application for that we will be using Visual Studio Code source code editor. It is very light weight to write code for JavaScript applications.
Install Visual Studio Code from this link. For more detail please visit this web page.
Creating Demo App
- Create a folder called FirstAnguar2Demo in your desired location in the system. Open Visual Studio Code editor and click on option 'File' > 'Open Folder' Button. Browse 'FirstAnguar2Demo' folder. Now VS Code editor window looks like as.

- After browsing the application folder 'FirstAngular2Demo', VS code Editor will look like as.

So far we did not add any file to the folder so let’s do it. Add a file to this folder name it as package.json.

Paste following code in package.json file.{ "name": "first-angular2-demo", "version": "2.0.0", "description": "Creating first component in Angular 2", "main": "main.js", "keywords": [], "repository": { "type": "git", "url": "git://github.com/deeleman/learning-angular2.git" }, "scripts": { "start": "tsc && concurrently \"tsc -w\" \"lite-server\" ", "lite": "lite-server", "tsc": "tsc", "tsc:w": "tsc -w" }, "dependencies": { "@angular/common": "~2.4.0", "@angular/compiler": "~2.4.0", "@angular/core": "~2.4.0", "@angular/forms": "~2.4.0", "@angular/http": "~2.4.0", "@angular/platform-browser": "~2.4.0", "@angular/platform-browser-dynamic": "~2.4.0", "@angular/router": "~3.4.0", "systemjs": "0.19.40", "core-js": "^2.4.1", "rxjs": "5.0.1", "zone.js": "^0.7.4", "bootstrap": "^3.3.7" } }More about package.json file is explained at here. In above code following are the critical parts:
scripts: is a property of package.json script file. It contains script commands that are run at various times in the lifecycle of your package. Have a look at this page for more description.
dependencies: in this section we specify all required dependencies for the angular application.
- Add a file called Systemjs.Config.js to 'FirstAnguar2Demo' folder. Paste the below code in Systemjs.Config.js file
(function (global) {
  System.config({
    map: {
      app: 'app',

      '@angular/core': 'node_modules/@angular/core/bundles/core.umd.js',
      '@angular/common': 'node_modules/@angular/common/bundles/common.umd.js',
      '@angular/compiler': 'node_modules/@angular/compiler/bundles/compiler.umd.js',
      '@angular/platform-browser': 'node_modules/@angular/platform-browser/bundles/platform-browser.umd.js',
      '@angular/platform-browser-dynamic': 'node_modules/@angular/platform-browser-dynamic/bundles/platform-browser-dynamic.umd.js',
      '@angular/http': 'node_modules/@angular/http/bundles/http.umd.js',
      '@angular/router': 'node_modules/@angular/router/bundles/router.umd.js',
      '@angular/forms': 'node_modules/@angular/forms/bundles/forms.umd.js',
      'rxjs': 'node_modules/rxjs'
    },
    packages: {
      app: {
        main: './main.js',
        defaultExtension: 'js'
      },
      rxjs: {
        defaultExtension: 'js'
      }
    }
  });
})(this);
For more about Systemjs.Config.js have a look at at this link.
- Add a new file called tsconfig.json to 'FirstAnguar2Demo' folder.
 {
  "compilerOptions": {
    "target": "es5",
    "module": "commonjs",
    "moduleResolution": "node",
    "sourceMap": true,
    "emitDecoratorMetadata": true,
    "experimentalDecorators": true,
    "lib": [ "es2015", "dom" ]
  }
}
tsconfig.json: we specify settings required by the TypeScript compiler to transpile the component code into plain ECMAScript 5 JavaScript code readable by current browsers.
- Add a new file called typings.json. Add the same code as written below in the newly created file:
{
    "ambientDependencies":
  {
         "es6-shim": "github:DefinitelyTyped/DefinitelyTyped/es6-shim/es6-shim.d.ts#6697d6f7dadbf5773cb40ecda35a76027e0783b2"
   }
}
typings.Json: it’s used to check compile time errors and provides the intellisense.
- Open command prompt and reach till application folder path(for me it is E:\Angular2\FirstAnguar2Demo). run following command:
npm install

By running this command all required dependency specified in packages.json file will be installed. Open 'FirstAnguar2Demo' folder, you will be able to see 'node_modules' folder is created. Open this folder you will see all dependencies are added.
Click on Refresh option in VS code, now node_modules folder will be visible in VS code as well.

- Add a new folder called app in root folder. Add a file called main.ts.
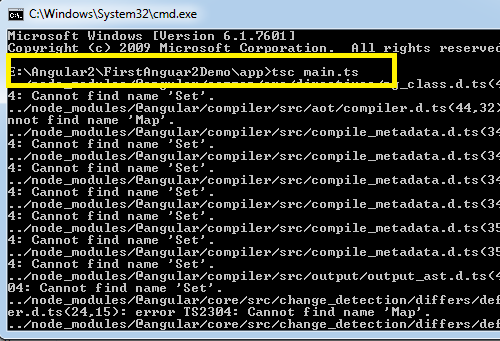
import { Component, NgModule } from '@angular/core';
import { BrowserModule } from '@angular/platform-browser';
import { platformBrowserDynamic } from '@angular/platform-browser-dynamic';
@Component({
    selector: 'hello-angular',
    template: '<h1 class="text-center"> {{greeting}} </h1>'
})
export class DemoAngularComponent {
    greeting: string;
    constructor() {
        this.greeting = 'Welcome to Angular 2 App !!';
    }
}
// Main module, bootstrapping HelloAngularComponent as root component
@NgModule({
    imports: [BrowserModule],
    declarations: [DemoAngularComponent],
    bootstrap: [DemoAngularComponent],
})
export class AppModule { }
// Application bootstrap (specific for browser environments)
const platform = platformBrowserDynamic();
platform.bootstrapModule(AppModule);
Reach app folder in Command Prompt and run following command.tsc main.ts
When we run this command main.ts file is compiled by TypeScript compiler and creates main.js file at the same location.
- Now we need a .html file which can be viewed in browser so let's add a Index.html file at the root folder level (E:\Angular2\FirstAnguar2Demo). Paste the below code in Index.html file as written here.
<!DOCTYPE HTML>
<html>
    <head>
    <meta charset="utf-8">
    <title>Learning Angular 2</title>
    <!-- Polyfill for older browsers -->
    <script src="node_modules/core-js/client/shim.min.js"></script>
    <script src="node_modules/zone.js/dist/zone.js"></script>
    <script src="node_modules/reflect-metadata/Reflect.js"></script>
    <script src="node_modules/systemjs/dist/system.src.js"></script>
    <script src="systemjs.config.js"></script>
    <script>
        System.import('app').catch(console.error.bind(null));
    </script>
    <link rel="stylesheet" href="node_modules/bootstrap/dist/css/bootstrap.min.css">
  </head>
    <body>
    <hello-angular></hello-angular>
  </body>
</html>
Running Demo App
We will use lite-server to run the app quickly. It serves the static content, detects changes, refreshes the browser, and offers many customizations. Lets install and run the app using lite-server:
# To install globally:
    npm install -g lite-server


# To run (you must be in the application folder as shown in below screenshots):
    lite-server

In browser you will be able to see your first angular 2 app is running.

Conclusion
In this article we learned how to setup environment for Angular 2 application development with Visual Studio code. Hope those steps will help while you take first step in learning Angular 2. Your comments and suggestions are most welcome.
References
[1] Why do we have install Node.js for Angular 2.0?
[2] What does systemjs.config.js do in angular 2 packaging structure?