
Easy Molar Mass Calculator
4.68/5 (12 votes)
This article describes how to create a UWP application that uses a Window Runtime Component.
Table of contents
- Introduction
- Background
- Using the code
- Unit tests with MsTests
- UWP deployment
- Points of Interest
- References
- History
Introduction
This article describes how to create a Universal Windows Platform (UWP) app that uses a Window Runtime Component. The Window Runtime Component is written in C and C++. One of the challenges building the molar mass calculator was the exchange of data between the UWP app and the Window Runtime Component. In this article, I will explain how I accomplished this data exchange. Furthermore, the application uses a free chart library, which will also be discussed in this article. The source code can be downloaded using the link on top of this article, the installation package can be downloaded here.
Background
The molar mass calculator allows you to calculate the molar mass and composition of an molecule. If you want to know more about molar mass, you can read this article. The molecule composition is used to check the purity of a compound. If an organic chemist synthesizes a new compound, the chemist can compare the actual composition with the theoretical composition.

Using the Code
Application Architecture
The molar mass calculator uses the MVVM architecture, which means that there is no code behind and that the MainView has a corresponding ViewModel which contains all the logic. The DataContext of the View is set when the View is created, as can be seen in the code snippet below.
public sealed partial class MainPage : Page
{
    public MainPage()
    {
        this.InitializeComponent();
        this.DataContext = new MainViewModel();
    }
}
Code snippet 1: The DataContext of the MainPage is set to the MainViewModel.
To enable events from the View to be passed to the ViewModel, I used two libraries, which are the Mvvmlight and the Microsoft.Behaviors.UWP.Managed library. The behaviors library allows the user to select a PIE slice, after which the selection changed event is passed to the ViewModel. The selection changed event is then handled in the ViewModel by setting the status property, as shown in code snippet 3.
<Interactivity:Interaction.Behaviors>
    <Interactions:EventTriggerBehavior EventName="SelectionChanged">
        <Interactions:InvokeCommandAction Command="{Binding SelectedSliceCmd}"/>
    </Interactions:EventTriggerBehavior>
</Interactivity:Interaction.Behaviors>
Code snippet 2: The SelectionChanged event is bound the SelectedSliceCmd.
private void OnSelectedSliceCmd(object prm)
{
    SelectionChangedEventArgs args = (SelectionChangedEventArgs)prm;

    if (args.AddedItems.Any())
    {
        Status = string.Format("{0} ({1:0.00}%)",
            ((Element)args.AddedItems[0]).element,
            ((Element)args.AddedItems[0]).relativeMassContent);
    }
}
Code snippet 3: The SelectionChanged event triggers the OnSelectedSliceCmd command handler.
As you can see from the user interface, the user can enter a molecule formula in the textbox. The entered formula is validated using a regular expression. The regular expression used is shown below. As you can see from the code, the regular expression validation is case sensitive, that is because all the elements start with a capital. This syntax is used to tokenize the entered molecule to its corresponding elements.
private static readonly string allowedElements = @"^(\(|\)|[0-9]|H|He|Li|Be|B|C|N|O|F|Ne|..U)*
Code snippet 4: The regular expression only allows digits, parenthesis and elements to be entered.
The code used to tokenize a molecule formula can be found here. This code allows you to enter formulas with nested parenthesis. In order to use the tokenize algorithm, I embedded the C code in a Window Runtime Component. Using this Window Runtime Component, I can call the tokenize algorithm from the UWP app.
Styling the PIE Chart Using Templates
The molar mass calculator uses a PIE chart library to visualize the molecule composition. This library is based on the Silverlight chart library and can be downloaded as a NuGet package. One challenge I faced when using this library is that each PIE slice dynamically changes color when the PIE chart is initialized and created. In contrast to dynamic coloring, I wanted to give each element in the PIE chart a fixed color. To accomplish this, the color of each element is set in the code behind, as shown in the code snippet below. This approach resulted in that each specific element has a fixed background color in the chart (e.g. H=Green, O=Blue, etc.).
private int InitializeChartPalette(out string errorMsg)
{
    int retVal = Constants.Failure;
    errorMsg = string.Empty;

    try
    {
        ResourceDictionaryCollection rdCollection = new ResourceDictionaryCollection();
        if (PaletteCollection != null)
        {
            PaletteCollection.Clear();
            PaletteCollection = null;
        }

        // Create a color palette entry for each data point
        foreach (Element el in SelectedMolecule.Composition)
        {
            ResourceDictionary rd = new ResourceDictionary();
            Style dataPointStyle = new Style(typeof(Control));
            dataPointStyle.Setters.Add(new Setter(Control.BackgroundProperty, el.Brush));
            dataPointStyle.Setters.Add(new Setter(Control.TemplateProperty,
              App.Current.Resources["PieDataPointControlTemplate"] as ControlTemplate));
            dataPointStyle.Setters.Add(new Setter
              (DataPoint.DependentValueStringFormatProperty, "{0:0.00}"));
            rd.Add("DataPointStyle", dataPointStyle);
            Style dataShapeStyle = new Style(typeof(Shape));
            dataShapeStyle.Setters.Add(new Setter(Shape.StrokeProperty, el.Brush));
            dataShapeStyle.Setters.Add(new Setter(Shape.StrokeThicknessProperty, 2));
            dataShapeStyle.Setters.Add(new Setter(Shape.StrokeMiterLimitProperty, 1));
            dataShapeStyle.Setters.Add(new Setter(Shape.FillProperty, el.Brush));
            rd.Add("DataShapeStyle", dataShapeStyle);
            rdCollection.Add(rd);
        }
        PaletteCollection = rdCollection;
        retVal = Constants.Success;
    }
    catch (Exception ex)
    {
        retVal = Constants.Failure;
        errorMsg = string.Format("An unexpected error occurred: {0}", ex.Message);
    }

    return retVal;
}
Code snippet 5: The chart pallet is set in the ViewModel.
Furthermore, the chart is styled using DataTemplates and ControlTemplates. When the mouse hovers over a PIE slice, the tooltip shows the details of that element.
<ControlTemplate x:Key="PieDataPointControlTemplate" TargetType="charting:PieDataPoint">
    <Grid>
        <Path   x:Name="Slice"
                Data="{TemplateBinding Geometry}"
                Fill="{TemplateBinding Background}"
                Stroke="{TemplateBinding BorderBrush}">
            <ToolTipService.ToolTip>
                <StackPanel Orientation="Horizontal">
                    <ContentControl Content="{TemplateBinding IndependentValue }"/>
                    <ContentControl Content=" ("/>
                    <ContentControl Content="{TemplateBinding FormattedDependentValue}"/>
                    <ContentControl Content="%)"/>
                </StackPanel>
            </ToolTipService.ToolTip>
        </Path>
    </Grid>
</ControlTemplate>
Code snippet 6: Controltemplate with a customized tooltip.
The chart legend is customized using a style and a controltemplate, which can be found in the dictionary of the project. The customized legend allows scrolling when there are a lot of elements in the chart legend.
Interface between UWP and Window Runtime Component
As mentioned earlier, the C# UWP app needs to communicate with the Windows Runtime Component written in C and C++. The communication between the UWP app and the Windows Runtime Component is accomplished using the Platform::String type (Unicode format). Internally, the Windows Runtime Component uses the classic char* type, this was necessary in order to use the external molecule parser, which only accepts char* type. Because of the two types used in the Windows Runtime Component, I created two conversion methods to convert between these two types. The Windows Runtime Component performs all the calculations and returns a dictionary containing compositions to the UWP app, as can be seen in the code snippet below.
IMap<String^, double>^ FormulaParser::ParseElements(int *errorCode)
{
    double elementComposition = 0;
    int retVal = SUCCESS;
    map<String^, double> stlMap;

    try
    {
        //Make sure that the formula and the calculatedMoleMass are set
        if (formula != NULL && calculatedMoleMass > .5)
        {
            Atom_count *iterator = parse_formula_c(formula);

            while (iterator != NULL)
            {
                std::map<const char*, double, ltstr>::iterator search =
                    periodicTableOfElements.find(iterator->element_symbol);
                elementComposition =
                    (((search->second * iterator->count) / calculatedMoleMass)  * 100) ;
                stlMap.insert(std::pair<String^, double>
                    (StringFromAscIIChars(iterator->element_symbol), elementComposition));
                iterator = iterator->next;
            }
        }
        else
        {
            retVal = NO_FORMULA_SPECIFIED;
            SetLastError("Specify a formula using the method SetFormula(String^ moleculeFormula).");
        }
    }
    catch (Exception^ ex)
    {
        retVal = GENERAL_ERROR;
        SetLastError(ex->Message);
    }

    return ref new Map<String^, double>(stlMap);
}
Code snippet 7: The Windows Runtime Component returns a dictionary containing the composition.
public int CalculateComposition(out string errorMsg)
{
    int retVal = Constants.Failure;
    errorMsg = string.Empty;
    try
    {
        Composition.Clear();
        IDictionary<string, double> calculatedComposition
            = parser.ParseElements(out retVal);
        if (retVal == Constants.Success)
        {
            foreach (var element in calculatedComposition)
            {
                string elementName = element.Key;
                double massContent = element.Value;

                Composition.Add(new Element()
                {
                    element = elementName,
                    relativeMassContent = massContent,
                    Brush = elementColors[elementName]
                });
            }
        }
        else
        {
            errorMsg = parser.GetLastError();
        }
    }
    catch (Exception ex)
    {
        retVal = Constants.Failure;
        errorMsg =
            string.Format("An unexpected error occurred: {0}", ex.Message);
    }
    return retVal;
}
Code snippet 8: UWP app receives a dictionary from the Windows Runtime Component.
Unit Tests with MsTests
NUnit currently does not fully support UWP projects, therefore I had to resort to using MSTests. Alternative frameworks that can be used can be found in this article. To create a test project, you can navigate to create new project -> Visual C# -> Windows -> Universal and select Unit Test App (Universal Windows), you then need to reference your project in the Unit Test App, after which you can start covering your source code. An example of a testcase is shown below.
public void TestCase001()
{
    bool equal;
    int retVal = Failure;
    string errorMsg = string.Empty;
    double expectedElementComposition;
    string Formula = "C8H10N2O", formulaSummary;
    double expectedMolarMass = 150.18, actualMolarMass;
    Dictionary<string, double> expectedComposition = new Dictionary<string, double>()
    {
        { "C", 63.98 },
        { "H", 6.71  },
        { "N", 18.66 },
        { "O", 10.65 },
    };

    FormulaParser parser = new FormulaParser();
    retVal = parser.SetFormula(Formula, out formulaSummary, out actualMolarMass);
    Assert.AreEqual(Success, retVal);
    equal = Math.Abs(expectedMolarMass - actualMolarMass) <= allowedDifference;
    Assert.IsTrue(equal);

    IDictionary<string, double> actualComposition = parser.ParseElements(out retVal);
    Assert.AreEqual(Success, retVal);
    Assert.AreEqual(expectedComposition.Count, actualComposition.Count);

    foreach (KeyValuePair<string, double> kvp in actualComposition)
    {
        expectedElementComposition = expectedComposition[kvp.Key];
        equal = Math.Abs(expectedElementComposition - kvp.Value) <= allowedDifference;
        Assert.IsTrue(equal);
    }
}
Code snippet 9: A test case used to validate the calculations.
UWP Deployment
Create Deployment Package
After you have created your UWP application, you want that it reaches its intended audience. The app manifest file (package.appxmanifest.xml) has the properties and settings that are required to create your app deployment package. For example, properties in the manifest file describe the image to use as the tile of your app and the orientations that your app supports when a user rotates the device. Visual Studio has a manifest designer that makes it easy for you to update the manifest file without editing the raw XML of the file. The manifest designer is shown when you double-click the app manifest file. The manifest designer allows you to configure the deployment of your app. Each tab contains information that you can configure.

In the app manifest file, there is a dedicated section for Visual Assets, which allows you to specify all the required tiles for your UWP application. I used this Visual Studio extension to specify all the required tiles. Using this extension, you can simply right click on a square SVG or PNG and select Generate UWP Tiles, after which all the recommended tile sizes are generated. Furthermore, the extension will also update your Package.appxmanifest so you don't have to do it manually.
In the Packaging tab, you can enter publishing data. This is where you can choose which certificate to use to sign your app. All UWP apps must be signed with a certificate. In order to sideload an app package, you need to trust the package. The certificate must be installed on that device to trust the package, details can be found here.
In Visual Studio 2015, you can use a wizard to create an App Package, which can then be uploaded to the Window Store or used for Sideloading. To start the wizard, right-click the project and choose Store->Create App Packages. In the first dialog, the wizard asks you if you want to create a Windows Store package. If you choose No here, Visual Studio will not generate the required .appxupload package you need for store submission. If you only want to sideload your app to run it on internal devices, then you can select the No option. In my case, I just wanted to Sideload the application, therefore I choose No. In the future, I will make the Molare Mass Calculator available via the Windows Store. If you want to deploy your application to the Window store, you need to have a developer account to the Windows Dev Center. If you don't have a developer account yet, the wizard will help you create one.

In the next wizard form, you can select the target architectures of your app. Make sure you select all three architecture configurations (x86, x64, and ARM) in the Select and Configure Packages dialog. That way, your app can be deployed to the widest range of devices. In the Generate app bundle listbox, select Always. This makes the store submission process much simpler because you will only have one file to upload (.appxupload). The single bundle will contain all the necessary packages to deploy to devices with each processor architecture.

Next click Create to generate your appxupload package. When the install package is created, you will see the form displayed below.

If you are going to publish your App in the Window store, you need to validate your App using the Certification Kit. After the Certification process has finished and your app has passed, you are ready to upload your App to the store. Make sure you upload the correct file. It can be found in the root folder of your and it will end with the .appxupload file extension.
Installing the UWP Application Using Sideloading
UWP apps cannot simply be installed to your device like Desktop apps. Typically, you download these apps from the Store and that is how they are installed on your device. Alternatively, you can sideload apps to your device without submitting them to the Store. This lets you install them and test them out using the app package (.appx) that you have created in the deployment process. Using the app package, you can distribute your application locally, like a line-of-business (LOB) app. To sideload your app package to a Windows 10 device, you need to take the following two steps:
- Enable Developer Mode on the target device.
- Copy the app package folder to the target device and install it with PowerShell.
To enable Developer mode, go to, Start->Settings->Update & Security -> For developers and select Developer Mode.

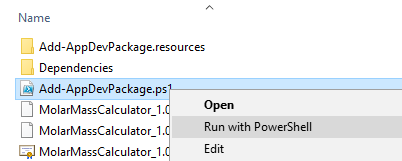
The app package of the molar mass calculator can be downloaded using this link. You need to copy the correct architecture folder (x86, x64 or ARM) to your computer. Next Right-click the Add-AppDevPackage.ps1 file, then choose Run with PowerShell and follow the prompts. When the app package has been installed, you will see this message in your PowerShell window: Your app was successfully installed. If you want to sideload your app on a Windows 10 Mobile device, you must use the WinAppDeployCmd.exe tool.
After installation, the molar mass calculator will appear in the start menu.

Points of Interest
- Visual Studio allows you to combine C and C++ code. In order to use C functions, you need to set the
_CRT_SECURE_NO_WARNINGSpreprocessor directive to suppress security warnings.
References
- Packaging UWP apps
- Color items dynamically in code behind
- Styling Charts with the Silverlight Toolkit
- A Minimal MVVM UWP App
- Graphs and charts in store apps
- Custom legend style
- WinRTXamlToolkit, the chart library used
- How to get a Dictionary from C++ DLL to C#
- Customizing tooltip
- Chemistry-MolecularMass
History
- July 2nd, 2016: Version 1.0.0.0 - Published the article