
Packaging Lightswitch Project
5.00/5 (3 votes)
This article will explain how to package your lightswitch application in a zip folder in Visual Studio Lightswitch 2013 professional.
Introduction
Lately, I have been going through various MSDN sites looking for a solution for packaging Lightswitch applications. But I struggled a lot and had to visit few sites to get my job done. Hence for a newbie like me, it's a difficult job to browse through various number of sites and do RnD and then find a solution to your problem. Also, most of the articles related to Lightswitch are based on the older versions of Visual Studio and Lightswitch.
In this article I will try to explain the various steps of packaging your lightswitch application. I am working on Visual Studio 2013 professional. You can deploy a LightSwitch 3-tier application by either publishing or packaging it. In either case, the LightSwitch Publish Application Wizard guides you through the deployment process.
Also since this is my first article, kindly pardon me for any mistakes or any kind of immature language.
Background
There are two words in the world of Lightswitch which actually confused me a lot initially: Packaging and Publishing. From its literal meaning, you get some idea of what it does but being a tech person, I wanted to know more.
A published application can be run on client computers immediately after the wizard has been completed. The application is ready to install and the installation automatically deploys the database schema to SQL Server. Users can run a published application on client computers immediately after you complete the wizard. You must have administrative access to both the web server and the database server for this option. The server must also be provisioned for LightSwitch. Basically in very simple words, this will allow users to run the application directly on the Browser (website). No extra steps need to be done. Clients can just access the URL where you are hosting your application.
On the other hand, A packaged application means that everything that is required to run the application is bundled together, but additional steps must be taken to make the application available to the user. Choose this option when a server administrator will be installing the application and database schema. In simple words, in a packaged application, you bundle together everything that's required to run the application. The server administrator must take additional steps to install the application and make it available to end users.
In this article, we would just be doing the packaging part. The end result would be that we will get all the related files that are required for deploying the code. We would also get a zip folder in which all our application related code would be clubbed.
Steps to Package Lightswitch Project
Step 1: In Solution Explorer, choose the ProjectName node, where ProjectName is the name of your project.
Step 2: On the menu bar, choose Build, Publish ApplicationName. The LightSwitch Publish Application Wizard appears.
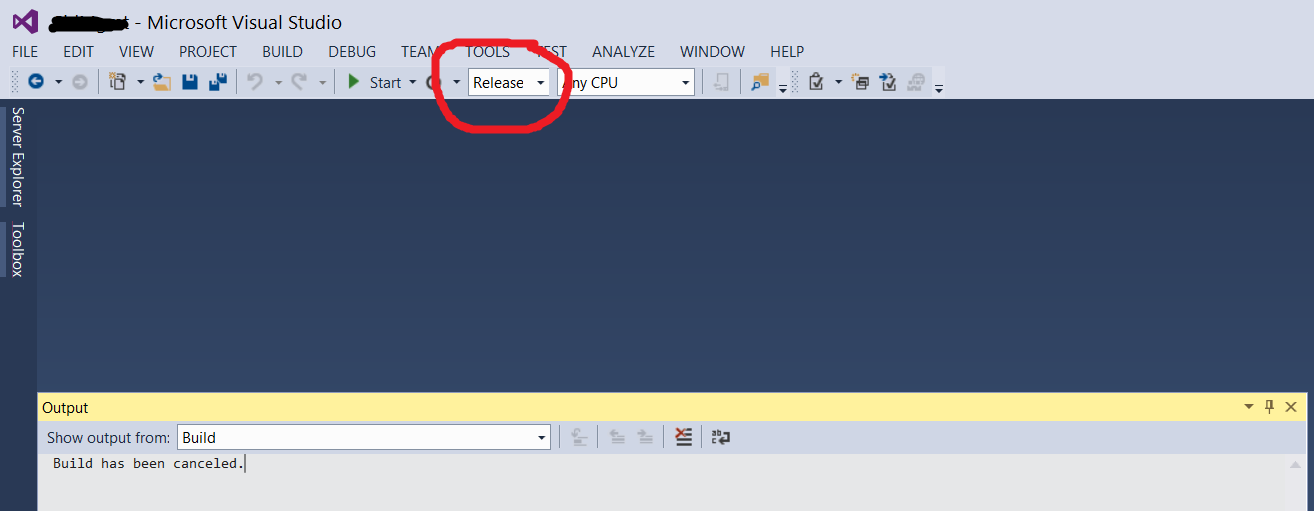
Notice if you receive a warning message in the bottom section of the wizard screen. Refer to the following image (I have no idea how will it look like when it posts the article. :) )

So, to remove this error, close the LightSwitch Publish Application Wizard and click on the solution (projectname) in the solution explorer. Right click on it and select Configuration Manager. In the Active solution Configuration dropdown, change the selection to Release mode from Debug mode. Build your solution and repeat the earlier steps. You won't find the warning message in the LightSwitch Publish Application Wizard.
Step 3: On the Application Type page, choose the Complete application option button, and then choose the Next button.
Step 4: On the Application Server Configuration page, choose the IIS Server option button, and then choose the Next button.
Step 5: On the Publish Output page, choose the Create a package on disk option button, and then choose the Next button.
Step 6: On the Publish Settings page, in the What should the website be named? box, enter a name for the website. The default name is the application name.
Step 7: In the Where should the package be created? box, enter the UNC path for the location where you want the output to be published, and then choose the Next button. The default location is the Publish subdirectory under your project directory.
Step 8: If the Application Administrator tab of the Security Settings page appears, enter a valid User Name, Full Name, and Password for the user who'll be the initial application administrator, and then choose the HTTPS tab. When you publish updates, the application administrator already exists. Select the No, an Application Administrator already exists check box to skip this step.
Step 9: On the HTTPS tab of the Security Settings page, choose Yes to require a secure HTTPS connection, or choose No if your application doesn’t need a secure connection, and then choose the Digital Signature tab.
Step 10: To publish without a certificate, clear the Specify a certificate check box. You can choose the option of unchecking it and publish it without a certificate. There would absolutely be no problem because of it. But in case you want to Specify a certificate, follow the below process:
On the Digital Signature tab, select the Specify a Certificate check box.
-
Choose the Browse button.
-
In the Select File dialog box, browse to the location of the certificate that you want to use, and then choose the OK button.
Basic information about the certificate appears. You can choose the View Certificate button to display more information about the certificate.
Step 11: Choose the Next button
Step 12: On the Database Configuration page of the wizard, select the Generate a new database called option and enter the name for the database.
Very important note: This must be the same name that you entered for the Application Name property in the Application Designer.
If the database already exists on the server, choose the Update an existing database option button, and then, in the Connection String text box, enter the connection string for that database. If you don't have access to the server, you can enter a connection string for another database that has the same schema as the database on the server.
Step 13: Choose the Attached Data Sources tab, update the connection strings for any additional connections as needed, and then choose the Next button.
Step 14: Choose the Publish button to publish the application.
When the application is published, a .zip file that contains the package is placed in the directory that you specified for the publish output. After this package has been created, a server administrator can use the MSDeploy tool to deploy the application to servers that are running IIS and SQL Server.
Points of Interest
Congratulations everybody on successfully creating a package of your lightswitch application. And also congratulations to myself for writing the first article and that too, after bunking my work in office. :)
I hope you like the article and I am always open for your feedback. Waiting to hear from you guys. Cheers!!!
History
- 13th April, 2016: Initial version