Create a skin for MyMobiler
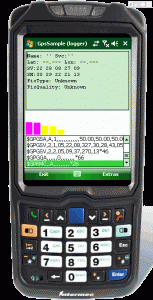
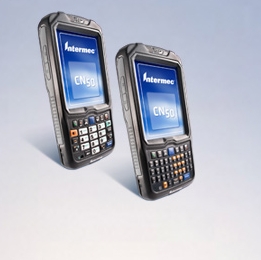
This is a skin for the remote viewer MyMobiler for Windows mobile showing the Intermec CN50 with numeric keyboard
Hopefully you know the great free remote software MyMobiler for Windows and Windows Mobile devices. MyMobiler supports remote use of Windows mobile device from your Windows PC. It also has some additional features like a remote file explorer, etc.
Although MyMobiler allows to use skins, there is no Skin editor. A skin lets you view the windows mobile device on your Windows PC to look like the real device.
MyMobiler skins support up to three bitmaps:
- the normal device bitmap
- a ‘hover’ bitmap
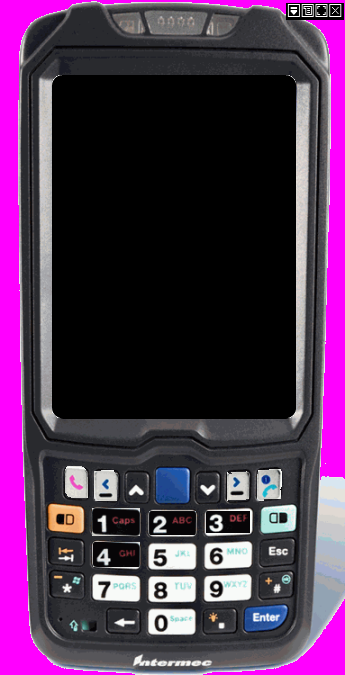
- an inverted bitmap
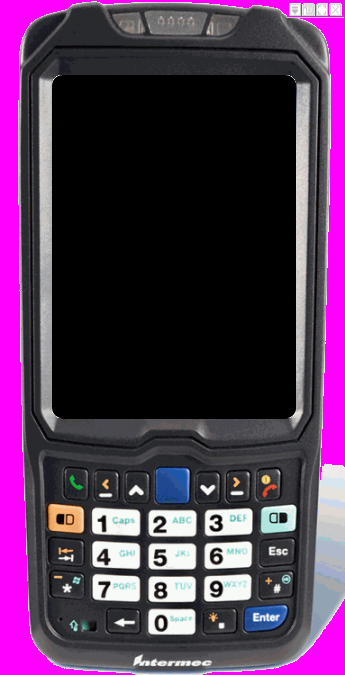
The first bitmap is responsible for the device to look at your Windows PC. You can use/define a transparent color and will get a non-regular sharp of the remote device look.
The ‘hover’ bitmap enables you to highlight rectangular areas for example for buttons on your device. These areas will ‘hover’, when the mouse cursor is inside the rectangle. The nice pink color is used for the transparent area.
The inverted bitmap will invert the rectangular areas of buttons, when you virtually ‘click’ them.
All these bitmaps and areas have to be defined in one XML file. Then you place the bitmap and XML in the MyMobiler directory and change the skin entry in MyMobiler.ini.
...
# ****************************************************************
# Mobiler Skin (skin file path)
#
# SkinFile=Skin\Skin.xml
# SkinFile=DefaultSkin.xml (Default)
#
# ****************************************************************
SkinFile=cn50skin2.xml
#cn50_numSkin.xml
ShowSkin=1
ShowMenu=0
ShowToolbar=1
...
All the XML definitions and usages have been copied from the DefaultSkin.xml file:
<form position="0 0 240 320"
    backgroundimage="face.bmp"
    clipcolor="FF00FF"
    hoverimage="select.bmp"
    selectimage="select.bmp">

    <button id="101" text="Menu" command="Menu" position="185 4 15 15"></button>
    <button id="102" text="Show Menubar" command="ShowMenu" position="200 4 15 15">
	</button>
    <button id="103" text="Maximize" command="Maximize" position="215 4 15 15"></button>
    <button id="104" text="Close" command="Close" position="230 4 15 15"></button>
    <button id="105" text="Show Toolbar" command="LoadSkin:expand.xml"
	position="20 340 200 10"></button>

    <button  id="106" runat="desktop" action="run"
            command="mexplorer" text="Mobile Explorer"
            position="245 4 15 15" ></button>

    <control id="200" text="MobileView" position="5 20 240 320" zoom="100"> </control>
</form>
Unfortunately, MyMobiler does not support multiple keyboard planes and so we are unable to code for example the alpha layer of the CN50 keyboard where pressing the green button switches from numeric to alpha chars. MyMobiler also does not support multikeys, like pressing the 2 key on the CN50 in alpha mode (green plane) one, two or three times to get A, B or C.
OK, here is the XML for the CN50 numeric keyboard:
<form position="0 0 240 320"
    backgroundimage="cn50_.bmp"
    clipcolor="FF00FF"
    hoverimage="selectCN50.bmp"
    selectimage="selectCN50.bmp">

    <button id="101" text="Menu" command="Menu" position="285 4 15 15"></button>
    <button id="102" text="Show Menubar"
	command="ShowMenu" position="300 4 15 15"></button>
    <button id="103" text="Maximize" command="Maximize" position="315 4 15 15"></button>
    <button id="104" text="Close" command="Close" position="330 4 15 15"></button>

    <button id="105" text="Show Toolbar"
	command="LoadSkin:expand.xml" position="20 340 200 10"></button>

    <button  id="106" runat="desktop" action="run"
            command="mexplorer" text="Mobile Explorer"
            position="245 4 15 15" ></button>

    <control id="200" text="MobileView" position="55 85 240 320" zoom="100"> </control>

    <button  id="201"
            runat="mobile"
            command="soft1"
            text="Soft1"
            position="95 470 32 32" ></button>

    <button  id="202"
            runat="mobile"
            command="soft2"
            text="Soft2"
            position="225 470 32 32" ></button>

    <button  id="203"
            runat="mobile"
            command="talk"
            text="Talk"
            position="65 470 21 32" ></button>

    <button  id="204"
            runat="mobile"
            command="end"
            text="Call End / Home"
            position="255 460 32  38" ></button>

    <button  id="205"
            runat="mobile"
            command="Key:1"
            text="1"
            position="80 510 60 32" ></button>

    <button  id="206"
            runat="mobile"
            command="Key:2"
            text="2"
            position="150 510 45 32" ></button>

    <button  id="207"
            runat="mobile"
            command="Key:3"
            text="3"
            position="208 510 45 32" ></button>

    <button  id="208"
            runat="mobile"
            command="Key:4"
            text="4"
            position="90 540 45 32" ></button>

</form>
First, the lines:
    backgroundimage="cn50_.bmp"
    clipcolor="FF00FF"
    hoverimage="selectCN50.bmp"
    selectimage="selectCN50.bmp">
define the bitmap files to use and the clip color: FF00FF.
Then the following lines define the desktop side button areas of the skin image:
<button id="101" text="Menu" command="Menu" position="285 4 15 15"></button>
<button id="102" text="Show Menubar" command="ShowMenu" position="300 4 15 15"></button>
<button id="103" text="Maximize" command="Maximize" position="315 4 15 15"></button>
<button id="104" text="Close" command="Close" position="330 4 15 15"></button>

<button id="105" text="Show Toolbar" command="LoadSkin:expand.xml"
	position="20 340 200 10"></button>

<button  id="106" runat="desktop" action="run"
        command="mexplorer" text="Mobile Explorer"
        position="245 4 15 15" ></button>

<control id="200" text="MobileView" position="55 85 240 320" zoom="100"> </control>
With these button definitions, you control MyMobiler and can access the MyMobiler menu or close MyMobiler.
These desktop side button areas are followed by the mobile side button definitions:
...
    <button  id="201"
            runat="mobile"
            command="soft1"
            text="Soft1"
            position="95 470 32 32" ></button>

    <button  id="202"
            runat="mobile"
            command="soft2"
            text="Soft2"
            position="225 470 32 32" ></button>

...
All buttons should have a unique ID. Then you need to define, where to execute the command (desktop or mobile). The text field defines the command itself. For example “Soft1? fires the soft key 1 on the mobile, “Key:3? fires the 3 key on the mobile. Last you define the area where to click on the skin image. The same area is used for hover and invert visible ‘action’.
For the expand menu option, you also need the expanded bitmaps and another XML: expand.xml.
Downloads (copy all the files into your MyMobiler dir or a sub dir and then edit the Skin line in MyMobiler.ini)
Download MyMobiler CN50 skin - (Hits: 0, size: 354 kB)<!-- Social Bookmarks BEGIN --> <!-- Social Bookmarks END -->


