
Tips & Tricks: How to change the output location of the Silverlight XAP?
5.00/5 (3 votes)
Description about changing the location of the output of your Silverlight application
In this Tips&Tricks, I will describe about changing the location of the output of your Silverlight application, i.e., the .XAP file from its original “ClientBin” location to a different place. Developers sometimes need to put the XAP file in a specific directory based on their requirement. This trick will help them to relocate the XAP file.
Read the full post and if you have any queries or suggestions, please let me know. I appreciate your feedbacks.
To change the location of the output XAP file, just follow the steps below:
- Right click on the Web Application project.
- Click on the "Properties" from the context menu.
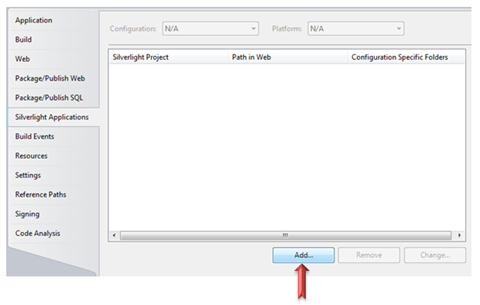
- Click on "Silverlight Applications" from the left panel as shown in the below snapshot.

- Click the project name from the right panel.
- Click Remove. This step is required. Else, the next step will generate a duplicate copy in both the locations while building the project.
- Click on “Yes” in the dialog that pops up in the screen.

- Click on "Add" to add a new configuration setting.
- Now, you can choose the new output location for your Silverlight Application.
- Clear the "Destination folder" textbox ("
ClientBin" will be there by default). Now type your new location. It can be absolute or relative path. Here, I put relative location “MyNewClientBin”.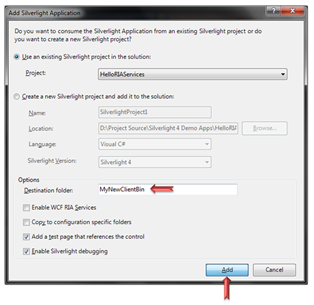
- Click "Add" in the popup dialog box to confirm your new location of the .XAP file.
- Click "Yes" in the dialog that pops up in the screen. This replaces the existing HTML page with a new one referring to the new location of the .XAP file.
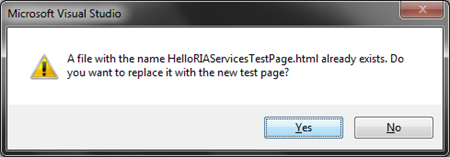
- Click “Yes” once again in the popup dialog box. This now ensures the aspx page will be replaced with a new one referring to the new location of your .XAP file.

- Now build your solution. You will get the output XAP in the mentioned location.

- You will see that the new folder has been created automatically in your project directory and the new XAP is hosted inside that. In our case, it is “
MyNewClientBin”. If you mentioned an absolute path, you will see the XAP created there.
So, what next? Go and put your publish anywhere you want. Don't forget to provide your feedback.