A security requirement on the internet is one of the prime needs these days. There are millions of users active on social networking sites as well as there are also some businesses like banks and insurance companies which continuously have a security risk of data theft. A secure platform is needed which secures the user’s data which is most precious. Therefore, it is an essential task for every web developer to secure web applications and all the services from those who can misuse them.
Microsoft introduces ASP.NET Identity as a system to manage access in ASP.NET application on premises and also in the cloud.
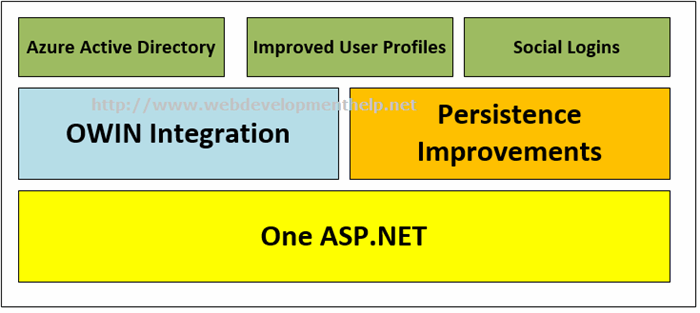
ASP.NET Identity Framework is an open source platform and can be customized according to requirements. Through this platform, it provides a user membership in the form of store or hybrid application which eradicates every security risk to web applications. Now every social networking site uses a user authentication and authorization. ASP.NET Identity Framework 2.0 can be used with ASP.NET Web Forms, MVC, Web Pages, Web API, and SignalR.
This platform provides the major security like Two Factor Authentication, Account Lockout, and Account Confirmation, etc. Along with these features, a more important feature which makes it more prominent is that supported by multiple storage systems like Relational Databases, SharePoint, Azure, etc.
Here in this Web Development Tutorial, we will understand about the default profile details and learn how to customize Profile Information in ASP.NET Identity. Let’s follow a step by step approach to customize profile information.
Exploring the Default
Create a New Project in Visual Studio 2013
Open Visual Studio 2013 and create a new project from “File -> New Project”. Select ASP.NET Web Application. Type any name for the project as I am using “TestIdentity” and click OK.

Select MVC and make sure we have selected in Authentication to Individual User Accounts which is used for those applications that store their user profile information in SQL Server database as shown below. There are other authentication methods like using existing accounts for Twitter, Facebook, Microsoft or Gmail, etc. but I am not going into detail for those.
A default ASP.NET MVC Web Application is created. We can check reference identity libraries that are already added to our solution under references.
Otherwise, we can install Microsoft ASP.NET Identity using Nuget or Package Manager Console.
Looking into Default Profile/Register Page
First build the project and view the default profile page in browser. We can easily find Register.cshtml file under TestIdentity->Views->Account->[Register.cshtml]. Right click and select “View in Browser”.
We can see that, by default, User Profile form has three fields, i.e., Username, Password and Confirm password. So, in order to customize the profile, we are going to add more fields to Profile/Register form.
Note: You can download the source code for the project here. Kindly note that I have excluded the package folder from source code to reduce the size of file.
Customizing the User Profile using ASP.NET Identity
Step 1. Add Custom Properties in Application User Class
To add custom fields, we will go to Models folder and open IdentityModel.cs file. There are two classes inside this file as:
ApplicationUser – is the class where we will add other properties, i.e., Email, Address and Phone Number.ApplicationDbContext - used for connection to database as base constructor having “DefaultConnection” name which is the same as we have in our Web.Config file.
Step 2. Customize Register ViewModel
Build the project so that we can use these properties further. Now open AccountViewModel.cs file where we will find RegisterViewModel class that is used for Registration Form. Here, we will add those three fields that I want to show in the registration form. For these custom fields, we made the Email as Required field using Data Annotation technique. Similarly, Display is also a Data Annotation that is used to display Name that we want rather than exact property name. I have already discussed in another ASP.NET Web API Tutorial about Data Annotation Technique.
Step 3. Register Form View
We need to change the Register form view. Go to views folder, click account folder and here, we will find a Register.cshtml. Add Email, Address, and phone using HTML helpers [to understand more about HTML Helpers in MVC, click here] as follows:
Step 4. Account Controller
The last step is to change the Register method in Account Controller. Go to controller folder and click account controller. The Application user has other properties as well now here we will map the Email, Address and phone number from RegisterViewModel to Application user’s properties. The Usermanager.createAsync method is used to register the user and if the result succeeded, the SignInAsync method is used to automatically login the user after registration.
Step 5. View and Verify Results
Finally, build the project and view the Register.cshtml file again in browser as we did earlier and check the registration form that displays fields that we have just added.
Now, if we fill the fields and click register button, it will register a new profile successfully and login as well.
In order to further validate the output, we can check the values in database. Open web.config file and check connection string.
Go to server explorer and click data connection, enter the Server name and find the database as we see in connection string in web.config file.
Check the tables that Identity is using. Right Click on ASP.NET user and click Show Table Data.
The table is showing the information that we just added using Registration form.
Concluding Remarks
This is how we can customize Profile Information using ASP.NET Identity to increase security in our Application? and we can see how the changes are reflected in the database table. We used only Individual User Accounts although there are other authentication methods where we use built-in email accounts like Facebook or Gmail account, etc. that will be covered in the next topic.
You can download the source code here
More You Must Read about ASP.NET MVC & Related
The post How to Customize Profile Info in ASP.NET Identity? appeared first on Web Development Tutorial.


 General
  News
News  Suggestion
  Question
  Bug
Bug  Answer
  Joke
Joke  Praise
  Rant
Rant  Admin
Admin 


